rip动态路由以及三层交换实现DHCP服务实验【笔记|实验】
一、单臂路由器
1、作用:实现不同vlan间通信
2、子接口:路由器的物理接口可以被划分成多个逻辑接口,每个子接口对应一个vlan网段的网关
3、vlan标签的封装结构
全局:interface f0/0.1
encapsulation dot1Q 2 2和0.1是可变的。
4、单臂路由的缺陷:单笔容易形成网络瓶颈,子接口依托于我录接口,应用不灵活。vlan间转发需要查看路由表,严重浪费设备资源。
二、三层交换技术
1、使用三层交换技术实现vlan间通信:三层交换=二层交换+三层转发
2、基于CEF的快速转发:主要包含两个转发用的信息表:
转发信息库FIB:FIB类似于路由表,包含路由表中转发信息的镜像。当网络的拓扑发生变化时,路由表将被更新,而FIB也将随之变化。
邻接关系表:没个FIB条目,邻接关系表中都包含相应的第2层地址。
3、虚拟接口SVI:三层交换机上配置的vlan接口为虚接口。
4、三层交换机的配置:在三层交换机启用路由功能;全局:ip routing;
配置虚拟接口的IP地址:全局:interface vlan 2;ip address 192.168.2.1 255.255.255.0;no shutdown
三层交换机上配置trunk并制定接口封装为802.1q。接口模式:switchport trunk encapsulation dot1q ;switchport mode trunk
5、配置路由接口:进入接口:no switchport
三、动态路由
1、动态路由的特点:优点是减少了管理任务;缺点是占用了网络带宽。
2、按照路由执行的算法,动态路由协议的分类:距离矢量路由协议:依据从源网络到目标网络所经过的路由器的个数选择路由。(RIP、IPRP)
综合考虑从源网络到目标网络的各条路径的情况选择路由。OSPE、IS-IS
3、RIP路由协议:是距离-矢量路由选择协议;RIP度量值为跳数,最大条数为25跳。16跳路为不可达,
RIT更新时间:每个20s发送路由更新消息,UDP520端口》发送整个路由表信息。
4、RIPV1与ROPV2的区别
RIPV1 RIPV2
有类路由协议 无类路由协议
广播更新 组播更新(224.0.0.9)
不支持VLSM 支持VLSM
自动路由汇总,不可关闭 自动汇总可关闭,可手工汇总
更新的过程中不携带子网信息 更新的过程中携带子网信息
5、RIPV2的配置
全局:router rip ;version 2;no auto-summary(关闭路由汇总)
network 主网络ID不需要子网掩码
show ip int br
rip最多十五跳,十六跳不可达
实验一
实验名称:实现三个路由器通过rip连接能够通
实验过程:
步骤1:配置基本环境
首先打开cisco packet tracer,购买三个路由器,两台主机。
并配置相应的IP段,如下图。

进入router6输入以下命令:
Router>ena
Router#conf t
Enter configuration commands, one per line. End with CNTL/Z.
Router(config)#router rip
Router(config-router)#version 2
Router(config-router)#no auto-summary
Router(config-router)#network 192.168.1.0
Router(config-router)#network 192.168.2.0
Router(config-router)#
进入router7输入以下
Router>enable
Router#configure terminal
Enter configuration commands, one per line. End with CNTL/Z.
Router(config)#router rip
Router(config-router)#version 2
Router(config-router)#no auto-summary
Router(config-router)#network 192.168.2.0
Router(config-router)#network 192.168.3.0
Router(config-router)#
进入router8
Router>enable
Router#
Router#conf t
Enter configuration commands, one per line. End with CNTL/Z.
Router(config)#router rip
Router(config-router)#version 2
Router(config-router)#no auto-summary
Router(config-router)#network 192.168.3.0
Router(config-router)#network 192.168.4.0
Router(config-router)#
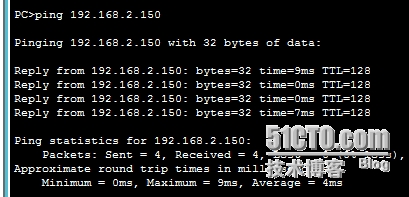
两台主机之间是可以ping通的
实验二
实验名称:三层交换机实现DHCP自动获取
实验过程
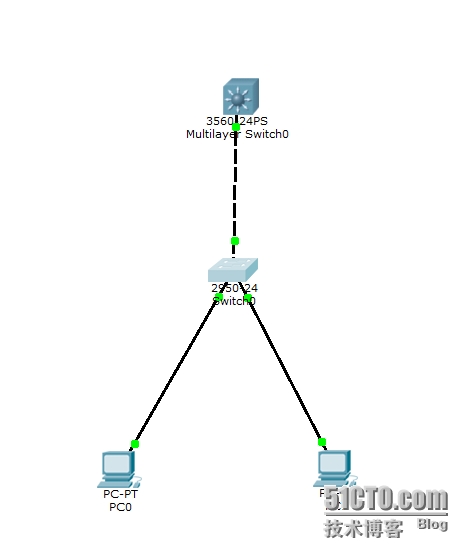
步骤1:配置基本环境
如下图

打开二层交换机输入
witch#
Switch#vlan database
% Warning: It is recommended to configure VLAN from config mode,
as VLAN database mode is being deprecated. Please consult user
documentation for configuring VTP/VLAN in config mode.
Switch(vlan)#vlan 2 name caiwu
VLAN 2 added:
Name: caiwu
Switch(vlan)#vlan 3 name renshi
VLAN 3 added:
Name: renshi
Switch(vlan)#exit
APPLY completed.
Exiting....
Switch#conf t
Enter configuration commands, one per line. End with CNTL/Z.
Switch(config)#int f0/1
Switch(config-if)#switchport access vlan 2
Switch(config-if)#int f0/2
Switch(config-if)#switchport access vlan 3
Switch(config-if)#end
Switch#
%SYS-5-CONFIG_I: Configured from console by console
Switch#show vlan
VLAN Name Status Ports
---- -------------------------------- --------- -------------------------------
1 default active Fa0/3, Fa0/4, Fa0/5, Fa0/6
Fa0/7, Fa0/8, Fa0/9, Fa0/10
Fa0/11, Fa0/12, Fa0/13, Fa0/14
Fa0/15, Fa0/16, Fa0/17, Fa0/18
Fa0/19, Fa0/20, Fa0/21, Fa0/22
Fa0/23, Fa0/24
2 caiwu active Fa0/1
3 renshi active Fa0/2
接下来为二层交换机和三层交换机的线路配置中继链路
Switch#
Switch#conf t
Enter configuration commands, one per line. End with CNTL/Z.
Switch(config)#int f0/24
Switch(config-if)#switchport mode trunk
Switch(config-if)#
%LINEPROTO-5-UPDOWN: Line protocol on Interface FastEthernet0/24, changed state to down
%LINEPROTO-5-UPDOWN: Line protocol on Interface FastEthernet0/24, changed state to up
Switch(config-if)#
步骤2:配置三层交换机
Switch>
Switch>enable
Switch#vlan database
% Warning: It is recommended to configure VLAN from config mode,
as VLAN database mode is being deprecated. Please consult user
documentation for configuring VTP/VLAN in config mode.
Switch(vlan)#vlan 2 name caiwu
VLAN 2 added:
Name: caiwu
Switch(vlan)#vlan 3 name renshi
VLAN 3 added:
Name: renshi
Switch(vlan)#exit
APPLY completed.
Exiting....
Switch(config)#int vl 2
Switch(config-if)#
%LINK-5-CHANGED: Interface Vlan2, changed state to up
%LINEPROTO-5-UPDOWN: Line protocol on Interface Vlan2, changed state to up
Switch(config-if)#ip address 192.168.1.254 255.255.255.0
Switch(config-if)#no shutdown
Switch(config-if)#exit
Switch(config)#int vl 3
Switch(config-if)#
%LINK-5-CHANGED: Interface Vlan3, changed state to up
%LINEPROTO-5-UPDOWN: Line protocol on Interface Vlan3, changed state to up
Switch(config-if)#ip address 192.168.2.254 255.255.255.0
Switch(config-if)#no shutdown
Switch(config-if)#exit
Switch(config)#int f0/24
Switch(config-if)#switchport trunk encapsulation dot1q
Switch(config-if)#switchport mode trunk
Switch(config-if)#
三层交换机配置完成,下面为三层交换机下的vlan配置dhcp自动获取
步骤3:
Switch(config)#ip dhcp pool vlan1
Switch(dhcp-config)#network 192.168.1.0 255.255.255.0
Switch(dhcp-config)#default-router 192.168.1.254
Switch(dhcp-config)#dns-server 202.106.0.20
Switch(dhcp-config)#ip dhcp pool vlan2
Switch(dhcp-config)#network 192.168.2.0 255.255.255.0
Switch(dhcp-config)#dns-server 202.106.0.20
Switch(dhcp-config)#default-router 192.168.2.254
Switch(dhcp-config)#
这样就为两和vlan配好了各自的dhcp


下面为各自网段进行IP限制
Switch(config)#ip dhcp excluded-address 192.168.1.1 192.168.1.149
Switch(config)#ip dhcp excluded-address 192.168.1.156 192.168.1.254
Switch(config)#ip dhcp excluded-address 192.168.2.1 192.168.2.149
Switch(config)#ip dhcp excluded-address 192.168.2.156 192.168.2.254
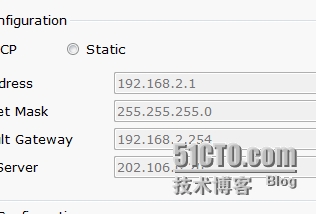
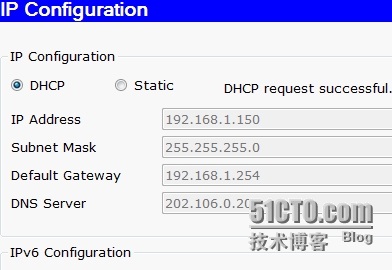
如图


至此,实验完成
实验结果:今天的实验除了需要很熟练的手法意外,还得需要熟练以前的所有基础内容,应该注意以前的知识的融合。同时要明白整个实验的理论体系。