PXE技术装机,并实现kickstart自动安装
一、前期准备
使用PXE网络装机技术前需要有以下5个条件:
1、你所在局域网PC机和服务器网卡ROM支持PXE(Pre-booteXcution Environ),但现有的绝大多数网卡都支持PXE协议;
2、PC机和服务器的主板支持网络启动
3、PC机和服务器需在同一个网端中
4、服务器端需要以下服务来支持:
DHCP服务:分配IP地址,定位引导程序
TFTP服务:提供引导程序下载
FTP服务/HTTP服务/NFS服务:三种服务选择其中一种提供yum安装源,这里我用NFS来举例。
DNS服务(可选):为客户机分配主机名,这里我就不写了,有兴趣的可以试试。
5、如果要安装以上服务需要配置yum库来安装这些服务
二、基本部署思路
1、准备红帽企业版5.9(RHEL5.9)安装源(yum库或NFS共享)
2、启用DNS服务(可选)
3、启用DHCP服务
4、启用TFTP服务,并提供内核、引导程序
5、为PXE安装配置启动菜单
三、实现步骤
1、配置yum库
[root@localhost ~]# mount | tail -1
/dev/hdc on /misc/cd type iso9660 (ro,nosuid,nodev)
[root@localhost ~]# cat/etc/yum.repos.d/server1.repo
[rhel-server1]
name=Red Hat Enterprise Linux Server
baseurl=file:///misc/cd/Server
enabled=1
gpgcheck=1
gpgkey=file:///etc/pki/rpm-gpg/RPM-GPG-KEY-redhat-release
2、安装并配置DHCP服务
[root@localhost ~]# rpm -q dhcp
package dhcp is not installed
[root@localhost ~]# yum -y install dhcp
[root@localhost ~]# ifconfig eth0 | grep"inet addr"
inet addr:192.168.20.253 Bcast:192.168.20.255 Mask:255.255.255.0
[root@localhost ~]# service network restart
[root@localhost ~]# cat /etc/dhcpd.conf
ddns-update-style interim;
next-server 192.168.20.253;
filename "pxelinux.0";
subnet 192.168.20.0 netmask 255.255.255.0 {
option subnet-mask 255.255.255.0;
option domain-name "tarena.com";
option domain-name-servers 192.168.20.253;
range dynamic-bootp 192.168.20.20 192.168.20.30;
default-lease-time 21600;
max-lease-time 43200;
host ns {
next-server marvin.redhat.com;
hardware ethernet12:34:56:78:AB:CD;
fixed-address 207.175.42.254;
}
}
[root@localhost ~]# service dhcpd restart
[root@localhost ~]# chkconfig dhcpd on
3、配置TFTP
[root@localhost ~]# rpm -q tftp-server
tftp-server-0.49-2
[root@localhost ~]# vim /etc/xinetd.d/tftp
…
13 server_args = -s/tftpboot
14 disable = no
…
[root@localhost ~]# service xinetd restart
[root@localhost ~]# chkconfig xinetd on
[root@localhost ~]# netstat -tulnp | grep:69
udp 0 0 0.0.0.0:69 0.0.0.0:* 12250/xinetd
4、配置NFS
[root@localhost ~]# rpm -q nfs-utils portmap
nfs-utils-1.0.9-66.el5
portmap-4.0-65.2.2.1
[root@localhost ~]# cat /etc/exports
/data/iso/rhel5.9 192.168.20.*(ro)
[root@localhost ~]# service portmap restart
[root@localhost ~]# service nfs restart
[root@localhost ~]# chkconfig nfs on
[root@localhost ~]# chkconfig portmap on
5、复制文件到指定目录
[root@localhost ~]# cd /misc/cd/images/pxeboot/
[root@localhost pxeboot]# cp initrd.img vmlinuz /tftpboot/
[root@localhost pxeboot]# cp/usr/share/syslinux/pxelinux.0 /tftpboot/
[root@localhost pxeboot]# mkdir /tftpboot/pxelinux.G
6、启动一台无操作系统的PC客户机,并进入BIOS界面,设置硬盘启动为第一顺序,网络启动为第二顺序,保存并退出;
7、前面安装部分跟光盘安装一样,到选择以什么形式安装的选项是选择NFS,第一行输入服务器的IP地址,路径写你把光盘里的文件复制到的那个文件夹,后面跟正常安装UNIX没有区别
优点:实现了在局域网内的安装,而且安装速度比光盘安装速度快
缺点:如果大批量安装计算机,需要有人值守
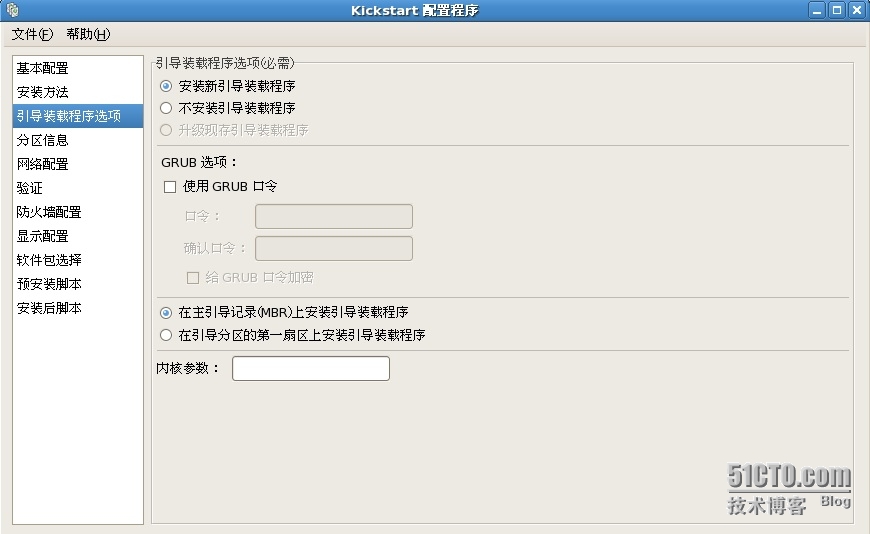
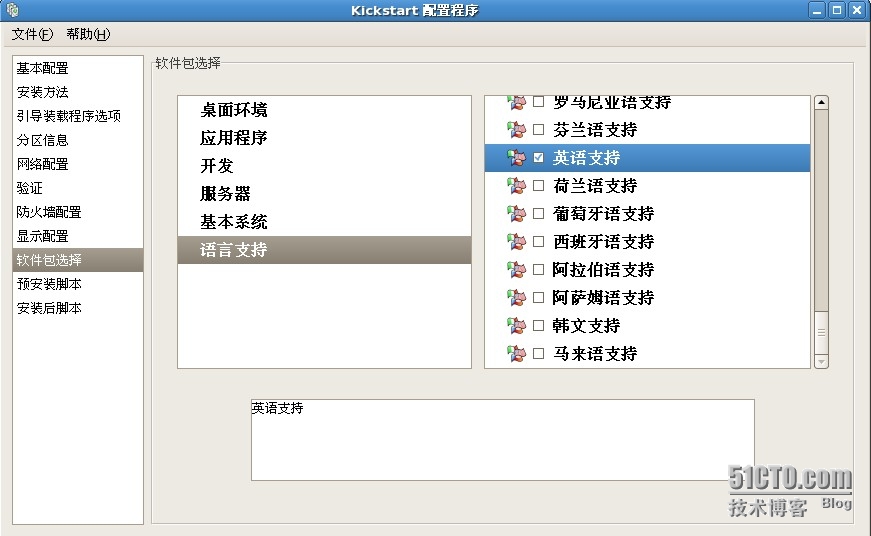
因此我在此引进Linux5.9自带的kickstart无人值守安装如下:
[root@localhost ~]# yum -y installsystem-config-kickstart


文件默认保存在/root下
[root@localhost ~]# yum -y install httpd
[root@localhost ~]# cp /root/ks.G/var/www/html/
[root@localhost ~]# service httpd restart
[root@localhost ~]# chkconfig httpd on
[root@localhost ~]# vim/var/www/html/ks.G
在文件中添加key �Cskip
[root@localhost ~]# vim/tftpboot/pxelinux.G/default
…
10 label linux
11 kernel vmlinuz
12 append ks=http://192.168.20.253/ks.G initrd=initrd.img
…
然后启动一台裸机就会自动安装。
优点:可以不用在花太多精力去操作;
缺点:如果是要让其他已安装操作系统覆盖安装,还是需要手动改BIOS启动路径。
本文出自 “无敌的Linux” 博客,转载请与作者联系!