kickstart 无人值守安装系统
起因:新服务器到货,安装系统,可是公司里的系统盘总是不给力,第一次,只带了一个光盘,结果安装完成一台之后就罢工了,只好回公司第二天再来安装,第二次,有经验了带了3张光盘,刻盘的兄弟估计刻录完成没有测试,结果只有一张盘可用,本来半个小时的工作,这个干了2个多小时,太没有效率了,哥们实在忍不住了,就做了一个kickstart无人值守安装。
一、配置过程
配置PXE安装,要进行如下步骤:
1、配置DHCP,用于给客户端提供IP地址等信息。
安装dhcp 直接yum
[root@master2 ~]# yum -y install dhcp
Installed:
dhcp.x86_64 12:4.1.1-38.P1.el6.centos
Dependency Updated:
dhclient.x86_64 12:4.1.1-38.P1.el6.centos dhcp-common.x86_64 12:4.1.1-38.P1.el6.centos
Complete!
提示安装成功。
配置dhcp
[root@master2 ~]# vi /etc/dhcp/dhcpd.conf
#
# DHCP Server Configuration file.
# see /usr/share/doc/dhcp*/dhcpd.conf.sample
# see 'man 5 dhcpd.conf'
可以把样例拷贝过来,也可以手工添加
[root@master2 ~]# cp /usr/share/doc/dhcp*/dhcpd.conf.sample /etc/dhcp/dhcpd.conf
cp: overwrite `/etc/dhcp/dhcpd.conf'? y
[root@master2 ~]# vi /etc/dhcp/dhcpd.conf
allow booting;//允许pxe
allow bootp;//允许boot
subnet 192.168.1.0 netmask 255.255.255.0 {
option routers 192.168.1.8;
option subnet-mask 255.255.255.0;
filename "pxelinux.0"; //tfpt需要推送给客户端的启动文件。
next-server 192.168.1.8;
filename "/pxelinux.0";//tftp文件的绝对路径。
option domain-name-servers 192.168.1.8;
option time-offset -18000;
range dynamic-bootp 192.168.1.100 192.168.1.200;
default-lease-time 21600;
}
启动dhcp
[root@localhost ~]# /etc/init.d/dhcpd start
2、配置tftp
安装tftp
root@localhost ~]# yum -y install tftp
root@localhost ~]# vi /etc/xinetd.d/tftp
# default: off
# description: The tftp server serves files using the trivial file transfer \
# protocol. The tftp protocol is often used to boot diskless \
# workstations, download configuration files to network-aware printers, \
# and to start the installation process for some operating systems.
service tftp
{
socket_type = dgram
protocol = udp
wait = yes
user = root
server = /usr/sbin/in.tftpd
server_args = -s /tftpboot
# disable = yes //改为 no
disable =no
per_source = 11
cps = 100 2
flags = IPv4
}~
"/etc/xinetd.d/tftp" 18L, 509C
启动服务
[root@localhost ~]# /etc/init.d/xinetd start
Starting xinetd:
3、配置pxe
拷贝内核文件。
创建安装目录 /tftpboot
cp images/pxeboot/vmlinuz /tftpboot/
cp images/pxeboot/initrd.img /tftpboot/
创建/tftpboot/pxelinux.cfg/ 目录,该目录用于存放客户端的配置文件
cp /media/rhel5/isolinux/isolinux.cfg /tftpboot/pxelinux.cfg/default
可根据个人需求进行修改。列如timeout 等。
4、配置nfs
安装nfs和rpc
yum -y install nfs*
配置nfs
vi /etc/exports
/data/install 192.168.1.0/24(ro,sync) //光盘挂载或者拷贝光盘的目录
启动rpc和nfs
查看是否正确共享
root@localhost install]# showmount -e localhost
Export list for localhost:
/data/install 192.168.1.0/24
5、配置kickstart(最关键的地方)
1)可以直接拷贝原有系统的文件 路径 cp /root/anaconda-ks.cfg /data/install/进行修改
#platform=x86, AMD64, or Intel EM64T
#version=DEVEL
# Firewall configuration
firewall --disabled
# Install OS instead of upgrade
install
# Use NFS installation media
nfs --server=192.168.1.8 --dir=/data/install //添加 nfs路径和地址
# Root password
rootpw --iscrypted $1$J712LOV4$yk.hWtreRYa/v/qgrfR711
# System authorization information
auth --useshadow --passalgo=sha512
# Use graphical install
graphical
firstboot --disable
# System keyboard
keyboard us
# System language
lang en_US
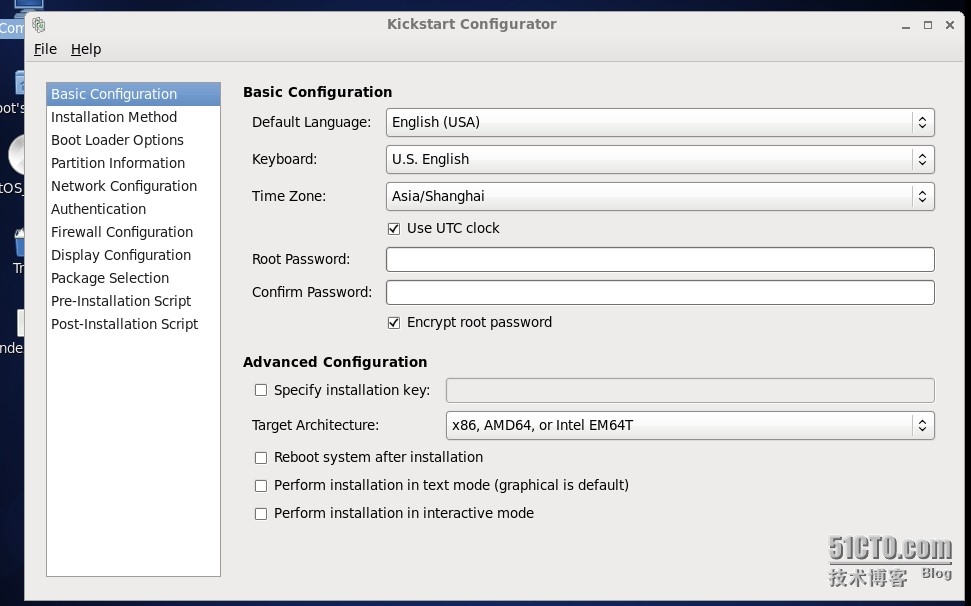
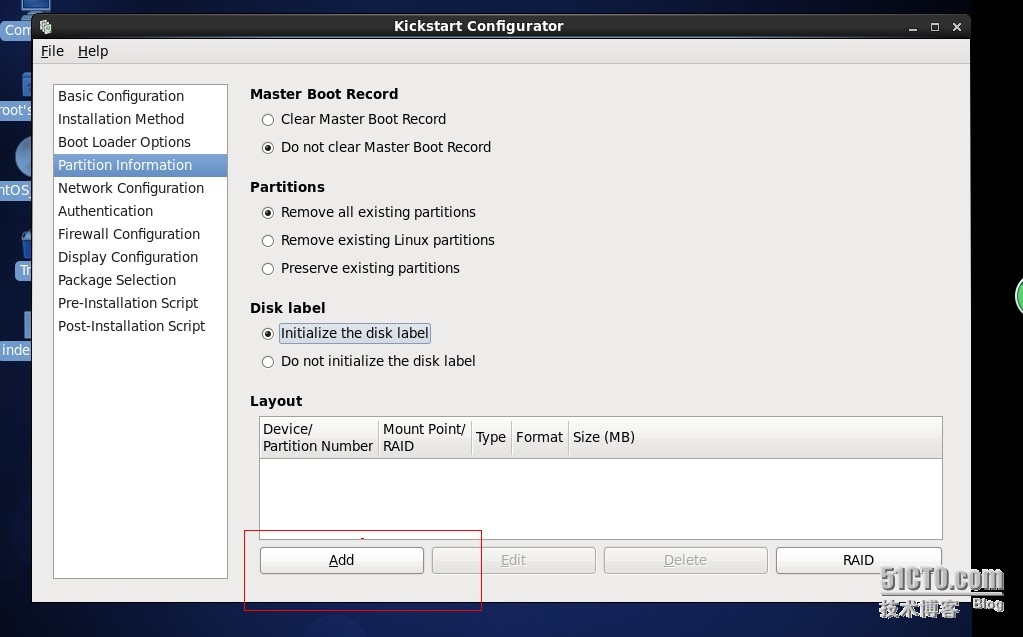
2)可以根据个人需求进行配置ks.cfg文件。
选择安装语言和添加密码


保存配置,生成ks.cfg文件,把文件拷贝到/data/install/目录下。
重启dhcp nfs xinetd 服务,关闭iptables和seLinux 开启客户端进行测试,成功!
本文出自 “linux运维” 博客,转载请与作者联系!