LAMP源代码安装
LAMP源代码安装
前言:
LAMP即Linux+Apache+Mysql+PHP,一组常用来搭建动态网站或者服务器的开源软件,本身都是各自独立的程序,但是因为常被放在一起使用,拥有了越来越高的兼容度,共同组成了一个强大的Web应用程序平台。随着开源潮流的蓬勃发展,开放源代码的LAMP已经与J2EE和.Net商业软件形成三足鼎立之势,并且该软件开发的项目在软件方面的投资成本较低,因此受到整个IT界的关注。从网站的流量上来说,70%以上的访问流量是LAMP来提供的,LAMP是最强大的网站解决方案。
1.系统要求
CentOS6.4 64位
2.源码包
apr-1.5.1.tar.bz2
apr-util-1.5.3.tar.bz2
httpd-2.4.9.tar.bz2
mysql-5.6.10.tar.gz
php-5.5.8.tar.bz2
3.安装前准备
关闭selinux和防火墙
安装开发工具
Development tools
Additional Development
Server Platform Development
4.安装顺序
MySQL――》Apache――》PHP
5搭建LAMP环境
(1)
安装MySQL
首先我们先查询一下系统中是否安装的有mysql,有的话通过yum卸载掉,否则会产生冲突。
接下来我们解压源代码压缩包
[root@localhost ~]# ll
-rw-r--r--. 1 root root 35174149 Apr 9 23:32 mysql-5.6.15-linux-glibc2.5 -x86_64.tar.gz
[root@localhost ~]# tar -zxvf mysql-5.6.15-linux-glibc2.5-x86_64.tar.gz -C /usr/local/ //将MySQL解压到/usr/local/src/ 下
[root@localhost ~]# cd /usr/local/src/ mysql-5.6.15-linux-glibc2.5-x86_64.tar.gz/
[root@localhost local]# ln -s mysql-5.5.15-linux2.6-i686/ mysql //创建一个连接
[root@localhost mysql]# vim INSTALL-BINARY //在这里面我们可以看到MySQL的安装步骤,我们按照步骤一步一步来
76 To install and use a MySQL binary distribution, the basic command
77 sequence looks like this:
78 shell> groupadd mysql
79 shell> useradd -r -g mysql mysql
80 shell> cd /usr/local
81 shell> tar zxvf /path/to/mysql-VERSION-OS.tar.gz
82 shell> ln -s full-path-to-mysql-VERSION-OS mysql
83 shell> cd mysql
84 shell> chown -R mysql .
85 shell> chgrp -R mysql .
86 shell> scripts/mysql_install_db --user=mysql
87 shell> chown -R root .
88 shell> chown -R mysql data
89 # Next command is optional
90 shell> cp support-files/my-medium.cnf /etc/my.cnf
91 shell> bin/mysqld_safe --user=mysql &
92 # Next command is optional
93 shell> cp support-files/mysql.server /etc/init.d/mysql.server
[root@localhost mysql]# groupadd mysql //创建mysql组
[root@localhost mysql]# useradd -r -g mysql mysql // 创建mysql用户
[root@localhost mysql]#. S/cripts/mysql_install_db --user=mysql //初始化数据库
如果出错Installing MySQL system tables..../bin/mysqld: error while loading shared libraries: libaio.so.1: cannot open shared object file: No such file or directory
[root@localhost mysql]# yum install libaio-devel 安装这个软件包
[root@localhost mysql]# chown -R root . //修改所有文件的拥有者为root
[root@localhost mysql]# chown -R mysql data //修改data文件的拥有者为mysql
[root@localhost mysql]# cp my.cnf /etc/ // mysql server 配置文件
[root@localhost mysql]# cp support-files/mysql.server /etc/init.d/mysqld
//产生mysql server 控制文件
[root@localhost mysql]# chmod a+x /etc/init.d/mysqld
[root@localhost mysql]# service mysqld start //启动mysql
Starting MySQL SUCCESS!
[root@localhost mysql]# chkconfig --add mysqld
[root@localhost mysql]# chkconfig mysqld on //设置为开机自启动
[root@localhost mysql]# vim /etc/profile

PATH=$PATH:/usr/local/mysql/bin //添加一条命令修改环境变量注意这个环境变量添加在export之前
[root@localhost mysql]# . /etc/profile
[root@localhost mysql]#echo "/usr/local/mysql/lib" > /etc/ld.so.conf.d/mysql.conf
//mysql库文件的输出
[root@localhost mysql]# ldconfig //重新加载配置文件
[root@localhost mysql]# echo "MANPATH /usr/local/mysql/man">>/etc/man.conf
//配置手册
启动MySQL
[root@localhost ~]# mysql
Type 'help;' or '\h' for help. Type '\c' to clear the current input statement.
mysql>
测试成功!
添加用户root 密码为 123
[root@localhost ~]# mysqladmin -u root -p password '123'
Enter password: //输入原来的密码,因为没有所以直接回车
MySQL安装完毕
(2)安装Apache:
所需源码包:
apr-1.5.1.tar.bz2
apr-util-1.5.3.tar.bz2
httpd-2.4.9.tar.bz2
解压缩包
[root@localhost ~]# tar -jxvf apr-1.5.1.tar.bz2 -C /usr/local/src/
[root@localhost ~]# tar -jxvf apr-util-1.5.3.tar.bz2 -C /usr/local/src/
安装apr
[root@localhost ~]# cd /usr/local/src/apr-1.5.1/
[root@localhost apr-1.5.1]# vim README
Configuring and Building APR on Unix
====================================
Simply;
./configure --prefix=/desired/path/of/apr
make
make test
make install
[root@localhost apr-1.5.1]# ./configure --prefix=/usr/local/
[root@localhost apr-1.5.1]#make && make install
安装apr-util
[root@localhost apr-util-1.5.3]# ./configure --prefix=/usr/local/apr-utils --with-apr=/usr/local/apr/bin/apr-1-config
[root@localhost apr-util-1.5.3]# make &&make install
安装httpd
先安装pcre-devel,否则编译httpd时会报错。
[root@localhost ~]# yum install pcre-devel
[root@localhost src]# ./configure \
> --prefix=/usr/local/apache \
> --sysconfdir=/etc/httpd \
> --enable-so \
> --enable-ssl \
> --enable-rewrite \
> --with-apr=/usr/local/apr/bin/apr-1-config \
> --with-apr-util=/usr/local/apr-utils/bin/apu-1-config \
> --with-pcre \
> -with-z \
> --enable-mpms-shared=all \
[root@localhost httpd-2.4.9]# make && make install
编译安装完之后,我们需要修改一下环境变量
[root@localhost ~]# vim /etc/profile
在原有的PATH=$PATH:/usr/local/mysql/bin后边儿添加 :/usr/local/apache/bin

[root@localhost ~]# . /etc/profile 重新执行profile文件
配置手册
[root@localhost ~]# echo "MANPATH /usr/local/apache/man" >>/etc/man.conf
还缺少一个控制文件
[root@localhost ~]# cd /usr/local/apache/bin/
在bin目录下有http的运行程序
[root@localhost bin]# ll
-rwxr-xr-x. 1 root root 1840370 Apr 10 05:56 httpd //这个就是web运行程序
[root@localhost bin]# httpd -h
Usage: httpd [-D name] [-d directory] [-f file]
[-C "directive"] [-c "directive"]
[-k start|restart|graceful|graceful-stop|stop]
可以看到httpd的各种参数,我们可以通过这些参数来编写httpd的控制脚本
[root@localhost ~]# vim /etc/init.d/httpd
1 #!/bin/bash
2 # chkconfig: 2345 88 44
3 #descriptions : the apache server
4 prog=/usr/local/apache/bin/httpd
5 lockfile=/var/lock/subsys/httpd
6 . /etc/init.d/functions
7 start() {
8 if [ -e $lockfile ];then
9 echo "the apache server is started"
10 else
11 echo "the apache server is starting....."
12 sleep 1
13 $prog -k start && echo "ok" && touch $lockfile ||echo "fail"
14 fi
15
16 }
17 stop(){
18 if [ ! -e $lockfile ];then
19 echo "the apache server is stoped....."
20 else
21 echo "the apache server is stoping....."
22 sleep 1
23 $prog -k stop && echo "ok" && rm -rf $lockfile ||echo "fail"
24 fi
25
26 }
27
28 case "$1" in
29 start)
30 start
31 ;;
32 stop)
33 stop
34 ;;
35 restart)
36 stop
37 start
38 ;;
39 *)
40 echo "USAGE: start|stop|restart"
41 ;;
42 esac
然后给这个控制文件添加执行权限
[root@localhost ~]# chmod a+x /etc/init.d/httpd
启动httpd
[root@localhost ~]# service httpd start
/etc/init.d/httpd: line 4: ./etc/init.d/functions: Permission denied
the apache server is starting.....
AH00558: httpd: Could not reliably determine the server's fully qualified domain name, using localhost.localdomain. Set the 'ServerName' directive globally to suppress this message
/etc/init.d/httpd: line 11: ok: command not found
Fail
提示没有设置ServerName
我们去配置一下
[root@localhost ~]# vim /etc/httpd/httpd.conf

[root@localhost ~]# service httpd stop
the apache server is stoping.....
ok
[root@localhost ~]# service httpd start
the apache server is starting.....
ok
[root@localhost ~]# chkconfig --add httpd
[root@localhost ~]# chkconfig httpd on
浏览器测试
http://192.168.3.100

测试正常!
(3)安装PHP
先查询一下系统中有没有安装和PHP有关的rpm包,有的话要先卸载了。
[root@localhost ~]# rpm -qa |grep php
[root@localhost ~]# ll
-rw-r--r--. 1 root root 11144328 Apr 10 01:07 php-5.3.7.tar.bz2
解压缩
[root@localhost ~]# tar -jxvf php-5.3.7.tar.bz2 -C /usr/local/src/
编译安装:
[root@localhost php-5.3.7]# ./configure -help //可以查看各个选项参数的意思
[root@localhost php-5.3.7]# ./configure \
> --prefix=/usr/local/php \
> --with-config-file-path=/etc/php \
> --with-config-file-scan-dir=/etc/php5.d \
> --with-apxs2=/usr/local/apache/bin/apxs \
> --with-mysql=/usr/local/mysql \
> --with-mysqli=/usr/local/mysql/bin/mysql_config \
> --enable-mbstring=all
[root@localhost php-5.3.7]# make && make install
[root@localhost ~]# cd /usr/local/php/etc/
[root@localhost etc]# ll
-rw-r--r--. 1 root root 1148 Apr 10 08:17 pear.conf
没有我们刚刚 . /configure 参数指定的php、php5.d 目录,所以我们需要自己创建
[root@localhost php]# mkdir -pv /etc/php /etc/php5.d
mkdir: created directory `/etc/php'
mkdir: created directory `/etc/php5.d'
我们要把PHP与Apache联合起来
[root@localhost ~]# vim /etc/httpd/httpd.conf
添加第151行的内容

[root@localhost ~]# cd /usr/local/src/php-5.3.7/
[root@localhost php-5.3.7]#ll
-rw-r--r--. 1 1000 1000 68898 Feb 9 2011 php.ini-development
这是PHP的初始化文件,我们需要把他放到/etc/php/下
[root@localhost php-5.3.7]# cp php.ini-development /etc/php/php.ini
重启Apache
接下来我们测试PHP与Apache的连通性。
我们的Apache是用绿色软件包安装的,站点主目录是在/usr/local/apache/htdocs/目录下
[root@localhost ~]# cd /usr/local/apache/htdocs/
[root@localhost htdocs]# ll
total 8
-rw-r--r--. 1 root root 45 Apr 10 12:54 index.html
我们新建一个php页面
[root@localhost htdocs]# vim index.php

用浏览器打开测试一下。

测试成功!
安装wordpress测试
[root@localhost ~]# unzip wordpress-3.8-zh_CN.zip
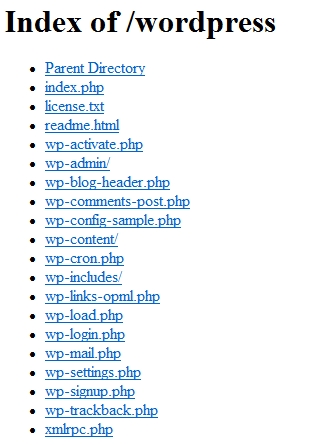
[root@localhost ~]# mv wordpress /usr/local/apache/htdocs/
浏览器访问http://192.168.3.100/wordpress

出现这种情况,修改httpd的配置文件。
[root@localhost ~]# vim /etc/httpd/httpd.conf

重新访问http://192.168.3.100/wordpress

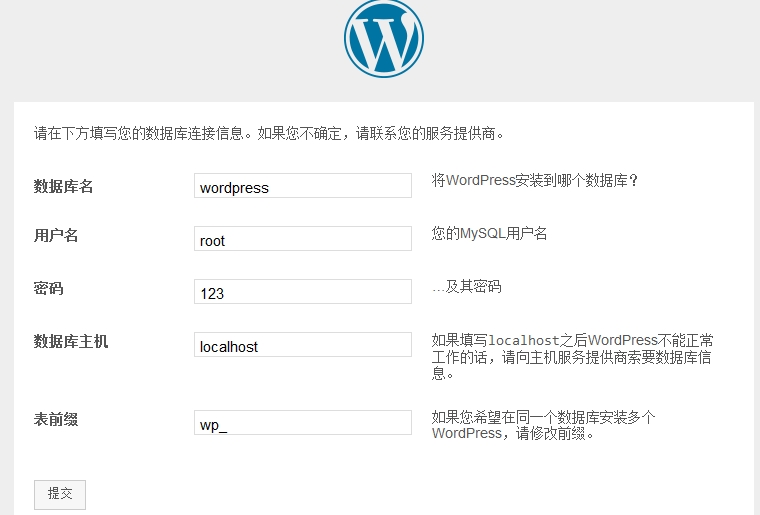
点击创建配置文件
先创建wordpress数据库再提交
mysql> create database wordpress;
Query OK, 1 row affected (0.00 sec)
mysql> \q


[root@localhost ~]# cd /usr/local/apache/htdocs/wordpress/
[root@localhost wordpress]# vim wp-config.php //先将内容保存到wp-config.php中再点击进行安装。


安装完成!!!!!!!
世界你好!!!!