在CentOS6.5上搭建RSYSLOG & MySQL & LogAnalyzer平台
写在前面:如果此文有幸被某位朋友看见并发现有错的地方,希望批评指正。如有不明白的地方,愿可一起探讨。
安装apache
在CentOS6.5上默认情况下,已经安装了Apache。如果没有安装,进行如下步骤进行安装:
# yum -y install httpd
启动httpd服务
# service httpd start
设置httpd服务开机启动
# chkconfig httpd on
测试httpd
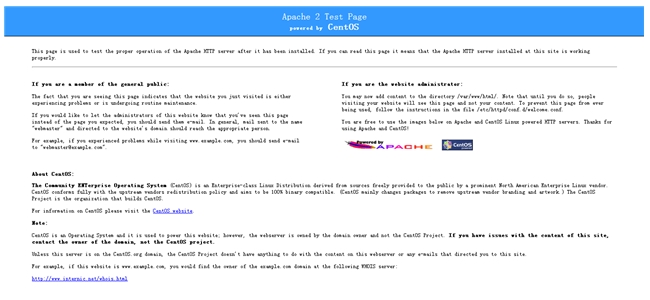
在浏览器中键入你服务器的IP地址,如得到下面结果证明测试成功
安装MySQL
安装mysql和mysql-server
# yum -y install mysql mysql-server
启动mysqld和rsyslog服务
# service mysqld start
设置mysqld和rsyslog服务开机启动
# chkconfig mysqld on
给数据库设置登录密码
# mysqladmin -u root password '......'
测试数据库
# mysql -u root -p
Enter password:
Welcome to the MySQL monitor. Commands end with ; or \g.
Your MySQL connection id is 3
Server version: 5.1.71 Source distribution
Copyright (c) 2000, 2013, Oracle and/or its affiliates. All rights reserved.
Oracle is a registered trademark of Oracle Corporation and/or its
affiliates. Other names may be trademarks of their respective
owners.
Type 'help;' or '\h' for help. Type '\c' to clear the current input statement.
mysql>
安装PHP
安装php,php-mysql和php-gd
# yum -y install php php-mysql php-gd
编辑php测试文件
# vim /var/www/html/index.php
<?php
phpinfo();
?>
重启httpd服务
# service httpd restart
测试php功能
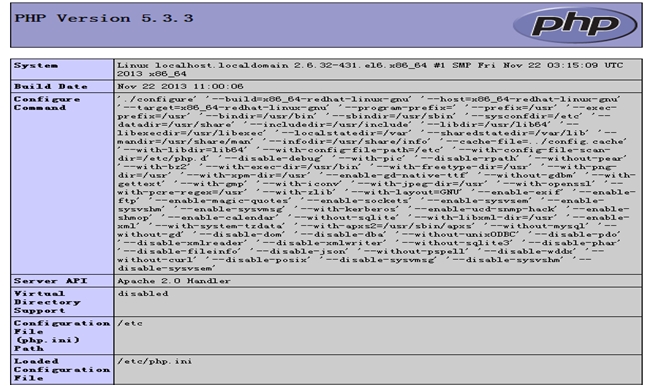
打开你的浏览器,键入你的IP地址/index.php,例如:10.170.2.100/index.php,如果得到如下结果,则证明php功能测试成功
安装rsyslog
默认情况下,rsyslog已经安装
安装rsyslog-mysql
# yum -y install rsyslog-mysql
启动rsyslog服务
# service rsyslog start
设置rsyslog服务开机启动
# chkconfig rsyslog on
利用createDB.sql 创建rsyslog所依赖的数据库
# mysql -u root -p < /usr/share/doc/rsyslog-mysql-5.8.10/createDB.sql
授权rsysloguser用户调用数据库的权限
mysql> GRANT ALL ON Syslog.* TO [email protected] IDENTIFIED BY '......';
mysql> GRANT ALL ON Syslog.* TO rsysloguser@localhost IDENTIFIED BY '......';
mysql> FLUSH PRIVILEGES;
编辑rsyslog.conf
启用下面两部分:
# Provides UDP syslog reception
$ModLoad imudp
$UDPServerRun 514
# Provides TCP syslog reception
$ModLoad imtcp
$InputTCPServerRun 514
增加下面部分:
$ModLoad ommysql
修改下面部分(下面两行处于同一行,......为用户密码):
*.info;mail.none;authpriv.none;cron.none :ommysql:127.0.0.1,Syslog,rsysloguser,......
下载Analyzer并安装
下载Analyzer
wget http://download.adiscon.com/loganalyzer/loganalyzer-3.6.5.tar.gz
解压loganalyzer-3.6.5.tar.gz到/var/www/html/
# tar xf loganalyzer-3.6.5.tar.gz -C /var/www/html/
复制安装文件至apache
# cd /var/www/html/
# mkdir log
# cp -r loganalyzer-3.6.5/src/* log/
# cp -r loganalyzer-3.6.5/contrib/* l
进入log目录并对设置相关文件的权限
# cd log/
# chmod +x configure.sh secure.sh
# ./configure.sh
# ./secure.sh
# chmod 666 config.php
# chown -R apache.apache ./*
安装Analyzer
在浏览器中键入你的IP地址/log,例如:10.170.2.100/log,可以得到如下页面

点击上图here可以得到下面页面
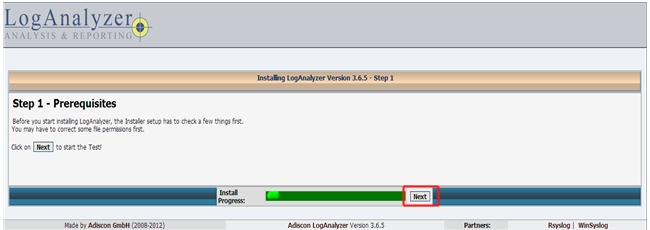
点击上图Next可以得到如下页面
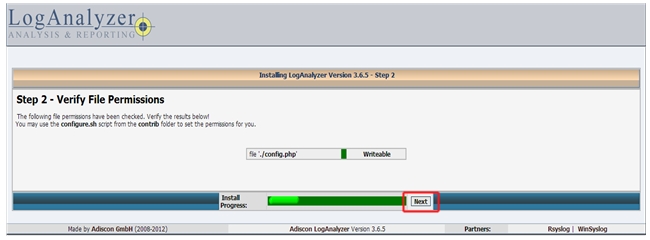
点击上图Next可以得到如下页面
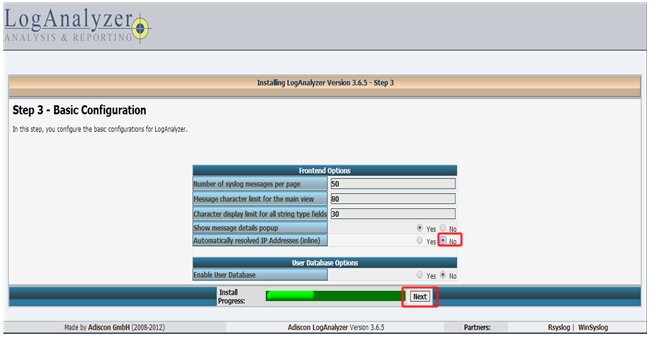
选择上图的No并点击Next可以得到如下页面
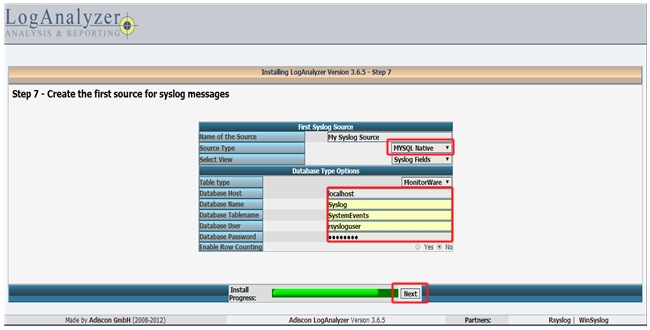
选择上图中Source Type栏中MYSQL Native选项并键入数据库信息后点击Next可以得到如下页面

点击上图的Finish,可以得到如下页面
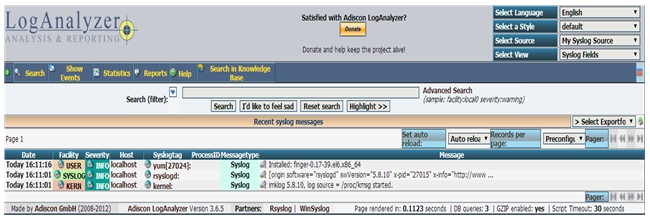
接下来,你就可以在上图中查看日志信息了