01-SpringMVC-HelloWorld
一、什么是SpringMVC
SpringMVC是非常优秀的MVC框架
SpringMVC比Struct2更优秀。至于原因,我们可以先简单的理解,Spring4MVC是在Struct2后面出现的,SpringMVC占有后发优势。至于其他的原因,学完了这套课程后,我们再做详细的比较。
二、怎么从官网下载Spring的jar包
无论学习编程语言还是框架,个人认为与其花大量的时间搜资料,不如静心好好学习官网,官网是最好的学习资料。现在带着大家一起来看看Spring的官网
1、spring的官网地址
http://spring.io/

看到这个简洁清新的界面,导航很明确。
2、进入projects
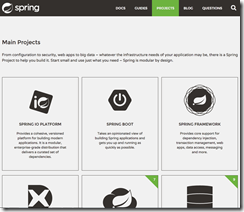
spring的涵盖面是很宽广的,你需要什么可以在上图所示的页面中查找,本页很清晰,很容易找到 spring framework , 还有一段英文介绍provides core support for dependency injection, transaction management, web apps, data access, messaging and more.(提供了核心功能依赖注入、事务管理、web应用、数据访问、远程访问等等)
3、进入了我们需要的spring framework页
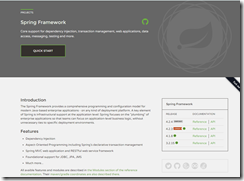
本页有介绍、特点说明、spring框架版本对jdk的要求、以及如果使用 Maven或 Gradle 构建项目的话,官网还提供了相应的范例向导。
最重要是在特征下面的这段话,需要注意:
![]()
这段话很清晰的告诉我们点击这段话上的链接,专门有关于所有特征和模块以及各模块之间关系的介绍。点击链接进入后,可以看见这样的页面
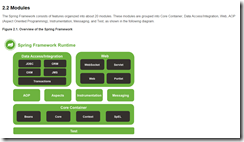
4、下载jar
这是一页关于spring框架的很详细的介绍,所以很有必要认真看一看,那么就在这一页中就有我们spring的Jar包链接以及说明。

我们发现各个spring版本的下载地址: http://repo.spring.io/release/org/springframework/spring
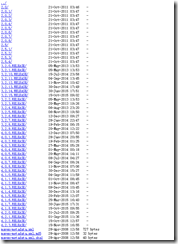
三、为Myeclipse安装spring的插件
1、下载spring的elcipse的插件
在浏览器上输入spring的官网地址:http://spring.io
在首页的底部,可以看见"tools"
![]()
点击进入
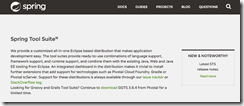
这个页面详细介绍了STS的使用,但我们需要的eclipse的插件,我们点击的“download"链接
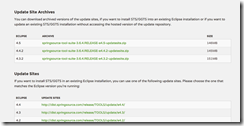
这里提供了离线安装和在线安装的二种方式。
2、查看MyEclipse中的Eclipse对应的版本
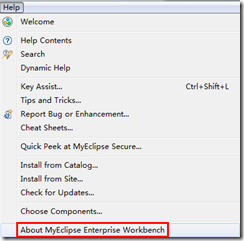
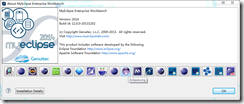
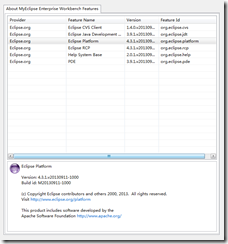
3、安装
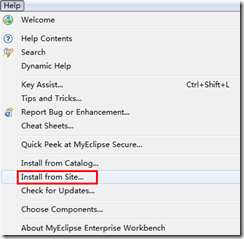
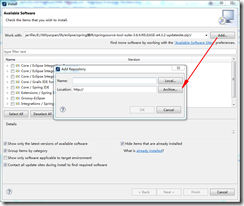
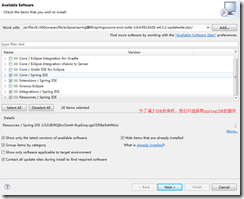
四、第一个SpringMVC的项目:HelloWorld
1、添加jar包
1.1 spring包
spring-aop-4.2.1.RELEASE.jar
spring-beans-4.2.1.RELEASE.jar
spring-context-4.2.1.RELEASE.jar
spring-core-4.2.1.RELEASE.jar
spring-expression-4.2.1.RELEASE.jar
spring-web-4.2.1.RELEASE.jar
spring-webmvc-4.2.1.RELEASE.jar
1.2 依赖的包
commons-logging-1.1.1.jar spring日志包
2、在web.xml中配置DispatcherServlet
<!-- 配置 DispatcherServlet -->
<servlet>
<servlet-name>dispatcherServlet</servlet-name>
<servlet-class>org.springframework.web.servlet.DispatcherServlet</servlet-class>
<!-- 配置 DispatcherServlet 的一个初始化参数: 配置 SpringMVC 配置文件的位置和名称 -->
<!--
实际上也可以不通过 contextConfigLocation 来配置 SpringMVC 的配置文件, 而使用默认的.
默认的配置文件为: /WEB-INF/<servlet-name>-servlet.xml
-->
<init-param>
<param-name>contextConfigLocation</param-name>
<param-value>classpath:springmvc.xml</param-value>
</init-param>
<load-on-startup>1</load-on-startup>
</servlet>
<servlet-mapping>
<servlet-name>dispatcherServlet</servlet-name>
<url-pattern>/</url-pattern>
</servlet-mapping>
3 加入SpringMVC的配置文件
3.1 springmvc.xml放在src目录下
将beans、context、mvc 三个schema加入进来
<?xml version="1.0" encoding="UTF-8"?>
<beans xmlns="http://www.springframework.org/schema/beans"
xmlns:xsi="http://www.w3.org/2001/XMLSchema-instance"
xmlns:context="http://www.springframework.org/schema/context"
xmlns:mvc="http://www.springframework.org/schema/mvc"
xsi:schemaLocation="http://www.springframework.org/schema/beans http://www.springframework.org/schema/beans/spring-beans.xsd
http://www.springframework.org/schema/context http://www.springframework.org/schema/context/spring-context-4.2.xsd
http://www.springframework.org/schema/mvc http://www.springframework.org/schema/mvc/spring-mvc-4.2.xsd">
</beans>
3.2 在springmvc.xml配置扫描包
<!-- 自动扫描包 -->
<context:component-scan base-package="cn.imentors.springmvc.handlers"/>
3.3 配置视图解析器
<!-- 配置视图解析器:如果把handler方法返回值解析为实际的物理视图 -->
<bean class="org.springframework.web.servlet.view.InternalResourceViewResolver">
<property name="prefix" value="/WEB-INF/views/"></property>
<property name="suffix" value=".jsp"></property>
</bean>
注:InternalResourceViewResoler的解析方式如下
prefix+returnVal+后缀(suffix)
4 编写片是请求的处理器,并标识为处理器
4.1 编写一个类
public class HelloWrold {
public String hello(){
System.out.println("Hello World");
return "success";
}
}
4.2 将这个类标识为@Controller
@Controller
public class HelloWrold {
4.3通过@RequestMapping 注解来映射请求的url
/**
* 通过@RequestMapping来注解请求的URL
* @return
*/
@RequestMapping("/helloworld")
public String hello(){
5 编写视图
5.1 index.jsp
<a href="helloworld">helloworld
5.2 success.jsp
4>success
6、总结
springmvc的工作流程。这里只简单的介绍一下,springmvc详细的工作原理,等我们把这门课程学门,再作分析。
用户请求
controller
返回到view
关注我们
师享空间的宗旨是分享知识,传播价值。关注我们,及时获得更多信息。

捐赠我们
如果您对我们的成果表示认同并且觉得对你有所帮助,欢迎您对我们捐赠^_^。
