CentOS6.6安装Zabbix2.4监控系统
一、安装前的准备:
防火墙关闭:service iptables stop
chkconfigiptables off
Selinux关闭:vi/etc/selinux/config enforing改成disabled,然后re、boot
网络设置:vi /etc/sysconfig/network-script on boot改成yes
然后service network restart
chkconfig network on
二、 zabbix-server服务器端的安装
安装 zabbix官方源和epel源
#rpm �Civh http://repo.zabbix.com/zabbix/2.4/rhel/6/x86_64/zabbix-release-2.4-1.el6.noarch.rpm
#rpm �Civh http://dl.fedoraproject.org/pub/epel/6/x86_64/epel-release-6-8.noarch.rpm
三、安装zabbix-server
#yum install �Cy zabbix zabbix-get zabbix-server zabbix-web-mysql zabbix-webzabbix-agent
安装完成后可以看到,yum方式安装并没有自动安装mysql-server。
四、安装MySQL数据库服务
#yum �Cy install mysql-server
[root@zabbix ~]# vi /etc/my.cnf
[mysqld]
datadir=/var/lib/mysql
socket=/var/lib/mysql/mysql.sock
user=mysql
# Disabling symbolic-links is recommendedto prevent assorted security risks
symbolic-links=0
character-set-server=utf8 #设置字符集为utf8
innodb_file_per_table=1 #让innodb的每个表文件单独存储
[mysqld_safe]
log-error=/var/log/mysqld.log
pid-file=/var/run/mysqld/mysqld.pid
#servicemysqld start
#chkconfig mysqld on
创建zabbix的数据库
# mysqladmin-uroot password admin
# mysql -uroot-padmin
mysql> createdatabase zabbix character set utf8;
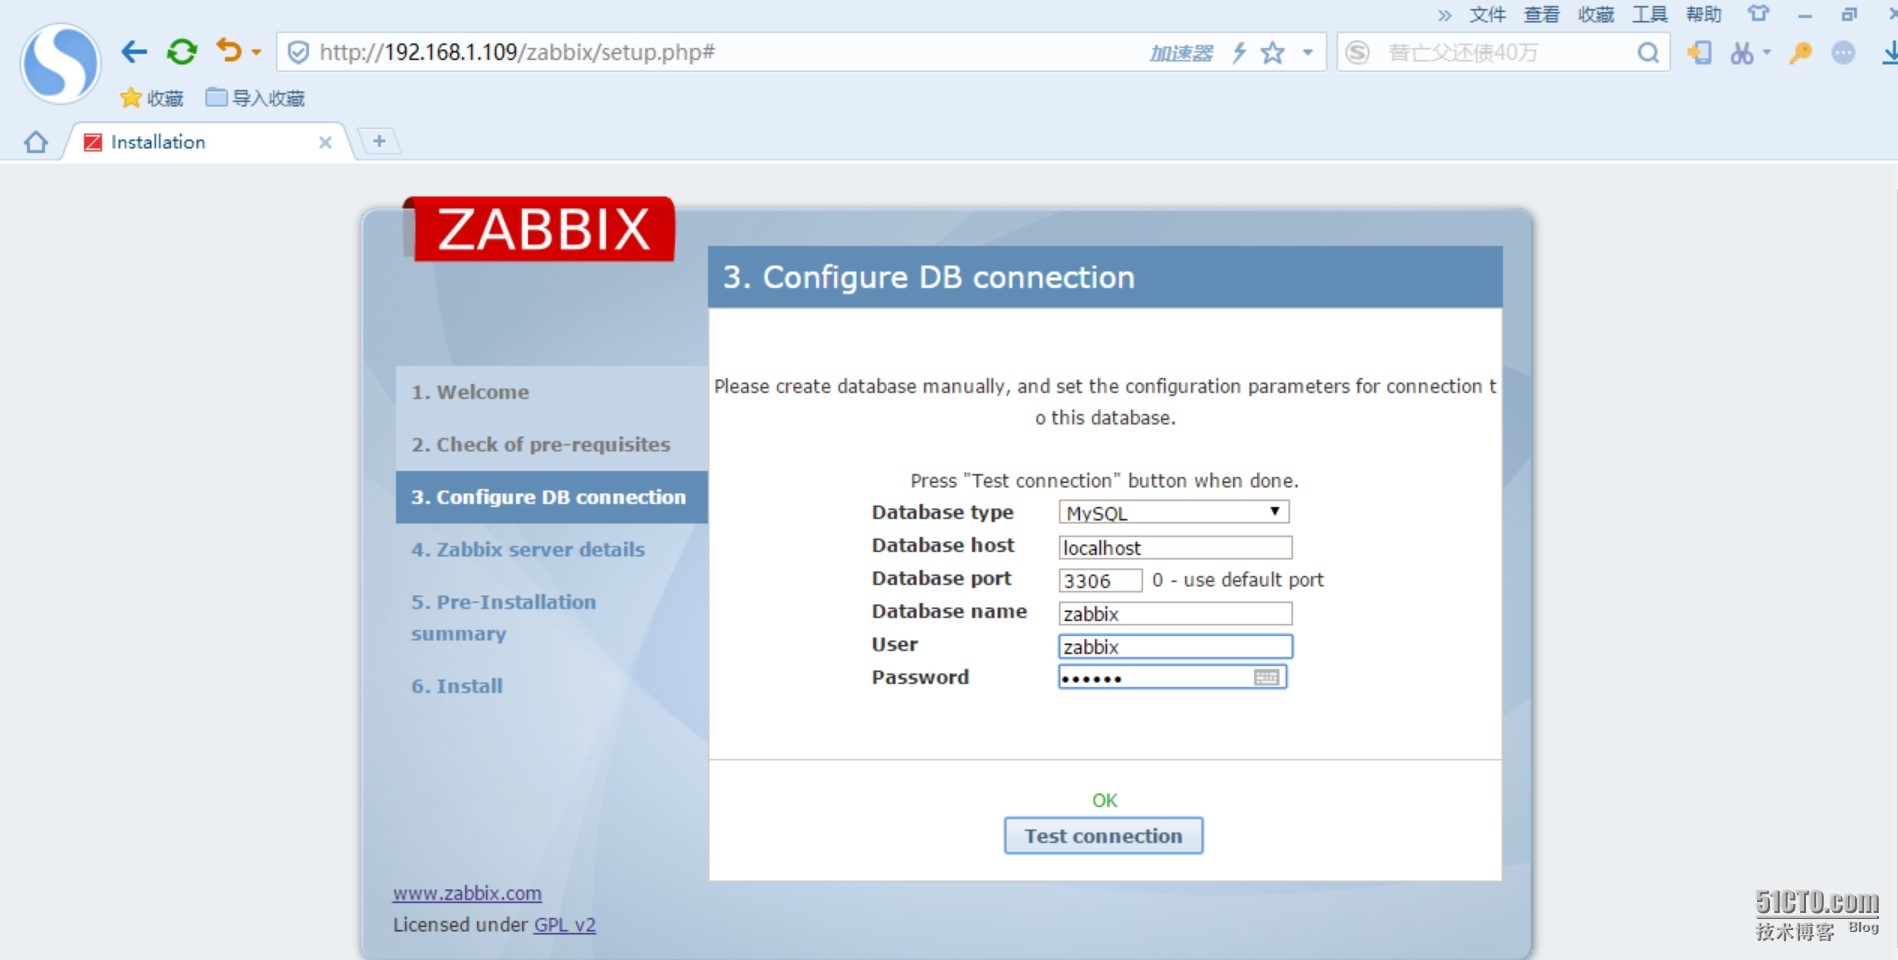
mysql> grantall privileges on zabbix.* to zabbix@localhost identified by 'zabbix';
mysql> flushprivileges;
导入zabbix-server的数据库
# mysql -uzabbix�Cpzabbix
mysql> usezabbix
mysql> source/usr/share/doc/zabbix-server-pgsql-2.4.6/create/schema.sql;
mysql> source/usr/share/doc/zabbix-server-pgsql-2.4.6/create/images.sql
mysql> source/usr/share/doc/zabbix-server-pgsql-2.4.6/create/data.sql
mysql> showtables;
五、配置zabbix_server.conf
1. 配置zabbix_server.conf
vi/etc/zabbix/zabbix_server.conf
### Option: DBHost
# Database host name.
# If set to localhost, socket is used for MySQL.
# If set to empty string, socket is used for PostgreSQL.
#
# Mandatory: no
# Default:
DBHost=localhost #可修改
### Option: DBName
# Database name.
# For SQLite3 path to database file must be provided. DBUser andDBPassword are ignored.
#
# Mandatory: yes
# Default:
# DBName=
DBName=zabbix #默认
### Option: DBSchema
# Schema name. Used for IBM DB2 and PostgreSQL.
#
# Mandatory: no
# Default:
# DBSchema=
### Option: DBUser
# Database user. Ignored for SQLite.
#
# Mandatory: no
# Default:
# DBUser=
DBUser=zabbix #默认
### Option: DBPassword
# Database password. Ignored for SQLite.
# Comment this line if no password is used.
#
# Mandatory: no
# Default:
DBPassword=zabbix #需修改
### Option: DBSocket
# Path to MySQL socket.
#
# Mandatory: no
# Default:
# DBSocket=/tmp/mysql.sock
DBSocket=/var/lib/mysql/mysql.sock
### Option: DBPort
# Database port when not using local socket. Ignored for SQLite.
以上参数只需关注黑体字部分,这部分为性能参数,需根据实际情况进行调整。默认只需修改DBPassword=zabbix即可。
# mkdir/etc/zabbix/alertscripts /etc/zabbix/externalscripts
启动zabbix-server服务
# service zabbix-server start
#service httpd start
# chkconfig zabbix-server on
# chkconfig httpd on
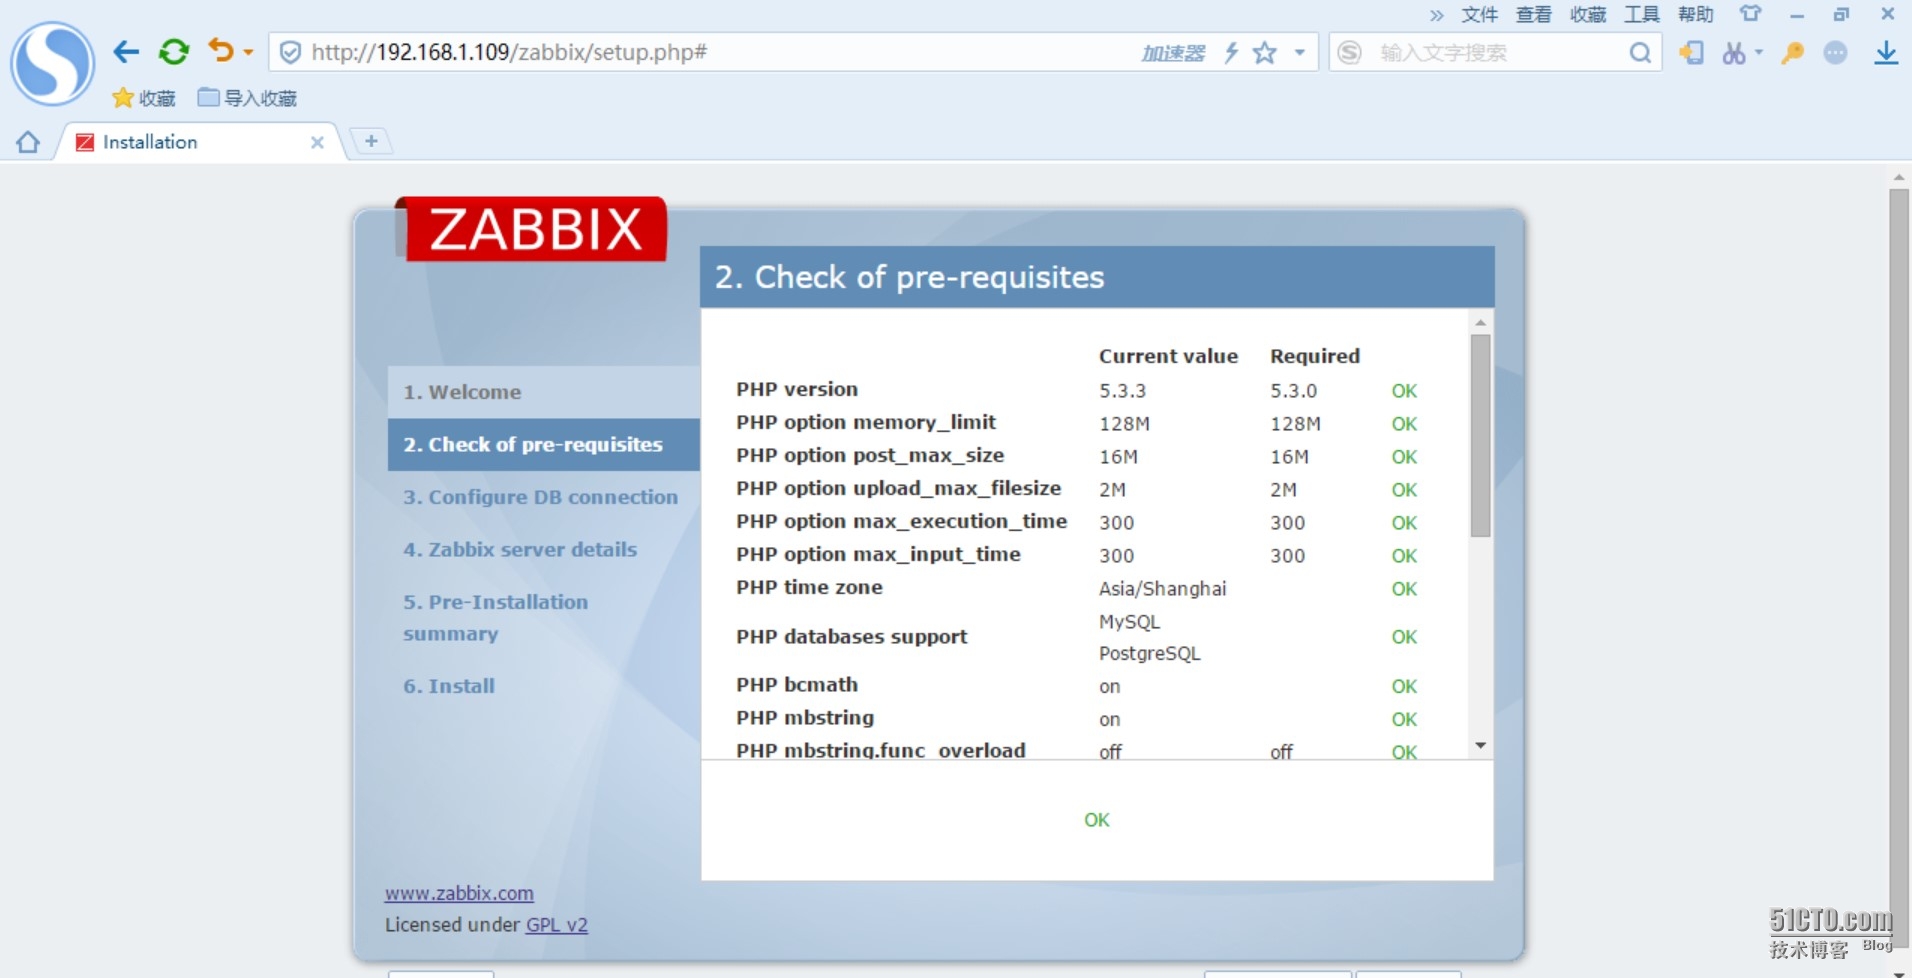
配置时区参数
vi /etc/httpd/conf.d/zabbix.conf
<Directory"/usr/share/zabbix">
Options FollowSymLinks
AllowOverride None
Order allow,deny
Allow from all
php_value max_execution_time 300
php_value memory_limit 128M
php_value post_max_size 16M
php_value upload_max_filesize 2M
php_value max_input_time 300
php_value date.timezone Asia/Shanghai #把时区改成中国上海
</Directory>
<Directory"/usr/share/zabbix/conf">
Order deny,allow
Deny from all
<files *.php>
Order deny,allow
Deny from all
#service httpd restart
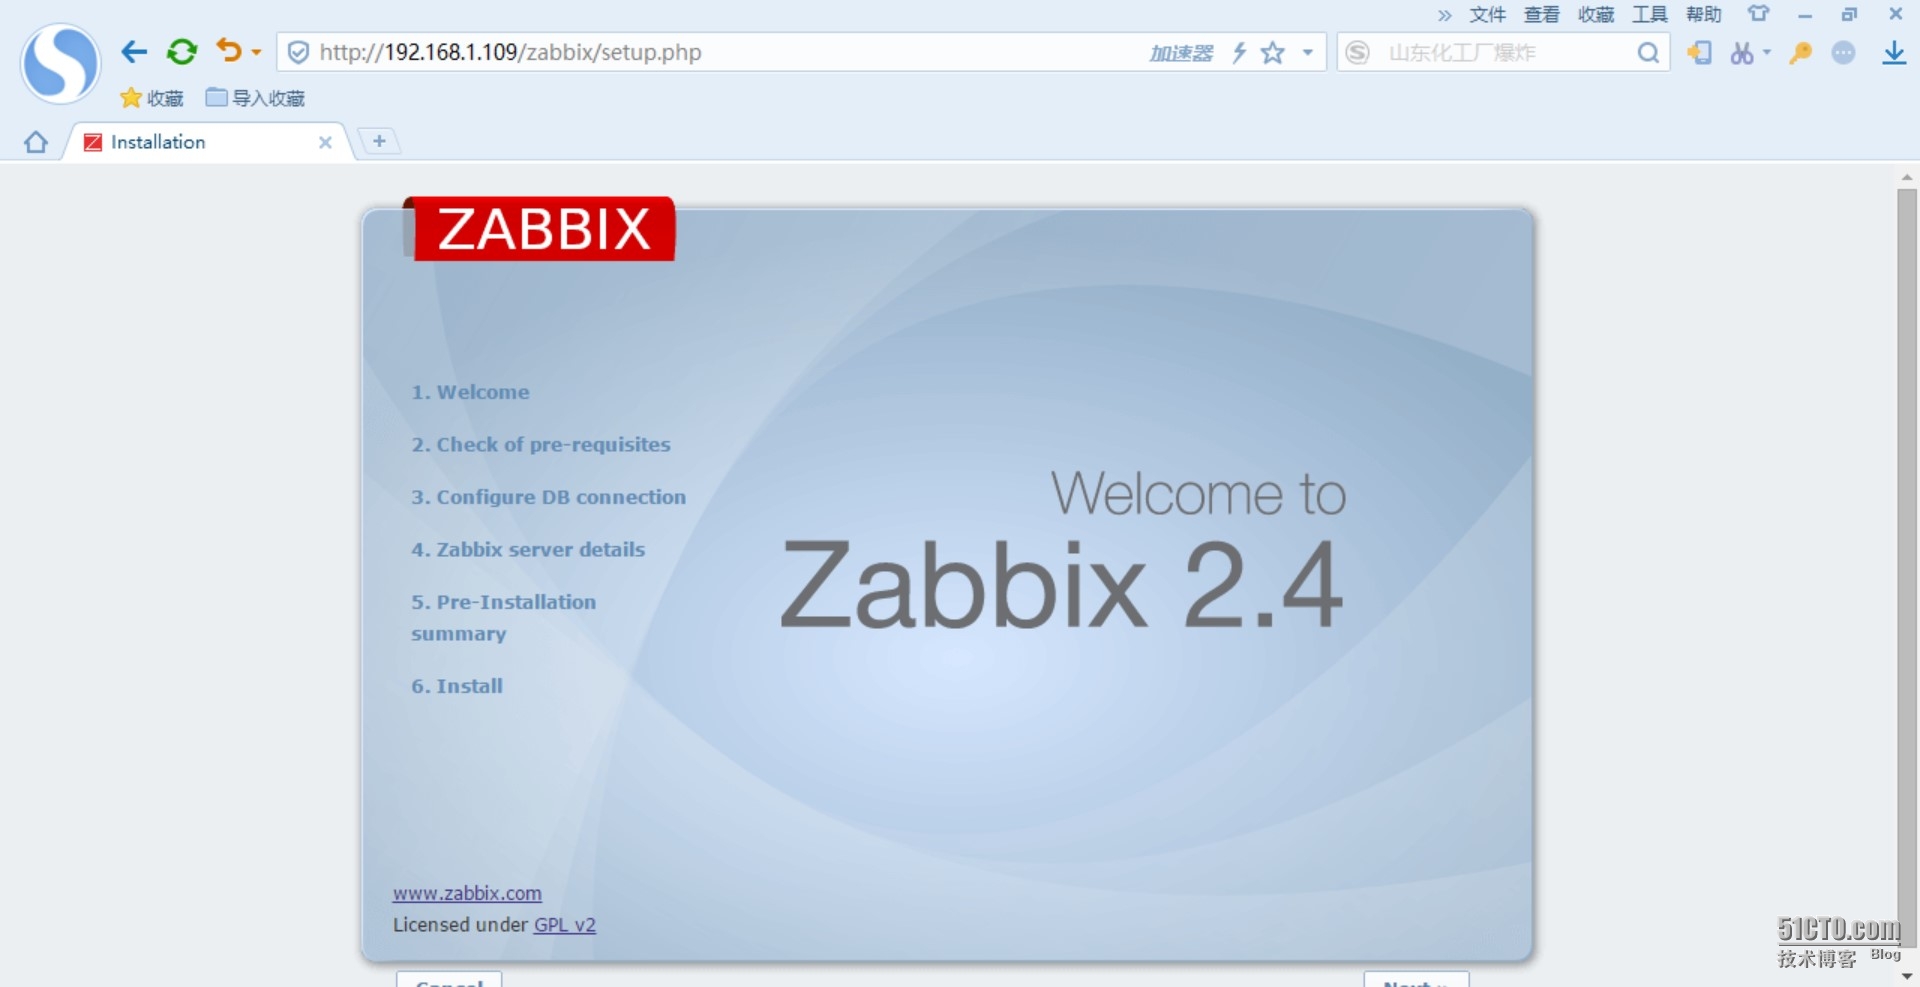
至此,默认配置完成,打开浏览器,输入http://ip地址/zabbix,会出现如下图所示的画面:
下一步:
下一步:
下一步:
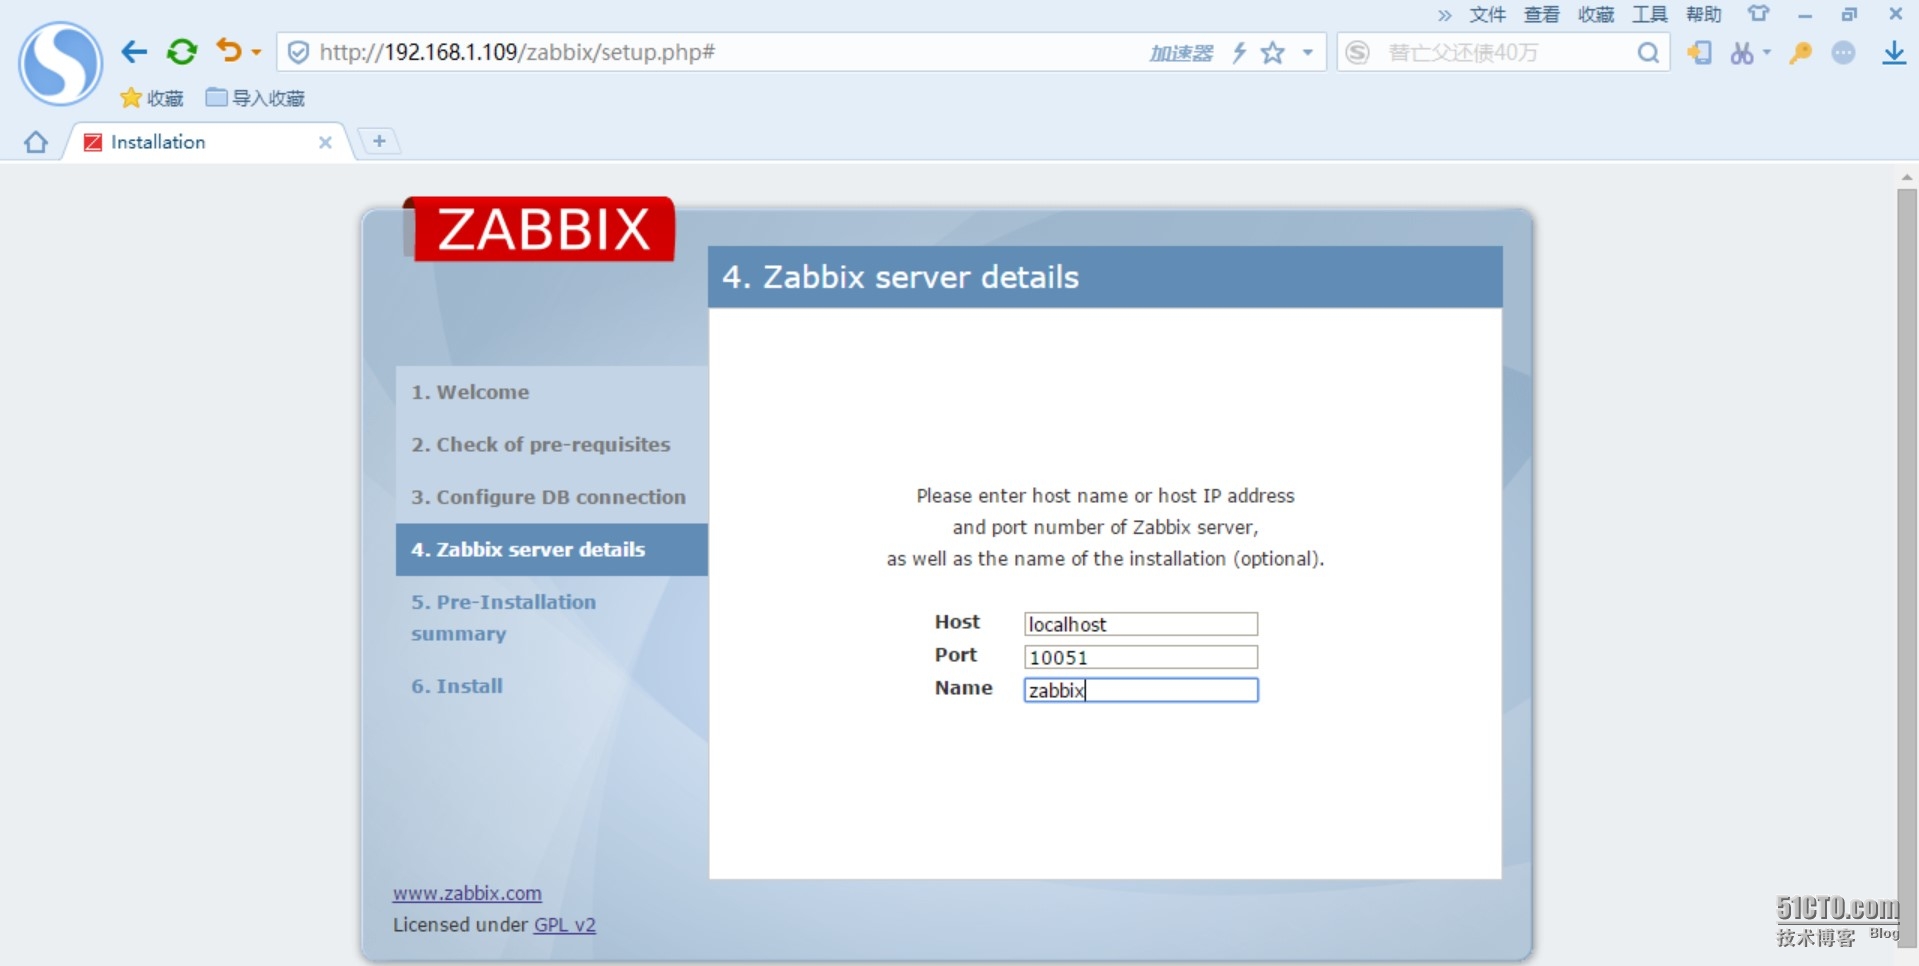
下一步:
下一步:
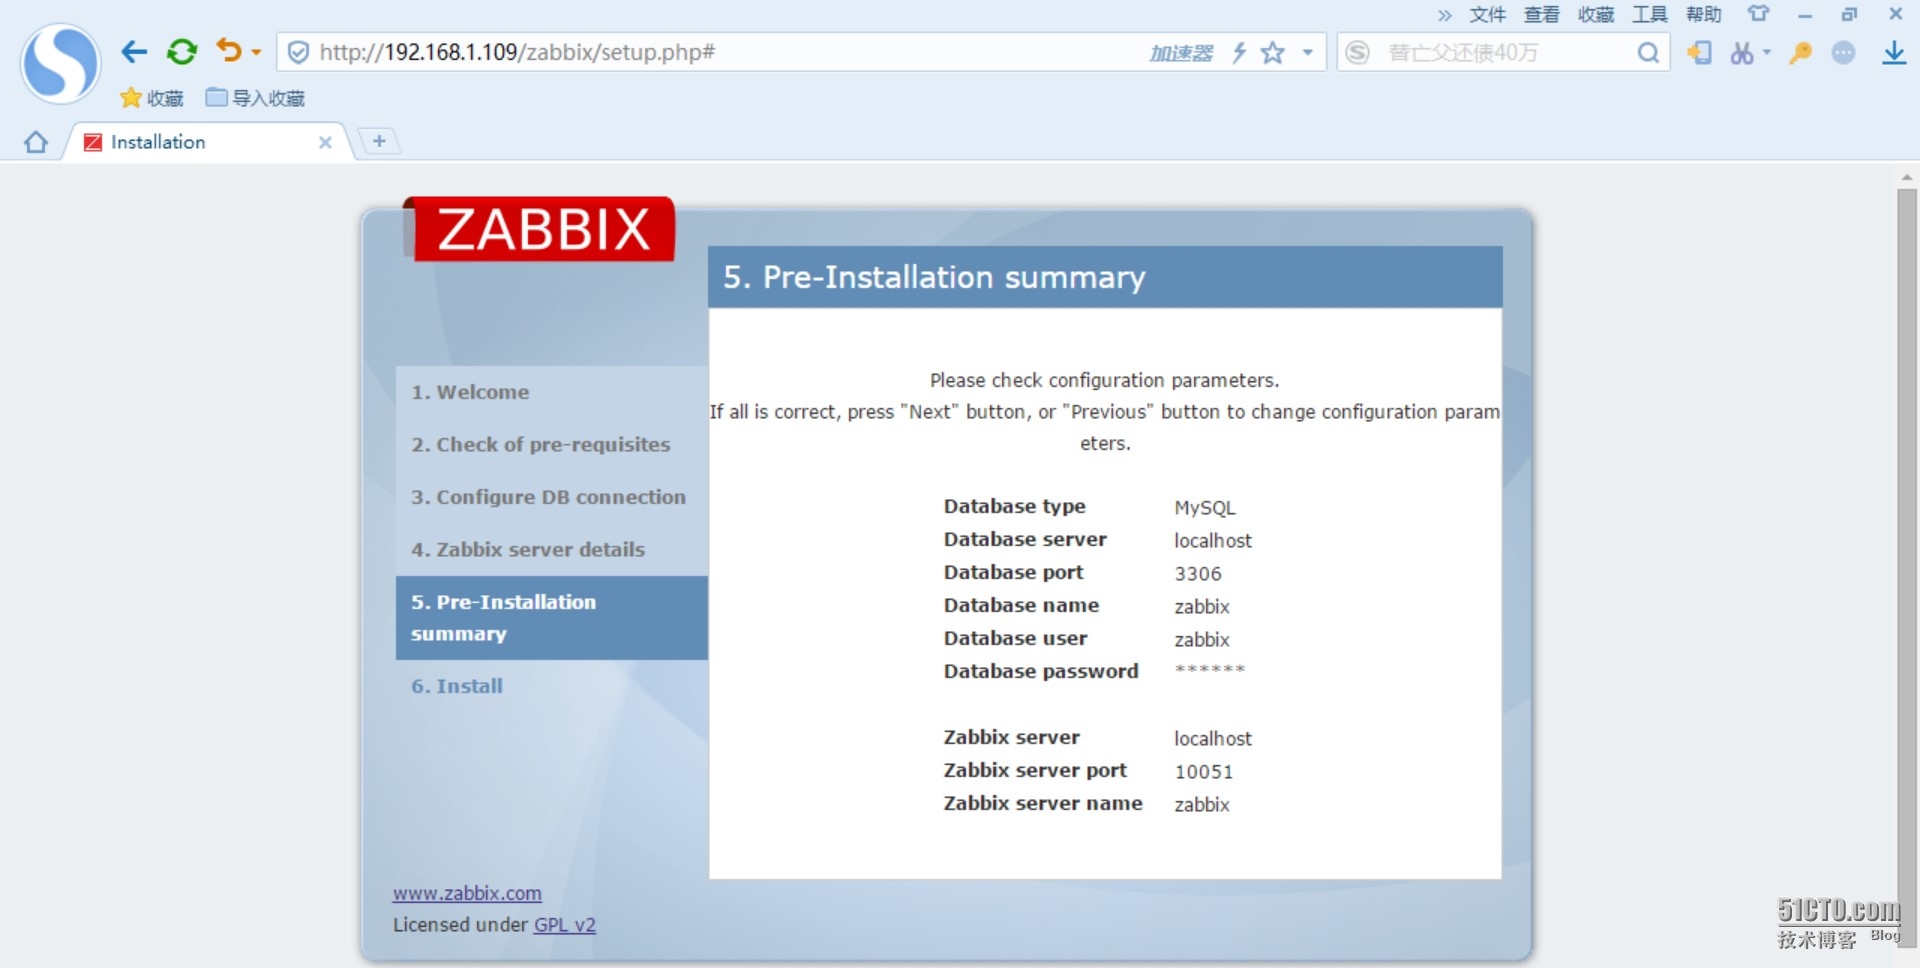
下一步:
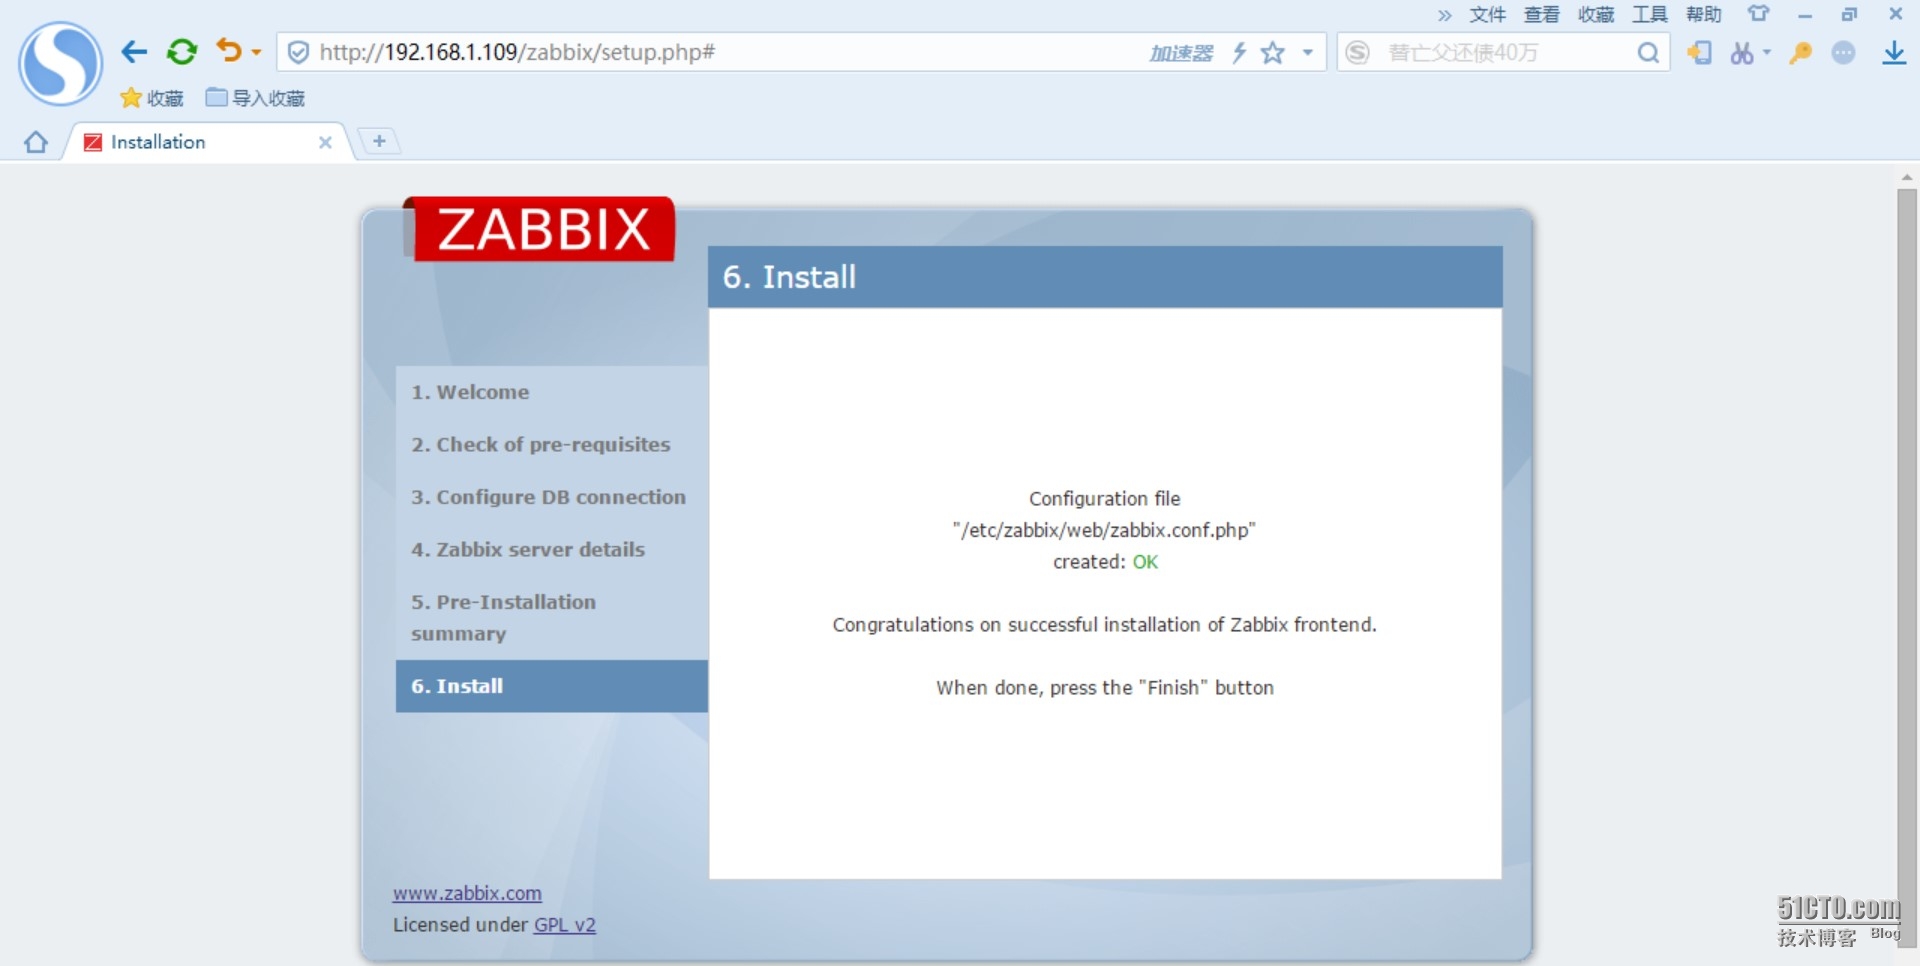
默认用户名:Admin
默认密码:zabbix