UWP 拉勾客户端
前些天, 用 Xamarin.Forms (XF) 将就着写了个拉勾的 UWP 和 Android 的客户端.
XF 对 Android 和 IOS 的支持做的很到位, 但是对 UWP 的支持目前仅限于预览版, "预留" 了很多BUG.
本想着等 Xamarin 团队尽快发部更新, 我好改掉这些 BUG, 但是苦等了个把月, 发部的 DLL 不但没有修改我所遇到的这些 BUG, 反而 BUG 越来越多了...
算鸟, 我也不等你了, 直接新开个项目, 直接写个 UWP 的...
源码
https://github.com/gruan01/Lagou.UWP
体验包
http://pan.baidu.com/s/1gei4V3l
安装步骤:
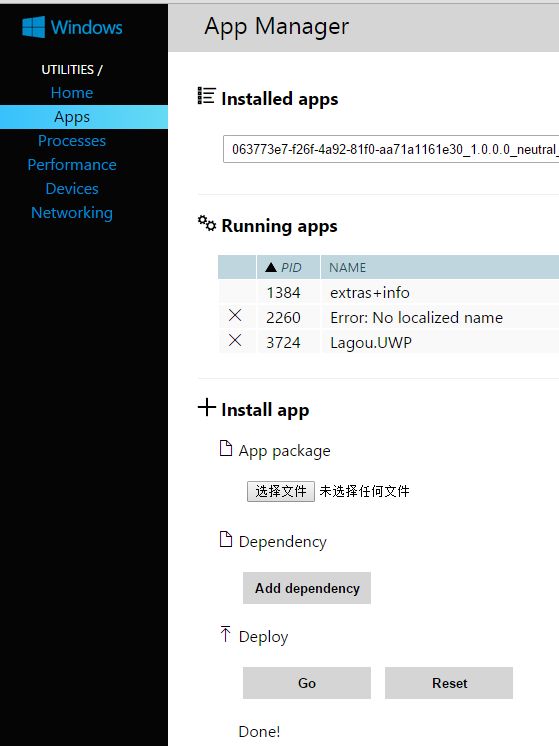
更新和安全->勾选开发人员模式-> 启用USB 和局域网连接,身份验证
然后在浏览器里输入手机上显示的地址,
点击 App Package 下面的那个按钮, 选择下载的 .appxbundle 文件 (你也可以用解压软件打开该文件, 里面包含 appx 文件).
点击 Go.
完成功能:
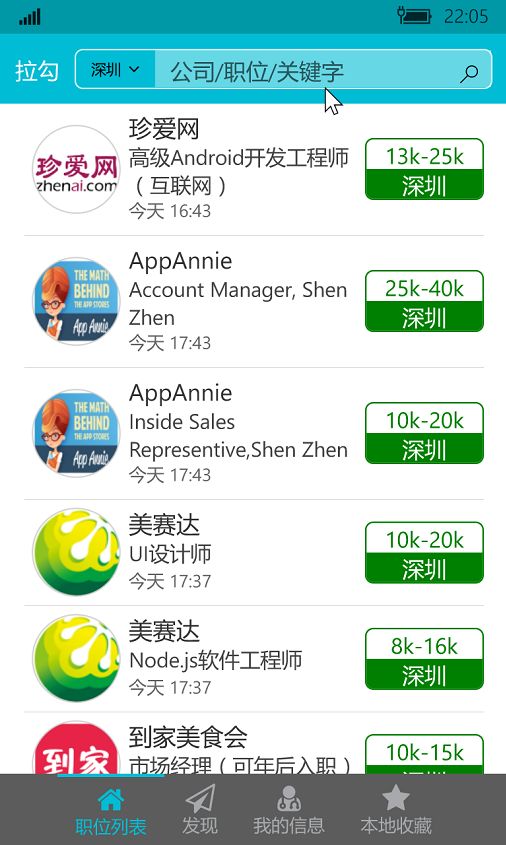
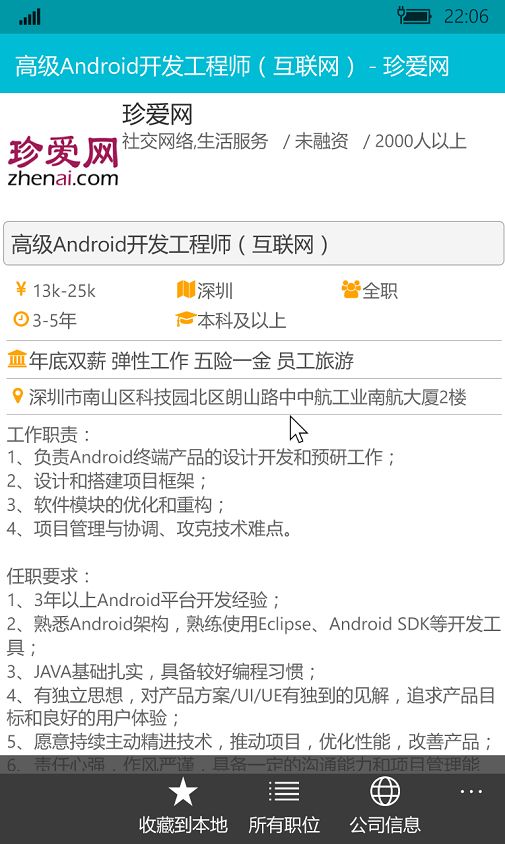
目前只写了 搜索 / 查看 / 及收藏到本地, 另外还有一个登陆查看简历的功能.
官方 app 中的 "发现" , 没有发现入口在哪里, 所以留白.
我的信息中, 除我的简历外, 其它都留白, 因为我没有可用数据可供调试.
已知 BUG :
登陆状态不准确.
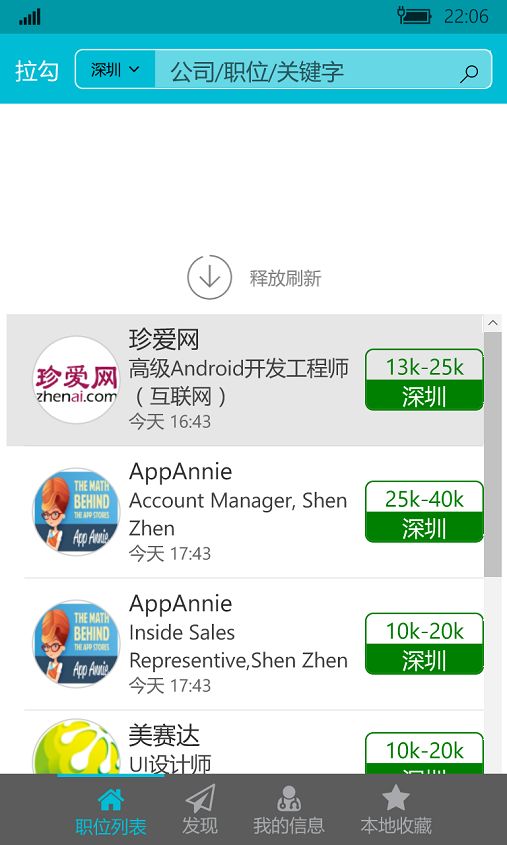
截图:
问题与解决
1, Caliburn.Micro 和 NavigationCacheMode
如果页面的 NavigationCacheMode 设为 Enabled 或 Required, Caliburn.Micro 的 Message.Attach 会多次绑定, 导至事件处理方法被多次调用 (导航到其它页面, 在返回, 在导航,在返回, 问题就出来了).
除了等大神修复这个 BUG 外, 用 Command / Behavior / Attached Property 都可以解决这个问题.
2, 返回时, ListView 无法定位到离开之前的位置.
这个问题有两种解决办法:
a, 设置页面的 NavigationCacheMode 为 Enabled 或 Required.
b, 对于不方便使用 NavigationCascheMode 的页面, 参照 Windows-universal-samples 中的 ListView 相关的示例, 我写了一个 ListViewPositionRestoreBehavior:
https://github.com/gruan01/Lagou.UWP/blob/master/Lagou.UWP/Common/ListViewPositionRestoreBehavior.cs
具体就是在 ListView 的 UnLoad 事件中, 获取某个 item 的 Key (至于是哪个, 没有细研究), 这个 Key 由 ListView 每数据中的可以做唯一标识的数据编码而得.
在 ListView.Loaded 事件, 获取已存在的 Key, 还原出唯一标识, 然后根据这个标识找到相关的 item.
1             <ListView ItemsSource="{Binding Datas}">
2                 <!--设置 Page 的 NavigationCacheMode 为 Enable 或 Required, 页面会被缓存,就不需要这个了 -->
3                 <i:Interaction.Behaviors>
4                     <common:ListViewPositionRestoreBehavior
5                      Identity="{Binding KeyFinder}"
6                      PersistedItemKey="{Binding PersistedItemKey, Mode=TwoWay}"
7                     />
8                 </i:Interaction.Behaviors>
ViewModel:
 1         #region used for ListView Position Restore
 2         public Func<object, string> KeyFinder { get; set; }
 3             = o => {
 4                 var item = (SearchedItemViewModel)o;
 5                 if (item != null) {
 6                     return item.Data.PositionId.ToString();
 7                 }
 8                 return string.Empty;
 9             };
10
11         public string PersistedItemKey { get; set; }
12         #endregion
3, 图片
不得不说, 拉勾的 图片是专坑你流量的. 根本就没有经过优化 (至少在 WAP 版中是这样的), 随便找个公司的 LOGO, 都是 二三十K, 几百乘几百的分辨率, 在手机上根本就是浪费内存,别无它用.
浪费流量, 这个没有办法, 因为没有其它的图可用..
至于分辨率, 一开始, 我写了个 ThumbImageSource , 专门用于将大图改成小图, 但是运行发现有些多线程的问题没有处理好, 在 UWP 上又不比桌面环境, 有诸多限制, 对 UWP的整个 API 还不甚了解.
比如:
BitmapEncoder 居然无法写入 MemoryStream 转换出的 IRandomAccessStream , 用 StorageFile.OpenFile 生成的 IRandomAccessStream 却可以顺利写入..
不同的 BitmapPixelFormat 对应的 pixels bytes 数组大小还不一样, 又没有一个详细的文档说明...
网上搜索到贴子, 很多都是 WP 8.1 时代的 UAP 的 示例, UWP 并不适用...能写出以下代码, 真的是翻了好几天的贴子, 试了又试:
 1 private async Task<Stream> CreateThumb(Stream orgStm, int width, int height, string filePath) {
 2
 3             var ras = orgStm.AsRandomAccessStream();
 4             var wb = new WriteableBitmap(width, height);
 5             ras.Seek(0);
 6             await wb.SetSourceAsync(ras);
 7
 8             var stm = wb.PixelBuffer.AsStream(); //需要引用 System.Runtime.WindowsRuntime, NUGET 中有
 9             var bytes = await stm.GetBytes();
10
11             using (var fs = await FileManager.Instance.Value.OpenFile(filePath)) {
12                 //BitmapEncoder 无法写入 MemoryStream
13                 BitmapEncoder encoder = await BitmapEncoder.CreateAsync(
14                     BitmapEncoder.JpegEncoderId,
15                     fs);
16
17                 encoder.BitmapTransform.ScaledWidth = (uint)width; // 最终的图片的大小
18                 encoder.BitmapTransform.ScaledHeight = (uint)height;
19                 //encoder.BitmapTransform.Rotation = BitmapRotation.Clockwise90Degrees;
20
21                 encoder.SetPixelData(
22                     BitmapPixelFormat.Bgra8,
23                     BitmapAlphaMode.Straight,
24                     (uint)wb.PixelWidth,
25                     (uint)wb.PixelHeight,
26                     96.0,
27                     96.0,
28                     bytes);
29
30                 await encoder.FlushAsync();
31                 return fs.CloneStream().AsStream();
32             }
33         }
最后, 放弃了 ThumbImageSource, 使用了这两个属性: DecodePixelHeight / DecodePixelWidth , 图片分辨的问题得以轻松解决,内存占用平滑多了!
1 <ImageBrush.ImageSource>
2       <BitmapImage UriSource="{Binding Data.CompanyLogoUri}"
3                    DecodePixelHeight="100" DecodePixelWidth="100"
4                    />
5 </ImageBrush.ImageSource>
4, 消息订阅与发布
Xamarin.Forms 中实现了一个叫 MessagingCenter 的东西,方便在不同的页面中传递数据.
直接的 UWP项目, 当然不可能使用 Xamarin.Forms, 也就无从使用这个 MessagingCenter , 好在 Caliburn.Micro 也提供了这样一个机制, 省了不少事呢!
发布者:
a, 首先在事件聚合器中注册发布者:
1         public JobDetailViewModel(INavigationService ns, IEventAggregator eventAggregator) {
2             this._eventAggregator = eventAggregator;
3             this._eventAggregator.Subscribe(this); 4             ....
b, 发布一个消息:
1         private async Task AddFavorite() {
2             await this._eventAggregator.PublishOnUIThreadAsync(this.Data);
3         }
接收者:
a, 同样也需要在事件聚合器中对接收者进行注册.
b, 接收消息, 需要实现 IHandle 事件:
public class LocalFavoriteViewModel : BasePageVM, IHandle<Position> {
....
....
        public async void Handle(Position arg) {
            var tip = "";
            if (!this.Favorites.Any(f => f.PositionID == arg.PositionID)) {
                var d = this.Convert(arg);
                this.Datas.Add(new SearchedItemViewModel(d, this.NS));
                this.AddToFavorite(arg);
                ......
        }
------------------
OK ,完
欢迎 UWP 开发者共同完善这个 APP.
