Maven下SpringMVC整合UEditor
SpringMVC的搭建我就不啰嗦了,直接开干。
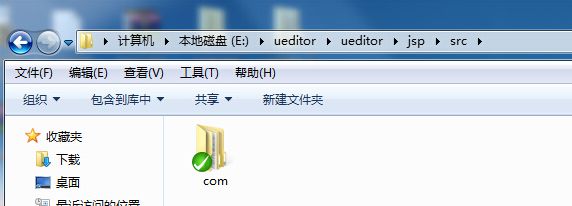
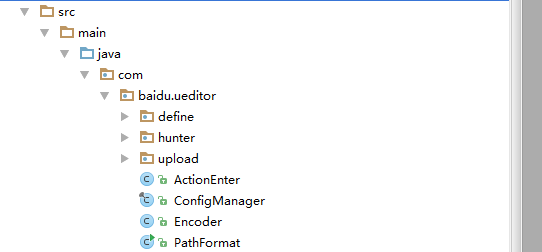
UEditor和SpringMVC整合有点复杂,首先下载UEditor的源码,其实主要是java源码,然后把如图所示的java代码直接copy到项目工程中:
大概就是这些:
这些源码导入之后会有很多jar包需要导入:
<dependency>
    <groupId>commons-codec</groupId>
    <artifactId>commons-codec</artifactId>
    <version>1.10</version>
</dependency>
<dependency>
    <groupId>commons-fileupload</groupId>
    <artifactId>commons-fileupload</artifactId>
    <version>1.3.1</version>
</dependency>
<dependency>
     <groupId>commons-io</groupId>
     <artifactId>commons-io</artifactId>
     <version>2.4</version>
</dependency>
<dependency>
      <groupId>org.json</groupId>
      <artifactId>json</artifactId>
      <version>20141113</version>
 </dependency>
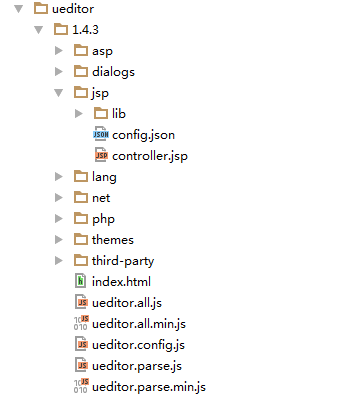
然后呢把UEditor的JS还有css都copy到webapp中:
这里面有很多是用不到的,直接删掉就行了。
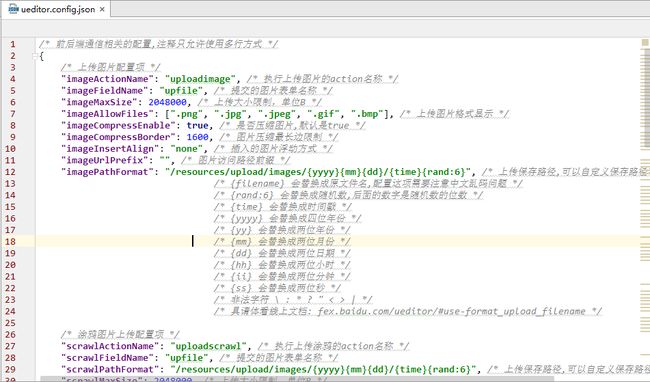
然后把配置文件config.json打开,我这里是修改了配置文件名的。
然后就是修改各种pathFormat,这个是上传目录路径,改成你自己的就好咯,这里很多人把这个config放在java工程的resources中,的确要专业些,但是java源码中的路径指向就要修改成WEB-INF class中,这个在用mvn tomcat7:run的时候会报找不到配置文件的异常,为了统一tomcat和mvn tomcat7:run都能找到该配置文件,我是直接放在webapp下的。
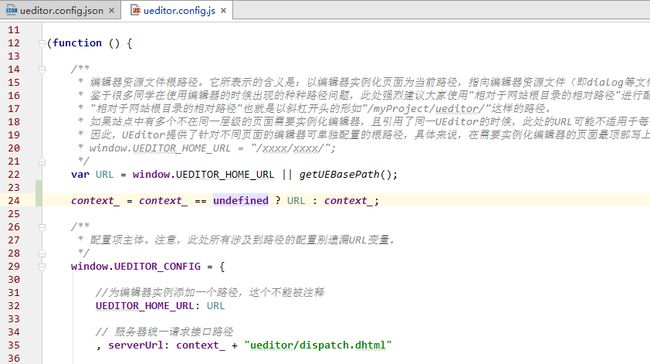
改完pathFormat之后需要修改下各种ListPath,改完后这个config的修改工作就完了,然后就是修改ueditor.config.js了
只定义了一个全局context_ 修改下serverUrl,这里的context_是JSP或者其它文件定义的,
= ;
这里serverUrl很重要,ueditor的上传啥的都是走的这个URL,然后就是建一个controller:
package com.ishare.mall.center.controller;

import com.baidu.ueditor.ActionEnter;
import com.ishare.mall.center.controller.base.BaseController;
import org.slf4j.Logger;
import org.slf4j.LoggerFactory;
import org.springframework.stereotype.Controller;
import org.springframework.web.bind.annotation.RequestMapping;

import javax.servlet.http.HttpServletRequest;
import javax.servlet.http.HttpServletResponse;
import java.io.IOException;
import java.io.PrintWriter;


/**
 * Created by yinlin on 2015/9/7.
 * Description :
 * Version 1.0
 */
@Controller
@RequestMapping(value = "/ueditor")
public class UploadController extends BaseController {

    private static final Logger log = LoggerFactory.getLogger(UploadController.class);

    public static Logger getLog() {
        return log;
    }

    @RequestMapping("/dispatch")
    public void config(HttpServletRequest request,  HttpServletResponse response, String action) {
            String rootPath = request.getSession().getServletContext().getRealPath("/");
            try {
                    String exec = new ActionEnter(request, rootPath).exec();
                    PrintWriter writer = response.getWriter();
                    writer.write(exec);
                    writer.flush();
                    writer.close();
            } catch (IOException e) {
                    e.printStackTrace();
            }

    }
}
最后就是修改ueditor的源码类了: ConfigManager.java
修改下它的构造函数:
/*
	 * 通过一个给定的路径构建一个配置管理器, 该管理器要求地址路径所在目录下必须存在config.properties文件
	 */
	private ConfigManager ( String rootPath, String contextPath, String uri) throws FileNotFoundException, IOException {

		rootPath = rootPath.replace( "\\", "/" );

		this.contextPath = contextPath;

		this.rootPath = rootPath;

		if ( contextPath.length() > 0 ) {
			this.originalPath = this.rootPath + uri.substring(contextPath.length() + (contextPath.endsWith("/") ? 0 : 1));
		} else {
			this.originalPath = this.rootPath + uri;
		}

		this.initEnv();

	}
修改下Json返回图片URI contextPath路径:
private void initEnv () throws FileNotFoundException, IOException {

		File file = new File( this.originalPath );

		if ( !file.isAbsolute() ) {
			file = new File( file.getAbsolutePath() );
		}

		this.parentPath = file.getParent();

		String configContent = this.readFile( this.getConfigPath() );

		try{
			JSONObject jsonConfig = new JSONObject( configContent );
			Iterator<String> it = jsonConfig.keys();
			while(it.hasNext()){
				String key=it.next();
				if(key.contains("UrlPrefix")) {
					jsonConfig.put(key, contextPath);
				}
			}
			this.jsonConfig = jsonConfig;
		} catch ( Exception e ) {
			this.jsonConfig = null;
		}

	}
修改下json配置所在路径:
/**
	 * 获得配置路径
	 * @return
	 */
	private String getConfigPath () {

		return this.rootPath + File.separator + "resources" + File.separator + "scripts" + File.separator + "ueditor" + File.separator + "config" + File.separator + ConfigManager.configFileName;

	}
OK了,可以愉快的玩耍了。如果需要修改其他的,那就要去修改其他的源码咯。
