服务器推送消息到客户端 SignalR 弹出消息
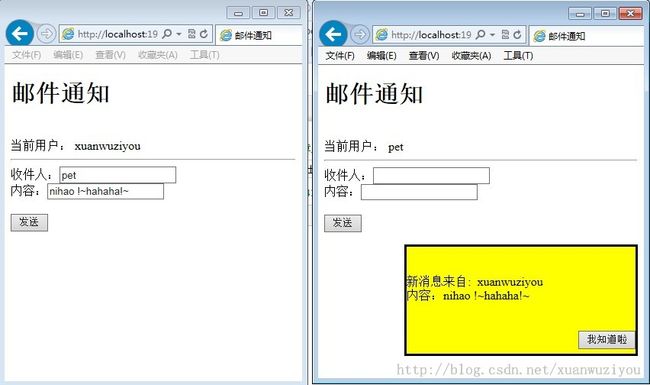
1.先来看一下成果:
用xuanwuziyou用户给pet用户发送消息,点击发送之后,pet用户即收到新消息弹出提示:
2.技术:Asp.net的SignalR,详情见官网 http://www.asp.net/signalr
http://www.asp.net/signalr/overview/signalr-20/getting-started-with-signalr-20/tutorial-getting-started-with-signalr-20
使用环境:VS2013 WebForm项目。
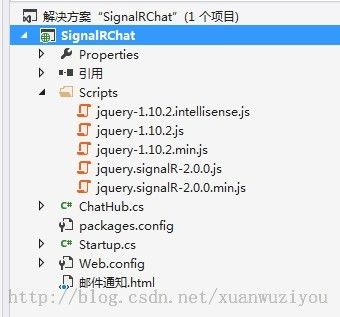
3.新建一个WebApplication的空项目,项目结构:
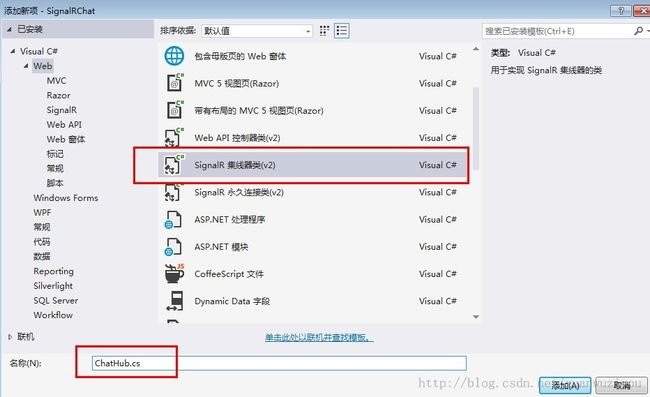
4.步骤1:添加ChatHub.cs类,如下:
ChatHub.cs代码:
using System;
using System.Collections.Generic;
using System.Linq;
using System.Web;
using Microsoft.AspNet.SignalR;

namespace SignalRChat
{
    public class ChatHub : Hub
    {

        public void SendEmail(string receiver, string sender, string message)
        {
            //调用广播方法推送消息到客户端
            Clients.All.broadcastMessage(receiver, sender, message);
        }
    }
}
步骤2:
添加Startup.cs类,如下:
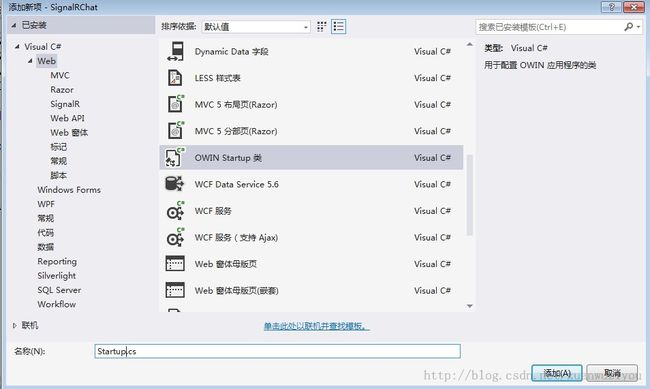
Startup.cs代码:
using System;
using System.Threading.Tasks;
using Microsoft.Owin;
using Owin;

[assembly: OwinStartup(typeof(SignalRChat.Startup))]

namespace SignalRChat
{
    public class Startup
    {
        public void Configuration(IAppBuilder app)
        {
            // Any connection or hub wire up and configuration should go here
            app.MapSignalR();
        }
    }
}
添加上这两个类,那么项目所需要的Scripts文件和引用就会自动添加进来。
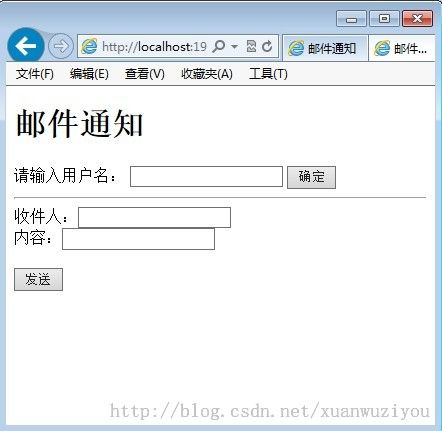
步骤3:添加一个Html页叫做“邮件通知.html”,内容如下:
<!DOCTYPE html>
<html xmlns="http://www.w3.org/1999/xhtml">
<head>
<meta http-equiv="Content-Type" content="text/html; charset=utf-8"/>
    <title>邮件通知</title>
    <script src="Scripts/jquery-1.10.2.min.js"></script>
    <script src="/Scripts/jquery.signalR-2.0.0.js"></script>
    <script src="/signalr/hubs"></script>
    <script>
        var username;
        $(function () {
            $("#notify").hide();

            $("#submit").click(function () {
                username = $("#username").val();
                $("#tishi").html("当前用户: " + username);
                $("#shuru").hide();
                $("#username").hide();
                $("#submit").hide();
            });

            var chat = $.connection.chatHub;
            chat.client.broadcastMessage = function (receiver, sender, message) {//显示从服务端收到的信息
                if (username == receiver) {
                    $("#sender").text(sender);
                    $("#receiveMsg").text(message);
                    $("#notify").slideDown();
                }
            };

            $.connection.hub.start().done(function () {//发送信息到服务端

                $('#sendmsg').click(function () {
                    chat.server.sendEmail($("#receiver").val(), username, $("#msg").val());
                });

            });

            $("#cancle").click(function () {
                $("#notify").slideUp();
            });
        });
    </script>
</head>
<body>
    <h1>邮件通知</h1>
    <label id="shuru">请输入用户名:</label>
    <input type="text" id="username" />
    <input type="button" id="submit" value="确定" />
    <br /><label id="tishi"></label>
    <hr />
<div>
    收件人:<input type="text" id="receiver" />
    <br />内容:<input type="text" id="msg" />
    <br /><br /><input type="button" id="sendmsg" value="发送"/>
</div>

    <p></p>
    <div id="notify" style="width:300px;height:140px;float:right;margin-bottom:10px;border:solid;background-color:yellow;">
        <br />
        <br />
        新消息来自:  <span id="sender"></span><br />
        内容:<span id="receiveMsg"></span>
        <br /><br /><br />
        <input type="button" id="cancle" value="我知道啦" style="float:right"/>
    </div>

</body>
</html>
5.然后就可以生成项目并运行了。
6.讲解:ChatHub.cs中的SendEmail(string receiver, string sender, string message)方法由我们自己编写,
这个方法在前端的javascript中被调用了:
$.connection.hub.start().done(function () {//发送信息到服务端

                $('#sendmsg').click(function () {
                    chat.server.sendEmail($("#receiver").val(), username, $("#msg").val());
                });

            });
只是把SendEmail调用时写作sendEmail,即第一个字母小写。这个方法在当singalr准备好之后,
在前端调用后台的方法把数据广播出去。
chat.client.broadcastMessage = function (receiver, sender, message) {//显示从服务端收到的信息
                if (username == receiver) {
                    $("#sender").text(sender);
                    $("#receiveMsg").text(message);
                    $("#notify").slideDown();
                }
            };
这个方法,正是客户端收到了服务器广播发来的数据之后调用的方法,收到的参数正是我们在
SendEmail中规定传送的参数。本程序中把收到的信息弹出给相应的用户。
就这样,实现了信息的实时推送,也就是服务器端主动向客户端推送消息的方式。结束。
