Django应用部署 - 上线指南
http://blog.csdn.net/pipisorry/article/details/46957613
python manage.py runserver已经很接近于服务器的形式,但是并不能支持外网访问或多人同时访问。因此需要将网站部署到服务器上,而django在本地使用runserver运行和部署到服务器在配置文件上是不同的。
目前比较流行的部署、运行Django应用方式是基于Apache的mod_wsgi模块。
但更加高效、弹性,同时又更加复杂的方式是使用以下工具来部署实施:Nginx、Gunicorn、virtualenv、supervisor、Postgresql。
以下详细介绍如何结合这些工具来部署Django应用到windows上(linux系统也类似)。
安装和配置虚拟环境
前提是已经安装了python3(或者python2+pip)
pip install virtualenv
Note:virtualenv安装完成后不要将外面的python卸载了,但外面的python可以修改成python2
e:\mine\python_workspace >virtualenv venv
[python virtualenv虚拟环境配置]
进入并激活虚拟开发环境
windows:
env\Script\activate.bat
Linux(mac os):
source env/bin/activate
mingw(git):
venv >source Scripts/activate
皮皮Blog
安装Django并配置Django项目
虚拟环境中pip安装Django
(venv) pip install Django
Note: pip install Django==1.7.9指定版本安装(lz用的是1.7.9版本的django)
python
import django
django.VERSION
没有发生错误,证明已经成功安装Django了
2. 安装包安装
只要还在virtualenv环境里,安装Django的步骤跟实际安装Django的步骤完全一样。可以参考官网的步骤。其实就是下载,然后输入命令行的事。
https://docs.djangoproject.com/en/1.4/topics/install/#installing-a-distribution-specific-package
1. Download the latest release from our download page.
2. Untar the downloaded file (e.g. tar xzvf Django-X.Y.tar.gz, where X.Y is the version number of the latest release). If you're using Windows, you can download the command-line tool bsdtar to do this, or you can use a GUI-based tool such as 7-zip.
3. Change into the directory created in step 2 (e.g. cd Django-X.Y).
4. If you're using Linux, Mac OS X or some other flavor of Unix, enter the command sudo python setup.py install at the shell prompt. If you're using Windows, start a command shell with administrator privileges and run the commandpython setup.py install. This will install Django in your Python installation's site-packages directory.
安装完Django 以后,用deactivate命令,退出virtualenv。
[使用Virtualenv搭建Python3的Django环境]
虚拟环境目录venv中创建Django项目
django-admin.py startproject labsite
[创建Django项目]
[Django模型(view-数据库)]
移植:git clone [email protected]:***.git
或者直接将已有的Django项目目录copy到venv目录中
生产环境中django的相关设置修改
关闭debug
为了安全起见,部署到服务器前需要关闭debug模式,即修改settings.py文件中的
DEBUG = False
TEMPLATE_DEBUG = False
当然,我们也可以重新建一个设置文件,如settings_production.py用于生产环境。在这个py文件中设置DEBUG为False。
当DEBUG= True时,默认使用的是django自带的404错误页面,同时页面中会显示具体的错误信息,可能会暴露隐私信息,因此需要关闭这一功能。关闭后如果出现404错误,django会在你的模版根目录中寻找名叫404.html的页面。因此,关闭了DEBUG功能后我们需要在根目录中添加有意义的404页面。
django在Debug功能关闭后就会自动停止staticfiles功能,因此这时候会发现runserver后网页中的静态文件都没有了。
到这一步的时候如果不需要部署到服务器上只想在电脑上测试可以使用命令python manage.py runserver –insecure网页中就会正确显示css,js等静态文件。
修改允许的HOST
DEBUG关闭后需要在修改ALLOWED_HOSTS = [ ‘127.0.0.1’ ]
皮皮Blog
安装并配置数据库相关模块(lz用的是mysql,其它数据库类似)
首先下载安装MySQL
django要求MySQL4.0或更高的版本。 3.X 版本不支持嵌套子查询和一些其它相当标准的SQL语句。
[Mysql数据库安装及配置]
Django中Mysql初始配置
我们需要告诉Django使用什么数据库以及如何连接数据库。假定你已经完成了数据库服务器的安装和激活,并且已经在其中创建了数据库(例如,用 CREATE DATABASE books;)。 如果你使用SQLite,不需要这步安装,因为SQLite使用文件系统上的独立文件来存储数据。
数据库配置也是在Django的配置文件里,缺省 是 settings.py 。
DATABASES = {
    'default': {
        'ENGINE': 'django.db.backends.mysql',
        'NAME': 'books',        #这里不要用绝对路径!
        'USER': 'pipi',
        'PASSWORD': '********',
        'HOST': '',
        'PORT': '',
    }
}
配置数据库连接插件MySQL
需要安装对应的mysql数据库插件。MySQLdb还不支持python3,所以用的是替代品PyMySQL。
1. 在虚拟环境中安装mysql数据库适配器:
e:\mine\python_workspace\venv >pip install pymysql
2. 在上面建好的django项目的init.py中加入(maybe not):
import pymysql pymysql.install_as_MySQLdb()
[Django模型(view-数据库]
注意根据上面的链接中的三个步骤构建Django的初始化数据库
配置数据库图片相关库
pip install pillow
Note:否则在数据库model中不能使用ImageField
配置后台管理模块
如果使用嵌套关联对象nested inline,安装django-nested-inline
pip install django-nested-inline
[Django项目实践4 - Django站点管理(后台管理员)]
皮皮Blog
windows下的安装部署
可以参考使用apache+mod_wsgi相关文章[django部署]配置好mod_wsgi后,只要将django相关路径添加到apache配置文件httpd.conf中就可以启动apache使用django。
Apache的安装和启动运行
安装Apache 2.4
MSI Installer安装
1. Run the msi installer.
2. Apache should now be seen in your computers Program Files directory under
[PROGRAM_FILES]\Apache Software Foundation\Apache2.4. This full path to Apache is known as theServer Root.
Zip File安装
1. Download the appropriate zip file for your system architecture.
2. Extract the Apache24 directory to the desired location of the Apache installation. The full installation path that you use is known as the Server Root. For the purposes of these steps we will refer to the Server Root path as [SERVER_ROOT].
3. Open a command prompt as an Administrator. Go to [SERVER_ROOT]/bin and run the command httpd -k install.
启动Apache
三种方法:
1. 手动启动Apache
httpd -k start
2. 使用apache自带的启动停止工具
D:\Apache24\bin\ApacheMonitor.exe在图形界面下控制apache。
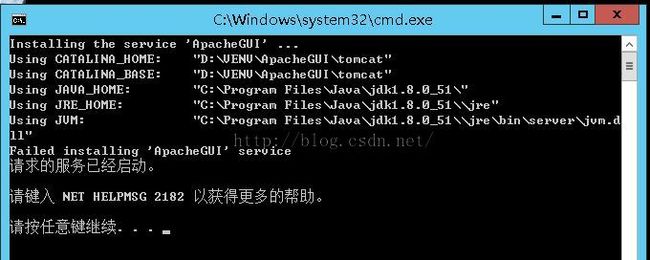
Note:如果出现the requested operation has failed!可能是因为系统中python没有安装、安装版本不对、安装路径改变了。
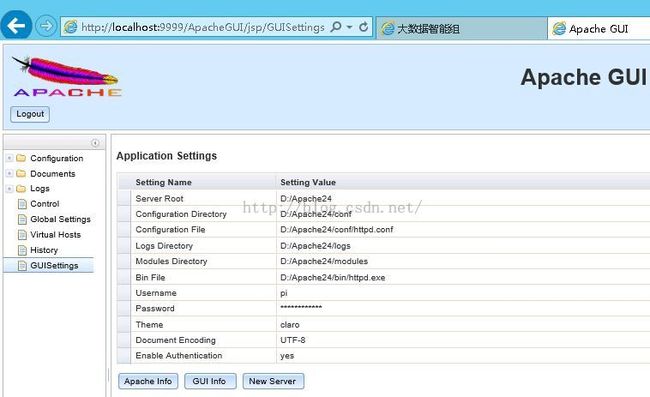
3. ApacheGUI图形管理界面安装和使用(可选)
Apache Web 服务器管理工具,是一个免费开源的 Web 工具,用来帮助管理 Apache HTTP 服务器。
1. Unzip the ApacheGUI archive to a directory of your choice. We will refer to this directory as [APACHEGUI_HOME] in the following installation steps.
2. To start the web tool go to [APACHEGUI_HOME]/bin and run the batch file run.bat. Once the GUI has started it may be accessed through http://localhost:9999/ApacheGUI/
3. To stop the web tool go to [APACHEGUI_HOME]/bin and run the batch file stop.bat
4. 打开http://localhost:9999/ApacheGUI/后输入server root:如D:\Apache24(包含conf文件夹的目录)。name和password自己设置即可。
Note:
1. 要安装java并配置JAVA_HOME相关路径才能正常运行apachegui[java环境配置]
2. 要显示ApacheGUI完整内容,IE的安全-Internet安全设置不能太高。禁用的东西太多可以GUI界面显示不全。
3. 如果restart失败可能是因为系统中python没有安装、安装版本不对、安装路径改变了。
[http://apachegui.net/installation]
皮皮Blog
linux下安装部署django应用
可以参考下面的部署步骤,因为gunicorn不能在windows下运行
配置Python WSGI 应用服务器 - Gunicorn
在生产环境中,我们将不会使用Django自带的单线程的开发服务器(python manage.py runserver),而是使用专门的Python WSGI 应用服务器——gunicorn
[gunicorn的详细介绍Gunicorn]
在你的应用的虚拟环境中安装gunicorn
pip install gunicorn
windows下要下载fcntl.py文件放到虚拟环境PYTHONPATH路径即可,如E:\mine\python_workspace\venv\Lib目录下。
[5.Re: No module named fcntl]
[ImportError: No module named]
安装成功后可以测试下gunicorn是否可以运行Django 应用,在项目hello目录下运行以下命令:
(hello_django)[django@rango hello]$ gunicorn hello.wsgi:application --bind localhost:8001
通过访问http://localhost:8001 ,可以访问到你的Gunicorn服务器。此处特意将端口从8000改为8001是为了迫使浏览器建立一个新的连接。
Gunicorn现在已经准备好运行你的app,现在可以配置一些选项来使得Gunicorn更加有用。此处通过编写一个shell脚本来设置一些参数,脚本保存为/django_webapps/hello_django/bin/gunicorn_start:
#!/bin/bash
NAME="hello_app" # Name of the application
DJANGODIR=/django_webapps/hello_django/hello #Django project directory
SOCKFILE=/django_webapps/hello_django/run/gunicorn.sock #unix socket fro communication
USER=django # the user to run as
GROUP=django_webapps # the group to run as
NUM_WORKERS=5 # how many worker processes should Gunicorn spawn
DJANGO_SETTINGS_MODULE=hello.settings # which settings file should Django use
DJANGO_WSGI_MODULE=hello.wsgi # WSGI module name
echo "Starting $NAME as `whoami`"
# Activate the virtual environment
cd $DJANGODIR
source ../bin/activate
export DJANGO_SETTINGS_MODULE=$DJANGO_SETTINGS_MODULE
export PYTHONPATH=$DJANGODIR:$PYTHONPATH
# Create the run directory if it doesn't exist
RUNDIR=$(dirname $SOCKFILE)
test -d $RUNDIR || mkdir -p $RUNDIR
# Start your Django Unicorn
# Programs meant to be run under supervisor should not daemonize themselves (do not use --daemon)
exec ../bin/gunicorn ${DJANGO_WSGI_MODULE}:application \
--name $NAME \
--workers $NUM_WORKERS \
--user=$USER --group=$GROUP \
--log-level=debug \
--bind=unix:$SOCKFILE
为该脚本增加可执行权限:
chmod u+x bin/gunicorn_start
以用户django的身份来运行这个脚本:
su - django
bin/gunicorn_start
Starting hello_app as django
2014-06-15 15:17:20 [18037] [INFO] Starting gunicorn 18.0
2014-06-15 15:17:20 [18037] [DEBUG] Arbiter booted
2014-06-15 15:17:20 [18037] [INFO] Listening at: unix:/django_webapps/hello_django/run/gunicorn.sock (18037)
2014-06-15 15:17:20 [18037] [INFO] Using worker: sync
2014-06-15 15:17:20 [18048] [INFO] Booting worker with pid: 18048
2014-06-15 15:17:20 [18049] [INFO] Booting worker with pid: 18049
2014-06-15 15:17:20 [18050] [INFO] Booting worker with pid: 18050
2014-06-15 15:17:20 [18051] [INFO] Booting worker with pid: 18051
2014-06-15 15:17:20 [18052] [INFO] Booting worker with pid: 18052
^C
2014-06-15 15:17:51 [18052] [INFO] Worker exiting (pid: 18052)
2014-06-15 15:17:51 [18051] [INFO] Worker exiting (pid: 18051)
2014-06-15 15:17:51 [18037] [INFO] Handling signal: int
2014-06-15 15:17:51 [18048] [INFO] Worker exiting (pid: 18048)
2014-06-15 15:17:51 [18049] [INFO] Worker exiting (pid: 18049)
2014-06-15 15:17:51 [18050] [INFO] Worker exiting (pid: 18050)
2014-06-15 15:17:51 [18037] [INFO] Shutting down: Master
注解:需要按照你自己的设置来修改脚本的路径和文件名。
-
--workers的设置一般是按照2*CPUS+1,我的cpu为双核,所以设置为5.
-
--name(NAME)为你的应用在某些程序(top,ps)中的标识,默认为gunicorn,此处设置为hello_app以便与其他gunicorn应用区别开来。
-
为了能够设置--name,需要安装一个名为setproctitle的Python模块:pip install setproctitle
通过ps可查看到哪个gunicorn属于哪个应用:
ps aux | grep hello_app
django 15226 0.0 0.2 15184 8068 ? S Jun13 0:25 gunicorn: master [hello_app]
django 15237 0.0 0.4 27636 16556 ? S Jun13 0:01 gunicorn: worker [hello_app]
django 15238 0.0 0.4 27640 16592 ? S Jun13 0:02 gunicorn: worker [hello_app]
django 15239 0.0 0.4 27644 16600 ? S Jun13 0:01 gunicorn: worker [hello_app]
django 15240 0.0 0.4 27656 16624 ? S Jun13 0:01 gunicorn: worker [hello_app]
django 15242 0.0 0.2 19276 10820 ? S Jun13 0:01 gunicorn: worker [hello_app]
Note:
1. Gunicorn是一个开源的Python WSGI HTTP服务器,移植于Ruby的Unicorn项目的采用pre-fork模式的服务器。Gunicorn服务器可与各种Web框架,包括django、flask、pyramid等。只要简单配置执行,轻量级的资源消耗,而且相当迅速。与各个Web结合紧密,部署很方便。缺点不支持HTTP 1.1,并发访问性能也不高。默认情况下,Gunicorn的工作进程是同步执行的模式,即单个进程在某个时间只处理一个请求。同时,Gunicorn也支持Gevent、Eventlet来实现异步。
2. 关于WSGI:WSGI即Python Web server Gateway Interface,是Python专门的用于Python应用程序或框架与Web服务器之间的一种接口,没有官方的实现,因为WSGI更像一个协议,只要遵照这些协议,WSGI应用都可以在任何服务器上运行,反之亦然。
[Setting up Django with Nginx, Gunicorn, virtualenv, supervisor and PostgreSQL]
[python+nginx+gunicorn 部署django小记]
[使用gunicorn部署Django]
[Nginx + Gunicorn + Django 部署小记]
[https://docs.djangoproject.com/en/1.7/howto/deployment/wsgi/gunicorn/]
[Running Gunicorn]
皮皮Blog
Django安全配置
[Django 安全配置(setting.py)]
域名查询和购买
[域名注册,国际域名,域名查询,域名申请,中文域名 - 耐思尼克]
[网站域名购买哪个好]
from:http://blog.csdn.net/pipisorry/article/details/46957613
ref:django部署
在亚马逊ec2上部署django应用


