WAMP多站点的配置和自拟定端口号
本文介绍在WAMP服务多站点的配置
多站点配置
在WAMP的安装目录:E:\Wamp\wamp\bin\apache\Apache2.2.21\conf\extra 下找到:httpd-vhosts.conf 文件找到
<VirtualHost *:80>
    ServerAdmin [email protected]                           //管理员邮箱地址
    DocumentRoot "c:/Apache2/docs/dummy-host.example.com"                  //网站根目录
    ServerName dummy-host.example.com                                      //主机名
    ServerAlias www.dummy-host.example.com
    ErrorLog "logs/dummy-host.example.com-error.log"                       //错误日志
    CustomLog "logs/dummy-host.example.com-access.log" common              //日常日志
</VirtualHost>

<VirtualHost *:80>
    ServerAdmin [email protected]
    DocumentRoot "c:/Apache2/docs/dummy-host2.example.com"
    ServerName dummy-host2.example.com
    ErrorLog "logs/dummy-host2.example.com-error.log"
    CustomLog "logs/dummy-host2.example.com-access.log" common
</VirtualHost>
<VirtualHost *:80>
    DocumentRoot "E:/Wamp/wamp_demo/test01"
    ServerName test01.com
</VirtualHost>

<VirtualHost *:80>
    DocumentRoot "E:/Wamp/wamp_demo/test02"
    ServerName test02.com
</VirtualHost>
接着打开WAMP控制面板的 Apache--->http.config 打开,找到这一句
# Virtual hosts
#Include conf/extra/httpd-vhosts.conf 去掉这句前面的 #
找到
# onlineoffline tag - don't remove
Order Deny,Allow
Deny from all Deny 改为 Allow
Allow from 127.0.0.1 这句前面加 # 号
保存,重启WAMP服务
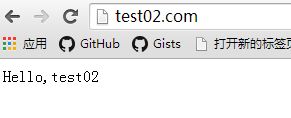
在 E:/Wamp/wamp_demo 下创建网站 test01, test02,在其中分别新建index.php 输入可以识别的内容
<?php
echo "Hello,test01";
?>
<?php
echo "Hello,test02";
?>
在 C:\Windows\System32\drivers\etc 下找到hosts文件,添加站点
127.0.0.1 test01.com
127.0.0.1 test02.com
查看是否可以登录
自拟定端口号
功能面板打开 Apache -> http.config
#Listen 12.34.56.78:80
Listen 80 //默认的80可以改成别的,如8080
ServerName localhost:80 //跟上面相同
浏览器输入 localhost:8080 测试

