【SSH项目实战】国税协同平台-15.系统、子系统首页&登录功能2
接上一篇:http://blog.csdn.net/acmman/article/details/49614841
我们的子系统界面已经加载出来:
我们找到左边菜单页,给它加链接:
<dl class="">
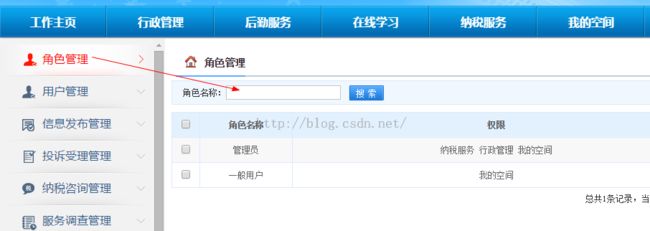
<dt><a class="yh" href="${ctx }tax/role_listUI.action" target="mainFrame"><b></b>角色管理<s class="down"></s>
</a></dt>
</dl>
<dl class="">
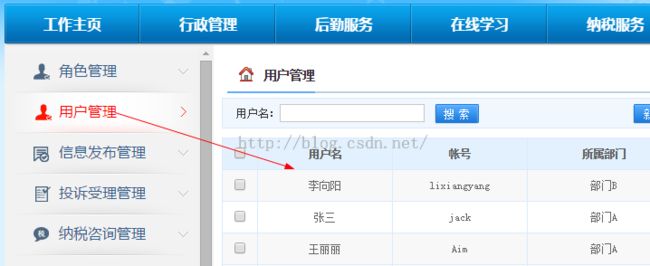
<dt><a class="yh" href="${ctx }tax/user_listUI.action" target="mainFrame"><b></b>用户管理<s class="down"></s>
</a></dt>
</dl>
我们指定了点击链接之后右侧模块页面的地址。
效果:
接下来我们要添加登录功能:
我们把工程原来的默认欢迎界面(WEB-INF下面的index.jsp)改为我们的登录界面。
<%@ page language="java" import="java.util.*" pageEncoding="utf-8"%>
<%
String path = request.getContextPath();
String basePath = request.getScheme()+"://"+request.getServerName()+":"+request.getServerPort()+path+"/";
response.sendRedirect(basePath+"sys/login_toLoginUI.action");
%>
可以看到我们让index.jsp去跳转到sys/login_toLoginUI.action,我们下面来实现这个action:
package cn.edu.hpu.tax.login.action;

import com.opensymphony.xwork2.ActionSupport;

public class LoginAction extends ActionSupport{

	//跳转到登录页面
	public String toLoginUI(){
		return "loginUI";
	}

}
然后写它的struts配置文件login-struts.xml:
<?xml version="1.0" encoding="UTF-8" ?>
<!DOCTYPE struts PUBLIC
	"-//Apache Software Foundation//DTD Struts Configuration 2.3//EN"
	"http://struts.apache.org/dtds/struts-2.3.dtd">


<struts>
	<package name="login-action" namespace="/sys" extends="base-default">
		<action name="login_*" class="cn.edu.hpu.tax.login.action.LoginAction" method="{1}">
			<result name="{1}">/WEB-INF/jsp/{1}.jsp</result>
			<result name="loginUI">/WEB-INF/jsp/loginUI.jsp</result>
		</action>
	</package>
</struts>
将配置文件加入到struts总配置文件中:
<!-- 登录跳转的struts配置文件 -->
<include file="cn/edu/hpu/tax/login/conf/login-struts.xml"/>
然后加入我们的登录页面loginUI.jsp:
<%@ page language="java" import="java.util.*" pageEncoding="utf-8"%>
<%@ taglib prefix="s" uri="/struts-tags" %>
<%
String path = request.getContextPath();
String basePath = request.getScheme()+"://"+request.getServerName()+":"+request.getServerPort()+path+"/";
request.setAttribute("ctx", path);
%>


<!DOCTYPE HTML PUBLIC "-//W3C//DTD HTML 4.01 Transitional//EN">
<html>
<head>
<meta http-equiv="Content-Type" content="text/html; charset=UTF-8">
<title>登录</title>
<link href="${ctx}/css/login.css" type="text/css" rel="stylesheet">
<script type="text/javascript">


function logins(){
	document.forms[0].submit();
}


function setClean(){
	document.getElementById("account").value = "";
	document.getElementById("password").value = "";
}


//解决子框架嵌套的问题
if(window != window.parent){
	window.parent.location.reload(true);
}


</script>
<style type="text/css">
html { overflow-y: hidden;  }


.password{
      background-color:#f1f3f6;
	  border:1px solid #f1f3f6;
	  font-color:#ccc;
}


#Layer1 {
	position:absolute;
	left:224px;
	top:479px;
	padding-top:5px;
	width:99px;
	height:21px;
	background-color:#fff;
	z-index:1;
}
.password1 {
	 background-color:#f1f3f6;
	  border:1px solid #f1f3f6;
	  font-color:#ccc;
}


.youbian input{ border:0px none; background-color:transparent; color:#555;padding-left:10px;font-size:16px;width:100%;overflow: hidden;}
</style>
    <!--[if IE 6]>
    <script type="text/javascript" src="${ctx}/ehome/js/DD_belatedPNG.js" ></script>
    <script type="text/javascript">
        DD_belatedPNG.fix('b, s, img, span, .prev, .next, a, input, .youbian, td');
    </script>
    <![endif]-->
</head>
<body scroll="no">
<s:form name="form1" namespace="/sys" action="login_login">
<div id="lo_tf">
<div class="outside">
    <div class="head">
      <table width="1000" height="60" border="0" align="center" cellpadding="0" cellspacing="0">
        <tr>
          <td width="840" align="left"><img src="${ctx}/images/login/form_03.png"   width="332" height="47"/></td>
          <td align="center">  <a href="#"></a></td>
        </tr>
      </table>
    </div>
    <div class="main2">
	   <div class="content">
	   <div class="youbian">
	    <table width="251" border="0" cellpadding="0" cellspacing="0">
          <tr>
            <td height="12"> </td>
          </tr>
          <tr>
           <td height="45" align="left"></td>
          </tr>
          <tr>
          	<td height="13">
            	<span><div height=20 valign="middle" style="padding-left: 18px"><font color="red" id="errMsg"><s:property value="loginResult"/></font></div></span>
            </td>
          </tr>
          <tr>
            <td height="40">
			<table width="100%" border="0" cellpadding="0" cellspacing="0">
  <tr>
    	<td height="32" align="left"><span style="color:#767676;font-size:14px;">帐号:</span></td>
  </tr>
</table>


			<table width="100%" height="39" border="0" cellpadding="0" cellspacing="0">
              <tr>
                <td background="${ctx}/images/login/shuru_03.png" width=""><table width="100%" border="0" cellpadding="0" cellspacing="0">
                  <tr>
                    <td align="left">
                    <s:textfield id="account" name="user.account" cssClass="password1" cssStyle="color: #767676" size="31"/>
                    </td>
                  </tr>
                </table></td>
              </tr>
            </table></td>
          </tr>
		    <tr>
            <td height="10"><table width="100%" border="0" cellpadding="0" cellspacing="0">
  <tr>
    <td height="32" align="left"><span style="color:#767676;font-size:14px;">密  码:</span></td>
  </tr>
</table></td>
          </tr>
          <tr>
            <td height="40"><table width="100%" height="39" border="0" cellpadding="0" cellspacing="0">
              <tr>
                <td background="${ctx}/images/login/shuru_03.png"><table width="100%" border="0" cellpadding="0" cellspacing="0">
                  <tr>
                    <td align="left">
                    	<s:password id="password" name="user.password" cssClass="password"  cssStyle="color: #767676" size="31"/>
                    </td>
                  </tr>
                </table></td>
              </tr>
            </table></td>
          </tr>

		   <tr>
            <td height="10"> </td>
          </tr>
          <tr>
            <td height="40"><table width="100%" border="0" cellpadding="0" cellspacing="0">
              <tr>
                <td align="right"><a href="#" onclick="javascript:logins();"><img src="${ctx}/images/login/form_15.png" width="95" height="37"/></a></td>
                <td width="18"> </td>
                <td align="left"><img src="${ctx}/images/login/form_17.png" width="95" height="37" onclick="setClean()"/></td>
              </tr>
            </table></td>
          </tr>
        </table>

	  </div>
       </div>
   </div>
	<div class="foot">版权所有 | 国税局  2014年</div>
</div>
</div>
</s:form>
</body>
</html>
然后重启服务器,测试登录页面:
跳转至登录页面成功。
我们下面来做登录功能:
我们是这么设计的:
登录:
1、获取帐号和密码
2、通过帐号和密码查询用户表;如果查询有记录说登录成功;否则登录失败跳转到登录页面并且提示用户登录失败信息
2.1、登录成功
2.1.1、将用户信息保存到session中
2.1.2、***
2.1.3、将用户登录记录到日志文件
2.1.4、重定向跳转到首页
2.2、登录失败
跳转到登录页面并且提示用户登录失败信息
退出(注销):清除session中保存的用户信息
下面编码实现:
首先在LoginAction中实现我们的登录检测方法:
//登录
public String login(){
if(user!=null){
if(StringUtils.isNoneBlank(user.getAccount())
&&StringUtils.isNoneBlank(user.getPassword())){
//根据用户的账号和密码查询用户列表
List<User> list=userService.findUserByAccountAndPassword(user.getAccount(),user.getPassword());
if(list!=null&&list.size()>0){//说明登录成功
//1、登录成功
User user=list.get(0);
//1.1、***
//1.2、将用户信息保存到session中
ServletActionContext.getRequest().getSession().setAttribute(Constant.USER, user);
//1.3、将用户登录记录到日志文件
Log log=LogFactory.getLog(getClass());
log.info("用户名称为:"+user.getName()+"的用户登录了系统");
//1.4、重定向跳转到首页
return "home";
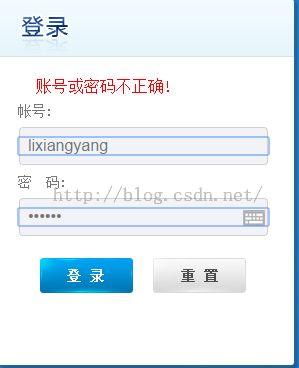
}else{
loginResult="账号或密码不正确!";
}
}else{
loginResult="账号或密码不能为空!";
}
}else{
loginResult="请输入账号和密码!";
}
return toLoginUI();
}
我们的loginResult设为LoginAction的成员参数,并且设置了set和get方法。当我们登录失败了,这个错误提示信息就将在域中,在页面显示错误的地方放置这个信息:
<s:property value="loginResult"/>
其中的常量Constant.USER被定义在Constant类中:
public class Constant {

	//系统中用户在session中的内容
	public static String USER="SYS_USER";
	//其它常量省略
}
然后在login-strust.xml配置文件中配置我们的home跳转页面:
<result name="home" type="redirectAction">
	<param name="actionName">home</param>
</result>
上面的登录方法中还有findUserByAccountAndPassword(user.getAccount(),user.getPassword());没有定义,我们在UserService中定义这个方法,然后在UserServiceImpl中实现这个方法:
@Override
public List<User> findUserByAccountAndPassword(String account,
		String password) {

	return userDao.findUserByAccountAndPassword(account,password);
}
我们在UserDao中定义findUserByAccountAndPassword()这个方法,然后在UserDaoImpl中实现这个方法:
@Override
public List<User> findUserByAccountAndPassword(String account,
		String password) {
	 Query query=getSession().createQuery("FROM User WHERE account=? AND password=?");
	 query.setParameter(0, account);
	 query.setParameter(1, password);
	return query.list();
}
我们来测试:
我们有一个账号和密码是:lixiangyang和554466
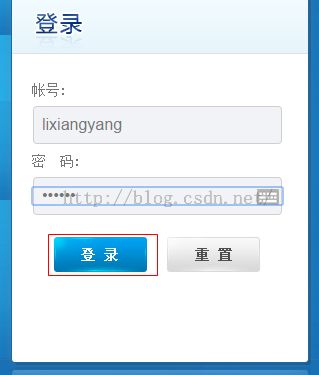
点击登录之后成功进入主页!

同时后台输出登录记录并存入Log日志中:

至此我们的登录方法完成,但是我们还要处理一些细节(注销等功能)。下篇总结再赘述。
转载请注明出处:http://blog.csdn.net/acmman/article/details/49614941