Android中的动画效果学习之二---Tween动画(使用XML文件进行配置动画效果)
上一篇学习用硬编码直接进行对动画效果进行设置(Android中的动画效果学习之---Tween动画(硬编码方法创建)),今天学习一下使用XML文件进行配置动画效果:
其中里面主要参数说明已经在上一篇讲过了,接下来进行设置动画的具体步骤:
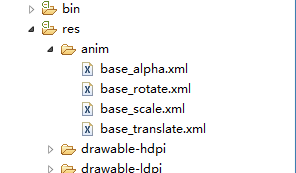
第一步:在项目的res文件下面新建一个文件夹名字是anim 【注意】这个名字必要要是anim
第二步: 在anim文件夹下面,新建新的XMl文件 在xml文件中具体设置动画效果
第三步: 在Activity中 使用AnimationUtils.loadAnimation(Demo_Animation_second.this, R.anim.xxxxx);进行获取
具体看下面的配置代码:
base_alpha配置:
<?xml version="1.0" encoding="utf-8"?>
<set xmlns:android="http://schemas.android.com/apk/res/android" >

    <alpha
        android:duration="3000"
        android:fromAlpha="0.0"
        android:toAlpha="1.0" />

</set>
base_rotate配置:
<?xml version="1.0" encoding="utf-8"?>
<set xmlns:android="http://schemas.android.com/apk/res/android" >

    <rotate
        android:duration="3000"
        android:fromDegrees="0.0"
        android:pivotX="80%"
        android:pivotY="80%"
        android:toDegrees="180" />

</set>
base_scale配置:
<?xml version="1.0" encoding="utf-8"?>
<set xmlns:android="http://schemas.android.com/apk/res/android" >

    <scale
        android:duration="3000"
        android:fromXScale="0.0"
        android:fromYScale="0.0"
        android:pivotX="80%"
        android:pivotY="80%"
        android:toXScale="10.0"
        android:toYScale="10.0" />

</set>
base_translate配置:
   <?xml version="1.0" encoding="utf-8"?>
<set xmlns:android="http://schemas.android.com/apk/res/android" >


    <translate
        android:fromXDelta="0.0"
        android:fromYDelta="0.0"
        android:toXDelta="10.0"
        android:toYDelta="10.0"
        android:duration="3000"/>


</set>
Demo Activity源代码如下:
package com.android.animation;

import com.android.R;

import android.app.Activity;
import android.os.Bundle;
import android.view.View;
import android.view.View.OnClickListener;
import android.view.animation.AlphaAnimation;
import android.view.animation.Animation;
import android.view.animation.AnimationUtils;
import android.view.animation.RotateAnimation;
import android.view.animation.ScaleAnimation;
import android.view.animation.TranslateAnimation;
import android.widget.Button;
import android.widget.ImageView;

public class Demo_Animation_second extends Activity {

	// 定义四个按钮,分别对用四种动画效果操作
	private Button alpha, roate, scale, translate;

	// 声明ImageView组件
	private ImageView animation_test;

	@Override
	protected void onCreate(Bundle savedInstanceState) {
		super.onCreate(savedInstanceState);
		setContentView(R.layout.animation);

		animation_test = (ImageView) this.findViewById(R.id.test_animation);
		alpha = (Button) this.findViewById(R.id.alpha);
		roate = (Button) this.findViewById(R.id.roate);
		scale = (Button) this.findViewById(R.id.scale);
		translate = (Button) this.findViewById(R.id.translate);

		// 为按钮组件添加监听事件
		alpha.setOnClickListener(new OnClickListener() {

			@Override
			public void onClick(View v) {

				// 使用AnimationUitls工具类进行常见动画,使用到XML配置文件
				Animation alphaAnimation = AnimationUtils.loadAnimation(
						Demo_Animation_second.this, R.anim.base_alpha);
				// 为图片添加效果,开始动画
				animation_test.setAnimation(alphaAnimation);
			}
		});

		roate.setOnClickListener(new OnClickListener() {

			@Override
			public void onClick(View v) {
				// 使用AnimationUitls工具类进行常见动画,使用到XML配置文件
				Animation roateAnimation = AnimationUtils.loadAnimation(
						Demo_Animation_second.this, R.anim.base_rotate);
				roateAnimation.setDuration(3000);
				// 为图片添加效果,开始动画
				animation_test.setAnimation(roateAnimation);
			}
		});

		scale.setOnClickListener(new OnClickListener() {

			@Override
			public void onClick(View v) {
				// 使用AnimationUitls工具类进行常见动画,使用到XML配置文件
				Animation scaleAnimation = AnimationUtils.loadAnimation(
						Demo_Animation_second.this, R.anim.base_scale);
				// 为图片添加效果,开始动画
				animation_test.setAnimation(scaleAnimation);
			}
		});
		translate.setOnClickListener(new OnClickListener() {

			/**
			 * 位置变化
			 */
			@Override
			public void onClick(View v) {
				// 使用AnimationUitls工具类进行常见动画,使用到XML配置文件
				Animation translateAnimation = AnimationUtils.loadAnimation(
						Demo_Animation_second.this, R.anim.base_translate);
				// 为图片添加效果,开始动画
				animation_test.setAnimation(translateAnimation);
			}
		});
	}
}
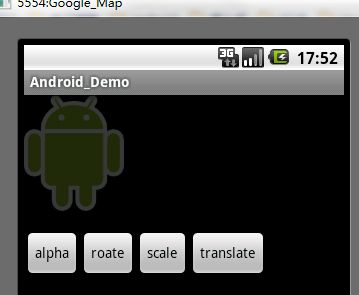
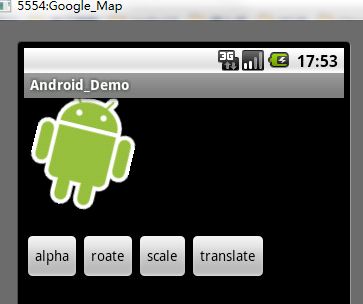
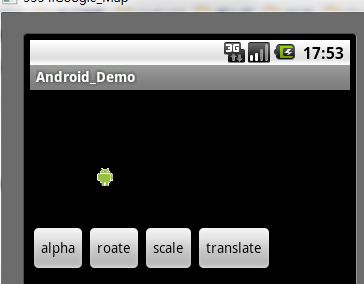
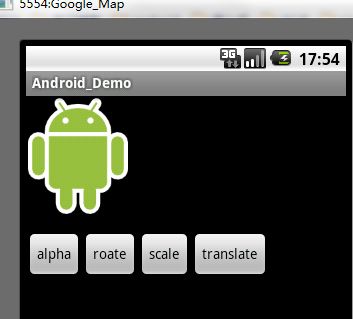
截图效果:
上面两个截图分别是 alpha和rotate的效果
下面两个截图分别是 scale 和translate的效果
