ios版本的helloworld
最近下载了个xcode_4.3.1_for_lion.dmg ,安装 xcode 时老是提示安装失败,后来网上查了下,把mac日期修改成2012.1.1,才能安装成功。第一次写ios程序啊,程序相当简单,就一个helloworld 点击按钮触发alert事件
开发环境 mac 10.7.3 xocde4.3.1 ios5.1.x
开发步骤
1. 下载安装 xcode_4.3.1_for_lion.dmg
2.运行xcode
3.新建一个Single View Application
4.创建完成后双击文件中的MainStoryboard_iPad.storyboard文件打开设计界面
5.拖个Round Rect Button控件到界面里面
6.修改ViewController.h头文件 加入代码
@interface ViewController : UIViewController
{
IBOutlet UIButton * btn;
}
-(IBAction)btnPressed:(id)sender;
7.修改ViewController.m文件 加入代码
-(void)btnPressed:(id)sender
{
NSLog(@"33333333");
UIAlertView *alert =[[UIAlertView alloc] initWithTitle:@"hello"
message:@"zhu"
delegate:self
cancelButtonTitle:@"ok"
otherButtonTitles:nil];
[alert show];
}
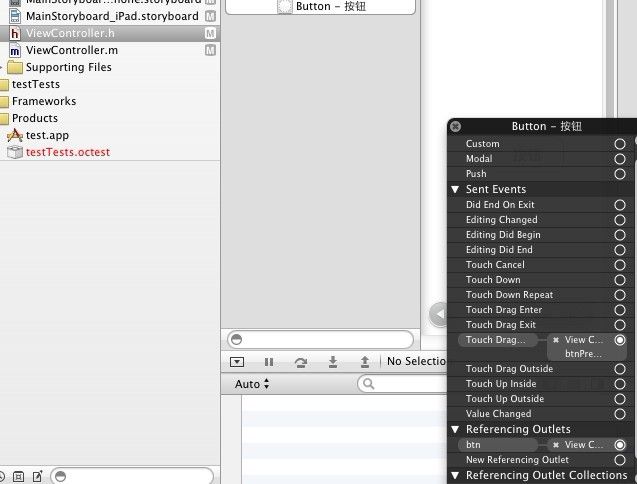
8.右键单击View中添加的按钮分别添加Touch Up Inside 跟 btnPressed, Referencing Outlets跟btn的 关联
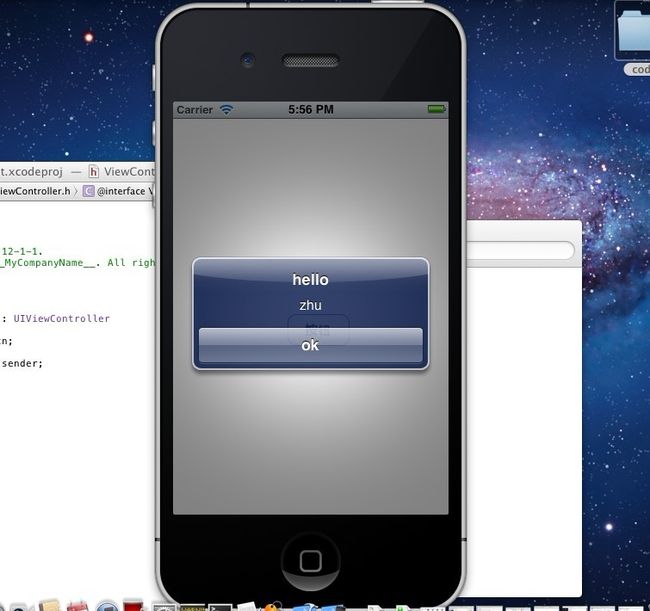
9.虚拟机运行效果
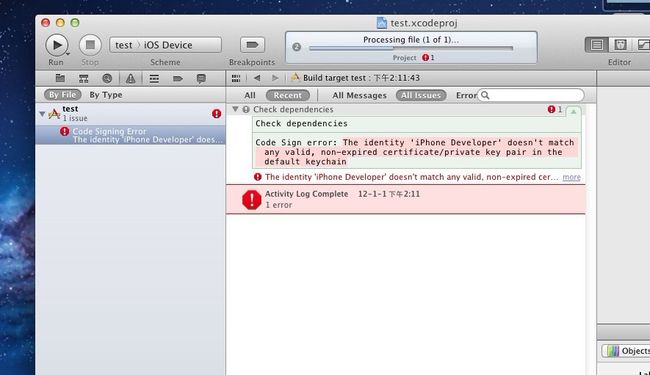
10.真机调试时如果有如下提示,需要进行xcode破解
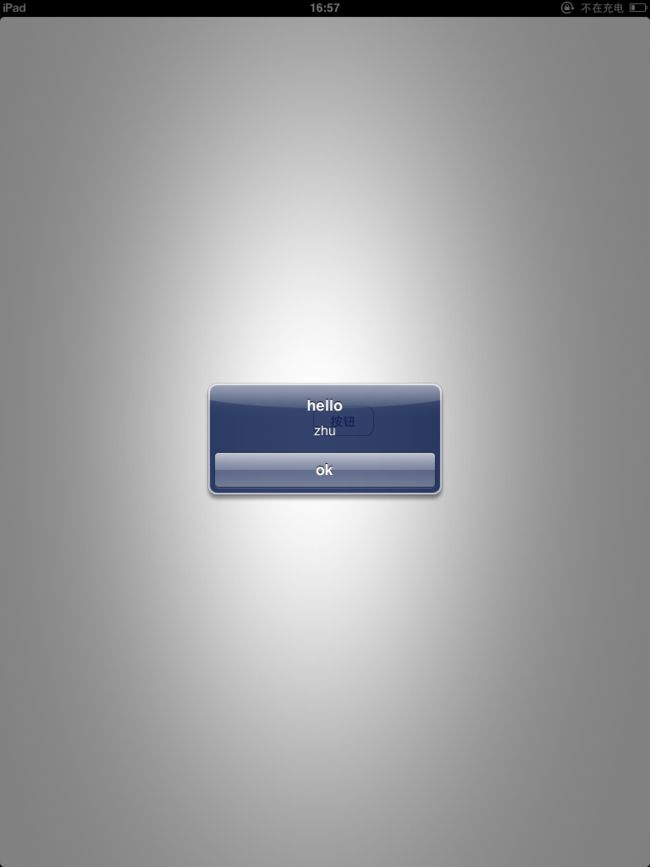
12. 在的越狱的板子上运行效果
备注:
一.ios5.1.1越狱步骤
1.下载Absinthe 2.0 点击Jailbreak ,最后提示Done,enjoy!越狱完成
2.在Cydia中下载appsync for ios 5.0+
二.xcode4.3.1真机调试步骤
1.创建证书
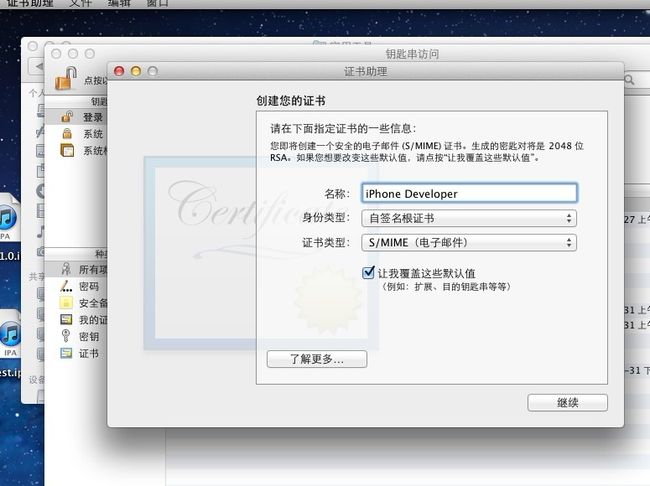
实用工具-钥匙串访问-证书助手-创建证书 名称填写:iPhone Developer 选中让我覆盖这些默认值 后面填好电子邮箱地址 选中代码签名 其他的默认就可以了
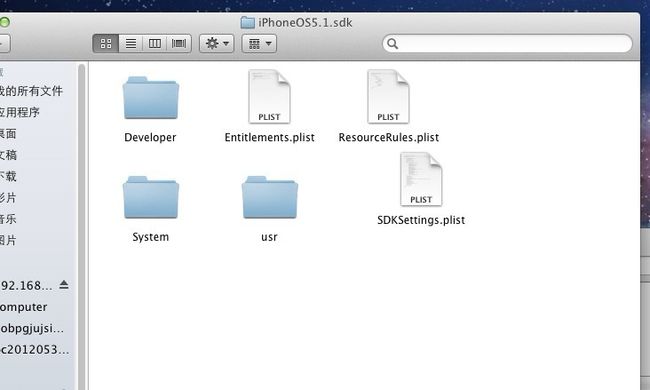
2.修改/Applications/Xcode.app/Contents/Developer/Platforms/iPhoneOS.platform/Developer/SDKs/iPhoneOS5.1.sdk目录下的 SDKSettings.plist文件
中<key>CODE_SIGNING_REQUIRED</key>
<string>YES</string>
<key>ENTITLEMENTS_REQUIRED</key>
<string>YES</string>
YES 改为NO
3.修改 /Applications/Xcode.app/Contents/Developer/Platforms/iPhoneOS.platform目录下 Info.plis中XCiPhoneOSCodeSignContext 修改为XCCodeSignContext
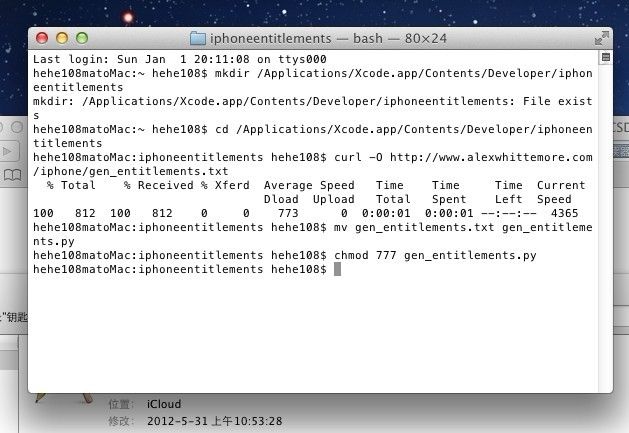
4.在命令提示符中执行下面代码(需联网)
mkdir /Applications/Xcode.app/Contents/Developer/iphoneentitlements
cd /Applications/Xcode.app/Contents/Developer/iphoneentitlements
curl -O http://www.alexwhittemore.com/iphone/gen_entitlements.txt
mv gen_entitlements.txt gen_entitlements.py
chmod 777 gen_entitlements.py
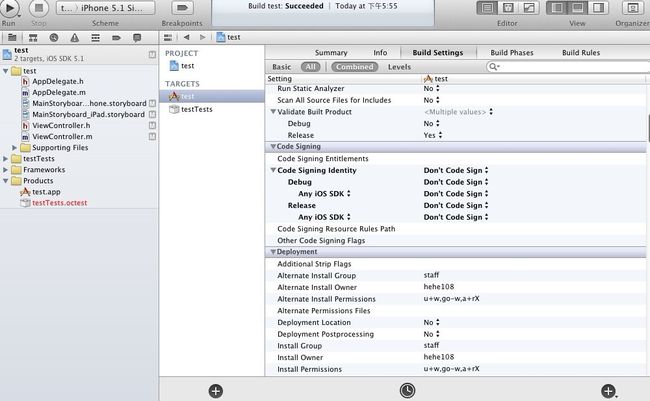
5.禁用Xcode自动的签名操作
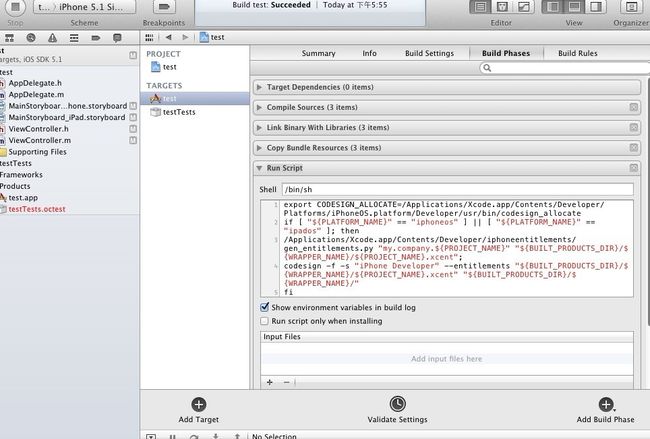
6.添加自定义的生成后脚本,在Build Phases中添加一个Phase,右下角的Add Build Phase,然后单击Add Run Script,输入以下脚本
export CODESIGN_ALLOCATE=/Applications/Xcode.app/Contents/Developer/Platforms/iPhoneOS.platform/Developer/usr/bin/codesign_allocate
if [ "${PLATFORM_NAME}" == "iphoneos" ] || [ "${PLATFORM_NAME}" == "ipados" ]; then
/Applications/Xcode.app/Contents/Developer/iphoneentitlements/gen_entitlements.py "my.company.${PROJECT_NAME}" "${BUILT_PRODUCTS_DIR}/${WRAPPER_NAME}/${PROJECT_NAME}.xcent";
codesign -f -s "iPhone Developer" --entitlements "${BUILT_PRODUCTS_DIR}/${WRAPPER_NAME}/${PROJECT_NAME}.xcent" "${BUILT_PRODUCTS_DIR}/${WRAPPER_NAME}/"
fi
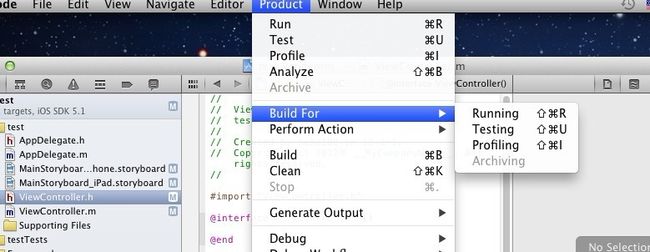
7.连上ios设备,点击Product-Build For -Archiving 就可以在ios设备上真机进行调试。
未连接ios设备时 为灰色
三.ipa生成步骤
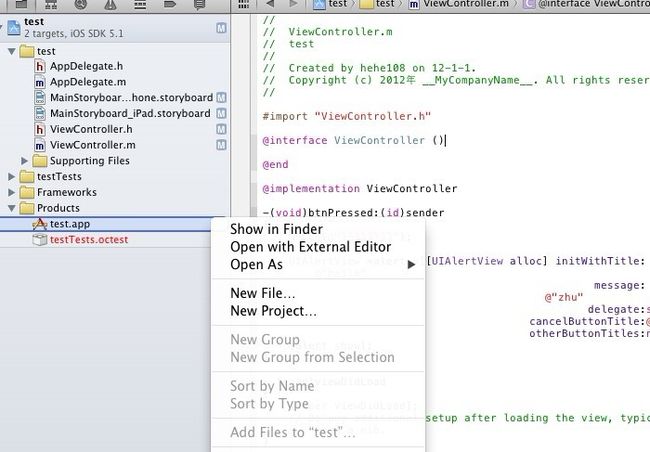
1.点击show in finder
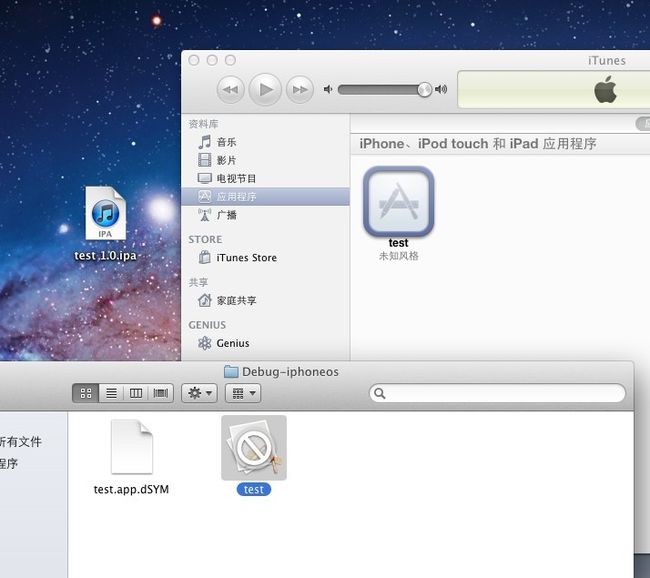
2.将finder中以项目名命名的文件拖到iTunes中
3.再将iTunes中的应用拖到桌面上就可以生成ipa文件。
如果你发现有什么不合理的,需要改进的地方,或者你有什么更好的实现方法邮件联系[email protected](qq常年不在线,邮件联系) 。相互交流 谢谢
源码下载地址 http://download.csdn.net/detail/xiaoxiao108/4344399
