ADO.NET与ORM的比较(5):MyBatisNet实现CRUD
说明:这是一个系列文章,在前面的四篇当中周公分别讲述了利用ADO.NET、NHibernate、Linq to SQL及EntityFramework来实现CRUD功能(C:Create/R:Read/U:Update/D:Delete),在这里再讲述另一种框架,那就是MyBatisNet。MyBatisNet源自于iBatisNet,而iBatisNet又是受了Java平台上的iBatis的影响。
iBatis及iBatis.NET都是利用XML描述来执行存储过程或者SQL语句。与其它ORM框架相比,简单易学是iBatis及iBatis.NET的最大特点,简单易学并不意味着它们功能简单,实际上它们能提供强大的功能。不过iBatis及iBatis.NET现在已经分别更名为MyBatis和MyBatis.NET,它们原来的官方网站http://ibatis.apache.org/上已经有声明新的官方网站网址:http://www.mybatis.org(迄今为止,它们提供的手册里仍是称呼iBatis及iBatis.NET,不过这个不影响使用,在本篇中一律以MyBatisNet来称呼)。
在这里需要说明的是MyBatis并不是一个ORM框架,像NHibernate之类的ORM框架会为你生成全部的或者绝大部分的SQL语句,但是MyBatis没有提供这种功能。MyBatis利用你编写的存储过程或者SQL语句来建立对象与数据库之间的关系映射。相比较而言NHibernate自动生成SQL语句(也可以利用HQL语言),学习难度比较大,而MyBatisNet学习起来比较容易,并且因为自己编写SQL语句,所以比较适合数据量大对性能要求高的场合。MyBatis的工作原理图如下:

一、准备
要想在项目中使用MyBatisNet,就需要到它的官方网站http://www.mybatis.org下载相应的dll,根据官方网站的链接可以下载到IBatis.DataAccess.1.9.2.bin.zip和IBatis.DataMapper.1.6.2.bin.zip两个压缩文件,在这个压缩文件中包含了几乎我们需要的所有dll文件(如果使用MySQL等其它数据库,可能需要到数据库厂商网站下载相应的dll驱动),包含如下文件:
Castle.DynamicProxy.dll
IBatisNet.Common.dll
IBatisNet.Common.Logging.Log4Net.dll
IBatisNet.DataAccess.dll
IBatisNet.DataMapper.dll
log4net.dll
同时MyBatis还提供了一些辅助文件,如IBatisNet.Common.Logging.Log4Net.xml、IBatisNet.Common.xml、IBatisNet.DataAccess.xml、log4net.xml及IBatisNet.DataMapper.xml,将这些文件拷贝到VS的相应目录就可以在编写代码时获得程序的API说明,这个位置就是你的.NET Framework的安装目录,比如系统盘是C盘,这个位置就是C:/WINDOWS/Microsoft.NET/Framework/v2.0.50727/zh-CN。除此之外,还有一些xsd文件,如provider.xsd、SqlMap.xsd及SqlMapConfig.xsd,这些文件都是对应的xml文件的验证文件,利用这些文件就可以在VS中编辑这些文件时获得智能感知,从而减少出错的机会。假设你的系统是安装在C盘,如果你使用的是VS2005,那么就把这些文件拷贝到C:/Program Files/Microsoft Visual Studio 8/Xml/Schemas;如果你使用的是VS2008,那么就拷贝到C:/Program Files/Microsoft Visual Studio 9.0/Xml/Schemas;如果你使用的是VS2010,那么就拷贝到C:/Program Files/Microsoft Visual Studio 10.0/Xml/Schemas。
除了上面的准备工作之外,我们还需要几个配置文件,分别如下:
Providers.config文件
这个文件可以从下载的MyBatis压缩包中找到,它包含了常用数据库驱动程序清单,里面一个典型的节点如下:
<provider name="sqlServer2005" enabled="true" description="Microsoft SQL Server, provider V2.0.0.0 in framework .NET V2.0" assemblyName="System.Data, Version=2.0.0.0, Culture=neutral, PublicKeyToken=b77a5c561934e089" connectionClass="System.Data.SqlClient.SqlConnection" commandClass="System.Data.SqlClient.SqlCommand" parameterClass="System.Data.SqlClient.SqlParameter" parameterDbTypeClass="System.Data.SqlDbType" parameterDbTypeProperty="SqlDbType" dataAdapterClass="System.Data.SqlClient.SqlDataAdapter" commandBuilderClass=" System.Data.SqlClient.SqlCommandBuilder" usePositionalParameters = "false" useParameterPrefixInSql = "true" useParameterPrefixInParameter = "true" parameterPrefix="@" allowMARS="true" />
这段XML代码想必大家也能猜得到大部分的属性的意思,在这里周公只讲两个需要注意的地方,一个是enabled属性,如果要启用某个数据库驱动就要将它的值设为true,还有一个就是parameterPrefix属性,表示参数化SQL语句中参数的前缀。
SqlMap.config文件
这是一个有关当前数据库信息及实体映射文件配置的文件。在这个文件里我们可以指定数据库连接的信息(账号、密码及主机等),还可以指定实体映射文件。
关于数据库连接的信息可以采用如下方式的配置:
首先在<properties>节点配置有关数据库连接的信息,在本实例中周公的配置如下:
<properties> <property key="userid" value="sa" /> <property key="password" value="root" /> <property key="database" value="AspNetStudy" /> <property key="datasource" value="netskycn/SQL2005" /> <property key="selectKey" value="select @@IDENTITY as value" /> <property key="directory" value="MapFiles" /> <property key="useStatementNamespaces" value="false" /> </properties>
上面的大部分属性的意思可以猜测得出来,唯一周公觉得需要说明的是selectKey属性,这是解决插入记录之后获取自增字段主键的值的,在不同的数据库中这个SQL语句可能会不同。
接着在<database>节点中使用这些属性,在周公的运行环境中<database>节点值如下:
<database> <provider name="sqlServer2005"/> <!--<dataSource name="iBatisNet" connectionString="data source=netskycn/SQL2005;database=AspNetStudy;user id=sa;password=root;"/>--> <dataSource name="iBatisNet" connectionString="data source=${datasource};database=${database};user id=${userid};password=${password};"/> </database>
当然,你也可以采用那种被注释的方式,也就是直接将连接字符串写好,而不是采用未注释的方式,不过个人感觉未注释的方式稍微容易维护一些,一旦数据库连接信息发生变动,集中修改<properties>节点中的值就可以了。
最后需要解决的是实体映射文件的问题。和NHibernate一样,MyBatis也是通过XML文件来解决数据记录与实体之间的映射关系的,关于这些映射文件如何编写周公稍后再说。这里要说的是在SqlMap.config文件中可以有两种方式引入外部的文件,一种是通过资源的方式,在文件中表现为resource,如<providers resource="providers.config"/>,另外一种嵌入式资源的方式,在文件中表现为embedded,如<sqlMap embedded="MapFiles.UserInfo.xml,MyBatisNetDemo"/>,这就需要将该文件设置为嵌入式资源,如下图所示: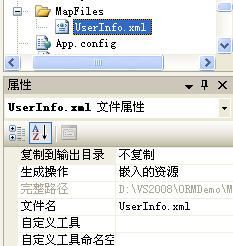
在本项目中有一个实体类,它就是MyBatisNetDemo程序集中的UserInfo类,它对应的XML映射文件是项目中的MapFiles文件下的UserInfo.xml。
在SqlMap.config文件中这部分的配置如下:
<sqlMaps> <sqlMap embedded="MapFiles.UserInfo.xml,MyBatisNetDemo"/> </sqlMaps>
App.config文件
为了调试时能得到运行过程中的相关信息,需要配置Log4Net,关于Log4Net的用法周公博客上有详尽的说明,这里就不在赘述了。在本项目中App.config文件的内容如下:
<?xml version="1.0" encoding="utf-8" ?> <configuration> <configSections> <sectionGroup name="iBATIS"> <section name="logging" type="IBatisNet.Common.Logging.ConfigurationSectionHandler, IBatisNet.Common" /> </sectionGroup> <section name="log4net" type="log4net.Config.Log4NetConfigurationSectionHandler, log4net" /> </configSections> <iBATIS> <logging> <logFactoryAdapter type="IBatisNet.Common.Logging.Impl.Log4NetLoggerFA, IBatisNet.Common.Logging.Log4Net"> <arg key="configType" value="inline" /> <arg key ="showLogName" value="true" /> <arg key ="showDataTime" value="true" /> <arg key ="level" value="ALL" /> <arg key ="dateTimeFormat" value="yyyy/MM/dd HH:mm:ss:SSS" /> </logFactoryAdapter> </logging> </iBATIS> <!-- 下面的节点定义log4net --> <log4net> <!-- 定义输出的appenders --> <appender name="RollingLogFileAppender" type="log4net.Appender.RollingFileAppender"> <param name="File" value="iBatisNet_log.txt" /> <param name="AppendToFile" value="true" /> <param name="MaxSizeRollBackups" value="2" /> <param name="MaximumFileSize" value="100KB" /> <param name="RollingStyle" value="Size" /> <param name="StaticLogFileName" value="true" /> <layout type="log4net.Layout.PatternLayout"> <param name="Header" value="[Header]/r/n" /> <param name="Footer" value="[Footer]/r/n" /> <param name="ConversionPattern" value="%d [%t] %-5p %c [%x] - %m%n" /> </layout> </appender> <appender name="ConsoleAppender" type="log4net.Appender.ConsoleAppender"> <layout type="log4net.Layout.PatternLayout"> <param name="ConversionPattern" value="%d [%t] %-5p %c [%x] <%X{auth}> - %m%n" /> </layout> </appender> <!-- Set root logger level to ERROR and its appenders --> <root> <level value="DEBUG" /> <appender-ref ref="RollingLogFileAppender" /> <appender-ref ref="ConsoleAppender" /> </root> <!-- Print only messages of level DEBUG or above in the packages --> <logger name="IBatisNet.DataMapper.Configuration.Cache.CacheModel"> <level value="DEBUG" /> </logger> <logger name="IBatisNet.DataMapper.Configuration.Statements.PreparedStatementFactory"> <level value="DEBUG" /> </logger> <logger name="IBatisNet.DataMapper.LazyLoadList"> <level value="DEBUG" /> </logger> <logger name="IBatisNet.DataAccess.DaoSession"> <level value="DEBUG" /> </logger> <logger name="IBatisNet.DataMapper.SqlMapSession"> <level value="DEBUG" /> </logger> <logger name="IBatisNet.Common.Transaction.TransactionScope"> <level value="DEBUG" /> </logger> <logger name="IBatisNet.DataAccess.Configuration.DaoProxy"> <level value="DEBUG" /> </logger> </log4net> </configuration>
做了上面的配置之外,还需要添加相关的dll引用,在本项目中所使用到的dll引用如下图所示:
至此,我们已经做好了所有的准备工作,可以进行下一步的编码工作了。
二、编码
编写实体类代码
在本项目中采用的数据表结构与本系列的第一篇一样(便于比较),如下:
CREATE TABLE [dbo].[UserInfo]( [UserID] [int] IDENTITY(1,1) NOT NULL, [UserName] [varchar](20) COLLATE Chinese_PRC_CI_AS NOT NULL, [RealName] [nvarchar](8) COLLATE Chinese_PRC_CI_AS NOT NULL, [Age] [tinyint] NOT NULL, [Sex] [bit] NOT NULL, [Mobile] [char](11) COLLATE Chinese_PRC_CI_AS NULL, [Phone] [char](11) COLLATE Chinese_PRC_CI_AS NULL, [Email] [varchar](50) COLLATE Chinese_PRC_CI_AS NOT NULL, CONSTRAINT [PK_UserInfo] PRIMARY KEY CLUSTERED ( [UserID] ASC )WITH (IGNORE_DUP_KEY = OFF) )
所对应的实体类的代码如下:
using System; using System.Collections.Generic; using System.Text; namespace MyBatisNetDemo { public class UserInfo { /// <summary> /// 用户编号 /// </summary> public int UserID { get; set; } /// <summary> /// 用户名 /// </summary> public string UserName { get; set; } /// <summary> /// 真实姓名 /// </summary> public string RealName { get; set; } /// <summary> /// 年龄 /// </summary> public byte Age { get; set; } /// <summary> /// 性别 /// </summary> public bool Sex { get; set; } /// <summary> /// 电子邮件 /// </summary> public string Email { get; set; } /// <summary> /// 手机号 /// </summary> public string Mobile { get; set; } /// <summary> /// 电话 /// </summary> public string Phone { get; set; } } }
编写映射文件
前面说到了映射文件是数据库记录与实体类之间的桥梁,它指示了数据库字段与实体类属性之间如何建立联系,并且还指示了MyBatis如何去操作数据库。在本项目中的UserInfo.xml文件内容如下:
<?xml version="1.0" encoding="utf-8" ?> <sqlMap namespace="UserInfo" xmlns="http://ibatis.apache.org/mapping" xmlns:xsi="http://www.w3.org/2001/XMLSchema-instance" > <alias> <typeAlias alias="UserInfo" type="MyBatisNetDemo.UserInfo,MyBatisNetDemo" /> </alias> <resultMaps> <resultMap id="SelectAllResult" class="UserInfo"> <result property="UserID" column="UserID" dbType="int" type="int" /> <result property="UserName" column="UserName" dbType="varchar" type="string" /> <result property="RealName" column="RealName" dbType="varchar" type="string" /> <result property="Sex" column="Sex" dbType="bit" type="bool" /> <result property="Mobile" column="Mobile" dbType="varchar" type="string" /> <result property="Phone" column="Phone" dbType="varchar" type="string" /> <result property="Email" column="Email" dbType="varchar" type="string"/> </resultMap> </resultMaps> <statements> <select id="SelectAllUser" resultMap="SelectAllResult"> <!--[CDATA[ SELECT UserID ,UserName ,RealName ,Age ,Sex ,Mobile ,Phone ,Email FROM UserInfo ]]> </select> <select id="SelectByUserId" parameterClass="int" resultMap="SelectAllResult" extends="SelectAllUser"> <![CDATA[ where UserID = #value# ]]> </select> <select id="SelectByUserName" resultClass="UserInfo" parameterClass="string" resultMap="SelectAllResult" extends="SelectAllUser"> <![CDATA[ where UserName = #value# ]]> </select> <select id="SelectUserInfoCount" resultClass="int"> <![CDATA[ SELECT COUNT(UserID) FROM UserInfo ]]> </select> <select id="SelectMaxUserId" resultClass="int"> <![CDATA[ SELECT MAX(UserID) FROM UserInfo ]]> </select> <insert id="InsertUserInfo" parameterClass="UserInfo" > <selectKey property="UserID" type="post" resultClass="int"> ${selectKey} </selectKey> <![CDATA[ insert into UserInfo (UserName,RealName,Age,Sex,Mobile,Phone,Email) values (#UserName#,#RealName#,#Age#,#Sex#,#Mobile#,#Phone#,#Email#) ]]> </insert> <update id="UpdateUserInfo" parameterClass="UserInfo"> <![CDATA[ UPDATE UserInfo SET UserName=#UserName#, RealName =#RealName#, Age =#Age#, Sex=#Sex#, Mobile=#Mobile#, Phone=#Phone#, Email=#Email# WHERE UserID=#UserID# ]]> </update> <delete id="DeleteUserInfo" parameterClass="int"> <![CDATA[ delete from UserInfo where UserID = #value# ]]--> </delete> </statements> </sqlMap>
为了便于维护和管理,这个文件放在了新建的MapFiles文件夹下。在本文件中出现的节点有如下:
<alias>:为了便于编码,可以给实体类是一个别名,例如<typeAlias alias="UserInfo" type="MyBatisNetDemo.UserInfo,MyBatisNetDemo" />就是说明在本文件中UserInfo是MyBatisNetDemo程序集中MyBatisNetDemo.UserInfo类的别名。
<resultMaps>:包含一个到多个<resultMap>节点,每个节点表示实体类到数据库字段的映射,比如我们需要一个完整的数据库字段到实体类的映射就可以用上面的表示方式,在某些情况下我们可能只需要数据库中的某几个字段到实体类的某几个属性的映射,那么可以再建一个<resultMap>节点表示这种映射,这些<resultMap>节点所表示的映射可以在下面的配置中用上。
<statements>:可以包含多个<select>、<insert>、<update>、<delete>节点,每个<select>、<insert>、<update>、<delete>中可以包含parameterClass及resultMap和resultClass属性,在上面的例子中可以看到这三个属性的值出现过string、int和UserInfo,这些是根据实际情况来的。这些代码本身比较容易理解,限于篇幅在这里举例解释其中的一个:
<select id="SelectByUserId" parameterClass="int" resultMap="SelectAllResult" extends="SelectAllUser">
<![CDATA[
where UserID = #value#
]]>
</select>
parameterClass="int"表示传入的参数值为int类型,resultMap="SelectAllResult" extends="SelectAllUser"表示数据库字段与实体类的映射关系如同id为SelectAllResult的<resultMap>节点所指示的那样,extends="SelectAllUser"表示它的SELECT子句前面部分和id为SelectAllUser的<select>节点一致,也就是完整的SQL语句是:
SELECT UserID
,UserName
,RealName
,Age
,Sex
,Mobile
,Phone
,Email
FROM UserInfo
where UserID = #value#
其中的#value#是占位符,将来会被传入的int类型的参数值替换。
如果传入的参数是实体类,如id为UpdateUserInfo的<update>节点所示,在SQL语句中出现了#RealName#等字符串,这些表示是UserInfo的属性。还有一点需要说明的是在<insert>节点中的${selectKey}的值在运行时将会被SqlMap.config中定义的<property key="selectKey" value="select @@IDENTITY as value" />这句所替换。
注意,有时候SQL语句中会出现“<”及“>”这样与XML文件本身相冲突的特殊字符,为了避免出现这种这种情况,我们可以将SQL语句写在“<![CDATA[”与“]]>”之间。
编写CRUD类
通过上面的工作我们配置了数据库连接并建立了数据库字段与实体类属性之间的联系,现在需要编写一个类来操作数据库,在本实例中的CRUD类的代码如下:
using System; using System.Collections.Generic; using System.Text; using IBatisNet.DataMapper.Configuration; using IBatisNet.DataAccess; using IBatisNet.DataMapper; namespace MyBatisNetDemo { public class MyBatisNetCRUD { private static SqlMapper sqlMapper = null; static MyBatisNetCRUD() { DomSqlMapBuilder builder = new DomSqlMapBuilder(); sqlMapper = builder.Configure() as SqlMapper; } /// <summary> /// 统计用户总数 /// </summary> /// <returns></returns> public int Count() { int result = sqlMapper.QueryForObject<int>("SelectUserInfoCount", null); return result; } /// <summary> /// 创建用户 /// </summary> /// <param name="info">用户实体</param> /// <returns></returns> public bool Create(UserInfo info) { //object o=sqlMapper.Insert("InsertUserInfo", info); //int id=(int)o; //return id>0; int id = (int)sqlMapper.Insert("InsertUserInfo", info); return id > 0; } /// <summary> /// 读取用户信息 /// </summary> /// <param name="userId">用户编号</param> /// <returns></returns> public UserInfo Read(int userId) { UserInfo info = sqlMapper.QueryForObject<UserInfo>("SelectByUserId", userId); return info; } public IList<UserInfo> GetUserList() { IList<UserInfo> userList = sqlMapper.QueryForList<UserInfo>("SelectAllUser", null); return userList; } public IList<UserInfo> GetUserList(int index,int size) { string connectionString=sqlMapper.DataSource.ConnectionString; Console.WriteLine(connectionString); IList<UserInfo> userList = sqlMapper.QueryForList<UserInfo>("SelectAllUser", null,index,size); return userList; } /// <summary> /// 更新用户信息 /// </summary> /// <param name="info">用户实体</param> /// <returns></returns> public bool Update(UserInfo info) { int result = sqlMapper.Update("UpdateUserInfo", info); return result > 0; } /// <summary> /// 删除用户 /// </summary> /// <param name="userId">用户编号</param> /// <returns></returns> public bool Delete(int userId) { int result = sqlMapper.Delete("DeleteUserInfo", userId); return result > 0; } /// <summary> /// 获取用户表中编号最大的用户 /// </summary> /// <returns></returns> public int GetMaxUserId() { int result = sqlMapper.QueryForObject<int>("SelectMaxUserId", null); return result; } } }
为了对比,在这个CRUD类中实现的功能与前几篇中实现的功能一致,在代码中我们首先要实例化SqlMapper类,获得了这个类的实例后就可以利用它来操作数据库了。在方法中第一个字符串类型的参数都是我们在UserInfo.xml中配置的那些<select>、<insert>、<update>、<delete>节点的id(这些id自然在整个项目中不能重复命名了),后面的参数是根据执行该id对应的SQL语句所需要的参数。
注意:在本项目中周公将providers.config和SqlMap.config文件设置成复制到输出目录,而将UserInfo.xml文件设置为嵌入式资源了。在实际操作中要注意这一点。整个项目的结构如下:

三、单元测试代码
为了照顾很多仍在使用NUnit作为单元测试工具的开发人员的习惯,我们的单元测试代码针对NUnit2.5.3,代码如下:
using System; using System.Collections.Generic; using System.Linq; using System.Text; using NUnit.Framework; using MyBatisNetDemo; namespace NUnitTest { [TestFixture] public class MyBatisNetTest { private MyBatisNetCRUD instance = null; [SetUp] public void Initialize() { instance = new MyBatisNetCRUD(); } [Test] public void Count() { Assert.Greater(instance.Count(), 0); } [Test] public void Create() { UserInfo userInfo = new MyBatisNetDemo.UserInfo { UserName = "www1", Age = 40, Email = "[email protected]", Mobile = "13567891234", Phone = "02786543210", RealName = "test", Sex = false }; Assert.True(instance.Create(userInfo)); } [Test] public void Read() { UserInfo info =instance.Read(2); //Assert.IsNotNull(info); Assert.AreEqual(info.UserID, 2); } [Test] public void GetUserList() { IList<UserInfo> userList = instance.GetUserList(); Assert.Greater(userList.Count,0); } [Test] public void GetUserListPaging() { IList<UserInfo> userList = instance.GetUserList(10,20); Assert.Greater(userList.Count, 0); } [Test] public void Update() { UserInfo info = instance.Read(1); Assert.True(instance.Update(info)); } [Test] public void Delete() { int maxUserId = instance.GetMaxUserId(); Assert.True(instance.Delete(maxUserId)); } [Test] public void GetMaxUserId() { int result = instance.GetMaxUserId(); Assert.True(result > 0); } } }
上面的代码在NUnit2.5.3中测试通过。
四、总结
作为一种数据库与实体类的映射框架二不是一个ORM框架,和ADO.NET相比MyBatis不用太多考虑ADO.NET的细节(比如是用SqlConnection还是用OleDbConnecion,还有如何打开和关闭数据库连接等),因而比较容易跨数据库;和NHibernate这样的ORM相比它又能让我们更多地操纵如何与数据库交互,性能上更容易控制一些(前提是必须有比较精通书库的开发人员或者DBA),同时它也比NHibernate更容易学习一些。
当然MyBatis也有它的一些不足,比如在UserInfo.xml中我们要编写大量的SQL语句和添加很多<select>、<insert>、<update>、<delete>节点,当然这些不足可以通过一个自动代码生成工具来解决。
从个人选择上来说,我更愿意选择MyBatisNet,今后的项目中我可能会更多的使用MyBatisNet。另外从我一个在银行从事开发的朋友得到的反馈,他们用Java做银行项目选择的也是MyBatisNet的Java版——MyBatis,这是出于对性能的考虑。
没有最好的,只有最合适的。如何选择合适的技术,取决于我们队将要运行的环境的判断,这来自于经验分析。
周公
2010-12-17
广告:本人现在正在参加“2010年度十大杰出IT博客大赛”,欢迎大家前去捧场投下您宝贵的一票!网址是:http://2010blog.51cto.com/792419,每天都可以投票支持周公。