如何创建一个Tab bar Application (xcode 4.2中或者代码的方式)
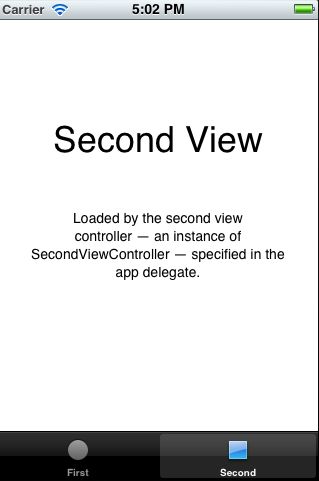
Xcode 4.2 缺省创建的Tabbed Application是这个样子的。
而且类被命名为XXFirstViewController,XXXSecondViewController,让我们很不爽,很多时候,我们需要更有意义的类名,更多的tab选项。那么我下面给大家演示以下如何自己定义这些。
我们假如创建一个有三个选项的工程,并且三个相关的viewcontroller分别是普通的,table View,带table view的导航模式的,并且命名为FViewController, SViewController,TViewController。
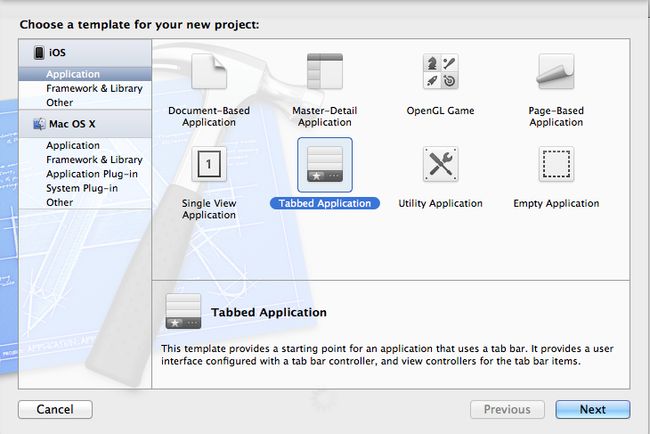
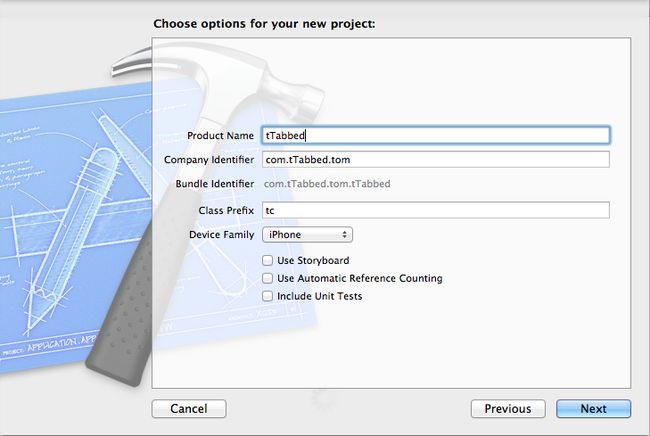
选择新建一个Tab bar Application,并把工程名称命名为tTabApp。
建好后的工程目录如下:
删除上面的tcFirstViewController.h,tcFirstViewController.m,tcSecondeViewController.h,tcSecondViewController.m,tcFirstViewController.xib,tcSecondViewController.xib六个文件。
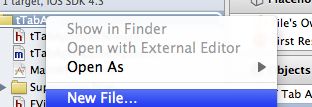
在tTabApp上点击右键,加入FViewController.
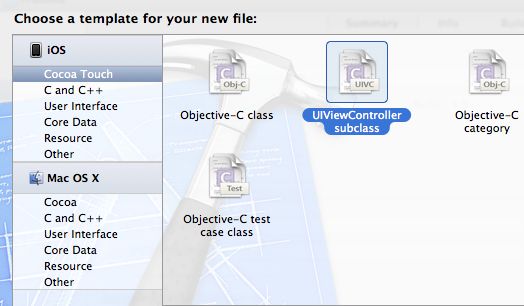
选择UIViewController subclass
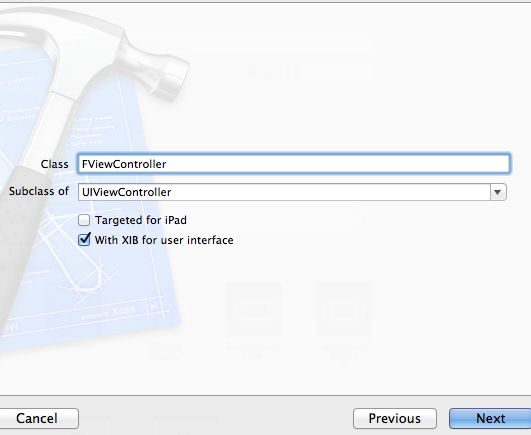
输入类名为FViewController,并且下面一定要选择Subclass of : UIViewController.
还需要选中With XIB for user interface.
然后依此假如另外两个View Controller,注意后面的两个必须在最后一个界面上的Subclass of : UITableViewController
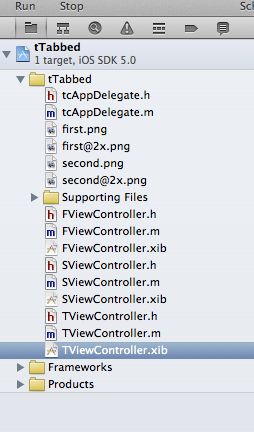
这时候的工程目录如下:
在FViewController.m中修改一个函数
- (id)initWithNibName:(NSString *)nibNameOrNil bundle:(NSBundle *)nibBundleOrNil
{
self = [super initWithNibName:nibNameOrNil bundle:nibBundleOrNil];
if (self) {
// Custom initialization
//self.title = @"第一个";
self.tabBarItem.title =@"第一个";
self.tabBarItem.image = [UIImage imageNamed:@"first"];
}
returnself;
}
修改SViewController中几个函数如下:
- (id)initWithNibName:(NSString *)nibNameOrNil bundle:(NSBundle *)nibBundleOrNil
{
self = [super initWithNibName:nibNameOrNil bundle:nibBundleOrNil];
if (self) {
// Custom initialization
self.tabBarItem.title =@"第二个";
self.tabBarItem.image = [UIImage imageNamed:@"second"];
}
returnself;
}
#pragma mark - Table view data source
- (NSInteger)numberOfSectionsInTableView:(UITableView *)tableView
{
#warning Potentially incomplete method implementation.
删除上面的一样,这行永远会在编译期间生成一个警告
// Return the number of sections.
return 1;
上面一行0改为1
}
- (NSInteger)tableView:(UITableView *)tableView numberOfRowsInSection:(NSInteger)section
{
#warning Incomplete method implementation.
// Return the number of rows in the section.
return 1;
}
- (UITableViewCell *)tableView:(UITableView *)tableView cellForRowAtIndexPath:(NSIndexPath *)indexPath
{
static NSString *CellIdentifier = @"Cell";
UITableViewCell *cell = [tableViewdequeueReusableCellWithIdentifier:CellIdentifier];
if (cell == nil) {
cell = [[[UITableViewCellalloc]initWithStyle:UITableViewCellStyleDefaultreuseIdentifier:CellIdentifier]autorelease];
}
cell.textLabel.text =@"1111";
上面这行是加入的,
// Configure the cell...
return cell;
}
在TViewController中做同样的更改,并且注意cell.textLabel.text = @"1111";改为cell.textLabel.text = @"222222";。以示区分。
- (id)initWithNibName:(NSString *)nibNameOrNil bundle:(NSBundle *)nibBundleOrNil
{
self = [super initWithNibName:nibNameOrNil bundle:nibBundleOrNil];
if (self) {
// Custom initialization
self.title = @"第三个";
self.tabBarItem.image = [UIImage imageNamed:@"second"];
}
returnself;
}
#import"FViewController.h"
#import"SViewController.h"
#import"TViewController.h"
在tcAppDelegate.m文件中修改函数
- (BOOL)application:(UIApplication *)application didFinishLaunchingWithOptions:(NSDictionary *)launchOptions
如下:- (BOOL)application:(UIApplication *)application didFinishLaunchingWithOptions:(NSDictionary *)launchOptions
{
self.window = [[[UIWindowalloc]initWithFrame:[[UIScreenmainScreen]bounds]]autorelease];
// Override point for customization after application launch.
UIViewController *viewController1 = [[FViewControlleralloc]initWithNibName:@"FViewController"bundle:nil];
UIViewController *viewController2 = [[SViewControlleralloc]initWithNibName:@"SViewController"bundle:nil];
UIViewController *viewController3 = [[TViewControlleralloc]initWithNibName:@"TViewController"bundle:nil];
UINavigationController *navigationController = [[UINavigationControlleralloc]initWithRootViewController:viewController3];
self.tabBarController = [[[UITabBarControlleralloc]init]autorelease];
self.tabBarController.viewControllers = [NSArrayarrayWithObjects:viewController1, viewController2, navigationController,nil];
[viewController1 release];
[viewController2release];
[viewController3release];
[navigationControllerrelease];
self.window.rootViewController =self.tabBarController;
[self.windowmakeKeyAndVisible];
returnYES;
}
最后形成的效果是。
