轻松把玩HttpClient之设置代理,可以访问FaceBook
前面的文章介绍了一些HttpClient的简单示例,本文继续采用示例的方式来演示HttpClient的功能。
在项目中我们可能会遇到这样的情况:为了保证系统的安全性,只允许使用特定的代理才可以访问,而与这些系统使用HttpClient进行交互时,只能为其配置代理。
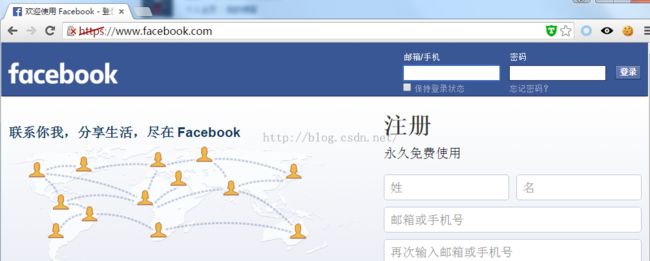
这里我们使用goagent代理访问脸书来模拟这种情况。facebook由于某些原因被封,只能通过代理来访问,所以正好也符合我们现在的演示需求。现在在浏览器上访问是可以访问的:
可以看到facebook采用的也是https的方式,而且该网站的证书不客户端被信任。所以我们要采用“绕过证书验证”的方式使用Https。那如何设置代理呢,官网有相关的示例。我采用的跟官网提供的稍微不一样,具体代码如下:
	/**
	 * 设置代理
	 * @param builder
	 * @param hostOrIP
	 * @param port
	 */
	public static HttpClientBuilder proxy(String hostOrIP, int port){
		// 依次是代理地址,代理端口号,协议类型
		HttpHost proxy = new HttpHost(hostOrIP, port, "http");
		DefaultProxyRoutePlanner routePlanner = new DefaultProxyRoutePlanner(proxy);
		return HttpClients.custom().setRoutePlanner(routePlanner);
	}
返回值是HttpClientBuilder,这个类是用来生成HttpClient对象的,同时可以设置各种参数,这里提供返回值是为了配置代理后,继续配置ssl。打开goagent,看看代理ip的设定如图:
现在修改send方法:
	/**
	 * 模拟请求
	 *
	 * @param url		资源地址
	 * @param map	参数列表
	 * @param encoding	编码
	 * @return
	 * @throws NoSuchAlgorithmException
	 * @throws KeyManagementException
	 * @throws IOException
	 * @throws ClientProtocolException
	 */
	public static String send(String url, Map<String,String> map,String encoding) throws KeyManagementException, NoSuchAlgorithmException, ClientProtocolException, IOException {
		String body = "";

		//绕过证书验证,处理https请求
		SSLContext sslcontext = createIgnoreVerifySSL();

        // 设置协议http和https对应的处理socket链接工厂的对象
        Registry<ConnectionSocketFactory> socketFactoryRegistry = RegistryBuilder.<ConnectionSocketFactory>create()
            .register("http", PlainConnectionSocketFactory.INSTANCE)
            .register("https", new SSLConnectionSocketFactory(sslcontext))
            .build();
        PoolingHttpClientConnectionManager connManager = new PoolingHttpClientConnectionManager(socketFactoryRegistry);
        HttpClients.custom().setConnectionManager(connManager);

        //创建自定义的httpclient对象
		CloseableHttpClient client = proxy("127.0.0.1", 8087).setConnectionManager(connManager).build();
//		CloseableHttpClient client = HttpClients.createDefault();

		//创建post方式请求对象
		HttpPost httpPost = new HttpPost(url);

		//装填参数
		List<NameValuePair> nvps = new ArrayList<NameValuePair>();
		if(map!=null){
			for (Entry<String, String> entry : map.entrySet()) {
				nvps.add(new BasicNameValuePair(entry.getKey(), entry.getValue()));
			}
		}
		//设置参数到请求对象中
		httpPost.setEntity(new UrlEncodedFormEntity(nvps, encoding));

		System.out.println("请求地址:"+url);
		System.out.println("请求参数:"+nvps.toString());

		//设置header信息
		//指定报文头【Content-type】、【User-Agent】
		httpPost.setHeader("Content-type", "application/x-www-form-urlencoded");
		httpPost.setHeader("User-Agent", "Mozilla/4.0 (compatible; MSIE 5.0; Windows NT; DigExt)");

		//执行请求操作,并拿到结果(同步阻塞)
		CloseableHttpResponse response = client.execute(httpPost);
		//获取结果实体
		HttpEntity entity = response.getEntity();
		if (entity != null) {
			//按指定编码转换结果实体为String类型
			body = EntityUtils.toString(entity, encoding);
		}
		EntityUtils.consume(entity);
		//释放链接
		response.close();
        return body;
	}
测试代码如下:
	public static void main(String[] args) throws ParseException, IOException, KeyManagementException, NoSuchAlgorithmException{
		String url = "https://www.facebook.com/";
		String body = send(url, null, "utf-8");
		System.out.println("交易响应结果");
		System.out.println(body);
	}
运行后,结果:
果然可以访问成功了。
好了基本的教程就到这里,下篇我将其封装的一个工具类,自认为相对于网上分享的封装类要强大很多,敬请期待吧。


