Android之Tab分页标签的实现方法一-----TabActivity和TabHost的结合(一)
许多软件,因为功能比较多,都喜欢采用Tab分页。在Android里面Tab分页,常用的方法有两种:
1、采用TabActivity和TabHost的结合
2、采用ActivityGroup和GridView的结合。
这里将会一一讲到他们的实现方法。现在,先讲讲TabActivity和TabHost的结合吧。其实,TabActivity和TabHost的结合的方式有三种,如下:
第一种方式:各个页面布局放在同一个文件,代码也紧凑一起。不建议。
第一种方式:各个页面布局文件是分割的,但代码仍然紧凑一起,也不建议。
第三种方式:各个页面布局文件是分割,各页面代码也是分割,建议。
没有差,怎样体现好;这里会把三种方式一一讲述,读者自己慢慢体会。
(一)TabActivity和TabHost的结合实现的分页标签-------方式一
实现细节:
1.主类继承TabActivity
public class Pagination extends TabActivity
2.获取当前TabHost对象
TabHost tabHost = getTabHost();
3.加载布局文件
LayoutInflater.from(this).inflate(R.layout.main, tabHost.getTabContentView(), true);
4.添加Tab分页标签
tabHost.addTab(tabHost.newTabSpec("tab1")
.setIndicator("tab1", getResources().getDrawable(R.drawable.a1))
.setContent(R.id.view1));
.........
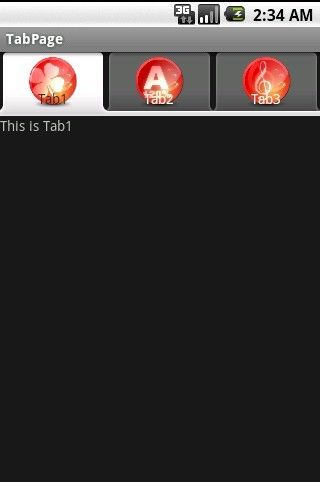
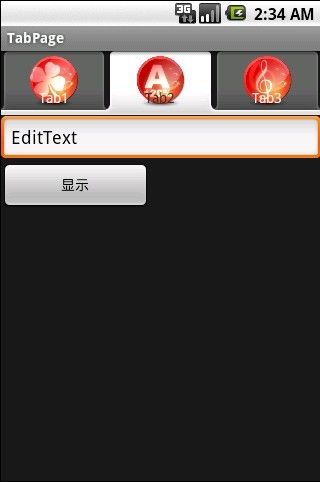


1、布局文件:main.xml
<?xml version="1.0" encoding="utf-8"?> <FrameLayout xmlns:android="http://schemas.android.com/apk/res/android" android:layout_width="fill_parent" android:layout_height="fill_parent"> <!-- 分页一 --> <TextView android:id="@+id/view1" android:layout_width="fill_parent" android:layout_height="fill_parent" android:text="This is Tab1"/> <!-- 分页二 --> <LinearLayout android:id="@+id/view2" android:layout_width="fill_parent" android:layout_height="fill_parent" android:orientation="vertical" > <EditText android:id="@+id/et_text" android:layout_width="fill_parent" android:layout_height="wrap_content" android:text="EditText" android:textSize="18sp" > </EditText> <Button android:id="@+id/bt_show" android:layout_width="149px" android:layout_height="wrap_content" android:text="显示" > </Button> </LinearLayout> <!-- 分页三 --> <TextView android:id="@+id/view3" android:layout_width="fill_parent" android:layout_height="fill_parent" android:text="This is Tab3"/> </FrameLayout>
2、代码
package com.myandroid.test; import android.app.TabActivity; import android.os.Bundle; import android.view.LayoutInflater; import android.view.View; import android.view.View.OnClickListener; import android.widget.Button; import android.widget.EditText; import android.widget.TabHost; import android.widget.Toast; public class Pagination extends TabActivity { private Button bt_show; private EditText et_text; /** Called when the activity is first created. */ @Override public void onCreate(Bundle savedInstanceState) { super.onCreate(savedInstanceState); //setContentView(R.layout.main); //这里无需加载主页面 TabHost tabHost = getTabHost(); LayoutInflater.from(this).inflate(R.layout.main, //加载页面 tabHost.getTabContentView(), true); tabHost.addTab(tabHost.newTabSpec("tab1") .setIndicator("tab1", getResources().getDrawable(R.drawable.a1)) .setContent(R.id.view1)); // 设置分页要显示的控件 tabHost.addTab(tabHost.newTabSpec("tab3") .setIndicator("tab2", getResources().getDrawable(R.drawable.a2)) .setContent(R.id.view2)); tabHost.addTab(tabHost.newTabSpec("tab3") .setIndicator("tab3", getResources().getDrawable(R.drawable.a3)) .setContent(R.id.view3)); bt_show = (Button)findViewById(R.id.bt_show); et_text = (EditText)findViewById(R.id.et_text); bt_show.setOnClickListener(new ClickEvent()); } class ClickEvent implements OnClickListener{ @Override public void onClick(View v) { // TODO Auto-generated method stub Toast.makeText(Pagination.this, et_text.getText(), Toast.LENGTH_SHORT).show(); } } }
下一篇是TabActivity和TabHost的结合实现的分页标签-------方式二