JavaFX8初探(HTML编辑器)
JavaFX8初探(HTML编辑器)
本章我们介绍如何使用HTML编辑器来编辑文本。
HTMLEditor 是一个强大的富文本编辑器,基于HTML5的特性,包含下列功能:
- 文本格式化,加粗、斜体、下划线等
- 段落格式化,字体,字体大小
- 前景和背景色
- 文本缩进
- 项目符号和编号列表
- 文本排列
- 添加水平规则
- 复制和粘贴文本
下图展示了一个HTML编辑器
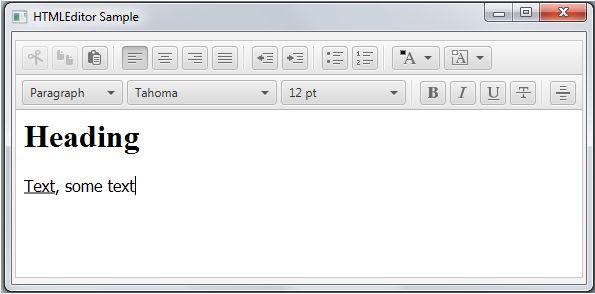
HTMLEditor 类代表了HTML字符串表单的一种形式,上面的图片表示了下面的字符串:
"<html><head></head><body contenteditable="true"><h1>Heading</h1><div><u>Text</u>, some text</div></body></html>因为HTMLEditor 是Node类的扩展,你可以为它的实例使用视觉效果。
添加html编辑器
和其他的UI控件一样,HTMLEditor也必须添加到场景中,你可以直接向下面这样直接添加到场景中,也可以添加到布局容器中。
import javafx.application.Application;
import javafx.scene.Scene;
import javafx.scene.web.HTMLEditor;
import javafx.stage.Stage;
public class HTMLEditorSample extends Application {
@Override
public void start(Stage stage) {
stage.setTitle("HTMLEditor Sample");
stage.setWidth(650650);
stage.setHeight(300);
final HTMLEditor htmlEditor = new HTMLEditor();
htmlEditor.setPrefHeight(245);
Scene scene = new Scene(htmlEditor);
stage.setScene(scene);
stage.show();
}
public static void main(String[] args) {
launch(args);
}
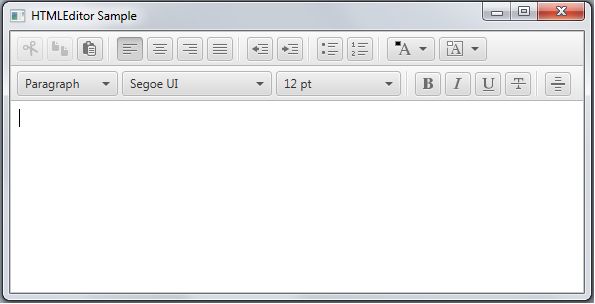
}编译运行,如下图所示:
HTMLEditor 类提供了一个方法可以让我们为编辑器添加内容,setHtmlText方法如下所示:
private final String INITIAL_TEXT = "<html><body>Lorem ipsum dolor sit "
+ "amet, consectetur adipiscing elit. Nam tortor felis, pulvinar "
+ "in scelerisque cursus, pulvinar at ante. Nulla consequat"
+ "congue lectus in sodales. Nullam eu est a felis ornare "
+ "bibendum et nec tellus. Vivamus non metus tempus augue auctor "
+ "ornare. Duis pulvinar justo ac purus adipiscing pulvinar. "
+ "Integer congue faucibus dapibus. Integer id nisl ut elit "
+ "aliquam sagittis gravida eu dolor. Etiam sit amet ipsum "
+ "sem.</body></html>";
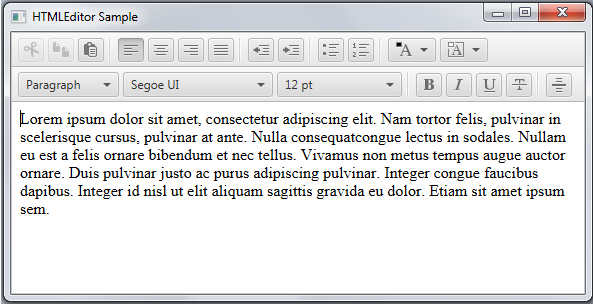
htmlEditor.setHtmlText(INITIAL_TEXT);使用编辑器显示这部分内容如下所示:
你也可以使用html标签来为编辑器内容提供特殊的格式
使用HMTL表机器构建用户界面
你可以使用HTMLEditor 来实现一般的用户界面,举个例子,你可以实现实时消息服务、邮件客户端、以及内容管理系统。
下面的例子是一个消息窗口,在很多邮件客户端中都有这种实现。
import javafx.application.Application;
import javafx.collections.FXCollections;
import javafx.geometry.Insets;
import javafx.geometry.Pos;
import javafx.scene.Group;
import javafx.scene.Scene;
import javafx.scene.control.*;
import javafx.scene.layout.GridPane;
import javafx.scene.layout.VBox;
import javafx.scene.web.HTMLEditor;
import javafx.stage.Stage;

public class HTMLEditorSample extends Application {

    @Override
    public void start(Stage stage) {
        stage.setTitle("Message Composing");
        stage.setWidth(650);
        stage.setHeight(500);
        Scene scene = new Scene(new Group());

        final VBox root = new VBox();
        root.setPadding(new Insets(8, 8, 8, 8));
        root.setSpacing(5);
        root.setAlignment(Pos.BOTTOM_LEFT);

        final GridPane grid = new GridPane();
        grid.setVgap(5);
        grid.setHgap(10);

        final ChoiceBox sendTo =
            new ChoiceBox(FXCollections.observableArrayList(
                "To:", "Cc:", "Bcc:")
        );

        sendTo.setPrefWidth(100);
        GridPane.setConstraints(sendTo, 0, 0);
        grid.getChildren().add(sendTo);

        final TextField tbTo = new TextField();
        tbTo.setPrefWidth(400);
        GridPane.setConstraints(tbTo, 1, 0);
        grid.getChildren().add(tbTo);

        final Label subjectLabel = new Label("Subject:");
        GridPane.setConstraints(subjectLabel, 0, 1);
        grid.getChildren().add(subjectLabel);

        final TextField tbSubject = new TextField();
        tbTo.setPrefWidth(400);
        GridPane.setConstraints(tbSubject, 1, 1);
        grid.getChildren().add(tbSubject);

        root.getChildren().add(grid);

        final HTMLEditor htmlEditor = new HTMLEditor();
        htmlEditor.setPrefHeight(370);

        root.getChildren().addAll(htmlEditor, new Button("Send"));

        final Label htmlLabel = new Label();
        htmlLabel.setWrapText(true);

        scene.setRoot(root);
        stage.setScene(scene);
        stage.show();
    }

    public static void main(String[] args) {
        launch(args);
    }
}
这个用户界面包含了一个选择框,用来选择接受者类型,两个文本域,一个是用来输入邮件地址,另一个用来输入邮件的主题,还有一个标签用来指示主题,另外还有编辑器和发送按钮。
这个UI控件使用Grid和VBox布局容器放到了场景中。当你编译和运行这段程序的时候,会出现下面的结果:
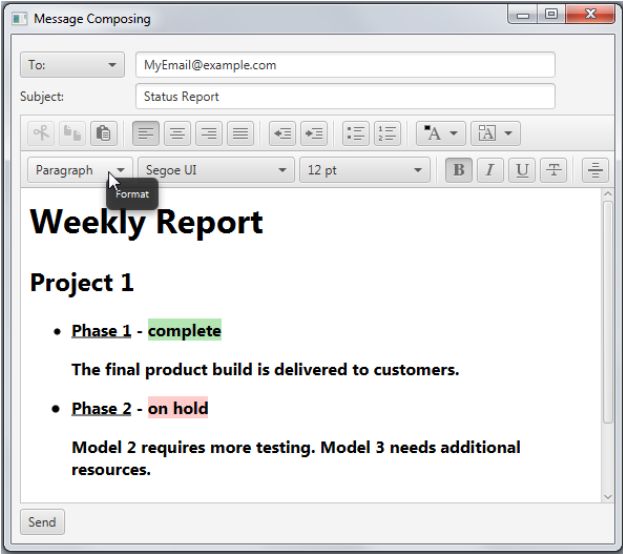
你可以为HTMLEditor 设定指定的宽度和高度,通过setPrefWidth 和setPrefHeight 方法来设置。当然你也可以不指定。
获得HTML内容
当使用HTMLEditor 的时候,我们可以定义编辑器的内容。另外我们也可以获得内容的html形式,下面的这个例子就完成了这项任务。
import javafx.application.Application;
import javafx.event.ActionEvent;
import javafx.geometry.Insets;
import javafx.geometry.Pos;
import javafx.scene.Group;
import javafx.scene.Scene;
import javafx.scene.control.*;
import javafx.scene.layout.VBox;
import javafx.scene.web.HTMLEditor;
import javafx.stage.Stage;

public class HTMLEditorSample extends Application {
    private final String INITIAL_TEXT = "Lorem ipsum dolor sit "
            + "amet, consectetur adipiscing elit. Nam tortor felis, pulvinar "
            + "in scelerisque cursus, pulvinar at ante. Nulla consequat"
            + "congue lectus in sodales. Nullam eu est a felis ornare "
            + "bibendum et nec tellus. Vivamus non metus tempus augue auctor "
            + "ornare. Duis pulvinar justo ac purus adipiscing pulvinar. "
            + "Integer congue faucibus dapibus. Integer id nisl ut elit "
            + "aliquam sagittis gravida eu dolor. Etiam sit amet ipsum "
            + "sem.";

    @Override
    public void start(Stage stage) {
        stage.setTitle("HTMLEditor Sample");
        stage.setWidth(650);
        stage.setHeight(500);
        Scene scene = new Scene(new Group());

        VBox root = new VBox();
        root.setPadding(new Insets(8, 8, 8, 8));
        root.setSpacing(5);
        root.setAlignment(Pos.BOTTOM_LEFT);

        final HTMLEditor htmlEditor = new HTMLEditor();
        htmlEditor.setPrefHeight(245);
        htmlEditor.setHtmlText(INITIAL_TEXT);

        final TextArea htmlCode = new TextArea();
        htmlCode.setWrapText(true);

        ScrollPane scrollPane = new ScrollPane();
        scrollPane.getStyleClass().add("noborder-scroll-pane");
        scrollPane.setContent(htmlCode);
        scrollPane.setFitToWidth(true);
        scrollPane.setPrefHeight(180);

        Button showHTMLButton = new Button("Produce HTML Code");
        root.setAlignment(Pos.CENTER);
        showHTMLButton.setOnAction((ActionEvent arg0) -> {
            htmlCode.setText(htmlEditor.getHtmlText());
        });

        root.getChildren().addAll(htmlEditor, showHTMLButton, scrollPane);
        scene.setRoot(root);

        stage.setScene(scene);
        stage.show();
    }

    public static void main(String[] args) {
        launch(args);
    }
}
使用getHTMLText 方法可以获得编辑器的html格式的内容。这段内容显示在一个文本区域内,所以你可以复制,粘贴这段html内容到任何你想到的地方。如下图所示:

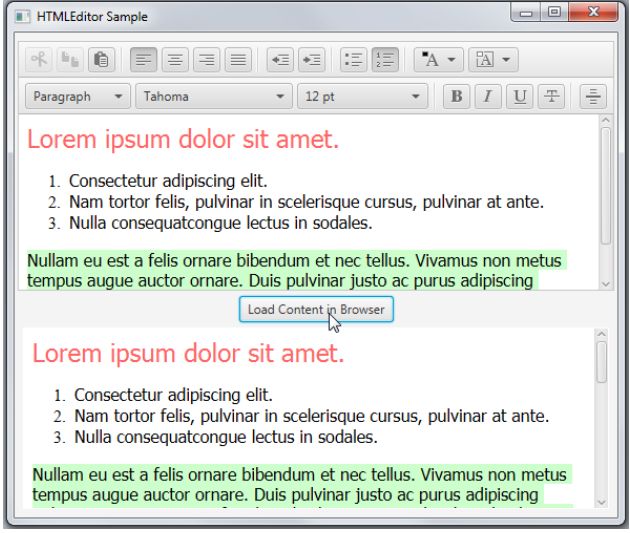
和获取html内容相似,你可以把这段代码存入一个文件,或者交给WebView控件,这就可以同步编辑器的内容和内嵌的浏览器的内容。我们看一下这个例子怎么实现:
import javafx.application.Application;
import javafx.event.ActionEvent;
import javafx.geometry.Insets;
import javafx.geometry.Pos;
import javafx.scene.Group;
import javafx.scene.Scene;
import javafx.scene.control.*;
import javafx.scene.layout.VBox;
import javafx.scene.web.HTMLEditor;
import javafx.scene.web.WebEngine;
import javafx.scene.web.WebView;
import javafx.stage.Stage;

public class HTMLEditorSample extends Application {
    private final String INITIAL_TEXT = "Lorem ipsum dolor sit "
            + "amet, consectetur adipiscing elit. Nam tortor felis, pulvinar "
            + "in scelerisque cursus, pulvinar at ante. Nulla consequat"
            + "congue lectus in sodales. Nullam eu est a felis ornare "
            + "bibendum et nec tellus. Vivamus non metus tempus augue auctor "
            + "ornare. Duis pulvinar justo ac purus adipiscing pulvinar. "
            + "Integer congue faucibus dapibus. Integer id nisl ut elit "
            + "aliquam sagittis gravida eu dolor. Etiam sit amet ipsum "
            + "sem.";

    @Override
    public void start(Stage stage) {
        stage.setTitle("HTMLEditor Sample");
        stage.setWidth(650);
        stage.setHeight(500);
        Scene scene = new Scene(new Group());

        VBox root = new VBox();
        root.setPadding(new Insets(8, 8, 8, 8));
        root.setSpacing(5);
        root.setAlignment(Pos.BOTTOM_LEFT);

        final HTMLEditor htmlEditor = new HTMLEditor();
        htmlEditor.setPrefHeight(245);
        htmlEditor.setHtmlText(INITIAL_TEXT);

        final WebView browser = new WebView();
        final WebEngine webEngine = browser.getEngine();

        ScrollPane scrollPane = new ScrollPane();
        scrollPane.getStyleClass().add("noborder-scroll-pane");
        scrollPane.setStyle("-fx-background-color: white");
        scrollPane.setContent(browser);
        scrollPane.setFitToWidth(true);
        scrollPane.setPrefHeight(180);

        Button showHTMLButton = new Button("Load Content in Browser");
        root.setAlignment(Pos.CENTER);
        showHTMLButton.setOnAction((ActionEvent arg0) -> {
            webEngine.loadContent(htmlEditor.getHtmlText());
        });

        root.getChildren().addAll(htmlEditor, showHTMLButton, scrollPane);
        scene.setRoot(root);

        stage.setScene(scene);
        stage.show();
    }

    public static void main(String[] args) {
        launch(args);
    }
}
编译运行如下图所示: