图像滤镜艺术---Photoshop实现Instagram之Sierra滤镜
本文介绍PS实现Instagram中的Sierra滤镜,内容如下:
先看下效果图:
下面是具体实现步骤:
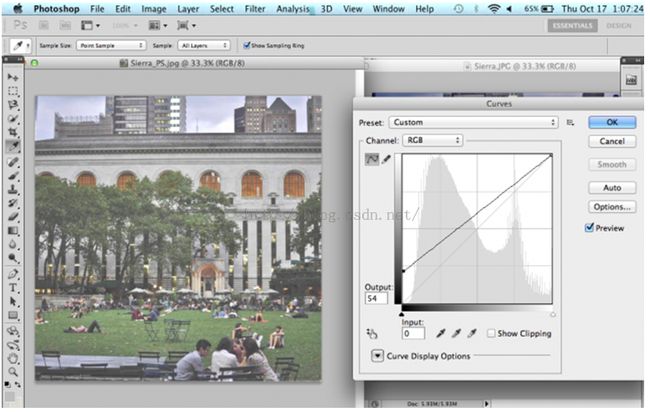
1. To replicate the faded look of Sierra, adjust the Curves of the photo with Command / Ctrl + M, or Image > Adjustments > Curves. Move the left point of the curve directly up the y-axis.
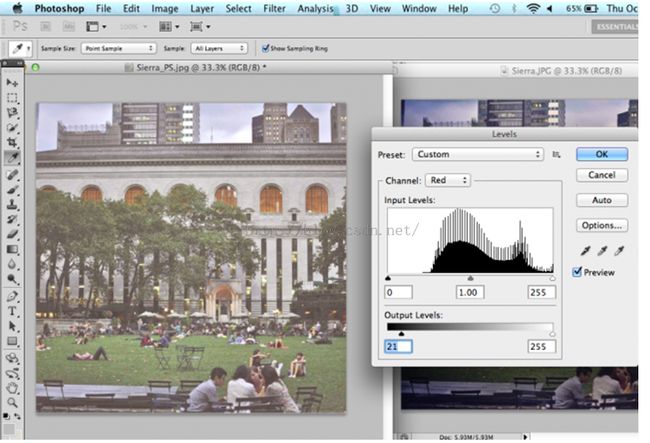
2. Adjust the levels with Command / Ctrl + L, or Image > Adjustments > Levels. Select "Red" in the "Channel" dropdown menu and increase the Output Levels to 21 by moving the left slider toward the center.
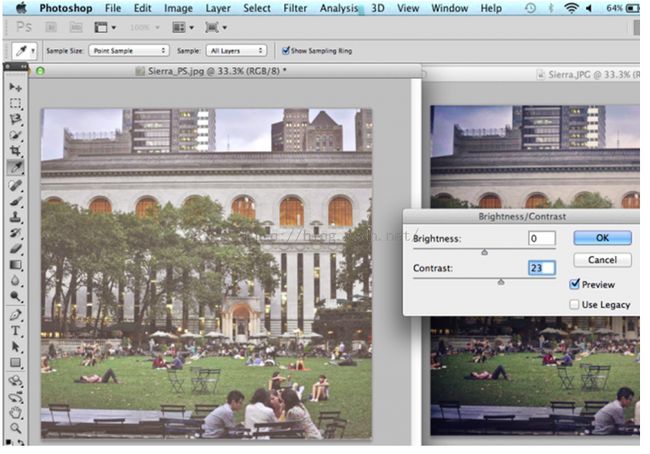
3. Increase the Contrast by going to Image > Adjustments > Brightness/Contrast.
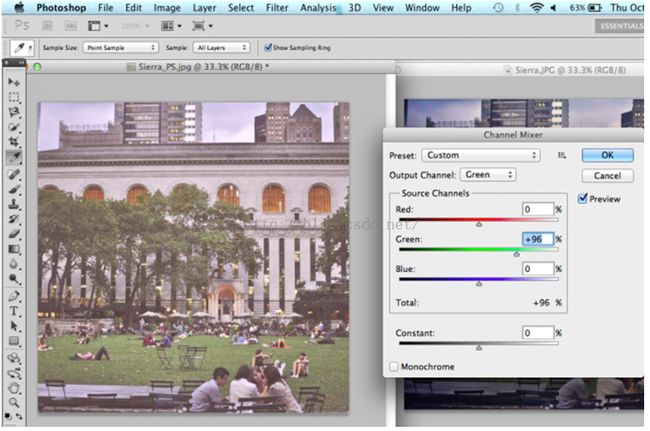
4. Adjust the channels by going to Image > Adjustments > Channel Mixer. Select "Green" in the "Output Channel" dropdown menu and move the Green slider to the right, giving the photo less of a green tint.
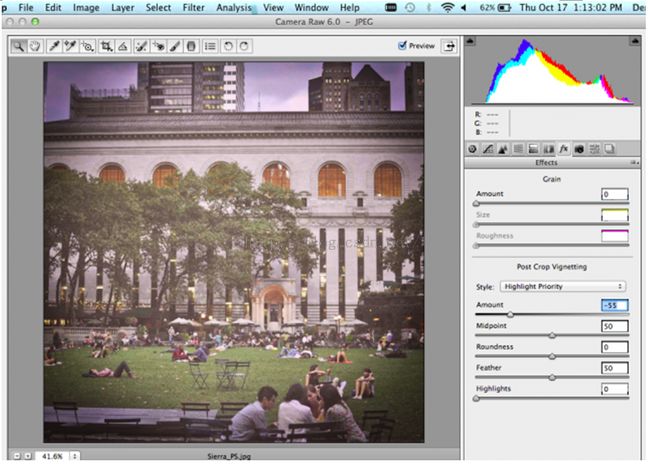
5. Save the image as is and reopen it in Camera Raw to add a vignette frame. You can do this by exiting out of the current window, then going to File > Open. Select the correct file, then select "Camera Raw" in the "Format" dropdown menu.
6. Once you have the file open in Camera Raw, select the Effects menu on the right-hand side of the editor. Make sure that "Highlight Priority" is selected in the "Style" dropdown menu. Move the "Amount" slider left to make a black vignette around the edges of the photo. Click "Save Image" to save the final result.
以上就是整个实现过程,如果大家需要用程序实现上述过程,可以使用ZPhotoEngine库来轻松实现,下载地址为:点击打开链接
