【Eclipse RCP】1. 一个简单的RCP程序示例
创建第一个RCP项目
New - Plugin Project
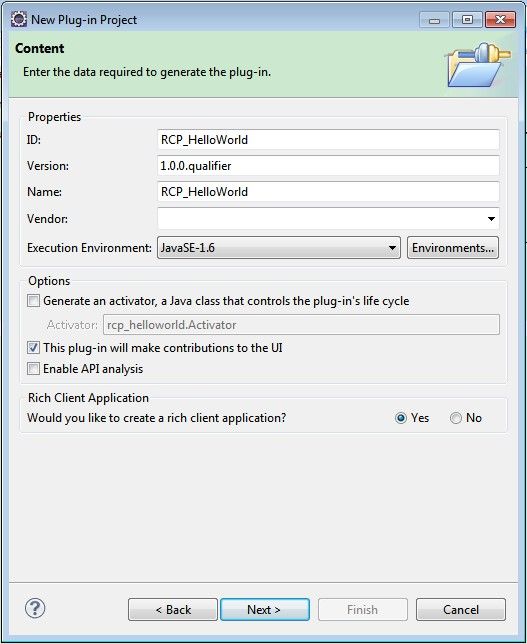
设置其ID、版本号、名称
取消选择Generate an activator
将Rich Client Application区域设为Yes
选择Hello RCP模板
生成的项目结构如下:
运行
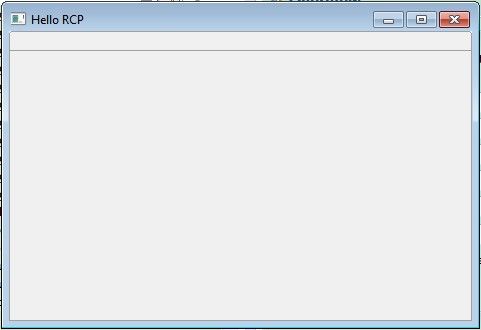
自动创建的代码会生成一个空界面,运行结果如图:
代码分析
plugin.xml
Eclipse默认用plugin manifest editor打开plugin.xml,主要有如下几个标签页:
1)Overview
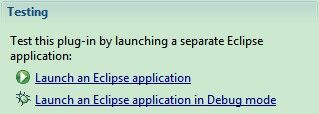
显示项目基本信息,其中Test区域的按钮可快速启动或调试plugin程序。
2)Dependencies
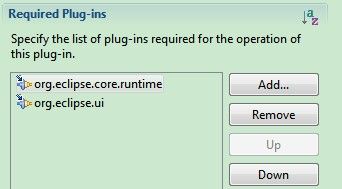
可查看该插件所依赖的其他插件,例如本插件依赖于org.eclipse.core.runtime、org.eclipse.ui;
还可通过Dependency Analysis查看dependency hierarchy。
这部分内容实际是定义在MANIFEST.MF文件中:
Manifest-Version: 1.0
Bundle-ManifestVersion: 2
Bundle-Name: RCP_HelloWorld
Bundle-SymbolicName: RCP_HelloWorld; singleton:=true
Bundle-Version: 1.0.0.qualifier
Require-Bundle: org.eclipse.core.runtime,
 org.eclipse.ui
Bundle-RequiredExecutionEnvironment: JavaSE-1.6
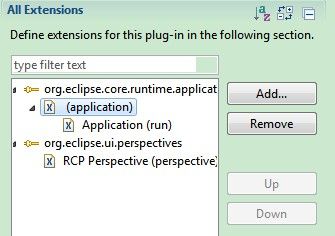
3)Extensions
扩展,是将类连接到Eclipse结构的机制。
这部分内容实际是定义在plugin.xml中的内容:
<plugin>
   <extension
         id="application"
         point="org.eclipse.core.runtime.applications">
      <application>
         <run
               class="rcp_helloworld.Application">
         </run>
      </application>
   </extension>
   <extension
         point="org.eclipse.ui.perspectives">
      <perspective
            name="RCP Perspective"
            class="rcp_helloworld.Perspective"
            id="RCP_HelloWorld.perspective">
      </perspective>
   </extension>
</plugin>
Application
/**
 * This class controls all aspects of the application's execution
 */
public class Application implements IApplication {

	/* (non-Javadoc)
	 * @see org.eclipse.equinox.app.IApplication#start
            (org.eclipse.equinox.app.IApplicationContext)
	 */
	@Override
	public Object start(IApplicationContext context) throws Exception {
		Display display = PlatformUI.createDisplay();
		try {
                //-----------WorkbenchAdvisor
                int returnCode = PlatformUI.
                      createAndRunWorkbench(display, new ApplicationWorkbenchAdvisor());
		    if (returnCode == PlatformUI.RETURN_RESTART)
			   return IApplication.EXIT_RESTART;
		    else
			   return IApplication.EXIT_OK;
		} finally {
			display.dispose();
		}

	}

	/* (non-Javadoc)
	 * @see org.eclipse.equinox.app.IApplication#stop()
	 */
	@Override
	public void stop() {
		if (!PlatformUI.isWorkbenchRunning())
			return;
		final IWorkbench workbench = PlatformUI.getWorkbench();
		final Display display = workbench.getDisplay();
		display.syncExec(new Runnable() {
			@Override
			public void run() {
				if (!display.isDisposed())
					workbench.close();
			}
		});
	}
}
相当于程序入口。
在start方法中,创建了一个Display;然后启动Eclipse Workbench(PlatformUI.createAndRunWorkbench(display, new ApplicationWorkbenchAdvisor()))。
Application必须关联到Eclipse Runtime的应用程序扩展点,从而使Runtime知道Application。
一个系统中的多个Eclipse插件可以共享应用程序扩展。
WorkbenchAdvisor
上面Application代码中createAndRunWorkbench方法参数中用到了WorkbenchAdvisor。WorkbenchAdvisor告诉Workbench如何行动:如何做、做什么。
本例的WorkbenchAdvisor:
- 定义了要显示的透视图
- 定义了要使用的WorkbenchWindowAdvisor
public class ApplicationWorkbenchAdvisor extends WorkbenchAdvisor {

    private static final String PERSPECTIVE_ID = "RCP_HelloWorld.perspective";
    //-----------WorkbenchWindowsAdvisor
    public WorkbenchWindowAdvisor createWorkbenchWindowAdvisor(
        IWorkbenchWindowConfigurer configurer) {
        return new ApplicationWorkbenchWindowAdvisor(configurer);
    }
    //----------Perspective
    public String getInitialWindowPerspectiveId() {
	return PERSPECTIVE_ID;
    }
}
如果要保存窗口位置和尺寸,以便下次打开的时候不被重置:
	@Override
	public void initialize(IWorkbenchConfigurer configurer){
		configurer.setSaveAndRestore(true);
	}
WorkbenchWindowAdvisor
每个应用程序的每一个窗口都有一个WorkbenchWindowAdvisor,定义如何渲染窗口:设置窗口初始大小、标题、状态栏、工具栏。
public class ApplicationWorkbenchWindowAdvisor extends WorkbenchWindowAdvisor {

    public ApplicationWorkbenchWindowAdvisor(IWorkbenchWindowConfigurer configurer) {
        super(configurer);
    }
    //----------ActionBarAdvisor
    public ActionBarAdvisor createActionBarAdvisor(IActionBarConfigurer configurer) {
        return new ApplicationActionBarAdvisor(configurer);
    }

    public void preWindowOpen() {
        IWorkbenchWindowConfigurer configurer = getWindowConfigurer();
        configurer.setInitialSize(new Point(400, 300));
        configurer.setShowCoolBar(false);
        configurer.setShowStatusLine(false);
        configurer.setTitle("Hello RCP"); //$NON-NLS-1$
    }
}
Perspective
定义透视图的布局。默认什么都不做:
public class Perspective implements IPerspectiveFactory {

	public void createInitialLayout(IPageLayout layout) {
	}
}
ActionBarAdvisor
创建窗口所需要的动作,并在窗口中定位它们。控制菜单栏上出现的命令、工具栏、状态栏。
默认什么都不做:
public class ApplicationActionBarAdvisor extends ActionBarAdvisor {

    public ApplicationActionBarAdvisor(IActionBarConfigurer configurer) {
        super(configurer);
    }

    protected void makeActions(IWorkbenchWindow window) {
    }

    protected void fillMenuBar(IMenuManager menuBar) {
    }

}
填充界面
添加菜单栏
1)首先在WorkbenchWindowAdvisor中显示菜单栏
@Override
public void preWindowOpen() {
        IWorkbenchWindowConfigurer configurer = getWindowConfigurer();
        configurer.setInitialSize(new Point(400, 300));
        configurer.setShowCoolBar(false);
        configurer.setShowMenuBar(true);//显示菜单栏
        configurer.setShowStatusLine(true);
        configurer.setTitle("Hello RCP");
    }
2)在 ActionBarAdvisor中添加动作
public class ApplicationActionBarAdvisor extends ActionBarAdvisor {

    private IWorkbenchAction exitAction;
    private IWorkbenchAction aboutAction;

    public ApplicationActionBarAdvisor(IActionBarConfigurer configurer) {
        super(configurer);
    }

    @Override
    protected void makeActions(IWorkbenchWindow window) {
    	exitAction = ActionFactory.QUIT.create(window);
    	aboutAction = ActionFactory.ABOUT.create(window);

    	register(exitAction);
    	register(aboutAction);
    }

    @Override
	protected void fillMenuBar(IMenuManager menuBar) {
    	MenuManager fileMenuMgr = new MenuManager("&File", "File");
    	fileMenuMgr.add(exitAction);

    	MenuManager helpMenuMgr = new MenuManager("&Help", "Help");
    	helpMenuMgr.add(aboutAction);

    	menuBar.add(fileMenuMgr);
    	menuBar.add(helpMenuMgr);
    }

}
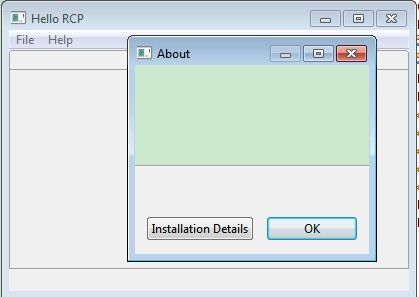
现在的界面如下:
添加工具栏
1)在WorkbenchWindowAdvisor中显示工具栏
configurer.setShowCoolBar(true);
2)在ActionBarAdvisor中添加动作
    @Override
    protected void fillCoolBar(ICoolBarManager icoolbarmanager){
    	IToolBarManager toolbar = new ToolBarManager(icoolbarmanager.getStyle());
    	icoolbarmanager.add(toolbar);
    	toolbar.add(aboutAction);
    	toolbar.add(exitAction);
    }
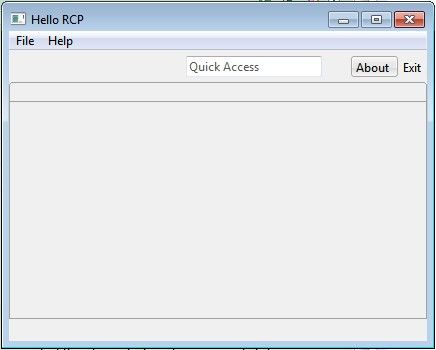
现在的界面如下:
添加状态栏
1)在WorkbenchWindowAdvisor中显示状态栏
configurer.setShowStatusLine(true);
2)在WorkbenchWindowAdvisor中添加动作
    @Override
    public void postWindowOpen(){
    	IStatusLineManager statusLine = getWindowConfigurer().
    			getActionBarConfigurer().
    			getStatusLineManager();
    	statusLine.setMessage("-login : "+new Date().toLocaleString());
    }
but,好像运行后没效果?
添加系统托盘
1)WorkbenchWindowAdvisor.postWindowOpen()
    @Override
    public void postWindowOpen(){
    	IStatusLineManager statusLine = getWindowConfigurer().
    			getActionBarConfigurer().
    			getStatusLineManager();
    	statusLine.setMessage("-login : "+new Date().toLocaleString());


    	final IWorkbenchWindow window = getWindowConfigurer().getWindow();
    	trayItem = initTaskItem(window);
		if (trayItem != null) {
			hookPopupMenu(window);
			hookMinimize(window);
		}
    }
     //初始化org.eclipse.swt.widgets.TrayItem;
      private TrayItem initTaskItem(IWorkbenchWindow window) {
		final Tray tray = window.getShell().getDisplay().getSystemTray();
		if (tray == null)
			return null;
		trayItem = new TrayItem(tray, SWT.NONE);
		trayImage = AbstractUIPlugin.imageDescriptorFromPlugin(
				"org.eclipsercp.hyperbola", "icons/sample.gif").createImage();
		trayItem.setImage(trayImage);
		trayItem.setToolTipText("Hyperbola");
		return trayItem;
	}
        //托盘菜单
	private void hookPopupMenu(final IWorkbenchWindow window) {
		// Add listener for menu pop-up
		trayItem.addListener(SWT.MenuDetect, new Listener() {
			@Override
			public void handleEvent(Event event) {
				MenuManager trayMenu = new MenuManager();
				Menu menu = trayMenu.createContextMenu(window.getShell());
				actionBarAdvisor.fillTrayItem(trayMenu);//ActionBarAdvisor
				menu.setVisible(true);
			}
		});
	}
	//托盘最小化最大化
	private void hookMinimize(final IWorkbenchWindow window) {
		window.getShell().addShellListener(new ShellAdapter() {
			@Override
			public void shellIconified(ShellEvent e) {
				window.getShell().setVisible(false);
			}
		});
		trayItem.addListener(SWT.DefaultSelection, new Listener() {
			@Override
			public void handleEvent(Event event) {
				Shell shell = window.getShell();
				if (!shell.isVisible()) {
					shell.setVisible(true);
					window.getShell().setMinimized(false);
				}
			}
		});
	}
2)托盘菜单事件由 ActionBarAdvisor定义
    protected void fillTrayItem(IMenuManager trayItem) {
		trayItem.add(aboutAction);
		trayItem.add(exitAction);
	}

