iPhone SDK: Saving User Preferences With Settings Bundle
Background
User Preferences are data and settings that are saved by your application. The iPhone OS has a mechanism that enables an application to "associate" its settings with the default iPhone user interface. You can access applications settings by selecting the Settings icon in the main iPhone screen. Try it and you should see entries for Safari settings. Some applications do not have settings; the behavior is dependent on how the application is designed. This
tutorial is a basic guide on how to enable your application so that its settings is accessible from the default iPhone Settings window.
Creating The Project
Create a new Project, View-Based. Name it PreferencesExample.Creating The Settings Bundle.
The iPhone OS automatically enables settings for application that contains a Settings Bundle, so let's create one for our application. Do File->New File. Select iPhone OS: Settings, then Settings Bundle.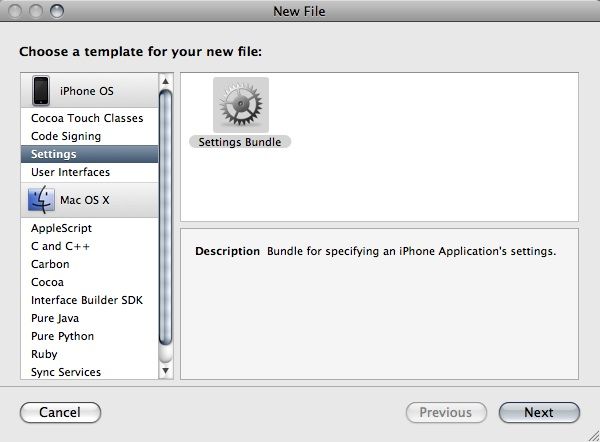 Settings bundle is very convenient because the iPhone handles much of the UI design for you, so you don't have to write them yourself. (More can use more advanced methods, which are: to save into a file, and to save into a
MySql database). The method described here is the simplest way to do persistent data saving. The drawback with our method is that user will have to exit your application to enter the Settings view. This isn't to say that you cannot have your own setting view to display. In fact, you can read and write to the settings value by code, but if you want to enable the Settings View from within your application, you will have to create/code the view yourself.
Running The Default Settings
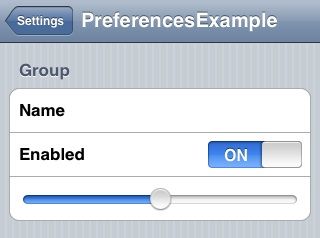
Compile and Run our application. You will see a blank application, which is okay since we haven't added anything into the stage. Now exit the application (by clicking the button on the bottom), then enter the Settings view by clicking the Settings icon. You should see PreferencesExample, which is our application listed. Select it and you should see the default preferences that looked like this:
Where Do The Entries Come From
Let's see where the default preferences come from, and how they can be edited. Expand Settings.bundle icon in the Group & Filespanel (the left panel shown below), then open Root.plist. Root.plist contains the definition of the settings view. You see there are 4 items:
- The Name text-field (PSTextFieldSpecifier),
- The Toggle button (PSToggleSwitchSpecifier),
- The Slider (PSSliderSpecifier),
- The PSGroupSpecifier. You can find a list of the supported Type at:http://developer.apple.com/iphone/library/documentation/PreferenceSettings/Conceptual/SettingsApplicationSchemaReference/Introduction/Introduction.htmlThe first one (PSGroupSpecifier) indicates the beginning of grouping (grouped items are surrounded by a sub-window). In the example above, there's only one group (which appropriately is named Group). You can change the text that appears in the items by editing the Title. The Title field under each item indicates the text that appears. Editing the Title involves two steps:
1) Changing the text that appear in the Title field, this text is not the actual text that appears when you run the application. Instead, this is an identifier that maps to the current language. To change the actual text, do step 2.
2) Edit en.lproj:Root.string (if your application supports more than english, then change the Root.string on the other languages, too).
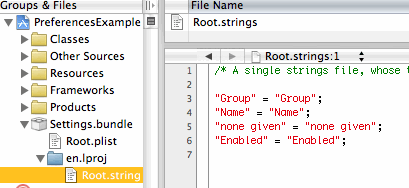 Why the two steps? Because of localization. Having the string on the localization bundle makes it easy to localize the string. Note: If you entered a Title identifier that doesn't exists on the string table, the identifier will be displayed instead.Important: Before you recompile and re-run with your changes, make sure to Save both files, because Xcode seem to behave a bit funky if you recompile without saving them, even if you have set Xcode to autosave mode.
Adding/Editing Preference
You can edit and delete the existing preference nodes using the PList editor.
To delete, highlight then node that you want to delete, then press the delete keyboard button (deleting a parent also deleted its children). To edit values, double click on the Value field.
To add, highlight the sibling of the node, then press the + button on the right.
For example, let's add another Item node. Select Item 4 since I want to add a node after Item 4. You should see the + button on the right. Click the + button to add.
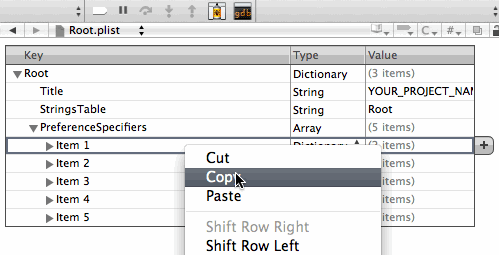
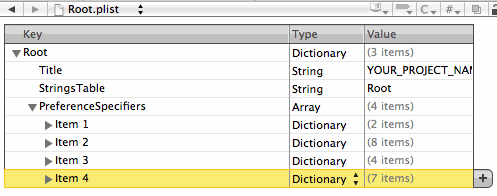 Tips: Rather than adding, an easier way is to copy from an existing node. You can select then right-click on a node, then select Copy from the context menu.
 Edit the list so it looks like below:
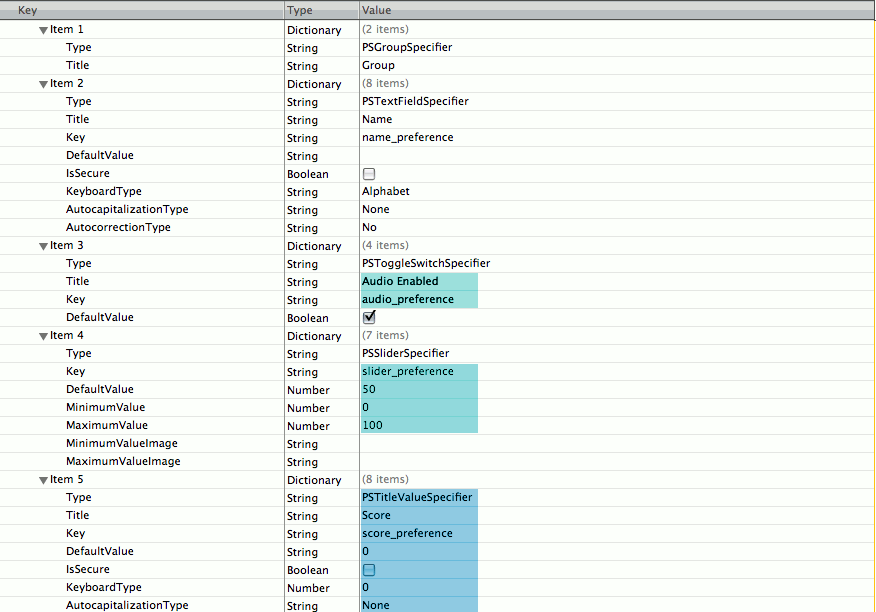 Item 5 is the new item we have just added. It is using PSTitleValueSpecifier, which is similar to PSTExtFieldSpecifier, except it is not editable (the KeyboardType node is not really needed, but I left it there since I copied the node from Item 1). Edit the en.lproj:Root.string so it looks like below:
/* A single strings file, whose title is specified in your preferences schema.
The strings files provide the localized content to display to the user for each
of your preferences. */

"Group" = "My Group";
"Name" = "Name";
"none given" = "none given";
"Enabled" = "Audio Enabled";
"Score" = "Score";
Running It
Save all the files. Recompile and run.You should see something like this:
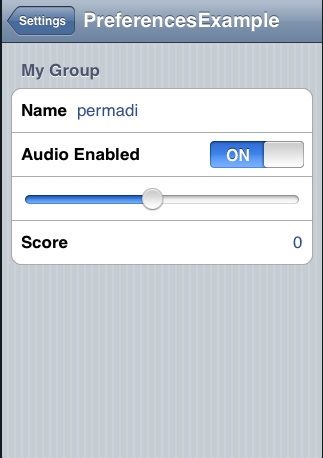
I edited the Name field and entered my name. You can too, by tapping on the field. Close and reopen, all the values you change should remain. Note that Score cannot be changed since we made it static by using PSTitleValueSpecifier.
Note also that the text Group has changed to My Group, and Enabled has changed to Audio Enabled (these changes were made in en.lproj:Root.string).
If these string did not change for you, make sure to Save all the files and Recompile. Next: Reading From Preferences.