在Eclipse使用插件将java程序打包成jar
插件下载地址 :
http://sourceforge.net/project/showfiles.php?group_id=115990&package_id=125924
插件的安装与启动:
zip文件含有插件目录的,把fatjar.jar放入eclipse的插件目录下.
关闭 eclipse.
以eclipse -clean命令从命令行启动 eclipse
否则发现不了插件.
只要在eclipse的插件目录下移出net.sf.fjep.fatjar_x.x.x即可
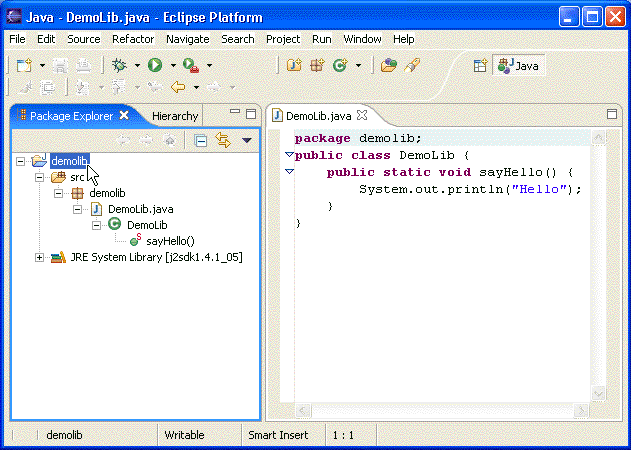
Create a new Java Project named "demolib".
Add the Class "demolib.DemoLib.java" containing the following code:
package demolib; |
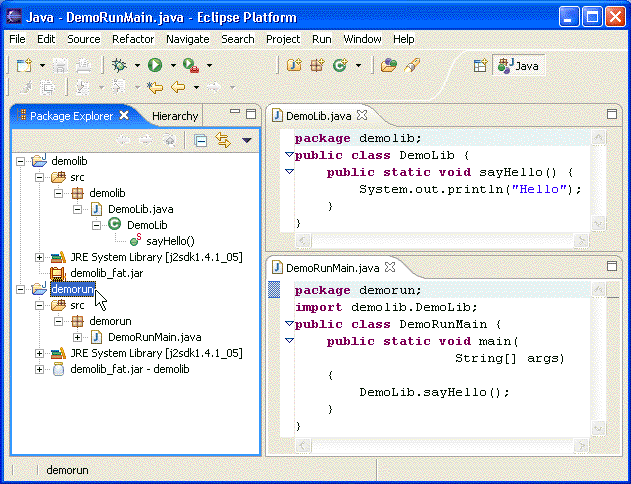
The Project should look something like this:
Step 2: Create a jar file using Fat Jar Plug-In
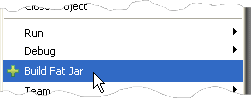
In the "Package-Explorer" (not the "Resource-View") right click on the project "demolib".
Select "+ Build Fat Jar".
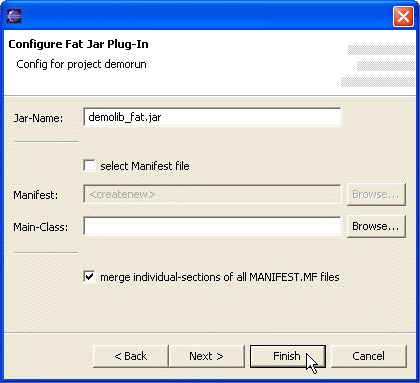
A Configuration Dialog appears. Just press "Finish".
在这一步遇到 “The chosen operation is not currently available” 的错误,将jdk升级或下载插件的时候选择较老的版本即可。这属于兼容性问题。
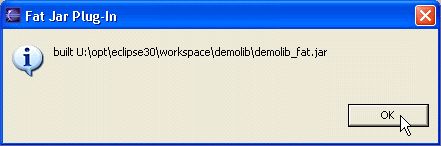
The File "demolib_fat.jar" has been created in the project root directory.
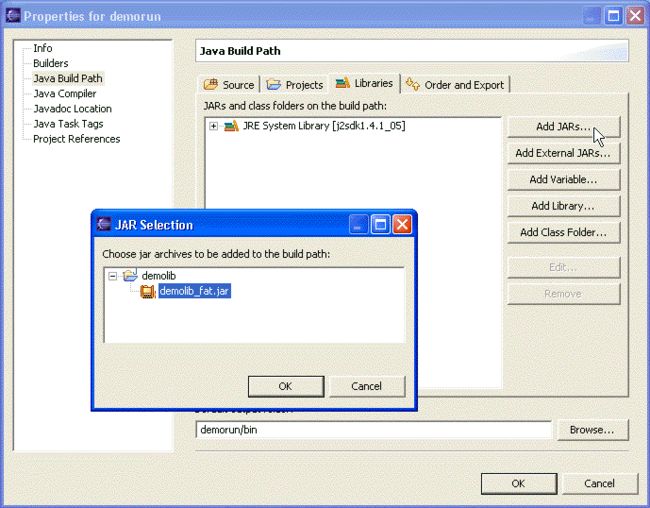
Step 3: Create a new Java-Project "demorun"
Create a new Java Project named "demorun".
In the project properties add the Library "demolib/demolib_fat.jar" to the Java Build Path":
Step 4: Create Main Class
Add the Class "demorun.DemoRunMain.java" containing the following code:
package demorun; |
The Project should look something like this:
Step 5: Start the Build Fat Jar Dialog
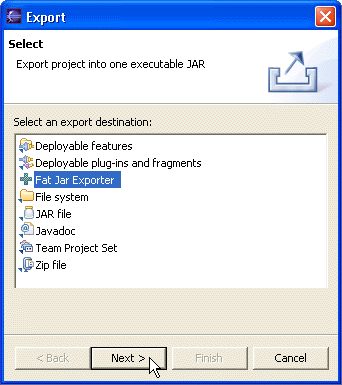
Start the Export Wizard from the File-Menu ("File" -> "Export").
Select "+ Fat Jar Exporter" and click "next >".
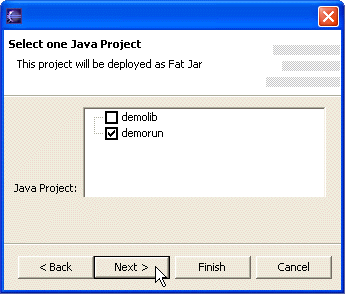
Select the project "demorun" and click "next >".
A Configuration-Dialog appears showing the current Settings.
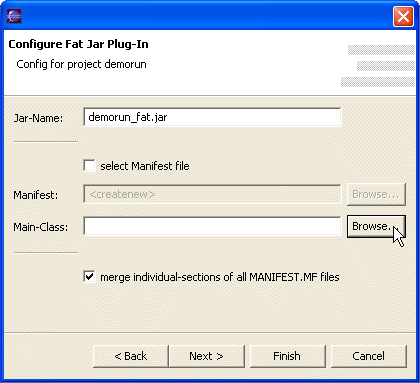
Step 6: Select the Main Class
The Main Class - the one containing the static methode main - must be defined in the jar.
Click on the "Browse..." Button on the right side behind the Main-Class Edit field.
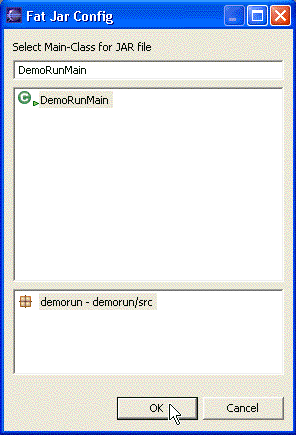
Select "DemoRunMain" and click the "OK" Button.
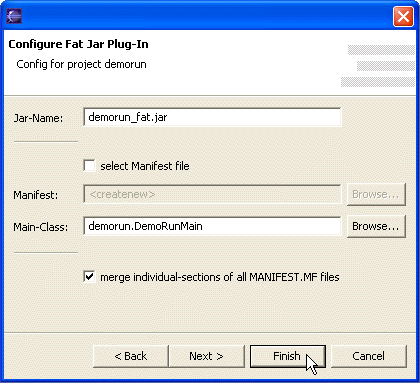
The FullyQualifiedName "demorun.DemoRunMain" is now set for "Main-Class".
Step7: Finish
Save the current Settings by clicking on the "Finish" Button.
The File "demorun_fat.jar" has been created in the project root directory.
In addition the file ".fatjar" storing the configuration settings has been created in the project root directory
The created jar file contains all classes from all referenced jar files (demolib_fat.jar) and the project classes.
This file can be executed anywhere, no classpath has to be set, because all necessary libraries
are extracted inside the "Fat Jar":
> java -jar demorun_fat.jar |