iOS客户端新浪微博SDK的使用:登陆,验证,发送,登出
原文地址: http://www.xiaoyaoli.com/?p=555
2012 年 6 月 27 日 by lipengxuan | Filed under iOS.
这篇博客记录了利用新浪官方SDK实现微博登陆认证,发送微博,登出微博这仨简单的功能,也是在移动客户端里最常用的功能。官方给的例子比较复杂,还包含微博的详细内容,这里没用到。
首先做准备工作:
从新浪微博SDK下载官方SDK,是一个文件夹SinaWeiBoSDK2。
创建一个SingleView项目,不建议用ARC,因为SDK里各种release,会报错,虽然有办法处理但是挺麻烦。
把SinaWeiBoSDK2文件夹中的src文件夹拖拽到项目里,并引入头文件search path(之前的博客有说)。
然后编译运行应该不报错
然后修改ViewController.h
#import <UIKit/UIKit.h>
#import “WBEngine.h”
#import “WBSendView.h”
#import “WBLogInAlertView.h”
@interface ViewController : UIViewController < WBEngineDelegate, WBSendViewDelegate>
{
WBEngine *weiBoEngine;//微博初始化对象,理解为微博发动机很合适
UIActivityIndicatorView *indicatorView;
UIButton *logInBtnOAuth;//登陆和发送按钮
UIButton *logInBtnXAuth;//登出按钮
}
@property (nonatomic, retain) WBEngine *weiBoEngine;
@end
接下来是最主要的ViewController.m文件,首先在最开始添加下面的代码,在@implementation ViewController之前,主要是设置AppKey和AppSecret
#import “ViewController.h”
#ifndef kWBSDKDemoAppKey
#define kWBSDKDemoAppKey @”524695845″//每一个要调用微博SDK的App有自己的AppKey和AppSecret,申请流程可以看官方SDK网站的流程,这里用的是测试key,实际的key和secret得经过Sina审核
#endif
#ifndef kWBSDKDemoAppSecret
#define kWBSDKDemoAppSecret @”9e489ff13a2d00ac6cb652e88c6d2d60″//同理AppKey
#endif
//设定Tag后面要用到
#define kWBAlertViewLogOutTag 100
#define kWBAlertViewLogInTag 101
@interface ViewController ()
@end
然后是ViewDidLoad方法,加载两个按钮:
- (void)viewDidLoad
{
[super viewDidLoad];
//实例化WBEngine
WBEngine *engine = [[WBEngine alloc] initWithAppKey:kWBSDKDemoAppKey appSecret:kWBSDKDemoAppSecret];
[engine setRootViewController:self];
[engine setDelegate:self];
[engine setRedirectURI:@"http://"];
[engine setIsUserExclusive:NO];
self.weiBoEngine = engine;
[engine release];
[self.view setBackgroundColor:[UIColor whiteColor]];
//登陆和发送按钮
logInBtnOAuth = [UIButton buttonWithType:UIButtonTypeRoundedRect];
[logInBtnOAuth setFrame:CGRectMake(10, 160, 300, 70)];
[logInBtnOAuth setTitle:@"没登陆过点击是登陆,登陆过点击是发送" forState:UIControlStateNormal];
[logInBtnOAuth addTarget:self action:@selector(onLogInOAuthButtonPressed) forControlEvents:UIControlEventTouchUpInside];
[self.view addSubview:logInBtnOAuth];
//登出按钮
logInBtnXAuth = [UIButton buttonWithType:UIButtonTypeRoundedRect];
[logInBtnXAuth setFrame:CGRectMake(85, 280, 150, 40)];
[logInBtnXAuth setTitle:@"登出" forState:UIControlStateNormal];
[logInBtnXAuth addTarget:self action:@selector(onLogOutPressed) forControlEvents:UIControlEventTouchUpInside];
[self.view addSubview:logInBtnXAuth];
//等待视图
indicatorView = [[UIActivityIndicatorView alloc] initWithActivityIndicatorStyle:UIActivityIndicatorViewStyleGray];
[indicatorView setCenter:CGPointMake(160, 240)];
[self.view addSubview:indicatorView];
}
第一个按钮之所以有两个功能是因为在移动应用中本来布局空间就有限,而且登陆功能一次就够了,以后可以直接点击用登陆的账号来发微博,据我观察很多应用的分享都是这么干的。
这个是登陆按钮点击的函数
- (void)onLogInOAuthButtonPressed
{
if ([weiBoEngine isLoggedIn] && ![weiBoEngine isAuthorizeExpired])
{
[self performSelector:@selector(sendWeibo) withObject:nil afterDelay:0.0];//如果已经登陆过了,微博账号信息记录在keychain里,就发送微博
}else {
[weiBoEngine logIn];//首次登陆
}
}
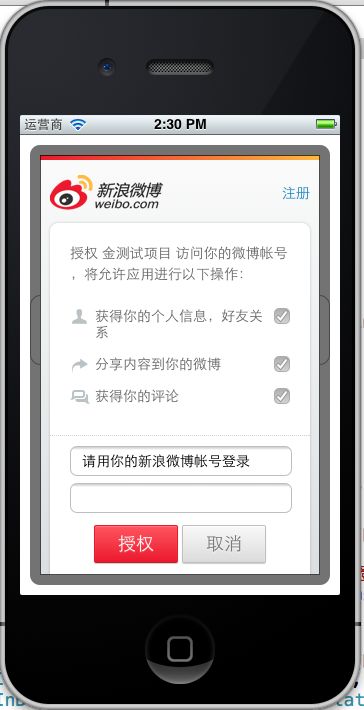
[weiBoEngine logIn]方法调用就是这个界面,是官方SDK提供的web认证方式的界面,是个webview,功能就是OAuth方式认证登陆:
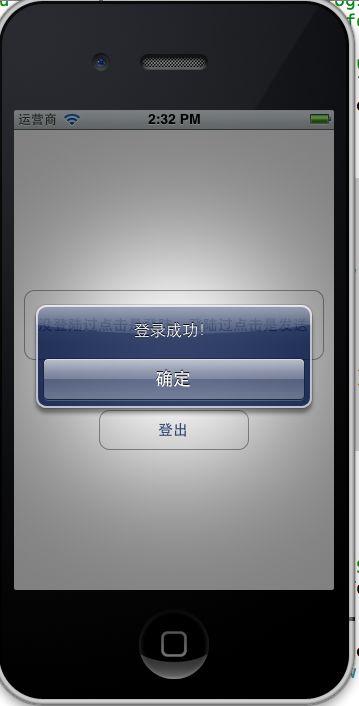
点击授权以后想有个提示登陆成功就要用到WBEngineDelegate的代理方法
// Log in successfully.点击授权按钮后触发
- (void)engineDidLogIn:(WBEngine *)engine{
NSLog(@”engineDidLogIn”);
[indicatorView stopAnimating];
UIAlertView* alertView = [[UIAlertView alloc]initWithTitle:nil
message:@”登录成功!”
delegate:self
cancelButtonTitle:@”确定”
otherButtonTitles:nil];
[alertView setTag:kWBAlertViewLogInTag];
[alertView show];[alertView release];
}
这样有个警告栏:
WBEngineDelegate还有其他的代理方法:
// If you try to log in with logIn or logInUsingUserID method, and
// there is already some authorization info in the Keychain,
// this method will be invoked.
// You may or may not be allowed to continue your authorization,
// which depends on the value of isUserExclusive.
- (void)engineAlreadyLoggedIn:(WBEngine *)engine;
// Log in successfully.
- (void)engineDidLogIn:(WBEngine *)engine;
// Failed to log in.
// Possible reasons are:
// 1) Either username or password is wrong;
// 2) Your app has not been authorized by Sina yet.
- (void)engine:(WBEngine *)engine didFailToLogInWithError:(NSError *)error;
// Log out successfully.
- (void)engineDidLogOut:(WBEngine *)engine;
// When you use the WBEngine’s request methods,
// you may receive the following four callbacks.
- (void)engineNotAuthorized:(WBEngine *)engine;
- (void)engineAuthorizeExpired:(WBEngine *)engine;
- (void)engine:(WBEngine *)engine requestDidFailWithError:(NSError *)error;
- (void)engine:(WBEngine *)engine requestDidSucceedWithResult:(id)result;
这样登陆这一步就做完了,接下来是发送,当登陆过以后再次点击第一个按钮就会执行这个方法:
[self performSelector:@selector(sendWeibo) withObject:nil afterDelay:0.0];//如果已经登陆过了,微博账号信息记录在keychain里,就发送微博
调用的函数(继续添加在ViewController.m文件中):
- (void)sendWeibo
{
WBSendView *sendView = [[WBSendView alloc] initWithAppKey:kWBSDKDemoAppKey appSecret:kWBSDKDemoAppSecret text:@”微博内容” image:[UIImage imageNamed:@"diablo.jpg"]];
[sendView setDelegate:self];
[sendView show:YES];
[sendView release];
}
这里挺像邮件,正文加图片,是调用的官方SDK提供的发送视图,如果想自定义视图可以查看官方SDK文档,核心发送代码是
- (void)sendWeiBoWithText:(NSString *)text image:(UIImage *)image
这个是利用官方SDK的发送视图的代码执行效果:
可以修改微博的内容和删除图片,关闭按钮点击后发送视图就消失,发送按钮点击后微博就发送,但是发送视图不会消失,这里就要用到WBSendViewDelegate的代理方法,在发送成功后调用函数来让发送视图消失并通知用户发送成功:
- (void)sendViewDidFinishSending:(WBSendView *)view{
NSLog(@”sendViewDidFinishSending”);
[view hide:YES];
UIAlertView* alertView = [[UIAlertView alloc]initWithTitle:nil
message:@”微博发送成功!”
delegate:nil
cancelButtonTitle:@”确定”
otherButtonTitles:nil];
[alertView show];
[alertView release];
}
和WBEngineDelegate一样,WBSendViewDelegate也有自己的代理方法:
- (void)sendViewWillAppear:(WBSendView *)view;
- (void)sendViewDidAppear:(WBSendView *)view;
- (void)sendViewWillDisappear:(WBSendView *)view;
- (void)sendViewDidDisappear:(WBSendView *)view;
- (void)sendViewDidFinishSending:(WBSendView *)view;
- (void)sendView:(WBSendView *)view didFailWithError:(NSError *)error;
- (void)sendViewNotAuthorized:(WBSendView *)view;
- (void)sendViewAuthorizeExpired:(WBSendView *)view;
发送功能写完了,接下来是登出功能:
//登出按钮点击后调用的函数
-(void)onLogOutPressed{
[weiBoEngine logOut];
}
//登出成功时调用的代理方法
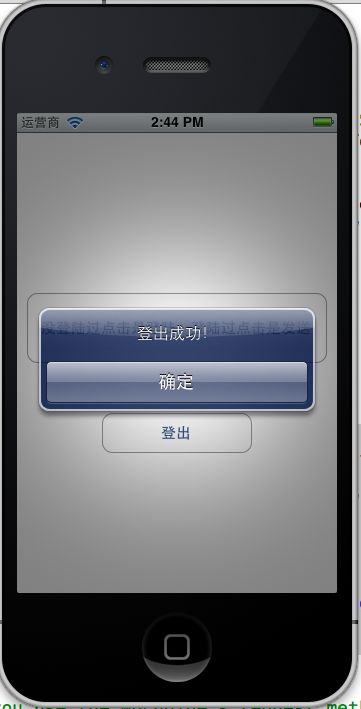
// Log out successfully.点击登出按钮后触发
- (void)engineDidLogOut:(WBEngine *)engine{
NSLog(@”engineDidLogOut”);
UIAlertView* alertView = [[UIAlertView alloc]initWithTitle:nil
message:@”登出成功!”
delegate:self
cancelButtonTitle:@”确定”
otherButtonTitles:nil];
[alertView setTag:kWBAlertViewLogOutTag];
[alertView show];
[alertView release];
}
OK写完收工


