cmake error at cmakelists-qutecom
某个工具从以下位置返回了错误代码: "正在执行生成后事件
直接在 项目属性 ->生成事件 ->生成后事件 ->命令行 中的内容删掉。
//////////////////////
我遭到的 lang.h 和 yahoo_profile.c 编译出错,我的处理措施是把无须要的语言剔除非,省时省力。
对于以下这个问题,有个更好的解决方案。
***我遇到的 lang.h 和 yahoo_profile.c 编译出错,我的处理方式是把不需要的语言删掉了,省时省力。 ****
这个主要是在中文系统下对非UNICODE的支持问题,可以在WINDOWS XP/VISTA/WIN7 下将非UNICODE的支持语言改为 English(United States)
“DD_SOFTPHONE_NAME”: 未声明的标识符e:\qutecom-3.0\qutecom\src\QuteComBuildId.cpp
61: “WengoPhoneBuildId::getSvnRevision”: 函数必须返回值
e:/qutecom-2-2-fbced64fe19d/wengophone/src/WengoPhoneBuildId.h(70) : 参见“WengoPhoneBuildId::getSvnRevision”的声明
解决方法如下:
改成
const char * WengoPhoneBuildId::getSvnRevision() {
return stringize(DD_VERSION);
}
/////////////////////////
boost的源码路径
BOOST_ROOT=D:\Program Files\boost_1_41 重启操作系统... "Its not necessary to add boost to environment because cmake will discover it automatically."
cmake_minimum_required(VERSION 2.8.3)
//////////////////////////////////
error:
 CMake Error at cmake/Macros/CMakeLists.txt:3 (include):
>       include could not find load file:
>
>         /GetMercurialRevision.cmake
>     Call Stack (most recent call first):
>       CMakeLists-QuteCom.txt:10 (include)
>       CMakeLists.txt:3 (include)
>
>
>     CMake Error at cmake/Macros/CMakeLists.txt:4 (include):
>       include could not find load file:
>
>         /GetCurrentDateTime.cmake
>     Call Stack (most recent call first):
>       CMakeLists-QuteCom.txt:10 (include)
>       CMakeLists.txt:3 (include)
>
>
>     CMake Error at cmake/Macros/CMakeLists.txt:6 (include):
>       include could not find load file:
原因: http://pl.digipedia.org/usenet/thread/17138/3323/
This is the problem : this directory should contains a CMakelists.txt see http://hg.qutecom.org/win32-libs/file//CMakeLists.txt Maybe you have download a tar archive from http://hg.qutecom.org/qutecom-3.0 This archive should not contain submodules ( win32-libs is a submobule ) To download complete revision of qutecom-3.3 do : hg clone http://hg.qutecom.org/qutecom-3.0
下载:
http://mercurial.selenic.com/downloads/
hg clone http://hg.qutecom.org/qutecom-3.0
//////////////////////////////////////////////////
1. http://bbs.pediy.com/showthread.php?t=157763
d/ /GZ "_DEBUG" /c
最后多了一个 "_DEBUG"
改成
/nologo /MDd /W3 /Gm /GX /ZI /Od /D "WIN32" /D "_DEBUG" /D "_WINDOWS" /D "_WINDLL" /D "_AFXDLL" /Fp"Debug/HookJmp.pch" /Yu"stdafx.h" /Fo"Debug/" /Fd"Debug/" /FD /GZ /c
就好了
你传的是VC6的工程,我这里用VC6直接可以编译
升级成08的工程,Debug版本出现你说的错误,解决办法,Debug版本的属性,C/C++分支下,最后有个命令行的选项,右边的附加选项/D/md/ "_DEBUG",整个删掉,同时还要把版本改成MFC共享DLL.
Release版本也是直接编译通过,就不说了
2.
http://pl.digipedia.org/usenet/thread/17156/340/
3.
VS2008打开项目源代码中有乱码,且不能通过编译
            const char* str =

                        "<?xml version=\"1.0\" encoding=\"ISO-8859-1\"?>"

                        "<ä>"

                        "CöntäntßäöüÄÖÜ"

                        "</ä>";
这个应该就是要显示的字符,但是显示正常,编译仍然有问题,仍提示 error C2001: 常量中有换行符
我感觉应该是打开时,除了编码不同外,可能行尾设置也有问题。
再试了几次后,解决了编译问题。
使用VS中的高级保存选项将文件保存为 编码:UTF-8,代签名。行尾: Windows (CR LF)
然后编译,出现一些warning,但是可以编译成功了。(编辑器会显示一些乱码)
/////////////////////////////
CMake 教程
介绍:http://baike.baidu.com/view/1126160.htm
本文件不介绍CMake的基本语法,下面是篇不错的入门教程:
http://www.ibm.com/developerworks/cn/linux/l-cn-cmake/
一,首先构建比较简单的工程,来对CMake有个简单的了解
1.构建一个工程的时候,需要做的几件事情(如果下面几件事你知道怎么做了,多大的工程就都不是问题了):
A.源代码在哪里?
B.头文件在哪里?
C.怎么生成静态或者动态库?
D.程序链接的静态库在哪里?
E.如果工程的代码存放在很多地方,那又该怎么找到它们呢?
2.下面从一个最简单的HelloWorld开始,然后一步一步构建一个比较复杂的工程:
A.工程文件如下(只有一个helloworld.cpp源文件):
ciw@ubuntu:~/my_projects/test$ tree .
└── helloworld.cpp
B.这时候,我们要写一个CMakeLists.txt(就3句代码):
PROJECT(hello) #定义整个CMake的工程名
FILE(GLOB SOURCE "./*.cpp") #告诉CMake:工程的源文件在哪里?
ADD_EXECUTABLE(hello ${SOURCE}) #告诉CMake:我们要生成可执行文件(hello),并且源文件是由上面定义的
这样就可以在目录下生成一个hello可执行文件了。
3.下面,我们讲一个带头文件的,而且文件都是存放在不同地方:
A.代码分布如下(main.cpp是main函数,里面调用了hello.h声明的SayHello,定义在hello.cpp中):
ciw@ubuntu:~/my_projects/test$ tree .
├── CMakeLists.txt
├── hello
│ └── hello.cpp
├── include
│ └── hello.h
└── main
└── main.cpp
B.main的代码:
#include "hello.h“
int main()
{
SayHello();
return 0;
}
C.CMakeLists.txt:
1 PROJECT(hello_2)
2
3 FILE(GLOB SOURCE_1 "${CMAKE_SOURCE_DIR}/main/*.cpp") //下面2句告诉CMake,源文件在哪里?main.cpp
4 FILE(GLOB SOURCE_2 "${CMAKE_SOURCE_DIR}/hello/*.cpp")//程序必须链接到hello.cpp里面的SayHello
5
6 INCLUDE_DIRECTORIES("${CMAKE_SOURCE_DIR}/include/")//告诉CMake头文件在哪里?
7
8 ADD_EXECUTABLE(hello_2 ${SOURCE_1} ${SOURCE_2})
4.最后来一个复杂的工程:
A.工程描述:
该工程由一个静态库和一个可执行文件组成,头文件和源文件都不在同一个目录,并且CMake也是独立在一个目录
B.代码分布:
ciw@ubuntu:~/my_projects/test$ tree .
test //工程根目录
├── cmake //CMake目录:代码和CMake编译目录分离
│ ├── bin
│ │ └── main //生成后的可执行文件
│ ├── CMakeLists.txt
│ ├── lib
│ │ └── libhello.a //生成后的静态库
│ └── src
│ ├── CMakeLists.txt
│ ├── hello
│ │ └── CMakeLists.txt
│ └── main
│ └── CMakeLists.txt
├── hello //hello静态库的源代码
│ └── hello.cpp
├── include //头文件
│ └── hello.h
└── main //可执行文件的源代码目录
└── main.cpp
可以看出,CMake里面的每一个子目录都有一个CMakeLists.txt
C.编译该工程的过程:
(a).首先,需要给CMake的一个总入口,这个CMake设置一些全局的变量(cmake/CMakeLists.txt):
PROJECT(hello_3)
SET(PROJECT_ROOT_PATH "${CMAKE_SOURCE_DIR}/../") #工程的根目录,即test
SET(EXECUTABLE_OUTPUT_PATH "${CMAKE_SOURCE_DIR}/bin/") #可执行生成后存放的目录(CMAKE_SOURCE_DIR是cmake目录)
SET(LIBRARY_OUTPUT_PATH "${CMAKE_SOURCE_DIR}/lib/") #静态库生成后存放的目录
INCLUDE_DIRECTORIES("${PROJECT_ROOT_PATH}/include/") #告诉CMake头文件在哪里?
LINK_DIRECTORIES("${CMAKE_SOURCE_DIR}/lib/") #告诉CMake静态库在哪里?
ADD_SUBDIRECTORY(src) #多目录,把src目录加进来,src里面才是真正编译main和hello的
(b).src目录下的CMakeList.txt,这个CMake只是简单地把main目录和hello目录链接起来:
ADD_SUBDIRECTORY(main)
ADD_SUBDIRECTORY(hello)
(c).hello静态库:
FILE(GLOB SOURCE_1 "${PROJECT_ROOT_PATH}/hello/*.cpp") #告诉CMake源文件在哪里?
ADD_LIBRARY(hello STATIC ${SOURCE_1}) #告诉CMake生成的是一个静态库
(d).main可执行文件:
FILE(GLOB SOURCE_1 "${PROJECT_ROOT_PATH}/main/*.cpp") #告诉CMake源文件在哪里?
ADD_EXECUTABLE(main ${SOURCE_1}) #告诉CMake生成一个main可执行文件
TARGET_LINK_LIBRARIES(main hello) #告诉CMake静态库在哪里?
整个编译的过程就是这样了,最主要的是记住上面”构建一个工程的时候,需要做的几件事情:头文件,源文件,静态库这个元素“,那么再复杂的工程都是这样一步一步构建的
////////////////
http://www.cnblogs.com/sinojelly/archive/2010/05/22/1741337.html
通过编写CMakeLists.txt,可以控制生成的Makefile,从而控制编译过程。CMake自动生成的Makefile不仅可以通过make命令构建项目生成目标文件,还支持安装(make install)、测试安装的程序是否能正确执行(make test,或者ctest)、生成当前平台的安装包(make package)、生成源码包(make package_source)、产生Dashboard显示数据并上传等高级功能,只要在CMakeLists.txt中简单配置,就可以完成很多复杂的功能,包括写测试用例。
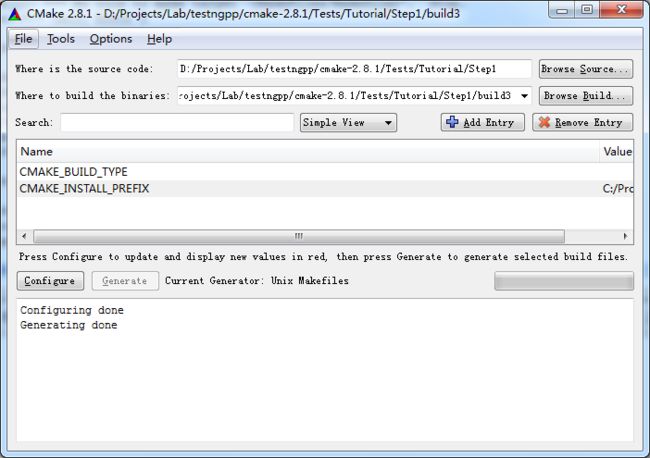
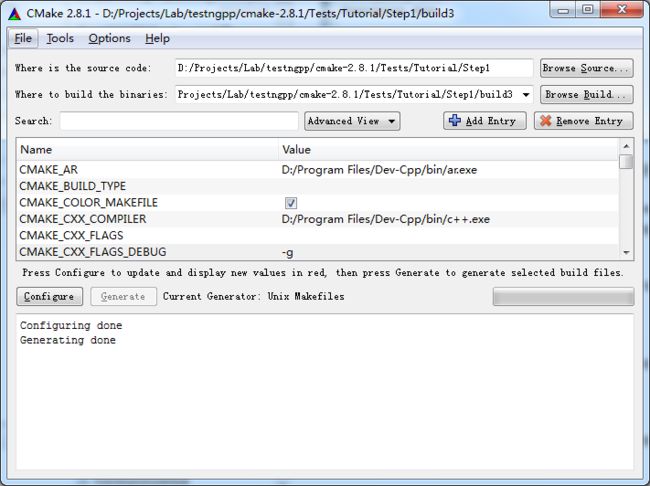
CMake使用步骤:
cmake-2.8.1-win32-x86\bin\cmake-gui.exe
执行Configure:
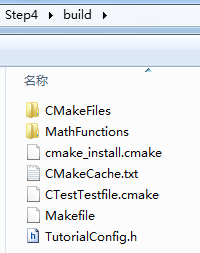
运行之后,生成了如下文件:
生成Makefile:
执行Generate之后生成如下文件:


http://www.cmake.org/cmake/help/cmake_tutorial.html
简单的程序编译。
D:\Projects\Lab\testngpp\cmake-2.8.1\Tests\Tutorial\Step1\build3> make
Linking CXX executable Tutorial.exe
[100%] Built target Tutorial
Tutorial.exe Version 1.0
Usage: Tutorial.exe number
D:\Projects\Lab\testngpp\cmake-2.8.1\Tests\Tutorial\Step1\build3>Tutorial.exe 4
The square root of 4 is 2
2、Step2
把子目录编译为库,并且链接到最终的可执行文件。
add_subdirectory (MathFunctions) # 使得子目录MathFunctions也能被编译
add_executable (Tutorial tutorial.cxx)
target_link_libraries (Tutorial MathFunctions)
产生makefile:
D:\Projects\Lab\testngpp\cmake-2.8.1\Tests\Tutorial\Step2\build>make
[ 50%] Building CXX object MathFunctions/CMakeFiles/MathFunctions.dir/mysqrt.cxx
.obj
Linking CXX static library libMathFunctions.a
[ 50%] Built target MathFunctions
Linking CXX executable Tutorial.exe
[100%] Built target Tutorial
3、Step3
macro (do_test arg result)
add_test (TutorialComp${arg} Tutorial ${arg})
set_tests_properties (TutorialComp${arg}
PROPERTIES PASS_REGULAR_EXPRESSION ${result})
endmacro (do_test)
do_test (25 "25 is 5")
do_test (-25 "-25 is 0")
执行make install:
D:\Projects\Lab\testngpp\cmake-2.8.1\Tests\Tutorial\Step3\build>make install
[ 50%] "Built target MathFunctions"
[100%] "Built target Tutorial"
Install the project...
-- Install configuration: ""
-- Installing: C:/Program Files/Tutorial/bin/Tutorial.exe
-- Installing: C:/Program Files/Tutorial/include/TutorialConfig.h
-- Installing: C:/Program Files/Tutorial/bin/libMathFunctions.a
-- Installing: C:/Program Files/Tutorial/include/MathFunctions.h
安装结果:
C:\Program Files\Tutorial>tree /f
C:.
├─bin
│ libMathFunctions.a
│ Tutorial.exe
│
└─include
MathFunctions.h
TutorialConfig.h
执行make test:
D:\Projects\Lab\testngpp\cmake-2.8.1\Tests\Tutorial\Step3\build>make test
Running tests...
Test project D:/Projects/Lab/testngpp/cmake-2.8.1/Tests/Tutorial/Step3/build
Start 1: TutorialRuns
1/5 Test #1: TutorialRuns ..................... Passed 0.01 sec
Start 2: TutorialComp25
2/5 Test #2: TutorialComp25 ................... Passed 0.01 sec
Start 3: TutorialNegative
3/5 Test #3: TutorialNegative ................. Passed 0.01 sec
Start 4: TutorialSmall
4/5 Test #4: TutorialSmall .................... Passed 0.00 sec
Start 5: TutorialUsage
5/5 Test #5: TutorialUsage .................... Passed 0.00 sec
修改一个测试用例,让它不过:
修改顶层CMakeLists.txt,然后重新Configure和Generate,然后make test即可看到结果。
D:\Projects\Lab\testngpp\cmake-2.8.1\Tests\Tutorial\Step3\build>make test
Running tests...
Test project D:/Projects/Lab/testngpp/cmake-2.8.1/Tests/Tutorial/Step3/build
Start 1: TutorialRuns
1/5 Test #1: TutorialRuns ..................... Passed 0.01 sec
Start 2: TutorialComp25
2/5 Test #2: TutorialComp25 ...................***Failed Required regular expre
ssion not found.Regex=[25 is 3
] 0.01 sec
Start 3: TutorialNegative
3/5 Test #3: TutorialNegative ................. Passed 0.01 sec
Start 4: TutorialSmall
4/5 Test #4: TutorialSmall .................... Passed 0.01 sec
Start 5: TutorialUsage
5/5 Test #5: TutorialUsage .................... Passed 0.01 sec
2 - TutorialComp25 (Failed)
Errors while running CTest
make: *** [test] Error 8
4、Step4
检查方法:
# does this system provide the log and exp functions?
include (CheckFunctionExists.cmake)
check_function_exists (log HAVE_LOG)
check_function_exists (exp HAVE_EXP)
(2)修改.in文件,定义宏。(修改TutorialConfig.h.in,cmake执行中会把宏定义为合适的值,生成TurorialConfig.h,供编译时使用)
// does the platform provide exp and log functions?
#cmakedefine HAVE_LOG
#cmakedefine HAVE_EXP
#if defined (HAVE_LOG) && defined (HAVE_EXP)
result = exp(log(x)*0.5);
#else // otherwise use an iterative approach
5、Step5
D:\Projects\Lab\testngpp\cmake-2.8.1\Tests\Tutorial\Step5\build>make
Scanning dependencies of target MakeTable
[ 25%] Building CXX object MathFunctions/CMakeFiles/MakeTable.dir/MakeTable.cxx.
obj
Linking CXX executable MakeTable.exe
[ 25%] "Built target MakeTable"
[ 50%] Generating Table.h
'.' 不是内部或外部命令,也不是可运行的程序
或批处理文件。
make[2]: *** [MathFunctions/Table.h] Error 1
make[1]: *** [ MathFunctions/CMakeFiles/MathFunctions.dir/all] Error 2
make: *** [all] Error 2
问题分析:
MakeTable: cmake_check_build_system
$(MAKE) -f CMakeFiles/Makefile2 MakeTable
.PHONY : MakeTable
再看Makefile2文件,找到出错时正在编译的目标。
MathFunctions/CMakeFiles/MakeTable.dir/all:
$(MAKE) -f MathFunctions/CMakeFiles/MakeTable.dir/build.make MathFunctions/CMakeFiles/MakeTable.dir/depend
$(MAKE) -f MathFunctions/CMakeFiles/MakeTable.dir/build.make MathFunctions/CMakeFiles/MakeTable.dir/build
$(CMAKE_COMMAND) -E cmake_progress_report D:/Projects/Lab/testngpp/cmake-2.8.1/Tests/Tutorial/Step5/build/CMakeFiles 1
@echo "Built target MakeTable"
.PHONY : MathFunctions/CMakeFiles/MakeTable.dir/all
Make规则的执行顺序是按照命令的先后顺序:
echo "First line."
echo "Second line."
那么make结果:
D:\Users\Desktop>make
echo "First line."
First line.
echo "Second line."
Second line.
6、Step6
D:\Projects\Lab\testngpp\cmake-2.8.1\Tests\Tutorial\Step6\build>make package
[ 50%] "Built target MathFunctions"
[100%] "Built target Tutorial"
Run CPack packaging tool...
CPack Error: Cannot find NSIS registry value. This is usually caused by NSIS not
being installed. Please install NSIS from http://nsis.sourceforge.net
CPack Error: Cannot initialize the generator NSIS
make: *** [package] Error 1
D:\Projects\Lab\testngpp\cmake-2.8.1\Tests\Tutorial\Step6\build>make package
[ 50%] "Built target MathFunctions"
[100%] "Built target Tutorial"
Run CPack packaging tool...
CPack: Create package using NSIS
CPack: Install projects
CPack: - Run preinstall target for: Tutorial
CPack: - Install project: Tutorial
CPack: Compress package
CPack: Finalize package
CPack: Package D:/Projects/Lab/testngpp/cmake-2.8.1/Tests/Tutorial/Step6/build/T
utorial-1.0.1-win32.exe generated.
D:\Projects\Lab\testngpp\cmake-2.8.1\Tests\Tutorial\Step6\build>make package_sou
rce
Run CPack packaging tool for source...
CPack Error: Cannot find a suitable ZIP program
CPack Error: Cannot initialize the generator ZIP
make: *** [package_source] Error 1
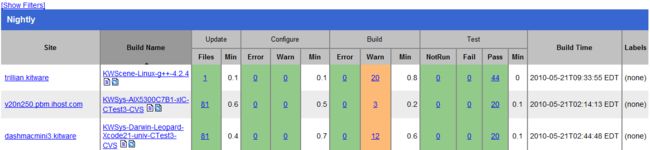
下面网址是一个公开的dashboard:
http://www.cdash.org/CDash/index.php?project=PublicDashboard

ental
Site: JELLY-PC2
Build name: Win32-make
Create new tag: 20100521-1833 - Experimental
Configure project
Each . represents 1024 bytes of output
. Size of output: 0K
Build project
Each symbol represents 1024 bytes of output.
'!' represents an error and '*' a warning.
. Size of output: 0K
0 Compiler errors
0 Compiler warnings
Test project D:/Projects/Lab/testngpp/cmake-2.8.1/Tests/Tutorial/Step7/build
Start 1: TutorialRuns
1/9 Test #1: TutorialRuns ..................... Passed 0.01 sec
Start 2: TutorialUsage
2/9 Test #2: TutorialUsage .................... Passed 0.01 sec
Start 3: TutorialComp4
3/9 Test #3: TutorialComp4 .................... Passed 0.01 sec
Start 4: TutorialComp9
4/9 Test #4: TutorialComp9 .................... Passed 0.01 sec
Start 5: TutorialComp5
5/9 Test #5: TutorialComp5 .................... Passed 0.01 sec
Start 6: TutorialComp7
6/9 Test #6: TutorialComp7 .................... Passed 0.01 sec
Start 7: TutorialComp25
7/9 Test #7: TutorialComp25 ................... Passed 0.01 sec
Start 8: TutorialComp-25
8/9 Test #8: TutorialComp-25 .................. Passed 0.01 sec
Start 9: TutorialComp0.0001
9/9 Test #9: TutorialComp0.0001 ............... Passed 0.01 sec
Performing coverage
Cannot find any coverage files. Ignoring Coverage request.
Submit files (using http)
Using HTTP submit method
Drop site:http://
Error when uploading file: D:/Projects/Lab/testngpp/cmake-2.8.1/Tests/Tutoria
l/Step7/build/Testing/20100521-1833/Build.xml
Error message was: couldn't connect to host
Problems when submitting via HTTP
Errors while running CTest