window phone7.1 天气预报教程(一)序言及UserControl的使用
自己开始学习window phone7也有一段时间了,看了很多的资源和别人的代码,自己也写了一些小程序,在这里也算是做一个备份和总结吧.今天就来做一个天气预报的小程序吧.这个是程序是我一直用案桌系统的 墨迹天气 感觉很好,就想着做一个.可是天气的信息实在是找不到人家哪么全,所以就做了一个简版的.fengyu1989的blog给了我很大的帮助 http://www.cnblogs.com/fengyun1989/archive/2012/04/30/2476948.html 有兴趣的朋友可以去看一下.
好,现在我们就开始来做我们的这个天气预报,天气预报的功能如下:
1,可以显示城市的当天天气
2,可以选择城市,并保存此城市的信息
3,可以显示城市一周内的天气
4,可以随时更新最新的天气情况
5,可以保存住天气信息(就是下次我开机的时候或是断网的时候,上次获取的天气信息还在)
6,可以根据天气情况变化背景图
比较简单,不是很麻烦,这其中所要应用到的技术有UserControl,WebClient请求,Json数据解析,XML数据解析,IsolatedStorage存储
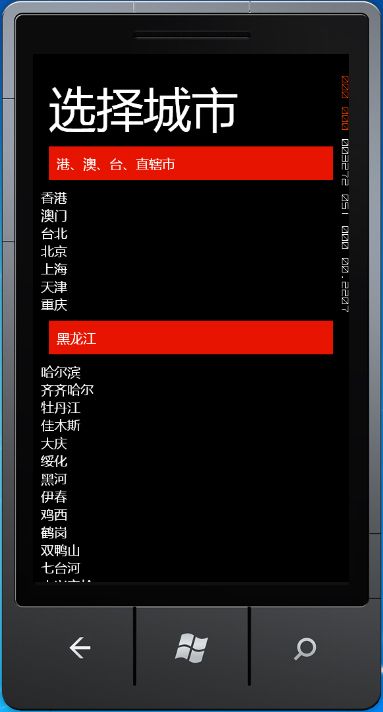
这些技术我们会在这个教程中一点一点的应用到啊.我们先看一下效果吧.自己的审美很差,各位就不要太介意了.
一个是显示页面,一个选择城市的页面.
好了,我们先从第一步开始做起.就是UserControl的使用
如果大家用过C#或是asp.net哪么这个UserControl就是简单的不用多说了.它的作用就是把一个多次使用的控件组,组合成一个.然后在页面中进行调用使用.我们这个程序什么地方要用它呢.大家看天气显示的页面,处了显示当天的天气外,在右边还要显示以后四天的天气,这个地方就是用Usertrol来完成的.
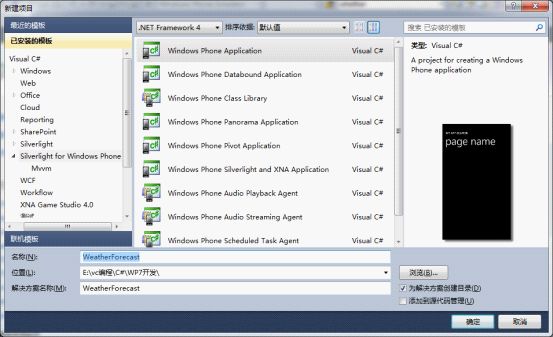
我们先新建立一个window phone项目叫weatherForecast
选择OS7.1
好了,我们的项目建立完了.现在开始新建一个UserControl
好了,建立好文件之后,我们就可以对其进行布局和编写后台代码了.
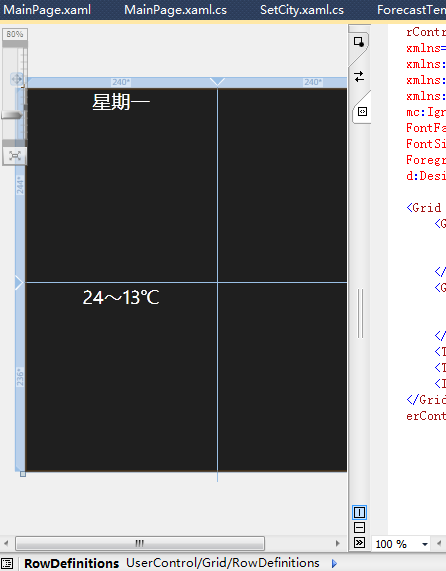
前台布局比较简单
代码:
<UserControl x:Class="WeatherForecast.ForecastTemplate"
    xmlns="http://schemas.microsoft.com/winfx/2006/xaml/presentation"
    xmlns:x="http://schemas.microsoft.com/winfx/2006/xaml"
    xmlns:d="http://schemas.microsoft.com/expression/blend/2008"
    xmlns:mc="http://schemas.openxmlformats.org/markup-compatibility/2006"
    mc:Ignorable="d"
    FontFamily="{StaticResource PhoneFontFamilyNormal}"
    FontSize="{StaticResource PhoneFontSizeNormal}"
    Foreground="{StaticResource PhoneForegroundBrush}"
    d:DesignHeight="480" d:DesignWidth="480">

    <Grid x:Name="LayoutRoot">
        <Grid.RowDefinitions>
            <RowDefinition Height="244*" />
            <RowDefinition Height="236*" />
        </Grid.RowDefinitions>
        <Grid.ColumnDefinitions>
            <ColumnDefinition Width="240*" />
            <ColumnDefinition Width="240*" />
        </Grid.ColumnDefinitions>
        <TextBlock Grid.Column="0" Grid.Row="0" x:Name="weekday" HorizontalAlignment="Center" VerticalAlignment="Top" Text="星期一" FontSize="24" />
        <TextBlock Grid.Column="0" Grid.Row="1" x:Name="temp" HorizontalAlignment="Center" VerticalAlignment="Top" Text="24~13℃" FontSize="24" />
        <Image x:Name="WImg" Grid.Column="1" Grid.Row="0" Grid.RowSpan="2" VerticalAlignment="Center" HorizontalAlignment="Left" />
    </Grid>
</UserControl>
它里的显示星期,天气图片与温度的信息,都是要从外部传进来的,所以后台代码如下:相当简单
using System;
using System.Collections.Generic;
using System.Linq;
using System.Net;
using System.Windows;
using System.Windows.Controls;
using System.Windows.Documents;
using System.Windows.Input;
using System.Windows.Media;
using System.Windows.Media.Animation;
using System.Windows.Shapes;
using System.Windows.Media.Imaging;

namespace WeatherForecast
{
    public partial class ForecastTemplate : UserControl
    {
        public ForecastTemplate()
        {
            InitializeComponent();
        }

        private string _imageUrl;

        public string imageUrl
        {
            get
            {
                return _imageUrl;
            }
            set
            {
                _imageUrl = value;
                BitmapImage bmp = new BitmapImage(new Uri(value, UriKind.Relative));
                WImg.Source = bmp;
            }
        }

        private string _weekday;

        public string Weekday
        {
            get
            {
                return _weekday;
            }
            set
            {
                _weekday = value;
                this.weekday.Text = value;
            }
        }

        private string _temp;

        public string Temp
        {
            get
            {
                return _temp;
            }
            set
            {
                _temp = value;
                this.temp.Text = value;
            }
        }
    }
}
这里要注意的是
BitmapImage bmp = new BitmapImage(new Uri(value, UriKind.Relative));
它是图片的路径,在使用BitmapImage之前要引用
using System.Windows.Media.Imaging;才行
这样我们的UserControl就做好.前台怎么调用呢.很简单
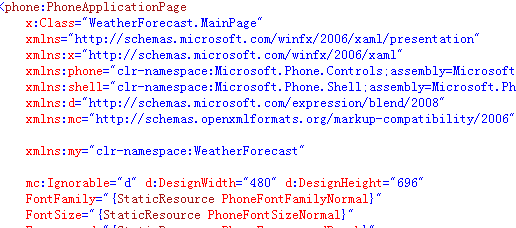
在MainPage.xaml页面上引用一下
xmlns:my="clr-namespace:WeatherForecast"
然后在你想使用这个控件地方
<my:ForecastTemplate x:Name="day1" Grid.Column="1" Grid.Row="1" Height="100" Width="230" Weekday="" Temp="" imageUrl="" MouseEnter="day1_MouseEnter"></my:ForecastTemplate>
大家加一下试一下吧,给你的UserControl中的weekday, temp, imageUrl赋个值,看一下效果
下回我们将介绍如何通过WebClient请求来取得天气情况来显示出来


