Eclipse Debug PHP (关于ZendDebugger)的使用
Apache 版本: 2.2
PHP 版本:5.2.11
Eclipse下载地址:http://downloads.zend.com/pdt/all-in-one/zend-eclipse-php-galileo-SR1-win32-x86.zip
解压后运行Eclipse.exe
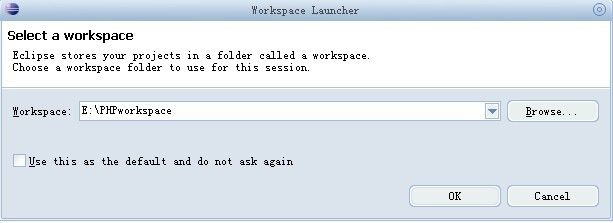
选择工作空间
我选择了E:/PHPworkspace
这时要插入一步
打开Apache的配置文件httpd.conf
查找”DocumentRoot“
修改documentroot的值
DocumentRoot "E:/PHPworkspace"
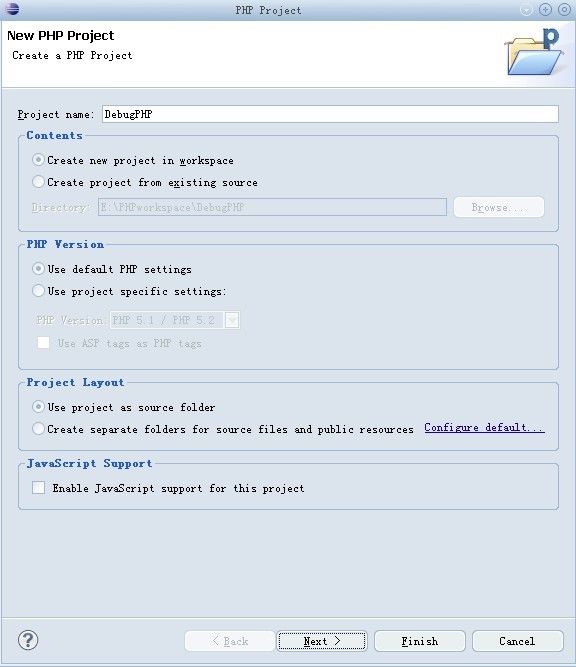
建立PHP项目
命名为"DebugPHP"
创建一个PHP文件:“debug.php”
写入代码如下:
<HTML> <BODY> <H1>Debug Demo</H1> <table border="1" width="700"> <tr bgcolor="red"> <th>Name</th> <th>Address</th> <th>Phone</th> </tr> <?php $db = array( array ("John", "E 10th St., NYC, NY 23742", "(212) 555-4456"), array ("Francois", "12 Bd. de Grenelle, Paris, 74897","(33) 433-544"), array ("Klaus", "312 Beethoven St., Frankfurt, Germany", "(44) 332-8065"), array ("Shirly", "72 Independence St., Tel Aviv, Israel 67283", "(972) 156-7777"), array ("Bill", "127 Maine St., San Francisco, CA 90298", "(415) 555-6565") ); /** @return string @param i int @desc Returns 'white' for even numbers and 'yellow' for odd numbers */ function row_color($i) { $bgcolor1 = "white"; $bgcolor2 = "yellow"; if ( ($i % 2) == 0 ) { return $bgcolor1; } else { return $bgcolor2; } } /** @return void @desc Displays a table of the workers */ function display_workers() { global $db; for ($i=0, $n=count($db); $i<$n; $i++) { $worker_data = $db[$i]; $worker_name = $worker_data[0]; $worker_address = $worker_data[1]; $worker_phone = $worker_data[2]; print "<tr bgcolor=/"".row_color($i)."/">/n"; print "<td>$worker_name</td>/n"; print "<td>$worker_address</td>/n"; print "<td>$worker_phone</td>/n"; print "</tr>/n"; } } display_workers(); echo $undefined_variable; ?> </table> </BODY> </HTML>
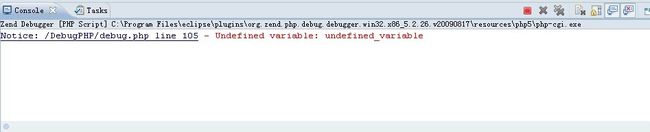
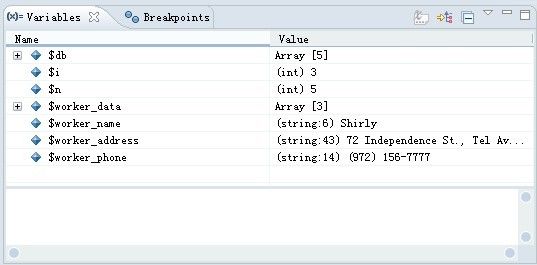
在第103行处加入断点
查看这个Eclipse版本所带的Debugger插件
Window--preferences--php-php executables
默认的是第一个,不用管
这一步只是让大家看一下
可以跳过
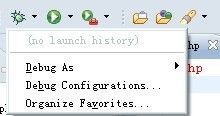
准备运行的部署
点击debug按钮的向下小箭头
选择“Debug Configuration...”
在弹出的对话框中进行如下设置

1.双击“PHP Script”会创建一项新的PHP Script “New_configuration”
2.修改name属性 “Zend Debugger”
PHP Debugger: Zend Debugger
PHP Executable: 默认就行,也可以自己选择,这里默认设置
PHP File: 点击"Browse" 选择 "debug.php"
勾选”Breat at First Line“选项
以上设置完毕
点击”Debug“按钮
就会弹出很期待的视图跳转对话框

对于如何调试程序就不详解了

向下运行
可以看到相应的视图有相应的值出现


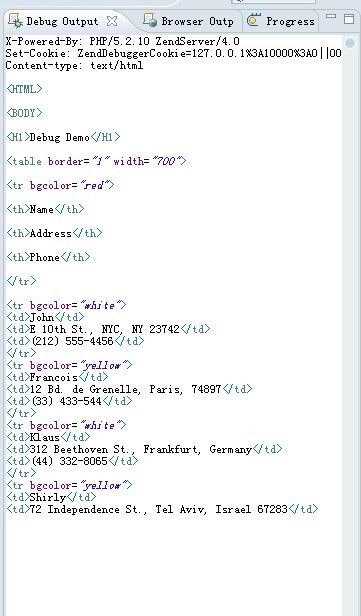
运行到最后可以看到