【Bing Map学习系列】(5)——如何使用图钉层和地图层
前面的章节,我们也都提及到了图钉(pushpin),那么如果我们需要在Bing Maps中加入一个小图钉标记,该如何实现了?
本文感谢原创:http://www.cnblogs.com/beniao/archive/2009/12/01/1614191.html
一、添加图钉层(Pushpin Layer)
Bing Maps控件已经为我们提供了这个功能,在Microsoft.Maps.MapControl名称空间下提供了实现图钉应用的图钉层Pushpin类,比如我们可以通过如下的方式来定位一个图订层在地图上的位置,在MainPage.xaml.cs文件添加以下代码:
double longitude = double.Parse("47.620574"); double latitude = double.Parse("-122.34942"); Pushpin pushpin = new Pushpin(); pushpin.Location = new Location(latitude, longitude);
从上面可以看书,实现定位Location类。那如何将其加入在地图上呢?其实步骤很简单的,Bing Maps地图控件直接提供了图钉层,通过内嵌的方式既可加入图订层,默认使用Bing Maps提供的图形标记。
<m:Map CredentialsProvider="AmreePcQ50WyjCYvxNo0xUQDwiYVM8VFVTxmcW_1RmOb2x_7T1muW-fSTQQkOok1" x:Name="map" Center="33.845881352,105.165628188471" ZoomLevel="6.0"> <m:Pushpin Location=="33.845881352,105.165628188471"></m:Pushpin> </m:Map>
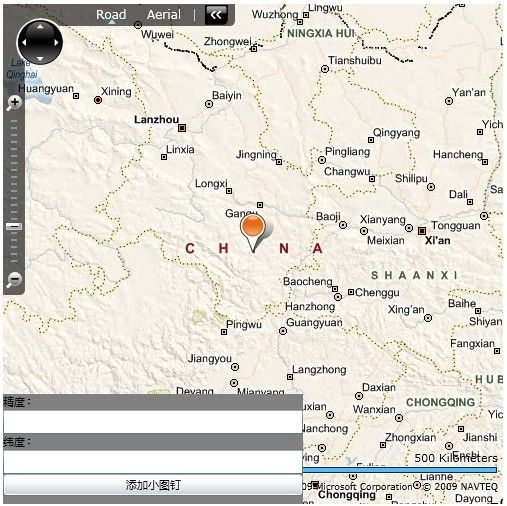
只要按照上面的两个步骤,就直接定位于33.845881352,105.165628188471这个坐标之上。效果图如下所示,该位置为China所在地。
二、添加地图层(Map Layer)
通过上述我们成功的添加上了一个小图钉层在地图上,除了添加图钉外,我们还可以自定义添加图形、图片、视频等在地图上,要实现添加图形、图片或视频等数据到地图上,需要使用Bing Maps为我们提供的地图图层(MapLayer)来实现,如下:
<m:Map CredentialsProvider="AmreePcQ50WyjCYvxNo0xUQDwiYVM8VFVTxmcW_1RmOb2x_7T1muW-fSTQQkOok1" x:Name="map" Center="33.845881352,105.165628188471" ZoomLevel="6.0"> <m:Pushpin Location="33.845881352,105.165628188471" x:Name="mayPushpin"></m:Pushpin> <m:MapLayer x:Name="myMapLayer"></m:MapLayer> </m:Map>
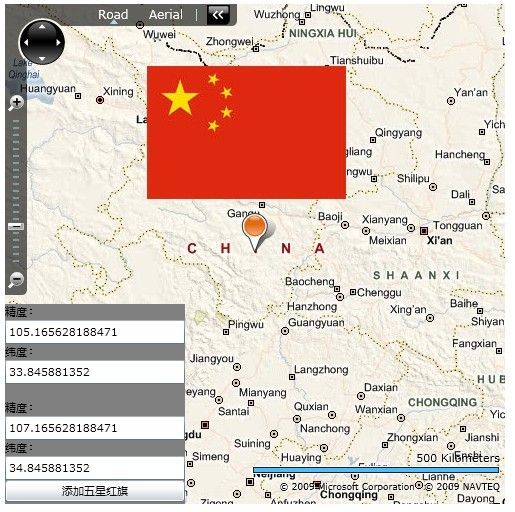
如上在地图中加入了一空白地图图层,接下来就可以使用程序动态在地图图层上添加自己想加的东西了,比如上面我们已经定位到了中国地图区域,接下来我们将中国国旗插上地图可以吗?答案是肯定的,如何做?
private void btnAddPushpin_Click(object sender, RoutedEventArgs e) { double longitude = double.Parse(this.tbLongitude2.Text.Trim()); double latitude = double.Parse(this.tbLatitude2.Text.Trim()); Location location = new Location(latitude, longitude); Image image = new Image(); image.Source = new BitmapImage(new Uri("http://localhost:2986/Images/China.jpg", UriKind.RelativeOrAbsolute)); image.Stretch = Stretch.None; image.ImageFailed += delegate(object senders, ExceptionRoutedEventArgs ex) { }; PositionOrigin position = new PositionOrigin(1.0, 1.0); this.myMapLayer.AddChild(image, location, position); }
同样通过Location进行坐标的精度和纬度定位,通过将制定的图片序列为Image对象作为一个可显示的对象添加到地图图层就OK了。效果如下:

至此,我们就成功的在地图上插上了中国国旗!Silverlight完整代码如下:
<UserControl x:Class="PushpinLayer.MainPage" xmlns="http://schemas.microsoft.com/winfx/2006/xaml/presentation" xmlns:x="http://schemas.microsoft.com/winfx/2006/xaml" xmlns:m="clr-namespace:Microsoft.Maps.MapControl;assembly=Microsoft.Maps.MapControl" xmlns:d="http://schemas.microsoft.com/expression/blend/2008" xmlns:mc="http://schemas.openxmlformats.org/markup-compatibility/2006" mc:Ignorable="d" d:DesignWidth="500" d:DesignHeight="500"> <Grid x:Name="LayoutRoot" Width="500" Height="500"> <m:Map CredentialsProvider="AmreePcQ50WyjCYvxNo0xUQDwiYVM8VFVTxmcW_1RmOb2x_7T1muW-fSTQQkOok1" x:Name="map" Center="33.845881352,105.165628188471" ZoomLevel="6.0"> <m:Pushpin Location="33.845881352,105.165628188471" x:Name="mayPushpin"></m:Pushpin> <m:MapLayer x:Name="myMapLayer"></m:MapLayer> </m:Map> <StackPanel HorizontalAlignment="Left" VerticalAlignment="Bottom" Width="180" Height="200" Background="Gray"> <TextBlock Text="精度:"></TextBlock> <TextBox x:Name="tbLongitude"></TextBox> <TextBlock Text="纬度:"></TextBlock> <TextBox x:Name="tbLatitude"></TextBox> <TextBlock Text=" "></TextBlock> <TextBlock Text="精度:"></TextBlock> <TextBox x:Name="tbLongitude2"></TextBox> <TextBlock Text="纬度:"></TextBlock> <TextBox x:Name="tbLatitude2"></TextBox> <Button x:Name="btnAddPushpin" Click="btnAddPushpin_Click" Content="添加五星红旗"></Button> </StackPanel> </Grid> </UserControl>
