vs2013在图像处理中的应用(5):3D显示
快乐虾
http://blog.csdn.net/lights_joy/(QQ群:Visual EmbedLinux Tools 375515651)
欢迎转载,但请保留作者信息
很久没有摸图像处理的东西了,近期刚好需要有此需求,希望能够有一个比较好用的开发环境。在学校的时候做图像处理一直用的是matlab,不过现在正好在做VELT的开发,尝试用vs2013+python构造一个适合于自己用的开发环境。
VTK主要用于三维计算机图形学、图像处理和可视化。
1. 安装vtk
VTK不能通过pip直接安装,但可以在网上找到一个安装包:
VTK-6.1.0-cp27-none-win32.whl
在windows命令行下安装:
C:\Python27\Scripts>pip install ..\VTK-6.1.0-cp27-none-win32.whl
Processing c:\python27\vtk-6.1.0-cp27-none-win32.whl
Installing collected packages: VTK
Successfully installed VTK-6.1.0
然后让PTVS更新一下IntelliSense。
2. 测试vtk
直接运行一遍VTK提供的示例:
#!/usr/bin/env python

# This simple example shows how to do basic rendering and pipeline
# creation.

import vtk
# The colors module defines various useful colors.
from vtk.util.colors import tomato

# This creates a polygonal cylinder model with eight circumferential
# facets.
cylinder = vtk.vtkCylinderSource()
cylinder.SetResolution(8)

# The mapper is responsible for pushing the geometry into the graphics
# library. It may also do color mapping, if scalars or other
# attributes are defined.
cylinderMapper = vtk.vtkPolyDataMapper()
cylinderMapper.SetInputConnection(cylinder.GetOutputPort())

# The actor is a grouping mechanism: besides the geometry (mapper), it
# also has a property, transformation matrix, and/or texture map.
# Here we set its color and rotate it -22.5 degrees.
cylinderActor = vtk.vtkActor()
cylinderActor.SetMapper(cylinderMapper)
cylinderActor.GetProperty().SetColor(tomato)
cylinderActor.RotateX(30.0)
cylinderActor.RotateY(-45.0)

# Create the graphics structure. The renderer renders into the render
# window. The render window interactor captures mouse events and will
# perform appropriate camera or actor manipulation depending on the
# nature of the events.
ren = vtk.vtkRenderer()
renWin = vtk.vtkRenderWindow()
renWin.AddRenderer(ren)
iren = vtk.vtkRenderWindowInteractor()
iren.SetRenderWindow(renWin)

# Add the actors to the renderer, set the background and size
ren.AddActor(cylinderActor)
ren.SetBackground(0.1, 0.2, 0.4)
renWin.SetSize(200, 200)

# This allows the interactor to initalize itself. It has to be
# called before an event loop.
iren.Initialize()

# We'll zoom in a little by accessing the camera and invoking a "Zoom"
# method on it.
ren.ResetCamera()
ren.GetActiveCamera().Zoom(1.5)
renWin.Render()

# Start the event loop.
iren.Start()
显示了一个圆柱体:
搞定。
3. 关于TVTK
enthought.com开发了一套TVTK库对标准的VTK库进行包装,提供了Python风格的API、支持Trait属性和numpy的多维数组。
不过目前enthought似乎已经将TVTK变成了一个庞大的库,且大部分的内容并不是我们所需要的,因而放弃使用它。
4. 安装Mayavi
Mayavi2完全用Python编写,因此它不但是一个方便实用的可视化软件,而且可以方便地用Python编写扩展,嵌入到用户编写的Python程序中,或者直接使用其面向脚本的API:mlab快速绘制三维图。
mayavi直接用pip安装就可以了:
----- Installing 'mayavi' -----
Collecting mayavi
  Downloading mayavi-4.4.1.tar.gz (8.0MB)
Collecting apptools (from mayavi)
  Downloading apptools-4.3.0.tar.gz (291kB)
Requirement already up-to-date: traits in c:\python27\lib\site-packages (from mayavi)
Requirement already up-to-date: traitsui in c:\python27\lib\site-packages (from mayavi)
Collecting configobj (from apptools->mayavi)
  Downloading configobj-5.0.6.tar.gz
Requirement already up-to-date: pyface in c:\python27\lib\site-packages (from traitsui->mayavi)
Requirement already up-to-date: six in c:\python27\lib\site-packages (from configobj->apptools->mayavi)
Installing collected packages: configobj, apptools, mayavi
  Running setup.py install for configobj
  Running setup.py install for apptools
  Running setup.py install for mayavi
Successfully installed apptools-4.3.0 configobj-5.0.6 mayavi-4.4.1
----- Successfully installed 'mayavi' -----
再让PTVS更新一下IntelliSense就可以了。
5. 测试Mayavi
用一段简单的脚本测试一下:
import numpy as np
from mayavi import mlab

x, y = np.ogrid[-2:2:20j, -2:2:20j]
z = x * np.exp( - x**2 - y**2)

pl = mlab.surf(x, y, z, warp_scale="auto")
mlab.axes(xlabel='x', ylabel='y', zlabel='z')
mlab.outline(pl)
mlab.show()
显示了一个很漂亮的曲面:
6. 安装vpython
vpython是Python的一个简单易用的3D图形库,使用它可以快速创建3D场景、动画。和TVTK相比它更加适合于创建交互式的3D场景,而TVTK则更加适合于数据的3D图形化显示。
vpython无法直接从pip安装,只能到
http://vpython.org/contents/download_windows.html
下载安装包。
7. 测试vpython
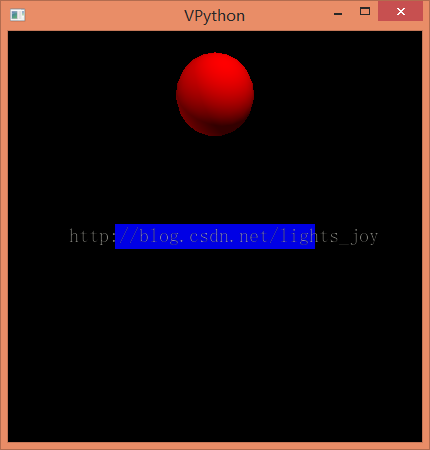
写个简单的代码测试一下:
from visual import *

floor = box (pos=(0,0,0), length=4, height=0.5, width=4, color=color.blue)
ball = sphere (pos=(0,4,0), radius=1, color=color.red)
ball.velocity = vector(0,-1,0)
dt = 0.01

while 1:
    rate (100)
    ball.pos = ball.pos + ball.velocity*dt
    if ball.y < ball.radius:
        ball.velocity.y = abs(ball.velocity.y)
    else:
        ball.velocity.y = ball.velocity.y - 9.8*dt
结果就是这样的:
