linux下android开发环境的配置
下文不全,请转此处:http://www.cnblogs.com/macobolo/archive/2009/03/17/1414238.html
1.下载android sdk
下载地址如下:
http://dl.google.com/android/android-sdk-windows-1.5_r2.zip
http://dl.google.com/android/android-sdk-linux_x86-1.5_r2.zip
2. 下载eclipse 3.4.2
按官方文档说,android sdk 可以运行在eclipse 3.3以上的IDE中,ubuntu源中的eclipse版本过低,建议使用eclipse 3.4.2,其下载地址为:
http://download.actuatechina.com/eclipse/eclipse/downloads/drops/R-3.4.2-200902111700/eclipse-SDK-3.4.2-linux-gtk.tar.gz
3. 安装eclipse 3.4.2
先将eclipse解压:
$tar xzvf eclipse-SDK-3.4.2-linux-gtk.tar.gz
将解压出的eclipse文件夹移动到目标目录中去,在 这里我设定的安装目标为:/usr/local下。
$sudo mv eclipse /usr/local/
( Java libjvm.so and SELinux error:
/opt/jre1.6.0_03/bin/../lib/i386/client/libjvm.so: cannot restore segment prot after reloc: Permission denied
解决方法:chcon -t textrel_shlib_t /opt/jre1.6.0_03/lib/i386/client/libjvm.so
)
4.安装android sdk
解压android sdk包:
$unzip android-sdk-linux_x86-1.5_r2.zip
移动到目标目 录:<在这里我将解压出的sdk文件夹目录改成了android-sdk>
$mv android-sdk-linux_x86-1.5_r2 android-sdk
$sudo mv android-sdk /usr/local/
5.配置环境变量:
修改~/.bashrc文件,加入android sdk与eclipse的环境变量。
$vi ~/.bashrc
在文件的最 后加入
export PATH=/usr/local/android-sdk/tools:/usr/local/eclipse:$PATH
保存并 退出vi
使配置信息生效
$source ~/.bashrc
6.android avd配置信息的生成
android avd的创建格式为:android create avd -n your-avd-name -t your-targets
其中:-n的参数为我们要创建的avd的名字;-t的参数为Available Android targets的id,我们可以使用命令:android list查寻其具体信息。
$android list
Available Android targets:
id: 1
Name: Android 1.1
Type: Platform
API level: 2
Skins: HVGA-P, HVGA (default), QVGA-P, HVGA-L, QVGA-L
id: 2
Name: Android 1.5
Type: Platform
API level: 3
Skins: HVGA-P, HVGA (default), QVGA-P, HVGA-L, QVGA-L
id: 3
Name: Google APIs
Type: Add-On
Vendor: Google Inc.
Description: Android + Google APIs
Based on Android 1.5 (API level 3)
Libraries:
* com.google.android.maps (maps.jar)
API for Google Maps
Skins: QVGA-P, HVGA-L, HVGA (default), QVGA-L, HVGA-P
Available Android Virtual Devices:
下面我们就以创建一个android 1.5的avd为例:
$android create avd -n android-sdk-15 -t 2
Android 1.5 is a basic Android platform.
Do you wish to create a custom hardware profile [no]yes
Device ram size: The amount of physical RAM on the device, in megabytes.
hw.ramSize [96]:128
Touch-screen support: Whether there is a touch screen or not on the device.
hw.touchScreen [yes]:yes
Track-ball support: Whether there is a trackball on the device.
hw.trackBall [yes]:yes
Keyboard support: Whether the device has a QWERTY keyboard.
hw.keyboard [yes]:yes
DPad support: Whether the device has DPad keys
hw.dPad [yes]:yes
GSM modem support: Whether there is a GSM modem in the device.
hw.gsmModem [yes]:yes
Camera support: Whether the device has a camera.
hw.camera [no]:
Camera support: Whether the device has a camera.
hw.camera [no]:yes
Maximum horizontal camera pixels
hw.camera.maxHorizontalPixels [640]:854
Maximum vertical camera pixels
hw.camera.maxVerticalPixels [480]:480
GPS support: Whether there is a GPS in the device.
hw.gps [yes]:yes
Battery support: Whether the device can run on a battery.
hw.battery [yes]:yes
Accelerometer: Whether there is an accelerometer in the device.
hw.accelerometer [yes]:yes
Audio recording support: Whether the device can record audio
hw.audioInput [yes]:yes
Audio playback support: Whether the device can play audio
hw.audioOutput [yes]:yes
SD Card support: Whether the device supports insertion/removal of virtual SD Cards.
hw.sdCard [yes]:yes
Cache partition support: Whether we use a /cache partition on the device.
disk.cachePartition [yes]:yes
Cache partition size
disk.cachePartition.size [66MB]:100MB
Created AVD ''android-sdk-15'' based on Android 1.5
这样我们就创建了一个基于1.5的avd,上面的具体意思我想大家都能看懂,就不多说了。下在我们就可以测试一下android emulator了:
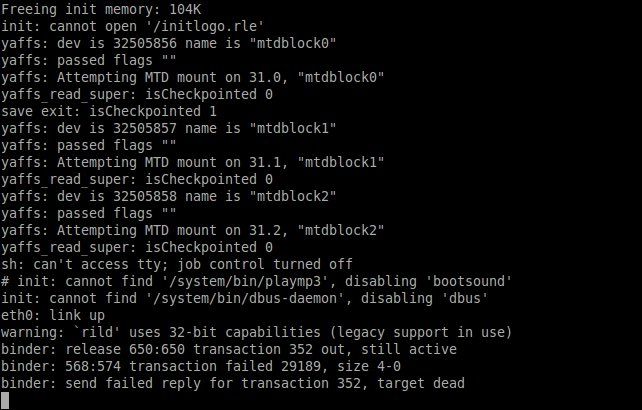
$emulator @android-sdk-15 -show-kernel
这样就可以启动android emulator了:
加入参数-show-kernel是为了在终端上打印android kernel的信息。
下面我们配置eclipse,使之支持android sdk:
打开Eclipse,Help->Software Updates->Available Software,点击
Add site,输入
http://dl-ssl.google.com/android/eclipse/
然后安装。完成后就可以开始在eclipse上建立android应用程序了。
++++++++++++++++++++++++++++++++++++++++++++++++++++++++++++++++++++++++++++++
全部流程以 Fedora 11 X86 版本为例。
1.下载Android SDK
首先,前往从以下网站获取 Android Linux 平台的 SDK 套件,目前只有 i386 架构的。
http://developer.android.com/sdk/
撰写本文时最新版本为 1.5 Release 2,下载完成会得到一个 zip 格式的压缩档案。
2. 解压缩并配置相关环境变量
将获得的 zip 解压到所喜好的位置即可,无须安装。
接下来需要将 SDK 目录中的 tools 添加到 PATH 路径中,方便调用。编辑 $HOME/.bash_profile 文件,在 PATH 一行末尾添加 SDK 中 tools 文件路径即可,用冒号分割。
推荐为其 Android SDK 目录创建一个不包括版本号的符号链接,这样日后 SDK 升级时就无须调整 PATH 路径了。
3. 安装 Eclipse 集成开发环境
Android 推荐的 IDE 为 Eclipse,使用下面的命令安装它:
.su -c 'yum install eclipse-jdt java-1.6.0-openjdk-devel'
即可获得 Fedora Eclipse 3.4.2 版本。
4.配置 Android Development Tools
首先要添加 Eclipse 的官方升级仓库,满足 Android Development Tools 所需要的 eclipse-wdt 。
在 Eclipse -> Help -> Software Updates -> Available Software -> Manage Sites 中勾选 Ganymede Update Site,点击 Close 返回 Available Software。
在 Available Software 点击 Add sites,输入
https://dl-ssl.google.com/android/eclipse/
然后勾选新出现的 Android DDMS 和 Android Development Tools 即可。
此刻 Android SDK 配置完成,可以开始 Android 平台应用软件的开发啦!
+++++++++++++++++++++++++++++++++++++++


