II. Positioning---Chapter 4----Aspect of the World
Aspect of the World
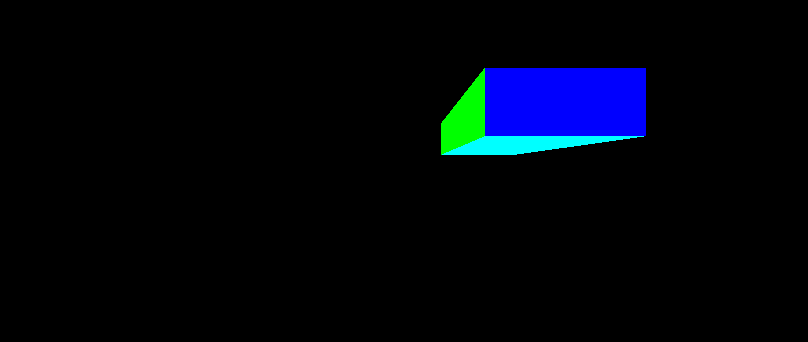
If you run the last program, and resize the window, the viewport resizes with it. Unfortunately, this also means that what was once a rectangular prism with a square front becomes elongated.
This is a problem of aspect ratio, the ratio of an image's width to its height. Currently, when you change the window's dimensions, the code calls glViewport to tell OpenGL the new size. This changes OpenGL's viewport transform, which goes from normalized device coordinates to window coordinates. NDC space has a 1:1 aspect ratio; the width and height of NDC space is 2x2. As long as window coordinates also has a 1:1 width to height ratio, objects that appear square in NDC space will still be square in window space. Once window space became non-1:1, it caused the transformation to also become not a square.
What exactly can be done about this? Well, that depends on what you intend to accomplish by making the window bigger.
One simple way to do this is to prevent the viewport from ever becoming non-square. This can be done easily enough by changing thereshape function to be this:
Example 4.6. Square-only Viewport
void reshape (int w, int h)
{
    if(w < h)
        glViewport(0, 0, (GLsizei) w, (GLsizei) w);
    else
        glViewport(0, 0, (GLsizei) h, (GLsizei) h);
}
Now if you resize the window, the viewport will always remain a square. However, if the window is non-square, there will be a lot of empty space either to the right or below the viewport area. This space cannot be rendered into with triangle drawing commands (for reasons that we will see in the next tutorial).
This solution has the virtue of keeping the viewable region of the world fixed, regardless of the shape of the viewport. It has the disadvantage of wasting window space.
What do we do if we want to use as much of the window as possible? There is a way to do this.
Go back to the definition of the problem. NDC space is a [-1, 1] cube. If an object in NDC space is a square, in order for it to be a square in window coordinates, the viewport must also be a square. Conversely, if you want non-square window coordinates, the object in NDC spacemust not be a square.
So our problem is with the implicit assumption that squares in camera space need to remain squares throughout. This is not the case. To do what we want, we need to transform things into clip space such that they are the correct non-square shape that, once the perspective divide and viewport transform converts them into window coordinates, they are again square.
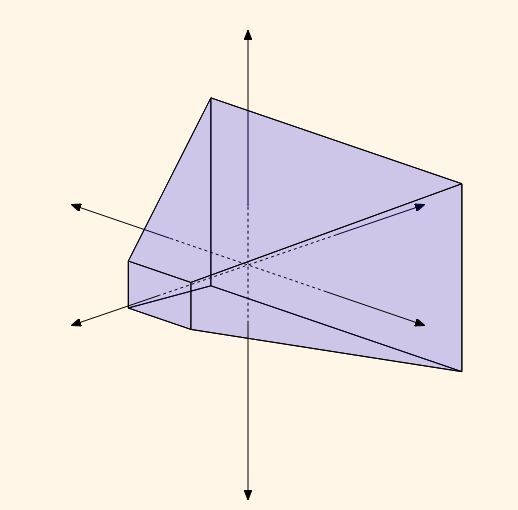
Currently, our perspective matrix defines a square-shaped frustum. That is, the top and bottom of the frustum (if it were visualized in camera space) would be squares. What we need to do instead is create a rectangular frustum.
We already have some control over the shape of the frustum. We said originally that we did not need to move the eye position from the origin because we could simply scale the X and Y positions of everything to achieve a similar effect. When we do this, we scale the X and Y by the same value; this produces a uniform scale. It also produces a square frustum, as seen in camera space. Since we want a rectangular frustum, we need to use a non-uniform scale, where the X and Y positions are scaled by different values.
What this will do is show more of the world. But in what direction do we want to show more? Human vision tends to be more horizontal than vertical. This is why movies tend to use a minimum of 16:9 width:height aspect ratio (most use more width than that). So it is usually the case that you design a view for a particular height, then adjust the width based on the aspect ratio.
This is done in the AspectRatio tutorial. This code uses the same shaders as before; it simply modifies the perspective matrix in the reshapefunction.
Example 4.7. Reshape with Aspect Ratio
void reshape (int w, int h)
{
    perspectiveMatrix[0] = fFrustumScale / (w / (float)h);
    perspectiveMatrix[5] = fFrustumScale;

    glUseProgram(theProgram);
    glUniformMatrix4fv(perspectiveMatrixUnif, 1, GL_FALSE, perspectiveMatrix);
    glUseProgram(0);

    glViewport(0, 0, (GLsizei) w, (GLsizei) h);
}
The matrix, now a global variable called perspectiveMatrix, gets its other fields from the program initialization function just as before. The aspect ratio code is only interested in the XY scale values.
Here, we change the X scaling based on the ratio of the width to the height. The Y scaling is left alone.
Also, the offset used for positioning the prism was changed from (0.5, 0.5) to (1.5, 0.5). This means that part of the object is off the side of the viewport until you resize the window. Changing the width shows more of the area; only by changing the height do you actually make the objects bigger. The square always looks like a square.
Further Study
Try doing these things with the given programs.
-
In all of the perspective tutorials, we only ever had a frustum scale of 1.0. Adjust the frustum scale and see how it affects the scene.
-
Adjust the zNear distance, so that it intersects with the prism. See how this affects the rendering. Adjust the zFar distance similarly and see what happens.
-
We made some simplifying assumptions in our perspective transformation algorithm. In particular, we fixed the eye point at (0, 0, 0). and the plane at (0, 0, 1). However, this was not strictly necessary; we could have altered our perspective transform algorithm to use a variable eye point. Adjust the ShaderPerspective to implement an arbitrary perspective plane location (the size remains fixed at [-1, 1]). You will need to offset the X, Y camera-space positions of the vertices by Ex and Ey respectively, but only after the scaling (for aspect ratio). And you will need to divide the camera-space Z term by -Ez instead of just -1.
-
Do the above, but in matrix form. Remember that any terms placed in the fourth column will be added to that component, due to the multiplication by Wcamera (which is always 1.0).
OpenGL Functions of Note
- glEnable/glDisable
-
These functions activate or inactivate certain features of OpenGL. There is a large list of possible features that can be enabled or disabled. In this tutorial,
GL_CULL_FACEwas used to enable/disable face culling. - glCullFace/glFrontFace
-
These two functions control how face culling works.
glFrontFacedefines which triangle winding order is considered the front.glCullFacedefines what face gets culled. This function can also cull all faces, though this is not useful if you want to get rendering done.These functions only do something useful if
GL_CULL_FACEis currently enabled. They still set the values internally even ifGL_CULL_FACEis not enabled, so enabling it later will use the up-to-date settings.

