Axis2 java WebServices开发二
开发环境 eclipse3.2 (没有配置环境 请参看上一篇日志)
新建项目:
UserCover(名称随便) 做个简单的报道并记录调用server的username
新建包:com.axis2.test
新建接口:
package com.axis2.test; public interface UserCover { public void CoverName(String myname); public String getUserList(); }
新建包:com.axis2.test.impl
编写实现类:
package com.axis2.test.impl; import java.util.ArrayList; import java.util.List; import com.axis2.test.UserCover; public class UserCoverService implements UserCover { public static List<String> userlist = new ArrayList<String>(); public void CoverName(String myname) { if(myname != null) userlist.add(myname); } public String getUserList() { String usernames = ""; for(String username:userlist){ usernames += username+"/n"; } return usernames; } }
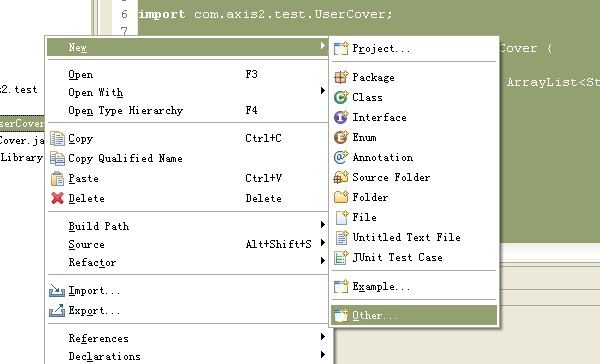
接下来是用开发一中介绍的eclipse插件 生成服务区端和客户端文件
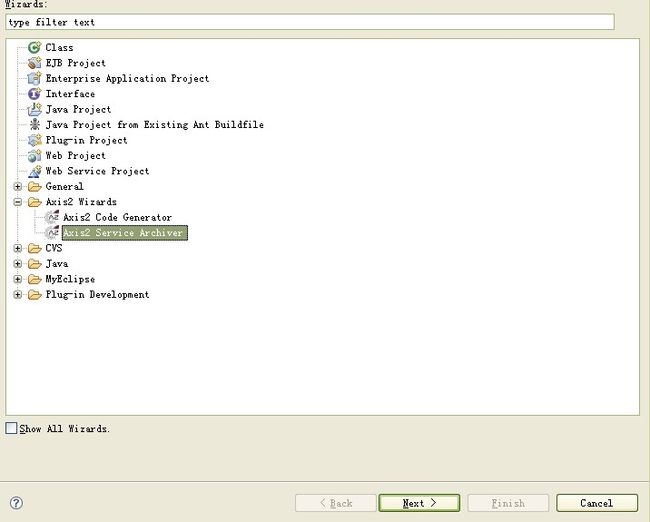
1.首先生成服务器端使用的aar文件
图解:
选择此项目的class路径
如果有wsdl可以选择指定的wsdl 不选择wsdl 服务器端在调用的时候也是会自动生成的 (后面生成客户端的时候会生成wsdl)
不需要其他的jar包 这里什么都不用选 继续下一步
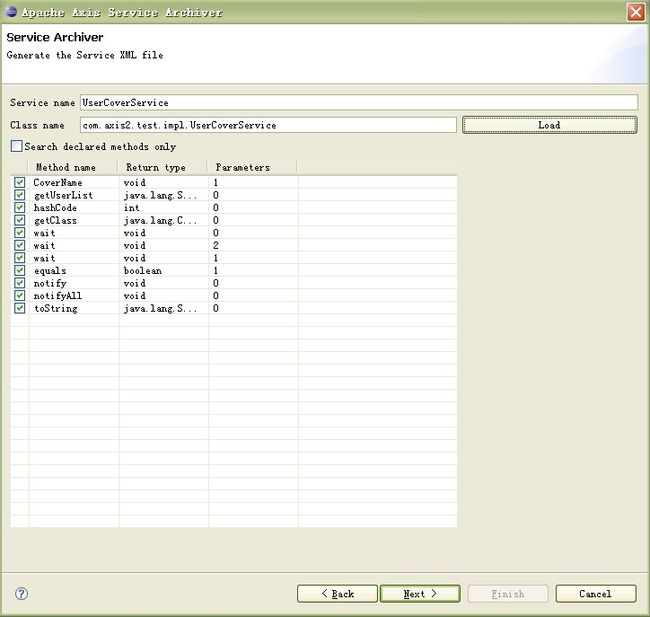
选择自动生成server.xml文件
server name随便起,
class那么为提供给客户端的server类 即开始编写的UserCover类(带包名) 填写完成后点击load 按钮 加载此类中的方法
这里的filename为aar文件的名称 也可以随便取,程序中要用的是上一步中的server name。即配置在server.xml中的server name。
输出文件夹选择 部署的axis2的web目录的WEB-INF/services目录下,如果没有使用web 容器 可使用axis解压后自带的容器 将此文件输出到
%AXIS2_HOME%/repository/services
现在可以启动tomcat 或是axis2
检测是否成功
http://localhost:8080/axis2/services/UserCoverService?wsdl
如果成功将出现wsdl文件的内容 笔者显示内容为
<?xml version="1.0" encoding="UTF-8" ?> - <wsdl:definitions xmlns:wsdl="http://schemas.xmlsoap.org/wsdl/" xmlns:mime="http://schemas.xmlsoap.org/wsdl/mime/" xmlns:soap12="http://schemas.xmlsoap.org/wsdl/soap12/" xmlns:http="http://schemas.xmlsoap.org/wsdl/http/" xmlns:ns1="http://org.apache.axis2/xsd" xmlns:wsaw="http://www.w3.org/2006/05/addressing/wsdl" xmlns:ns="http://impl.test.axis2.com" xmlns:xs="http://www.w3.org/2001/XMLSchema" xmlns:soap="http://schemas.xmlsoap.org/wsdl/soap/" targetNamespace="http://impl.test.axis2.com"> <wsdl:documentation>UserCoverService</wsdl:documentation> - <wsdl:types> - <xs:schema attributeFormDefault="qualified" elementFormDefault="qualified" targetNamespace="http://impl.test.axis2.com"> - <xs:element name="getUserListResponse"> - <xs:complexType> - <xs:sequence> <xs:element minOccurs="0" name="return" nillable="true" type="xs:string" /> </xs:sequence> </xs:complexType> </xs:element> - <xs:element name="CoverName"> - <xs:complexType> - <xs:sequence> <xs:element minOccurs="0" name="myname" nillable="true" type="xs:string" /> </xs:sequence> </xs:complexType> </xs:element> </xs:schema> </wsdl:types> - <wsdl:message name="CoverNameRequest"> <wsdl:part name="parameters" element="ns:CoverName" /> </wsdl:message> <wsdl:message name="getUserListRequest" /> - <wsdl:message name="getUserListResponse"> <wsdl:part name="parameters" element="ns:getUserListResponse" /> </wsdl:message> - <wsdl:portType name="UserCoverServicePortType"> - <wsdl:operation name="CoverName"> <wsdl:input message="ns:CoverNameRequest" wsaw:Action="urn:CoverName" /> </wsdl:operation> - <wsdl:operation name="getUserList"> <wsdl:input message="ns:getUserListRequest" wsaw:Action="urn:getUserList" /> <wsdl:output message="ns:getUserListResponse" wsaw:Action="urn:getUserListResponse" /> </wsdl:operation> </wsdl:portType> - <wsdl:binding name="UserCoverServiceSoap11Binding" type="ns:UserCoverServicePortType"> <soap:binding transport="http://schemas.xmlsoap.org/soap/http" style="document" mce_style="document" /> - <wsdl:operation name="CoverName"> <soap:operation soapAction="urn:CoverName" style="document" mce_style="document" /> - <wsdl:input> <soap:body use="literal" /> </wsdl:input> </wsdl:operation> - <wsdl:operation name="getUserList"> <soap:operation soapAction="urn:getUserList" style="document" mce_style="document" /> - <wsdl:input> <soap:body use="literal" /> </wsdl:input> - <wsdl:output> <soap:body use="literal" /> </wsdl:output> </wsdl:operation> </wsdl:binding> - <wsdl:binding name="UserCoverServiceSoap12Binding" type="ns:UserCoverServicePortType"> <soap12:binding transport="http://schemas.xmlsoap.org/soap/http" style="document" mce_style="document" /> - <wsdl:operation name="CoverName"> <soap12:operation soapAction="urn:CoverName" style="document" mce_style="document" /> - <wsdl:input> <soap12:body use="literal" /> </wsdl:input> </wsdl:operation> - <wsdl:operation name="getUserList"> <soap12:operation soapAction="urn:getUserList" style="document" mce_style="document" /> - <wsdl:input> <soap12:body use="literal" /> </wsdl:input> - <wsdl:output> <soap12:body use="literal" /> </wsdl:output> </wsdl:operation> </wsdl:binding> - <wsdl:binding name="UserCoverServiceHttpBinding" type="ns:UserCoverServicePortType"> <http:binding verb="POST" /> - <wsdl:operation name="CoverName"> <http:operation location="UserCoverService/CoverName" /> - <wsdl:input> <mime:content type="text/xml" part="CoverName" /> </wsdl:input> </wsdl:operation> - <wsdl:operation name="getUserList"> <http:operation location="UserCoverService/getUserList" /> - <wsdl:input> <mime:content type="text/xml" part="getUserList" /> </wsdl:input> - <wsdl:output> <mime:content type="text/xml" part="getUserList" /> </wsdl:output> </wsdl:operation> </wsdl:binding> - <wsdl:service name="UserCoverService"> - <wsdl:port name="UserCoverServiceHttpSoap11Endpoint" binding="ns:UserCoverServiceSoap11Binding"> <soap:address location="http://localhost:8080/axis2/services/UserCoverService.UserCoverServiceHttpSoap11Endpoint/" /> </wsdl:port> - <wsdl:port name="UserCoverServiceHttpSoap12Endpoint" binding="ns:UserCoverServiceSoap12Binding"> <soap12:address location="http://localhost:8080/axis2/services/UserCoverService.UserCoverServiceHttpSoap12Endpoint/" /> </wsdl:port> - <wsdl:port name="UserCoverServiceHttpEndpoint" binding="ns:UserCoverServiceHttpBinding"> <http:address location="http://localhost:8080/axis2/services/UserCoverService.UserCoverServiceHttpEndpoint/" /> </wsdl:port> </wsdl:service> </wsdl:definitions>
至此 服务器端已经配置完成 。接下来是用axis 的data banding 类型(ADB)类生成客户端
当然你也可以使用jixb等类型
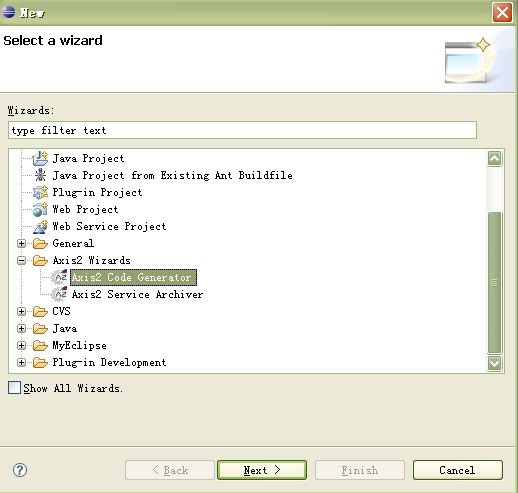
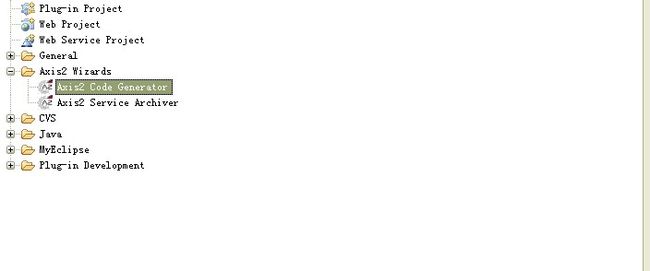
图解如下
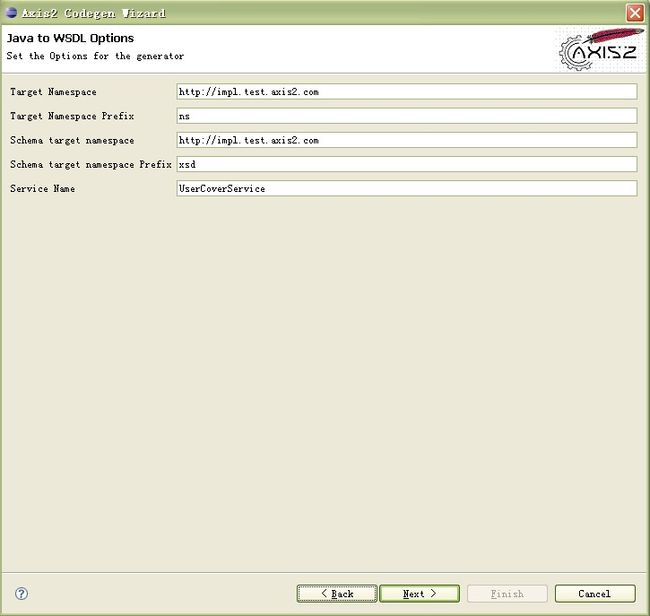
1.根据此java类生成wsdl文件 也可以复制以上浏览器中的代码保存为 ****.wsdl 笔者保存为usercover.wsdl
在城城wsdl文件之前新建java 项目UserCoverclient 用户保存wsdl文件和client lib 类
点击 add Folder 将本项目的class路径加入
Test Class Loading如果load失败仔细检查class name的填写
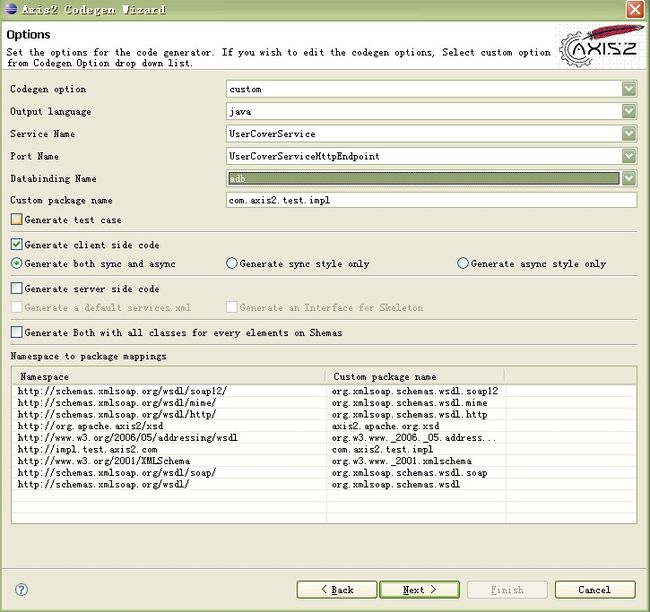
到此根据server类生成的wsdl已经完成 有了这个文件我们就可以根据其生成对应的client lib 类库 如下操作
完成后生成的源代码类库是有src文件夹的将其设置为源代码目录 结果如下所示
生成的类库需要axis类库的支持 新建axis2 用户类库 将%AXIS2_HOME%/lib下的所有jar包都导入
现在就可以编写client代码了
在此项目的基础上新增包com.axis2.test.impl.client
package com.axis2.test.impl.client; import com.axis2.test.impl.UserCoverServiceStub; public class ConnectionServer { public static void main(String[] s){ try { UserCoverServiceStub stub = new UserCoverServiceStub("http://localhost:8080/axis2/services/UserCoverService"); converMyname(stub,"a276202460"); printusername(stub); converMyname(stub,"Rich Qin"); printusername(stub); } catch (Exception e) { // TODO Auto-generated catch block e.printStackTrace(); } } public static void converMyname(UserCoverServiceStub stub,String myname)throws Exception{ UserCoverServiceStub.CoverName req = new UserCoverServiceStub.CoverName(); req.setMyname(myname); stub.CoverName(req); } public static void printusername(UserCoverServiceStub stub)throws Exception{ UserCoverServiceStub.GetUserListResponse res = stub.getUserList(); System.out.println(res.get_return()); } }
OK axis2的hello world 已经完成了
运行ConnectionServer类 看看输出结果。在axis2中 我认为对于client端最简洁的代码是jibx类型的data banding
其他进阶的开发将在后续的日志中推出。因为笔者也是刚刚接触 web services 接触 axis 大错小错还请多多指正。
