Oracle10.2.0.1 For CentOS6.0 安装文档(四)
进入oracle解压以后的目录
/home/zhaoyj/database
运行runinstaller
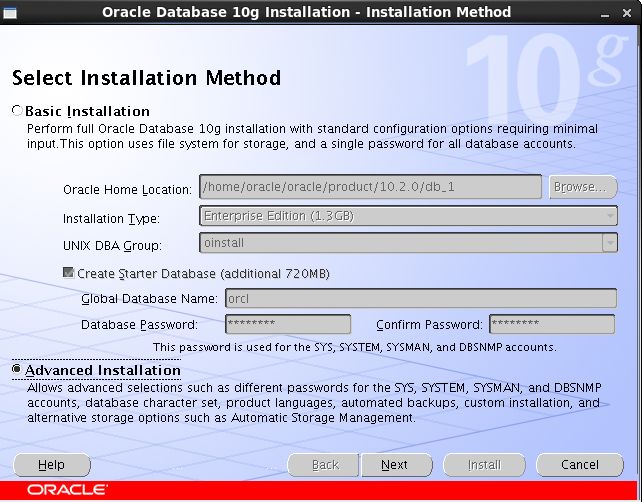
Select Installation Method
从上图可以看到Oracle的家目录是/home/oracle/oracle/product/10.2.0/db_1
数据库的全局名称是orcl
数据库管理员所属的组是 oinstall
选择“Advanced Installation”,点击“Next”
Specify Inventory directory and credentials
指定库存目录,即安装文件存放目录
Select Installation Type
Specify home details

Product-specific prerequisite checks
Select configure option-Installdatabase software only
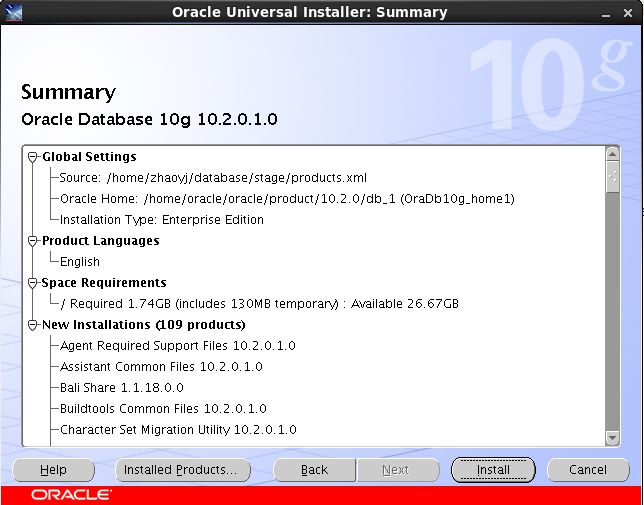
Summary
Install
点击“Continue”
点击“OK”
根据报错提示
[root@oracle10g oraInventory]# pwd
/home/oracle/oraInventory
[root@oracle10g oraInventory]#./orainstRoot.sh #修改库存目录的权限
Changing permissions of /home/oracle/oraInventory to 770.
Changing groupname of /home/oracle/oraInventory to oinstall.
The execution of the script is complete
[root@oracle10g oraInventory]# cd/home/oracle/oracle/product/10.2.0/db_1/
[root@oracle10g db_1]# ./root.sh #设置环境变量,指定bin目录,创建/etc/oratab配置文件目录
Running Oracle10 root.sh script...
The following environment variables are set as:
ORACLE_OWNER= oracle
ORACLE_HOME= /home/oracle/oracle/product/10.2.0/db_1
Enter the full pathname of the local bin directory:[/usr/local/bin]:
Copying dbhome to/usr/local/bin ...
Copying oraenv to/usr/local/bin ...
Copying coraenv to/usr/local/bin ...
Creating /etc/oratab file...
Entries will be added to the /etc/oratab file as needed by
Database Configuration Assistant when a database is created
Finished running generic part of root.sh script.
Now product-specific root actions will be performed.
End of Installation
点击“Exit”


