Xamarin.Forms Pages控件介绍一 - 通过代码构建Pages
Xamarin 3.0 最大的改进在于对移动端界面的统一,不再需要对不同平台的界面进行设计。程序员可以根据自己的喜好选择C#纯代码方式或者XAML方式通过Xamarin.Forms对移动平台UI进行定义。这里再强调一点Xamarin.Forms是会对界面转换为Native,这是比通过WebKit浏览器渲染产生的WebUI 性能有很大的提高。
今天先和大家谈谈用代码如何对Pages 进行定义。Xamarin.Forms 对移动平台中常用页面作出了一下归纳 :
1. ContentPage 就是最简单的展示页面,通过ContentPage 你可以对展示的控件进行简单布局,这里就涉及到StackLayout(布局方式)和ScrollView(滚动视图)。
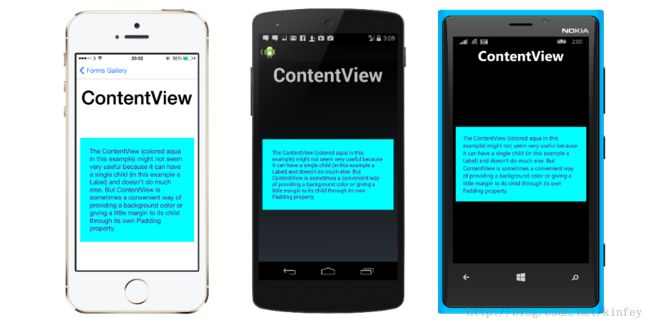
这是官网上对ContentPage 在不同平台展现的简单图示。我们来看看ContentPage 是如何运作的。ContentPage 属性里有一个公共属性Content , 从名字上不难看出这是一个对ContentPage展示内容的属性。假设我们需要定义一个简单页面 , 你可以创建一个继承自ContentPage的类 :
    class ContentPageDemoPage : <span style="color:#3366ff;">ContentPage</span>
    {
        public ContentPageDemoPage()
        {
            Label header = new Label
            {
                Text = "ContentPage",
                Font = Font.BoldSystemFontOfSize(40),
                HorizontalOptions = LayoutOptions.Center
            };

            Label label1 = new Label
            {
                Text = "ContentPage is the simplest type of page.",
                Font = Font.SystemFontOfSize(NamedSize.Large)
            };

            Label label2 = new Label
            {
                Text = "The content of a ContentPage is generally a " +
                       "layout of some sort that can then be a parent " +
                       "to multiple children.",
                Font = Font.SystemFontOfSize(NamedSize.Large)
            };

            Label label3 = new Label
            {
                Text = "This ContentPage contains a StackLayout, which " +
                       "in turn contains four Label views (including the " +
                       "large one at the top)",
                Font = Font.SystemFontOfSize(NamedSize.Large)
            };

            // Accomodate iPhone status bar.
            <span style="color:#3366ff;">this.Padding = new Thickness(10, Device.OnPlatform(20, 0, 0), 10, 5);</span>

            // Build the page.
            <span style="color:#3366ff;">this.Content = new StackLayout
            {
                Children =
                {
                    header,
                    label1,
                    label2,
                    label3
                }
            };</span>


        }
    }
从代码上看就是对4个Lable 进行一个垂直布局,而Padding 是位置上的一些限定 .当然由于页面布局的复杂性,你也可以通过new 来架构更复杂的框架
              var contentPage = new <span style="color:#3366ff;">ContentPage</span> {

				<span style="color:#3366ff;">Content</span>=new StackLayout{

					Children=
					{
						header,

						label

					}
				}
	      };
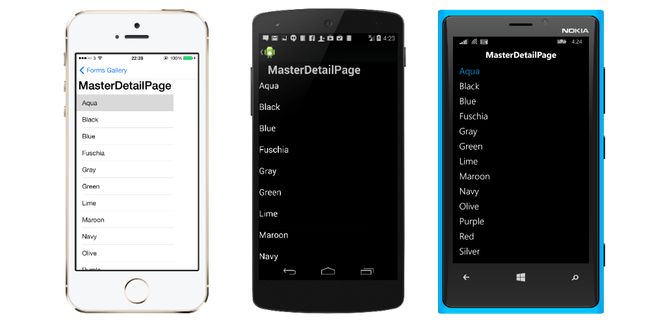
2. MasterDetailPage 用于这种场景最好不过了,阅读新闻时,一开始只有一个标题,当点击标题后才会有详细部分。

    var masterPage=new <span style="color:#3333ff;">MasterDetailPage</span>{

	   <span style="color:#3333ff;">Master</span>=content,
           <span style="color:#3333ff;">Detail</span>=new DetailPage()
    };
         // Define a selected handler for the ListView.
            listView.ItemSelected += (sender, args) =>
            {
                    // Set the BindingContext of the detail page.
                    <span style="color:#3333ff;">this.Detail.BindingContext = args.SelectedItem;</span>

                    // Show the detail page.
                    this.IsPresented = false;
            };
            <span style="color:#ff0000;">if (Device.OS == TargetPlatform.WinPhone)</span>
            {
                (this.Detail as ContentPage).Content.GestureRecognizers.Add(
                    new TapGestureRecognizer((view) =>
                    {
                        this.IsPresented = true;
                    }));
            }
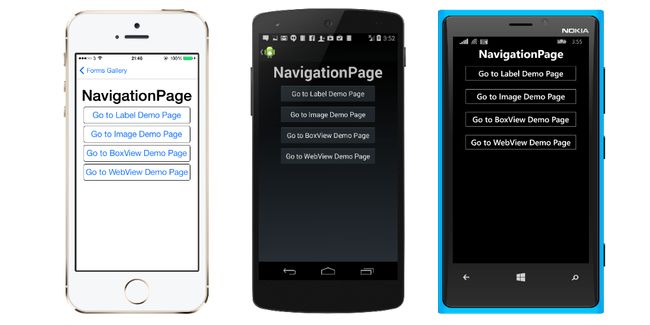
3. NavigationPage 跳转导航。相信每一个平台都不可缺少。这里可以结合ContentPage去完成
关键点在于通过Navigation.PushAsync的异步事件触发跳转。还有如果你是通过contentPage里面的控件进行跳转,一定要把它封装到NavigationPage当中,否则程序是会报错的。
<span style="color:#333333;">        var contentPage = new ContentPage {

			Content=new StackLayout{

					Children=
					{
						header,

						button1

					}
				}
			};


	</span><span style="color:#ff0000;">button1.Clicked += async (sender, args) =>
				await contentPage.Navigation.PushAsync(new WebViewPage());</span><span style="color:#333333;">


	</span><span style="color:#ff0000;">var navi = new NavigationPage (contentPage);</span>
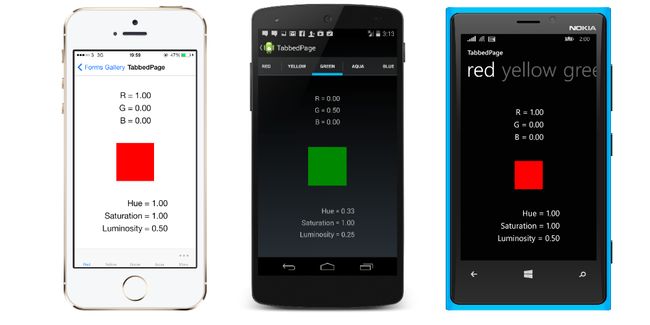
4. TabbedPage 便签页,这是三个平台入面显示出来效果差别最大的一种展示。iOS的Tab在下方,Android的在上方 ,Windows Phone的是Pivot.我这里真心觉得Xamarin的团队很赞,毕竟统一界面构造方式不是一件容易的事情能做到这个地步真的不错。
TabbedPage有几个属性是常用的ItemsSource是定义多少个Tabbed, ItemTemplate是对每个TabbedPage显示的页面进行定义。
<span style="color:#333333;">           var tabPage =new TabbedPage{

				</span><span style="color:#3366ff;">ItemsSource=nameList,

				ItemTemplate = new DataTemplate(() =>
					{
						return new DetailPage();
					}),</span><span style="color:#333333;">


	   };</span>
5. CarouselPage当你用手指滑动页面时自动切换,这个有点而像相册或者新闻阅读可以通过划动手势切换上一页/下一页。
      new CarouselPage {
         Children = {
           new ContentPage {Content = new BoxView {Color = new Color (1, 0, 0)}, Title = "Page 1"},
           new ContentPage {Content = new BoxView {Color = new Color (0, 1, 0)}, Title = "Page 2"},
           new ContentPage {Content = new BoxView {Color = new Color (0, 0, 1)}, Title = "Page 3"}
         }
     };
Xamarin.Forms 把移动平台中常用的页面展示做成了五个通用类给日常的使用。当然你可以在这个基础上定制灵活定制你的控件,从而提高生产效率。我还是那句Xamarin.Forms不是万能,但是已经足够用了。 文章会陆续更新,大家别急,下一篇会说说Xamarin.Forms在Pages上的实现原理,这样对大家通过XAML更快构建Xamarin.Forms UI 会有一定帮助。


