整合之道--Spring整合EhCache
写在前面的话
Spring与其他框架的整合一般的思路就是讲其他框架当作一个Spring的bean管理起来,一般会由Spring提供该bean的基本实现,用户只需配置即可。
spring与hibernate整合就是讲hibernate的sessionFactory当作一个bean由spring配置起来,其具体对应org.springframework.orm.hibernate5.LocalSessionFactoryBean
关于hibernate的整合参见
spring整合hibernate
Spring整合EhCache之Spring配置文件
首先从spring的核心配置spring-core.xml谈起
spring-core.xml
<?xml version="1.0" encoding="UTF-8"?>
<beans xmlns="http://www.springframework.org/schema/beans" xmlns:xsi="http://www.w3.org/2001/XMLSchema-instance" xmlns:p="http://www.springframework.org/schema/p" xmlns:context="http://www.springframework.org/schema/context" xsi:schemaLocation=" http://www.springframework.org/schema/beans http://www.springframework.org/schema/beans/spring-beans-4.2.xsd http://www.springframework.org/schema/context http://www.springframework.org/schema/context/spring-context-4.2.xsd">

    <!-- 扫描路径,不扫描Controller -->
    <context:component-scan base-package="com.wechat">
        <context:exclude-filter type="annotation" expression="org.springframework.stereotype.Controller" />
    </context:component-scan>
    <!-- 导入数据库的相关配置 -->
    <import resource="classpath:spring/spring-hibernate.xml" />
    <!-- 导入缓存的相关配置 -->
    <import resource="classpath:spring/spring-cache.xml" />
</beans>
Spring的核心简介明了,只是导入了需要的其他Spring组件,
先来看看
spring-hibernate.xml
<?xml version="1.0" encoding="UTF-8"?>
<beans xmlns="http://www.springframework.org/schema/beans" xmlns:xsi="http://www.w3.org/2001/XMLSchema-instance" xmlns:p="http://www.springframework.org/schema/p" xmlns:context="http://www.springframework.org/schema/context" xmlns:aop="http://www.springframework.org/schema/aop" xmlns:tx="http://www.springframework.org/schema/tx" xsi:schemaLocation=" http://www.springframework.org/schema/beans http://www.springframework.org/schema/beans/spring-beans-4.2.xsd http://www.springframework.org/schema/context http://www.springframework.org/schema/context/spring-context-4.2.xsd http://www.springframework.org/schema/aop http://www.springframework.org/schema/aop/spring-aop-4.2.xsd http://www.springframework.org/schema/tx http://www.springframework.org/schema/tx/spring-tx-4.2.xsd">

    <!-- 扫描路径不扫描controller -->
    <context:component-scan base-package="com.test">
        <context:exclude-filter type="annotation" expression="org.springframework.stereotype.Controller" />
    </context:component-scan>

    <!-- 加载配置文件 -->
    <context:property-placeholder location="classpath:jdbc.properties" file-encoding="utf-8" ignore-unresolvable="true" />

    <bean id="sessionFactory" class="org.springframework.orm.hibernate5.LocalSessionFactoryBean">
        <property name="dataSource" ref="dataSource" />
        <property name="packagesToScan">
            <list>
                <!-- 可以加多个包 -->
                <value>com.wechat.entity.po</value>
            </list>
        </property>
        <property name="hibernateProperties">
            <props>
                <prop key="hibernate.hbm2ddl.auto">${hibernate.hbm2ddl.auto}</prop>
                <prop key="hibernate.dialect">${hibernate.dialect}</prop>
                <prop key="hibernate.show_sql">${hibernate.show_sql}</prop>
                <prop key="hibernate.format_sql">${hibernate.format_sql}</prop>
                <prop key="hibernate.temp.use_jdbc_metadata_defaults">false</prop>
            </props>
        </property>
    </bean>

    <!-- 配置数据源 -->
    <bean id="dataSource" class="com.mchange.v2.c3p0.ComboPooledDataSource" destroy-method="close" p:driverClass="${jdbc.driverClassName}" p:jdbcUrl="${jdbc.url}" p:user="${jdbc.username}" p:password="${jdbc.password}" p:testConnectionOnCheckout="${jdbc.c3p0.testConnectionOnCheckout}" p:testConnectionOnCheckin="${jdbc.c3p0.testConnectionOnCheckin}" p:idleConnectionTestPeriod="${jdbc.c3p0.idleConnectionTestPeriod}" p:initialPoolSize="${jdbc.c3p0.initialPoolSize}" p:minPoolSize="${jdbc.c3p0.minPoolSize}" p:maxPoolSize="${jdbc.c3p0.maxPoolSize}" p:maxIdleTime="${jdbc.c3p0.maxIdleTime}" />

    <!-- <bean id="jdbcTemplate" class="org.springframework.jdbc.core.JdbcTemplate" p:dataSource-ref="dataSource" /> -->


    <!-- 配置Hibernate事务管理器 -->
    <bean id="transactionManager" class="org.springframework.orm.hibernate5.HibernateTransactionManager">
        <property name="sessionFactory" ref="sessionFactory" />
    </bean>

    <!-- 配置事务异常封装 -->
    <bean id="persistenceExceptionTranslationPostProcessor" class="org.springframework.dao.annotation.PersistenceExceptionTranslationPostProcessor" />

    <!-- 基于数据源的事务管理器 -->
    <!-- <bean id="transactionManager" class="org.springframework.jdbc.datasource.DataSourceTransactionManager" p:dataSource-ref="dataSource" /> -->

    <!-- 配合<tx:advice>和<aop:advisor>完成了事务切面的定义 -->
    <!-- 使用强大的切点表达式是语言轻松定义目标方法 -->
    <aop:config proxy-target-class="true">
        <!-- 通过aop定义事务增强切面 -->
        <aop:pointcut expression=" execution(* com.wechat.service..*(..))" id="serviceMethod" />
        <!-- 引用事务增强 -->
        <aop:advisor advice-ref="txAdvice" pointcut-ref="serviceMethod" />
    </aop:config>
    <!-- 事务增强 -->
    <tx:advice id="txAdvice" transaction-manager="transactionManager">
        <!-- 事务属性定义 -->
        <tx:attributes>
            <tx:method name="*" />
        </tx:attributes>
    </tx:advice>

</beans>
hibernate需要的
jdbc.properties
#------------------------------------------------------------------------------------
# 数据库配置
#------------------------------------------------------------------------------------
#服务器地址
host=127.0.0.1
dbName=hibernate_test
jdbc.driverClassName=com.mysql.jdbc.Driver
jdbc.url=jdbc:mysql://${host}:3306/${dbName}
jdbc.username=root
jdbc.password=cheng

#------------------------------------------------------------------------------------
# 适用于c3p0的配置
#------------------------------------------------------------------------------------
#------------------------------------------------------------------------------------
# c3p0反空闲设置,防止8小时失效问题28800
#------------------------------------------------------------------------------------
#idleConnectionTestPeriod要小于MySQL的wait_timeout
jdbc.c3p0.testConnectionOnCheckout=false
jdbc.c3p0.testConnectionOnCheckin=true
jdbc.c3p0.idleConnectionTestPeriod=3600

#------------------------------------------------------------------------------------
# c3p0连接池配置
#------------------------------------------------------------------------------------
#initialPoolSize, minPoolSize, maxPoolSize define the number of Connections that will be pooled.
#Please ensure that minPoolSize <= maxPoolSize.
#Unreasonable values of initialPoolSize will be ignored, and minPoolSize will be used instead.
jdbc.c3p0.initialPoolSize=10
jdbc.c3p0.minPoolSize=10
jdbc.c3p0.maxPoolSize=100
#maxIdleTime defines how many seconds a Connection should be permitted to go unused before being culled from the pool.
jdbc.c3p0.maxIdleTime=3600

#------------------------------------------------------------------------------------
# hibernate连接池配置
#------------------------------------------------------------------------------------
hibernate.connection.driverClass=com.mysql.jdbc.Driver
hibernate.connection.url=jdbc:mysql://${host}:3306/${dbName}
hibernate.dialect=org.hibernate.dialect.MySQL5Dialect
hibernate.show_sql=true
hibernate.format_sql=true
hibernate.hbm2ddl.auto=update
hibernate扫描的路径中持久化对象所在包
com.wechat.entity.po
User.java
package com.wechat.entity.po;

import java.sql.Blob;

import javax.persistence.Entity;
import javax.persistence.GeneratedValue;
import javax.persistence.Id;
import javax.persistence.Table;

import org.hibernate.annotations.GenericGenerator;

@Entity
@Table(name="user_info")
public class User {
    //用户id
    @Id
    @GenericGenerator(name="systemUUID",strategy="uuid")
    @GeneratedValue(generator="systemUUID")
    private String userid;
    //用户名
    private String username;
    //密码
    private String password;
    //注册日期
    private String registDate;
    //头像
    private Blob userPic;

    public String getRegistDate() {
        return registDate;
    }
    public void setRegistDate(String registDate) {
        this.registDate = registDate;
    }
    public Blob getUserPic() {
        return userPic;
    }
    public void setUserPic(Blob userPic) {
        this.userPic = userPic;
    }
    public String getUserid() {
        return userid;
    }
    public void setUserid(String userid) {
        this.userid = userid;
    }
    public String getUsername() {
        return username;
    }
    public void setUsername(String username) {
        this.username = username;
    }
    public String getPassword() {
        return password;
    }
    public void setPassword(String password) {
        this.password = password;
    }
    @Override
    public String toString() {
        return "User [userid=" + userid + ", username=" + username + ", password=" + password + ", registDate="
                + registDate + ", userPic=" + userPic + "]";
    }
}
关于hibernate的整合参见spring整合hibernate
Spring配置文件中需要的
spring-cache.xml
<?xml version="1.0" encoding="UTF-8"?>
<beans xmlns="http://www.springframework.org/schema/beans" xmlns:xsi="http://www.w3.org/2001/XMLSchema-instance" xmlns:p="http://www.springframework.org/schema/p" xmlns:context="http://www.springframework.org/schema/context" xmlns:cache="http://www.springframework.org/schema/cache" xsi:schemaLocation=" http://www.springframework.org/schema/beans http://www.springframework.org/schema/beans/spring-beans-4.2.xsd http://www.springframework.org/schema/context http://www.springframework.org/schema/context/spring-context-4.2.xsd http://www.springframework.org/schema/cache http://www.springframework.org/schema/cache/spring-cache-4.2.xsd">


    <cache:annotation-driven cache-manager="cacheManager"/>

    <bean id="cacheManager" class="org.springframework.cache.ehcache.EhCacheCacheManager" p:cache-manager-ref="ehcache" />

    <!-- EhCache library setup -->
    <bean id="ehcache" class="org.springframework.cache.ehcache.EhCacheManagerFactoryBean" p:config-location="classpath:ehcache.xml" />
</beans>
EhCache核心文件
需要的jar包 ehcache-core-2.6.11.jar,slf4j-api-1.7.1.jar,slf4j-log4j12-1.7.12.jar
ehcache.xml
<?xml version="1.0" encoding="UTF-8"?>
<ehcache xmlns:xsi="http://www.w3.org/2001/XMLSchema-instance" xsi:noNamespaceSchemaLocation="http://ehcache.org/ehcache.xsd">

    <diskStore path="java.io.tmpdir/ehcache" />

    <!-- 默认缓存 -->
    <defaultCache maxElementsInMemory="1000" eternal="false" timeToIdleSeconds="120" timeToLiveSeconds="120" overflowToDisk="false" />

    <!-- 配置自定义缓存 maxElementsInMemory:缓存中允许创建的最大对象数 eternal:缓存中对象是否为永久的,如果是,超时设置将被忽略,对象从不过期。 timeToIdleSeconds:缓存数据的钝化时间,也就是在一个元素消亡之前, 两次访问时间的最大时间间隔值,这只能在元素不是永久驻留时有效, 如果该值是 0 就意味着元素可以停顿无穷长的时间。 timeToLiveSeconds:缓存数据的生存时间,也就是一个元素从构建到消亡的最大时间间隔值, 这只能在元素不是永久驻留时有效,如果该值是0就意味着元素可以停顿无穷长的时间。 overflowToDisk:内存不足时,是否启用磁盘缓存。 memoryStoreEvictionPolicy:缓存满了之后的淘汰算法。 -->
    <!-- userService查询用户的缓存 -->
    <cache name="getUserById" maxElementsInMemory="1000" eternal="false" timeToIdleSeconds="120" timeToLiveSeconds="120" overflowToDisk="false" memoryStoreEvictionPolicy="LRU" />
</ehcache>
通过配置文件可以发现,Spring对EhCache的整合中是将EhCache的cacheManager通过org.springframework.cache.ehcache.EhCacheCacheManager配置起来,而cacheManager中依赖的ehcache则通过org.springframework.cache.ehcache.EhCacheManagerFactoryBean加载EhCache的核心配置文件ehcache.xml
EhCache的使用
在UserService对用户进行查询的时候根据查询的userid来进行缓存,即缓存的key为userid,当对用户更新之后,清除userid对应的缓存
UserServiceImpl.java
package com.wechat.service.user.impl;

import java.util.List;

import org.springframework.beans.factory.annotation.Autowired;
import org.springframework.cache.annotation.CacheEvict;
import org.springframework.cache.annotation.Cacheable;
import org.springframework.stereotype.Service;

import com.wechat.dao.UserDao;
import com.wechat.entity.po.User;
import com.wechat.service.user.UserService;
@Service
public class UserServiceImpl implements UserService {
    @Autowired
    private UserDao userDao;

    //当修改了用户之后,将user.userid对应的缓存从ehcache.xml中清除
    @Override
    @CacheEvict(cacheNames="getUserById", key="#user.userid")
    public void updateUser(User user) {
        userDao.updateUser(user);

    }
    //通过userid对查询的结果进行缓存,缓存的名字定义在ehcache.xml中
    @Override
    @Cacheable(cacheNames="getUserById", key="#userid")
    public User getUserById(String userid) {
        return userDao.getUserById(userid);
    }

}
UserService.java
package com.wechat.service.user;

import java.util.List;

import com.wechat.entity.po.User;

public interface UserService {
    //更新User
    public void updateUser(User user);
    //根据userid查询到User对象
    public User getUserById(String userid);

}
UserDao.java
package com.wechat.dao;

import java.util.List;

import com.wechat.entity.po.User;

public interface UserDao {

    // 通过id获取user对象
    public User getUserById(String userid);

    // 更新User
    public void updateUser(User user);

}
UserDaoImpl.java
package com.wechat.dao.impl;

import java.util.ArrayList;
import java.util.List;

import org.hibernate.Query;
import org.hibernate.Session;
import org.hibernate.SessionFactory;
import org.springframework.beans.factory.annotation.Autowired;
import org.springframework.stereotype.Repository;

import com.wechat.dao.UserDao;
import com.wechat.entity.po.User;

@Repository
public class UserDaoImpl implements UserDao {
    //sessionFactory在Spring配置文件中
    @Autowired
    private SessionFactory sessionFactory;

    @Override
    public User getUserById(String userid) {
        Session session = sessionFactory.getCurrentSession();
        // 为了验证缓存,这里使用了get,因为load方法如果不使用对象不会发出sql语句
        User user = session.get(User.class, userid);
        return user;
    }

    @Override
    public void updateUser(User user) {
        Session session = sessionFactory.getCurrentSession();
        session.update(user);
    }

}
测试
数据库中的数据

测试用例
package com.wechat.dao;

import java.util.List;

import org.junit.Test;
import org.junit.runner.RunWith;
import org.springframework.beans.factory.annotation.Autowired;
import org.springframework.test.context.ContextConfiguration;
import org.springframework.test.context.junit4.SpringJUnit4ClassRunner;

import com.wechat.entity.po.User;
import com.wechat.service.user.UserService;

@RunWith(SpringJUnit4ClassRunner.class)
@ContextConfiguration(locations = { "classpath:spring/spring-core.xml" })
public class UserServiceTest {
    @Autowired
    private UserService userService;

    @Test
    public void testEhcache(){
        //会发select sql,并缓存12345678
        User user0 = userService.getUserById("12345678");
        //有缓存key为12345678,不会发sql
        User user1 = userService.getUserById("12345678");
        //会发select sql,并缓存8a89b2fe5277f748015277f74d8c0000
        User user2 = userService.getUserById("8a89b2fe5277f748015277f74d8c0000");
        //有缓存8a89b2fe5277f748015277f74d8c0000,不会发sql
        User user3 = userService.getUserById("8a89b2fe5277f748015277f74d8c0000");
        //有缓存8a89b2fe5277f748015277f74d8c0000,不会发sql
        User user4 = userService.getUserById("8a89b2fe5277f748015277f74d8c0000");

        user1.setUsername("刘德华");
        //更新用户会发update sql,并清除key为12345678的缓存
        userService.updateUser(user1);
        //会发select sql,并缓存12345678
        user1 = userService.getUserById("12345678");
        //不会发sql,因为没有清楚key为8a89b2fe5277f748015277f74d8c0000的缓存
        user1 = userService.getUserById("8a89b2fe5277f748015277f74d8c0000");
    }
}
运行结果

程序运行结果和预期效果是一样的,说明缓存已经配置成功
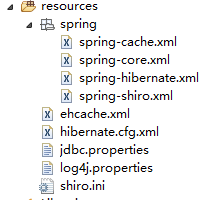
配置文件的结构
Spring整合EhCache就写到这里!
参考文献
http://www.ehcache.org/documentation/3.0/getting-started.html
http://docs.spring.io/spring/docs/current/spring-framework-reference/htmlsingle/