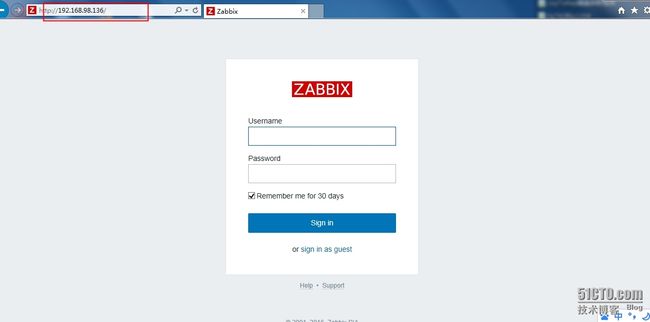
zabbix_直接使用80端口根目录访问
一般在ubuntu 和debian 系统是使用apt-get 包管理工具安装完zabbix-server后,默认的Apache是创建一个zabbix虚拟目录来提供访问,类似这样http://x.x.x.x/zabbix,现希望能够直接通过http://x.x.x.x 就能访问;
Ubuntu 和debian 系统的Apache 配置文件目录结构和redhat系列是有点不同的;
根据上图的每个目录的解释,我在sites-available目录下上删除了默认的站点文件,并创建了新的zabbix文件,然后通过ln �s 连接到sites-enable 目录下;
现在重启apache 即可直接访问zabbix站点;
看看两个文件内的具体内容;
#就是修改了站点的根目录
root@8f52c23e51e9:/etc/apache2/sites-enabled# vim zabbix-server3.0.conf
<VirtualHost *:80>
        # The ServerName directive sets the request scheme, hostname and port that
        # the server uses to identify itself. This is used when creating
        # redirection URLs. In the context of virtual hosts, the ServerName
        # specifies what hostname must appear in the request's Host: header to
        # match this virtual host. For the default virtual host (this file) this
        # value is not decisive as it is used as a last resort host regardless.
        # However, you must set it for any further virtual host explicitly.
        #ServerName www.example.com

        ServerAdmin webmaster@localhost
        DocumentRoot /usr/share/zabbix/

        # Available loglevels: trace8, ..., trace1, debug, info, notice, warn,
        # error, crit, alert, emerg.
        # It is also possible to configure the loglevel for particular
        # modules, e.g.
        #LogLevel info ssl:warn

        ErrorLog ${APACHE_LOG_DIR}/error.log
        CustomLog ${APACHE_LOG_DIR}/access.log combined

        # For most configuration files from conf-available/, which are
        # enabled or disabled at a global level, it is possible to
        # include a line for only one particular virtual host. For example the
        # following line enables the CGI configuration for this host only
        # after it has been globally disabled with "a2disconf".
                #Include conf-available/serve-cgi-bin.conf
</VirtualHost>
vim conf-enabled/zabbix.conf
#注释了Alisa 配置
# Define /zabbix alias, this is the default
#<IfModule mod_alias.c>
#    Alias /zabbix /usr/share/zabbix
#</IfModule>

<Directory "/usr/share/zabbix">
    Options FollowSymLinks
    AllowOverride None
    Order allow,deny
    Allow from all

    <IfModule mod_php5.c>
        php_value max_execution_time 300
        php_value memory_limit 128M
        php_value post_max_size 16M
        php_value upload_max_filesize 2M
        php_value max_input_time 300
        php_value always_populate_raw_post_data -1
        php_value date.timezone Asia/shanghai
    </IfModule>
</Directory>

<Directory "/usr/share/zabbix/conf">
    Order deny,allow
    Deny from all
    <files *.php>
        Order deny,allow
                Deny from all
    </files>
</Directory>

<Directory "/usr/share/zabbix/app">
    Order deny,allow
    Deny from all
    <files *.php>
        Order deny,allow
        Deny from all
    </files>
</Directory>

<Directory "/usr/share/zabbix/include">
    Order deny,allow
    Deny from all
    <files *.php>
        Order deny,allow
        Deny from all
    </files>
</Directory>

<Directory "/usr/share/zabbix/local">
    Order deny,allow
    Deny from all
    <files *.php>
        Order deny,allow
        Deny from all
    </files>
</Directory>
我的实际操作是在conf-enabled/zabbix.conf 文件中取消了Alias … 配置,并在sites-available/000-default.conf中修改了80 端口的网页根目录;然后再将这个文件通过ln -s 命令连接到sites-enable 目录下;
这样我就可以直接通过http://x.x.x.x访问zabbix web了;
!建议在web界面配置前修改
