PCL 室内三维重建
PCL 室内三维重建
http://blog.csdn.net/jinshengtao/article/details/48917263
手头有三个prime sensor摄像头,分别固定在不同角度,打算根据RGBD信息,将三个摄像头的点云数据拼接起来。
设备限制+能力不足,一直没有把point cloud library 1.8环境搭建起来,因此无法实时读取点云信息。此外,笔记本电脑USB芯片总线中断协议限制,亦无法同时使用三个摄像头。
在如此坑爹的境地,分享下我是怎么搞三维重建的。。。。
本文环境win7+vs2012+opencv2.4.9+openni2.0+pcl1.7.2
一、点云数据获取
1.采用openni2.0 采集depth和rgb数据
2.opencv实时显示(否则你不知道采集的是啥),借助IplImage接口拷贝RGB数据给cloudpoint(直接cloudpoint之间赋值结果不对)
3.利用PCL的IO接口,将数据倒腾到PCD文件(PCD采用binary形式保存,ASCII性能实在太差)
- #include <pcl/io/pcd_io.h>
- #include <pcl/point_types.h>
- // 标准库头文件
- #include <iostream>
- #include <string>
- #include <vector>
- // OpenCV头文件
- #include <opencv2\core\core.hpp>
- #include <opencv2\highgui\highgui.hpp>
- #include <opencv2\imgproc\imgproc.hpp>
- // OpenNI头文件
- #include <OpenNI.h>
- typedef unsigned char uint8_t;
- // namespace
- using namespace std;
- using namespace openni;
- using namespace cv;
- using namespace pcl;
- void CheckOpenNIError( Status result, string status )
- {
- if( result != STATUS_OK )
- cerr << status << " Error: " << OpenNI::getExtendedError() << endl;
- }
- int main( int argc, char **argv )
- {
- Status result = STATUS_OK;
- int i,j;
- float x=0.0,y=0.0,z=0.0,xx=0.0;
- //IplImage *test,*test2;
- IplImage *test2;
- //point cloud
- PointCloud<PointXYZRGB> cloud;
- //opencv image
- Mat cvBGRImg;
- Mat cvDepthImg;
- //OpenNI2 image
- VideoFrameRef oniDepthImg;
- VideoFrameRef oniColorImg;
- namedWindow("depth");
- namedWindow("image");
- char key=0;
- // 初始化OpenNI
- result = OpenNI::initialize();
- CheckOpenNIError( result, "initialize context" );
- // open device
- Device device;
- result = device.open( openni::ANY_DEVICE );
- CheckOpenNIError( result, "open device" );
- // create depth stream
- VideoStream oniDepthStream;
- result = oniDepthStream.create( device, openni::SENSOR_DEPTH );
- CheckOpenNIError( result, "create depth stream" );
- // set depth video mode
- VideoMode modeDepth;
- modeDepth.setResolution( 640, 480 );
- modeDepth.setFps( 30 );
- modeDepth.setPixelFormat( PIXEL_FORMAT_DEPTH_1_MM );
- oniDepthStream.setVideoMode(modeDepth);
- // start depth stream
- result = oniDepthStream.start();
- CheckOpenNIError( result, "start depth stream" );
- // create color stream
- VideoStream oniColorStream;
- result = oniColorStream.create( device, openni::SENSOR_COLOR );
- CheckOpenNIError( result, "create color stream" );
- // set color video mode
- VideoMode modeColor;
- modeColor.setResolution( 640, 480 );
- modeColor.setFps( 30 );
- modeColor.setPixelFormat( PIXEL_FORMAT_RGB888 );
- oniColorStream.setVideoMode( modeColor);
- // start color stream
- result = oniColorStream.start();
- CheckOpenNIError( result, "start color stream" );
- while(true)
- {
- // read frame
- if( oniColorStream.readFrame( &oniColorImg ) == STATUS_OK )
- {
- // convert data into OpenCV type
- Mat cvRGBImg( oniColorImg.getHeight(), oniColorImg.getWidth(), CV_8UC3, (void*)oniColorImg.getData() );
- cvtColor( cvRGBImg, cvBGRImg, CV_RGB2BGR );
- imshow( "image", cvBGRImg );
- }
- if( oniDepthStream.readFrame( &oniDepthImg ) == STATUS_OK )
- {
- Mat cvRawImg16U( oniDepthImg.getHeight(), oniDepthImg.getWidth(), CV_16UC1, (void*)oniDepthImg.getData() );
- cvRawImg16U.convertTo( cvDepthImg, CV_8U, 255.0/(oniDepthStream.getMaxPixelValue()));
- imshow( "depth", cvDepthImg );
- }
- // quit
- if( cv::waitKey( 1 ) == 'q' )
- break;
- // capture depth and color data
- if( cv::waitKey( 1 ) == 'c' )
- {
- //get data
- DepthPixel *pDepth = (DepthPixel*)oniDepthImg.getData();
- //create point cloud
- cloud.width = oniDepthImg.getWidth();
- cloud.height = oniDepthImg.getHeight();
- cloud.is_dense = false;
- cloud.points.resize(cloud.width * cloud.height);
- //test = cvCreateImage(cvSize(cloud.width,cloud.height),IPL_DEPTH_8U,3);
- test2 = &IplImage(cvBGRImg);
- for(i=0;i<oniDepthImg.getHeight();i++)
- {
- for(j=0;j<oniDepthImg.getWidth();j++)
- {
- float k = i;
- float m = j;
- xx = pDepth[i*oniDepthImg.getWidth()+j];
- CoordinateConverter::convertDepthToWorld (oniDepthStream,m,k,xx,&x,&y,&z);
- cloud[i*cloud.width+j].x = x;
- cloud[i*cloud.width+j].y = y;
- cloud[i*cloud.width+j].z = xx;
- cloud[i*cloud.width+j].b = (uint8_t)test2->imageData[i*test2->widthStep+j*3+0];
- cloud[i*cloud.width+j].g = (uint8_t)test2->imageData[i*test2->widthStep+j*3+1];
- cloud[i*cloud.width+j].r = (uint8_t)test2->imageData[i*test2->widthStep+j*3+2];
- /* test->imageData[i*test->widthStep+j*3+0] = test2->imageData[i*test2->widthStep+j*3+0];
- test->imageData[i*test->widthStep+j*3+1] = test2->imageData[i*test2->widthStep+j*3+1];
- test->imageData[i*test->widthStep+j*3+2] = test2->imageData[i*test2->widthStep+j*3+2];*/
- }
- }
- //cvSaveImage("test.jpg",test);
- pcl::io::savePCDFileBinaryCompressed("test_pcdc.pcd",cloud);
- cerr<<"Saved "<<cloud.points.size()<<" data points to test_pcd.pcd."<<endl;
- imwrite("c_color.jpg",cvBGRImg);
- imwrite("c_depth.jpg",cvDepthImg);
- /*for(size_t i=0;i<cloud.points.size();++i)
- cerr<<" "<<cloud.points[i].x<<" "<<cloud.points[i].y<<" "<<cloud.points[i].z<<endl;*/
- }
- }
- }
按C键,获取点云信息,按P键退出
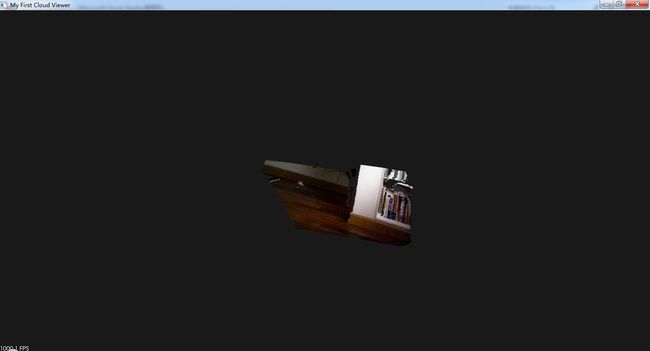
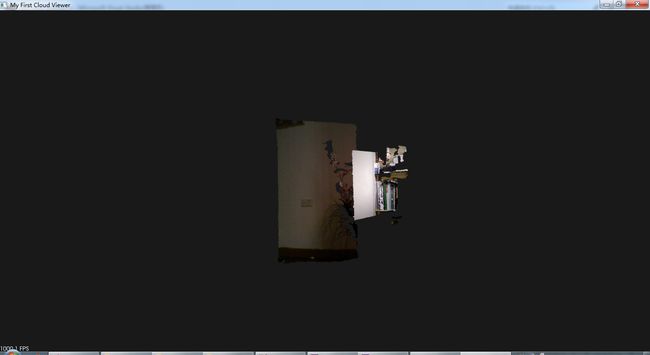
我们得到下面三组数据:
二、点云展示
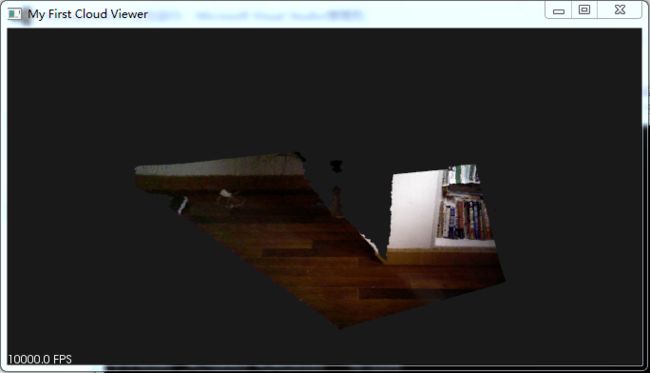
这个没啥东西,直接读取PCD,调用show即可
- #include <pcl/visualization/cloud_viewer.h>
- #include <iostream>
- #include <pcl/io/io.h>
- #include <pcl/io/pcd_io.h>
- int main ()
- {
- pcl::PointCloud<pcl::PointXYZRGB>::Ptr cloud (new pcl::PointCloud<pcl::PointXYZRGB>);
- if(pcl::io::loadPCDFile<pcl::PointXYZRGB>("test_pcda.pcd",*cloud)==-1)//*打开点云文件
- {
- PCL_ERROR("Couldn't read file test_pcd.pcd\n");
- return(-1);
- }
- std::cout<<"Loaded "<<cloud->width*cloud->height<<" data points from test_pcd.pcd with the following fields: "<<std::endl;
- pcl::visualization::CloudViewer viewer("My First Cloud Viewer");
- viewer.showCloud(cloud);
- while(!viewer.wasStopped())
- {
- }
- }
三组数据对应结果:
三、点云拼接
我直接拿原始数据让ICP处理,所以速度非常慢!关于ICP解释,摘录自《点云库PCL学习教程》
Iterative Closest Point,迭代最近点算法,对待拼接的2片点云,首先根据一定的准则确立对应点集P与Q,其中对应点对的个数为N。然后通过最小二乘法迭代计算最优的坐标变换,即旋转矩阵R和平移矢量t,使得误差函数最小。ICP算法计算简便直观且可使拼接具有较好的精度,但是算法的运行速度以及向全局最优的收敛性却在很大程度上依赖于给定的初始变换估计以及在迭代过程中对应关系的确立。各种粗拼接技术可为ICP算法提供较好的初始位置,所以迭代过程中确立正确对应点集以避免迭代陷入局部极值成为各种改进算法的关键,决定了算法的收敛速度与最终的拼接精度。
ICP处理流程:
1.对原始点云数据进行采样
2.确定初始对应点集
3.去除错误对应点对
4.坐标变换的求解
- #include <iostream>
- #include <pcl/io/pcd_io.h>
- #include <pcl/point_types.h>
- #include <pcl/registration/icp.h>
- #include <pcl/visualization/cloud_viewer.h>
- #include <pcl/kdtree/kdtree_flann.h>
- #include <time.h>
- int main (int argc, char** argv)
- {
- clock_t start,finish;
- double totaltime;
- pcl::PointCloud<pcl::PointXYZRGB>::Ptr cloud_in (new pcl::PointCloud<pcl::PointXYZRGB>);
- pcl::PointCloud<pcl::PointXYZRGB>::Ptr cloud_out (new pcl::PointCloud<pcl::PointXYZRGB>);
- pcl::PointCloud<pcl::PointXYZRGB>::Ptr cloud_out2 (new pcl::PointCloud<pcl::PointXYZRGB>);
- pcl::PointCloud<pcl::PointXYZRGB>::Ptr my_cloud (new pcl::PointCloud<pcl::PointXYZRGB>);
- pcl::PointCloud<pcl::PointXYZRGB>::Ptr my_cloud2 (new pcl::PointCloud<pcl::PointXYZRGB>);
- start=clock();
- if(pcl::io::loadPCDFile<pcl::PointXYZRGB>("test_pcda.pcd",*cloud_in)==-1)//*打开点云文件
- {
- PCL_ERROR("Couldn't read file test_pcd.pcd\n");
- return(-1);
- }
- finish=clock();
- totaltime = (double)(finish-start)/CLOCKS_PER_SEC;
- cout<<"\n load test_pcda.pcd data : "<<totaltime<<"seconds!"<<endl;
- start=clock();
- if(pcl::io::loadPCDFile<pcl::PointXYZRGB>("test_pcdb.pcd",*cloud_out)==-1)//*打开点云文件
- {
- PCL_ERROR("Couldn't read file test_pcd.pcd\n");
- return(-1);
- }
- finish=clock();
- totaltime = (double)(finish-start)/CLOCKS_PER_SEC;
- cout<<"\n load test_pcdb.pcd data : "<<totaltime<<"seconds!"<<endl;
- start=clock();
- if(pcl::io::loadPCDFile<pcl::PointXYZRGB>("test_pcdc.pcd",*cloud_out2)==-1)//*打开点云文件
- {
- PCL_ERROR("Couldn't read file test_pcd.pcd\n");
- return(-1);
- }
- finish=clock();
- totaltime = (double)(finish-start)/CLOCKS_PER_SEC;
- cout<<"\n load test_pcdc.pcd data : "<<totaltime<<"seconds!"<<endl;
- //call icp api
- start=clock();
- pcl::IterativeClosestPoint<pcl::PointXYZRGB, pcl::PointXYZRGB> icp;
- icp.setInputCloud(cloud_in);
- icp.setInputTarget(cloud_out);
- pcl::PointCloud<pcl::PointXYZRGB> Final;
- icp.align(Final);
- std::cout << "has converged:" << icp.hasConverged() << " score: " <<
- icp.getFitnessScore() << std::endl;
- std::cout << icp.getFinalTransformation() << std::endl;
- finish=clock();
- totaltime = (double)(finish-start)/CLOCKS_PER_SEC;
- cout<<"\n first time call icp process : "<<totaltime<<"seconds!"<<endl;
- //构造拼接临时的点云
- for(int i=0;i< Final.points.size();i++)
- {
- pcl::PointXYZRGB basic_point;
- basic_point.x = Final.points[i].x;
- basic_point.y = Final.points[i].y;
- basic_point.z = Final.points[i].z;
- basic_point.r = Final.points[i].r;
- basic_point.g = Final.points[i].g;
- basic_point.b = Final.points[i].b;
- my_cloud->points.push_back(basic_point);
- }
- //call icp api another time
- start=clock();
- icp.setInputCloud(cloud_out2);
- icp.setInputTarget(my_cloud);
- pcl::PointCloud<pcl::PointXYZRGB> Final2;
- icp.align(Final2);
- std::cout << "has converged:" << icp.hasConverged() << " score: " <<
- icp.getFitnessScore() << std::endl;
- std::cout << icp.getFinalTransformation() << std::endl;
- finish=clock();
- totaltime = (double)(finish-start)/CLOCKS_PER_SEC;
- cout<<"\n second time call icp process : "<<totaltime<<"seconds!"<<endl;
- //my_cloud.reset();
- //构造拼接最终的点云
- for(int i=0;i< Final2.points.size();i++)
- {
- pcl::PointXYZRGB basic_point;
- basic_point.x = Final2.points[i].x;
- basic_point.y = Final2.points[i].y;
- basic_point.z = Final2.points[i].z;
- basic_point.r = Final2.points[i].r;
- basic_point.g = Final2.points[i].g;
- basic_point.b = Final2.points[i].b;
- my_cloud2->points.push_back(basic_point);
- }
- pcl::visualization::CloudViewer viewer("My First Cloud Viewer");
- viewer.showCloud(my_cloud2);
- while(!viewer.wasStopped())
- {
- }
- return (0);
- }
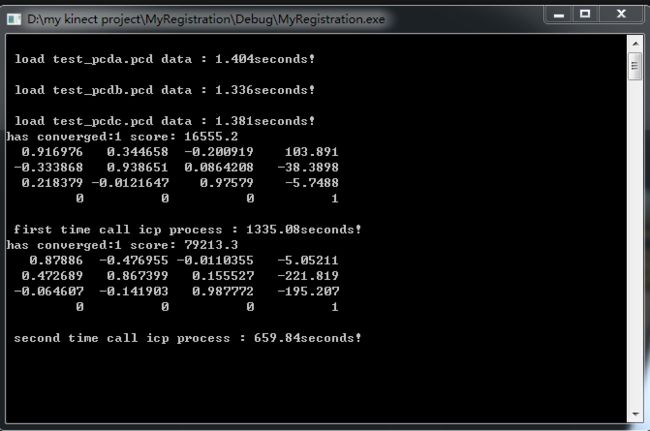
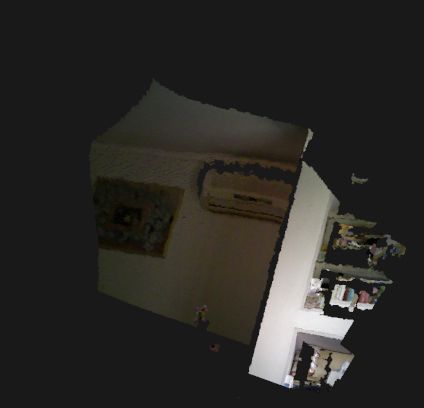
运行结果好像不大对头,收敛失败了(三幅点云图像之间的交集过小所致。。)
换一个顺序也不对:
四、编译错误解决
代码写的是很简单,但是各种开源的东西凑到一起就蛋疼了,这不遇到了opencv中的flann模块与pcl中的flann模块的冲突!
给大家讲讲我是怎么发现的。。。
问题现象:
有个坑爹结构体,跑出来了!!咋办?
source insight导入point cloud library 所有源码,再把flann第三方所有头文件导入,关联后会找到这个坑爹结构体
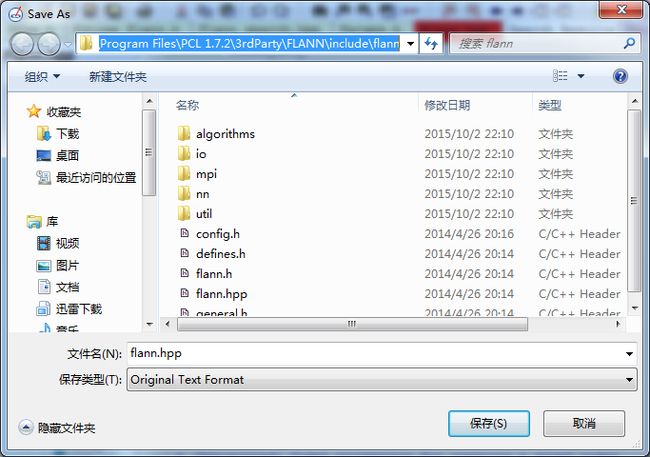
然后看看有谁调用它,Flann.hpp
它位于pcl第三方目录下
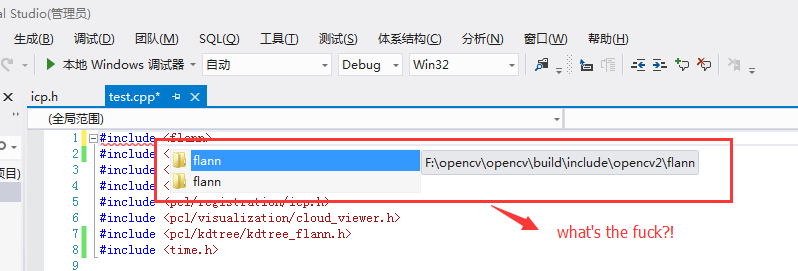
到现在位置我觉得没啥问题,由于《学习教程》中没有引用flann.hpp头文件,我想尝试引用一下会不会解决问题呢,后来vs2012的智能关联功能,帮了我大忙!
由于本次代码没有用到opencv的第三方库,果断干掉opencv2这块头文件
万事大吉!

