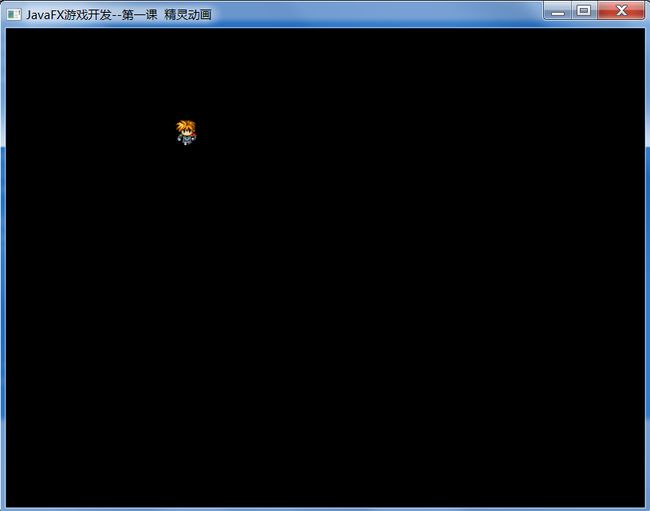
JavaFX游戏开发--第一课 精灵动画
一直在关注JavaFX的发展,最近想试试使用JavaFX开发游戏是什么样的情况。可惜令我汗颜的是--没有找到类似于Java 2D中Graphics/Graphics2D之类的类。自己单纯的继承Node的话,也没办法自己进行绘制。看来目前使用JavaFX进行游戏开发,只能使用JavaFX的Shape和ImageView了。
今天花时间写了个JavaFX的精灵的动画的例子,让我们看看在JavaFX中如何操作精灵的动画吧。
首先创建一个JavaFX项目。
暂时不进行Scene的创建,因为我们要使用自定义的Parent。
我们先进行创建一个Sprite类,继承Parent。 这就是我们的精灵类了。
下面来看看代码:
import javafx.geometry.Rectangle2D;
import javafx.scene.Parent;
import javafx.scene.image.Image;
import javafx.scene.image.ImageView;
/**
 * 精灵类
 * @author wing
 * @date 2012/7/17
 */
public class Sprite extends Parent {
	private enum Direction {
		Left, Right, Up, Down
	};

	private Direction direction = Direction.Left;
	private Direction lastDirection;
	private int x, y, width, height;
	private int index = 0;
	private int indexDiv = 5;
	private ImageView mImageView;
	private int speed = 4;

	public Sprite(int x, int y, int width, int height, String url) {
		this.x = x;
		this.y = y;
		this.width = width;
		this.height = height;
		Image actor = new Image(getClass().getResourceAsStream(url));
		mImageView = new ImageView(actor);
		mImageView.setViewport(new Rectangle2D(0, 0, width, height));
		mImageView.setLayoutX(x);
		mImageView.setLayoutY(y);
		getChildren().add(mImageView);
	}

	/**
	 * 像下移动
	 */
	public void moveDown() {
		direction = Direction.Down;
		if(lastDirection != direction){
			index = 0;
		}
		index++;
		if (index / indexDiv > 2) {
			index = 0;
		}
		mImageView.setViewport(new Rectangle2D(((index / indexDiv) % 3) * width, ((index / indexDiv) / 3) * height, width,
				height));
		mImageView.setLayoutY(mImageView.getLayoutY() + speed);

		lastDirection = direction;
	}

	/**
	 * 像左移动
	 */
	public void moveLeft() {
		direction = Direction.Left;
		if(lastDirection != direction){
			index = 3 * indexDiv;
		}
		index++;
		if (index / indexDiv > 5) {
			index = 3 * indexDiv;
		}
		mImageView.setViewport(new Rectangle2D(((index / indexDiv) % 3) * width, ((index / indexDiv) / 3) * height, width,
				height));
		mImageView.setLayoutX(mImageView.getLayoutX() - speed);

		lastDirection = direction;
	}

	/**
	 * 像右移动
	 */
	public void moveRight() {
		direction = Direction.Right;
		if(lastDirection != direction){
			index = 6 * indexDiv;
		}
		index++;
		if (index / indexDiv > 8) {
			index = 6 * indexDiv;
		}
		mImageView.setViewport(new Rectangle2D(((index / indexDiv) % 3) * width, ((index / indexDiv) / 3) * height, width,
				height));
		mImageView.setLayoutX(mImageView.getLayoutX() + speed);

		lastDirection = direction;
	}

	/**
	 * 像右移动
	 */
	public void moveUp() {
		direction = Direction.Up;
		if(lastDirection != direction){
			index = 9 * indexDiv;
		}
		index++;
		if (index / indexDiv > 11) {
			index = 9 * indexDiv;
		}
		mImageView.setViewport(new Rectangle2D(((index / indexDiv) % 3) * width, ((index / indexDiv) / 3) * height, width,
				height));
		mImageView.setLayoutY(mImageView.getLayoutY() - speed);

		lastDirection = direction;
	}


	public int getX() {
		return x;
	}
	public void setX(int x) {
		this.x = x;
	}
	public int getY() {
		return y;
	}
	public void setY(int y) {
		this.y = y;
	}
	public int getWidth() {
		return width;
	}
	public void setWidth(int width) {
		this.width = width;
	}
	public int getHeight() {
		return height;
	}
	public void setHeight(int height) {
		this.height = height;
	}
}
1.首先定义了一个枚举类型,用来标明当前精灵的方向。
2.x, y, width, height这几个参数顾名思义,就是表明精灵的X,Y坐标和宽,高。
3.我们创建了一个Image,然后基于Image创建了一个ImageView。Image的图片加载是通过getClass().getResourceAsStream(String str)来进行。
4.ImageView有个setViewport(Rectangle2D rect2D)是个很重要的方法,就是显示这个ImageView中图片以rect2D的x,y为起点,width,height为宽高的一部分。 其实就是切割显示。这在所有的精灵动画中都是很常用的。
至于indexDiv大家暂时可以不用看,这个只是为了减慢精灵动画的(太快看起来不协调)。所以你们可以把index /
indexDiv都当作index来看待。
精灵动画,我这里暂且使用很常见的RPGMaker VX中的默认的精灵图片。
我们以这个精灵为标准,从左上到右下,索引也就是Sprite中的index是从0-11。
那么我们在使用ImageView.setViewport()时就要进行相应的处理。最简单的就是X方向(index % 3) * width, Y方向(index / 3 ) * height。 当index到3时,就进入第二行动画。相应的从0, 0,width, height 也变为了0, height, width, height。
然后通过setLayoutX()进行改变精灵的坐标,产生正在行走的效果。
为了避免精灵方向切换的时候,动画出现异常问题(可能会停留一帧上一个方向的动画帧)。我们又创建了一个lastDirection的方向枚举类型。用来标识上一次的方向。如果方向相同,则不做处理,如果方向不同,则要把当前帧切换到当前方向的第一帧。
	/**
	 * 像下移动
	 */
	public void moveDown() {
		direction = Direction.Down;
		if(lastDirection != direction){
			index = 0;
		}
		index++;
		if (index / indexDiv > 2) {
			index = 0;
		}
		mImageView.setViewport(new Rectangle2D(((index / indexDiv) % 3) * width, ((index / indexDiv) / 3) * height, width,
				height));
		mImageView.setLayoutY(mImageView.getLayoutY() + speed);

		lastDirection = direction;
	}
另外,由于只有3帧,如果当index 大于当前方向动画帧数的最大值,得重置为最小。我这里只是简单的标注了数字 2 ,5, 8, 11。
然后创建一个类GamePanel,用来添加我们的所有精灵和地图绘制(以后课程)。
import javafx.event.EventHandler;
import javafx.scene.Parent;
import javafx.scene.input.KeyCode;
import javafx.scene.input.KeyEvent;
/**
 * @author wing
 * @date 2012/7/17
 */
public class GamePanel extends Parent {
    private Sprite sprite;
	public GamePanel() {
	}

	public void load(){
        sprite = new Sprite(50, 50, 32, 32, "actor.png");
        getChildren().add(sprite);
        getScene().setOnKeyPressed(new EventHandler<KeyEvent>() {
 			@Override
 			public void handle(KeyEvent event) {
 				onKeyPressed(event);
 			}
 		});
	}


	public void onKeyPressed(KeyEvent event){
		if(event.getCode() == KeyCode.LEFT){
		  sprite.moveLeft();
	   }else if(event.getCode() == KeyCode.RIGHT){
		  sprite.moveRight();
	   }else if(event.getCode() == KeyCode.UP){
		  sprite.moveUp();
	   }else if(event.getCode() == KeyCode.DOWN){
		  sprite.moveDown();
	   }
	}


	public void update(long now){

	}

}
这个类现在很简单,只是单纯的在50,50坐标处,创建了一个Sprite。然后给Scene添加了一个按键事件,在按Left right up 和 down的时候,将会控制精灵进行各个方向的移动。
下面来写我们的主类。
import javafx.application.Application;
import javafx.scene.Scene;
import javafx.scene.paint.Color;
import javafx.stage.Stage;

public class MainClass extends Application {

	@Override
	public void start(Stage stage) throws Exception {
          GamePanel mPanel = new GamePanel();
          final Scene scene = new Scene(mPanel,800, 600);
          mPanel.load();
          scene.setFill(Color.BLACK);
          stage.setScene(scene);
          stage.setTitle("JavaFX游戏开发--第一课  精灵动画");
          stage.show();
	}

	/**
	 * @param args
	 */
	public static void main(String[] args) {
        launch(MainClass.class, args);
	}

}
我们在主类中创建了GamePanel,根据GamePanel创建了一个Scene,调用了GamePanel的load方法,进行加载精灵和添加事件。然后将Scene背景设为了黑色。
下面我们来看看运行效果吧~
向右走:
向下走:
那么JavaFX游戏开发的第一课就讲到这里了。其实很简单,就是单纯的一个精灵动画的实现而已。所以我们并没有创建精灵的基类等工作。
后面的课程中,我们将会进行游戏地图,对话框等的加入。
本人水平不佳,望大家指正。一起进步。
转载请注明出处:http://blog.csdn.net/ml3947

