Java利用jQuery的ajaxFileUpload异步上传文件的几种方式
ajaxFileUpload实现异步上传文件
一、ajaxFileUpload是一个异步上传文件的jQuery插件。
传一个不知道什么版本的上来,以后不用到处找了。
语法:$.ajaxFileUpload([options])
options参数说明:
1、url 上传处理程序地址。
2,fileElementId 需要上传的文件域的ID,即<input type="file">的ID。
3,secureuri 是否启用安全提交,默认为false。
4,dataType 服务器返回的数据类型。可以为xml,script,json,html。如果不填写,jQuery会自动判断。
5,success 提交成功后自动执行的处理函数,参数data就是服务器返回的数据。
6,error 提交失败自动执行的处理函数。
7,data 自定义参数。这个东西比较有用,当有数据是与上传的图片相关的时候,这个东西就要用到了。
8, type 当要提交自定义参数时,这个参数要设置成post
错误提示:
1,SyntaxError: missing ; before statement错误
如果出现这个错误就需要检查url路径是否可以访问
2,SyntaxError: syntax error错误
如果出现这个错误就需要检查处理提交操作的服务器后台处理程序是否存在语法错误
3,SyntaxError: invalid property id错误
如果出现这个错误就需要检查文本域属性ID是否存在
4,SyntaxError: missing } in XML expression错误
如果出现这个错误就需要检查文件name是否一致或不存在
5,其它自定义错误
大家可使用变量$error直接打印的方法检查各参数是否正确,比起上面这些无效的错误提示还是方便很多。
使用方法:
第一步:先引入jQuery与ajaxFileUpload插件。注意先后顺序,这个不用说了,所有的插件都是这样。
    <script src="jquery-1.7.1.js" type="text/javascript"></script>
    <script src="ajaxfileupload.js" type="text/javascript"></script>
第二步:HTML代码:
<body>
    <p><input type="file" id="file1" name="file" /></p>
    <input type="button" value="上传" />
    <p><img id="img1" alt="上传成功啦,你妈个B啦" src="" /></p>
</body>
第三步:JS代码
    <script src="jquery-1.7.1.js" type="text/javascript"></script>
    <script src="ajaxfileupload.js" type="text/javascript"></script>
    <script type="text/javascript">
        $(function () {
            $(":button").click(function () {
                ajaxFileUpload();
            })
        })
        function ajaxFileUpload() {
            $.ajaxFileUpload
            (
                {
                    url: '/upload.aspx', //用于文件上传的服务器端请求地址
                    secureuri: false, //是否需要安全协议,一般设置为false
                    fileElementId: 'file1', //文件上传域的ID
                    dataType: 'json', //返回值类型 一般设置为json
                    success: function (data, status)  //服务器成功响应处理函数
                    {
                        $("#img1").attr("src", data.imgurl);
                        if (typeof (data.error) != 'undefined') {
                            if (data.error != '') {
                                alert(data.error);
                            } else {
                                alert(data.msg);
                            }
                        }
                    },
                    error: function (data, status, e)//服务器响应失败处理函数
                    {
                        alert(e);
                    }
                }
            )
            return false;
        }
    </script>
第四步:后台页面upload.aspx代码:
        protected void Page_Load(object sender, EventArgs e)
        {
            HttpFileCollection files = Request.Files;
            string msg = string.Empty;
            string error = string.Empty;
            string imgurl;
            if (files.Count > 0)
            {
                files[0].SaveAs(Server.MapPath("/") + System.IO.Path.GetFileName(files[0].FileName));
                msg = " 成功! 文件大小为:" + files[0].ContentLength;
                imgurl = "/" + files[0].FileName;
                string res = "{ error:'" + error + "', msg:'" + msg + "',imgurl:'" + imgurl + "'}";
                Response.Write(res);
                Response.End();
            }
        }
本实例完整代码下载
来一个MVC版本的实例:
控制器代码
    public class HomeController : Controller
    {
        public ActionResult Index()
        {
            return View();
        }

        public ActionResult Upload()
        {
            HttpFileCollection hfc = System.Web.HttpContext.Current.Request.Files;
            string imgPath = "";
            if (hfc.Count > 0)
            {
                imgPath = "/testUpload" + hfc[0].FileName;
                string PhysicalPath = Server.MapPath(imgPath);
                hfc[0].SaveAs(PhysicalPath);
            }
            return Content(imgPath);
        }
    }
前端视图,HTML与JS代码,成功上传后,返回图片真实地址并绑定到<img>的SRC地址
<html>
<head>
    <script src="/jquery-1.7.1.js" type="text/javascript"></script>
    <script src="/ajaxfileupload.js" type="text/javascript"></script>
    <script type="text/javascript">
        $(function () {
            $(":button").click(function () {
                if ($("#file1").val().length > 0) {
                    ajaxFileUpload();
                }
                else {
                    alert("请选择图片");
                }
            })
        })
        function ajaxFileUpload() {
            $.ajaxFileUpload
            (
                {
                    url: '/Home/Upload', //用于文件上传的服务器端请求地址
                    secureuri: false, //一般设置为false
                    fileElementId: 'file1', //文件上传空间的id属性  <input type="file" id="file" name="file" />
                    dataType: 'HTML', //返回值类型 一般设置为json
                    success: function (data, status)  //服务器成功响应处理函数
                    {
                        alert(data);
                        $("#img1").attr("src", data);
                        if (typeof (data.error) != 'undefined') {
                            if (data.error != '') {
                                alert(data.error);
                            } else {
                                alert(data.msg);
                            }
                        }
                    },
                    error: function (data, status, e)//服务器响应失败处理函数
                    {
                        alert(e);
                    }
                }
            )
            return false;
        }
    </script>
</head>
<body>
    <p><input type="file" id="file1" name="file" /></p>
    <input type="button" value="上传" />
    <p><img id="img1" alt="上传成功啦,你妈个B啦" src="" /></p>
</body>
</html>
最后再来一个上传图片且附带参数的实例:控制器代码:
    public class HomeController : Controller
    {
        public ActionResult Index()
        {
            return View();
        }

        public ActionResult Upload()
        {
            NameValueCollection nvc = System.Web.HttpContext.Current.Request.Form;

            HttpFileCollection hfc = System.Web.HttpContext.Current.Request.Files;
            string imgPath = "";
            if (hfc.Count > 0)
            {
                imgPath = "/testUpload" + hfc[0].FileName;
                string PhysicalPath = Server.MapPath(imgPath);
                hfc[0].SaveAs(PhysicalPath);
            }
            //注意要写好后面的第二第三个参数
            return Json(new { Id = nvc.Get("Id"), name = nvc.Get("name"), imgPath1 = imgPath },"text/html", JsonRequestBehavior.AllowGet);
        }
    }
Index视图代码:
<html>
<head>
    <script src="/jquery-1.7.1.js" type="text/javascript"></script>
    <script src="/ajaxfileupload.js" type="text/javascript"></script>
    <script type="text/javascript">
        $(function () {
            $(":button").click(function () {
                if ($("#file1").val().length > 0) {
                    ajaxFileUpload();
                }
                else {
                    alert("请选择图片");
                }
            })
        })
        function ajaxFileUpload() {
            $.ajaxFileUpload
            (
                {
                    url: '/Home/Upload', //用于文件上传的服务器端请求地址
                    type: 'post',
                    data: { Id: '123', name: 'lunis' }, //此参数非常严谨,写错一个引号都不行
                    secureuri: false, //一般设置为false
                    fileElementId: 'file1', //文件上传空间的id属性  <input type="file" id="file" name="file" />
                    dataType: 'json', //返回值类型 一般设置为json
                    success: function (data, status)  //服务器成功响应处理函数
                    {
                        alert(data);
                        $("#img1").attr("src", data.imgPath1);
                        alert("你请求的Id是" + data.Id + "     " + "你请求的名字是:" + data.name);
                        if (typeof (data.error) != 'undefined') {
                            if (data.error != '') {
                                alert(data.error);
                            } else {
                                alert(data.msg);
                            }
                        }
                    },
                    error: function (data, status, e)//服务器响应失败处理函数
                    {
                        alert(e);
                    }
                }
            )
            return false;
        }
    </script>
</head>
<body>
    <p><input type="file" id="file1" name="file" /></p>
    <input type="button" value="上传" />
    <p><img id="img1" alt="上传成功啦,你妈个B啦" src="" /></p>
</body>
</html>
此实例在显示出异步上传图片的同时并弹出自定义传输的参数。本实例下载地址
2013年1月28日,今天调试过程中发现一个问题,就是作为文件域(<input type="file">)必须要有name属性,如果没有name属性,上传之后服务器是获取不到图片的。如:正确的写法是<input type="file" id="file1" name="file1" />
2013年1月28日,最经典的错误终于找到原因所在了。Object function (a,b){return new e.fn.init(a,b,h)} has no method 'handleError',这个是google浏览器报的错误,非常经典, 不知道是我的版本问题还是真正存在的问题。这个问题的根源经过N次上传才找到问题的根本所在。答案是:dataType参数一定要大写。如:dataType: 'HTML'。
1.SSH2下使用ajaxFileUpload控件上传附件
使用jQuery的ajaxFileUpload控件以ajax方式上传附件有较好的用户体验,在某SSH2项目开发中,使用了ajaxFileUpload实现了附件的上传,具体过程如下:
1、引入及修改ajaxFileUpload.js
- <script type="text/javascript" src="<%=basePath%>/js/jquery/jquery-1.8.0.min.js"></script>
- <script type="text/javascript" src="<%=basePath%>js/ajaxfileupload.js"></script>
为了使得ajaxfileupload支持IE9、IE10,在ajaxfileupload.js中修改createUploadIframe方法(可参考 http://blog.csdn.net/tiangsu_php/article/details/7795927 )
- createUploadIframe: function(id, uri)
- {
- //create frame
- var frameId = 'jUploadFrame' + id;
- if(window.ActiveXObject) {
- if(jQuery.browser.version=="9.0"||jQuery.browser.version=="10.0") {
- io = document.createElement('iframe');
- io.id = frameId;
- io.name = frameId;
- } else if(jQuery.browser.version=="6.0"||jQuery.browser.version=="7.0"||jQuery.browser.version=="8.0") {
- var io = document.createElement('<iframe id="' + frameId + '" name="' + frameId + '" />');
- if(typeof uri== 'boolean'){
- io.src = 'javascript:false';
- }
- else if(typeof uri== 'string'){
- io.src = uri;
- }
- }
- }
2、form表单及上传控件
form表单设置为:
- enctype="multipart/form-data" id="addForm" method="post"
- <input id="upload" name="upload" size="50" type="file" />
- <a class="easyui-linkbutton" iconCls="icon-upload" onclick="ajaxFileUploadCheckType('/sys/file/uploadSysFile.action?fileVo.status=0')" >上传</a>
- <img src="<%=basePath%>/img/loading_16x16.gif" id="loading" style="display: none;">
- function ajaxFileUploadCheckType(url){
- var str="";
- var re=new RegExp("(.pdf|.PDF)$");
- var upload=$("#upload").val();
- if(upload=="")
- str+="请选择要上传的附件!<br/>";
- else if(!re.test(upload.toLowerCase()))
- str+="请上传PDF格式的文件!!";
- if(str=="")
- ajaxFileUpload(url);
- else
- alert(str);
- }
- //文件上传
- function ajaxFileUpload(url1)
- {
- $("#loading")
- .ajaxStart(function(){
- $(this).show();
- })//开始上传文件时显示一个等待图片
- .ajaxComplete(function(){
- $(this).hide();
- });//文件上传完成将图片隐藏起来
- var fileSelect=$("#fileSelect").val(); //是否选择了文件类型
- var url2=url1;
- if(fileSelect!=undefined&&fileSelect!=null&&fileSelect!=''){
- if(url1.indexOf('?')>0)
- url2=encodeURI(url1+"&fileVo.fileTypeId="+fileSelect);
- else
- url2=encodeURI(url1+"?fileVo.fileTypeId="+fileSelect);
- }
- var tableName=$("#tableName").val();
- if(url2.indexOf('?')>0)
- url2=encodeURI(url2+"&fileVo.tableName="+tableName);
- else
- url2=encodeURI(url2+"?fileVo.tableName="+tableName);
- var fid=$("#fid").val();
- if(url2.indexOf('?')>0)
- url2=encodeURI(url2+"&fileVo.fid="+fid);
- else
- url2=encodeURI(url2+"?fileVo.fid="+fid);
- $.ajaxFileUpload
- (
- {
- url:url2,//用于文件上传的服务器端请求地址
- secureuri:false,//一般设置为false
- fileElementId:'upload',//文件上传空间的id属性 <input type="file" id="upload" name="upload" />
- // type:'POST',
- dataType: 'text',//返回值类型 一般设置为json
- //contentType: "application/x-www-form-urlencoded; charset=utf-8",
- success: function (data, status) //服务器成功响应处理函数
- {
- //alert((data));
- var result=eval('('+data+')');
- generateFileList(result,"type"); //使用ajax方式重新长生附件列表
- },
- error: function (data, status, e)//服务器响应失败处理函数
- {
- $.messager.alert('错误提示',"文件上传出现异常,请重新上传或联系管理员!","error");
- }
- }
- )
- return false;
- }
3、Struts2的XML配置及服务器端处理
XML配置:
- <package name="sys.file" namespace="/sys/file" extends="globalpackage">
- lt;action name="uploadSysFile" class="com.cnpc.sys.action.FileUploadAction"
- method="uploadSysFile">
- lt;/action>
- ……
服务器端Action处理:
- package com.cnpc.sys.action;
- import java.io.File;
- import java.io.FileInputStream;
- import java.io.FileOutputStream;
- import java.io.IOException;
- import java.util.ArrayList;
- import java.util.Date;
- import java.util.List;
- import javax.servlet.http.HttpServletRequest;
- import javax.servlet.http.HttpServletResponse;
- import org.apache.struts2.ServletActionContext;
- import com.cnpc.framework.common.action.BaseAction;
- import com.cnpc.framework.common.exception.GlobalException;
- import com.cnpc.framework.common.servicefactory.SystemInstance;
- import com.cnpc.sys.entity.Dictionary;
- import com.cnpc.sys.entity.Employee;
- import com.cnpc.sys.service.IDictionaryService;
- import com.cnpc.sys.service.IEmployeeService;
- import com.cnpc.sys.service.ISysFileService;
- import com.cnpc.sys.vo.SysFileVo;
- import com.cnpc.utils.DateUtils;
- import com.cnpc.utils.PropertiesTools;
- import com.cnpc.utils.StrUtils;
- //附件上传处理类
- public class FileUploadAction extends BaseAction {
- private ISysFileService sysFileService = (ISysFileService) SystemInstance
- .getInstance().getBean(ISysFileService.class);
- private IDictionaryService dictionaryService = (IDictionaryService) SystemInstance
- .getInstance().getBean(IDictionaryService.class);
- private IEmployeeService employeeService = (IEmployeeService) SystemInstance
- .getInstance().getBean(IEmployeeService.class);
- private SysFileVo fileVo;
- private File upload;// 实际上传文件
- private String uploadContentType; // 文件的内容类型
- private String uploadFileName; // 上传文件名
- private List<SysFileVo> fileVoList;
- private String message = "你已成功上传文件";
- private String tableName;
- private String year;
- private List<SysFileVo> volist;
- public String getYear() {
- return year;
- }
- public void setYear(String year) {
- this.year = year;
- }
- public String getTableName() {
- return tableName;
- }
- public void setTableName(String tableName) {
- this.tableName = tableName;
- }
- public List<SysFileVo> getVolist() {
- return volist;
- }
- public void setVolist(List<SysFileVo> volist) {
- this.volist = volist;
- }
- public SysFileVo getFileVo() {
- return fileVo;
- }
- public void setFileVo(SysFileVo fileVo) {
- this.fileVo = fileVo;
- }
- public File getUpload() {
- return upload;
- }
- public void setUpload(File upload) {
- this.upload = upload;
- }
- public String getUploadContentType() {
- return uploadContentType;
- }
- public void setUploadContentType(String uploadContentType) {
- this.uploadContentType = uploadContentType;
- }
- public String getUploadFileName() {
- return uploadFileName;
- }
- public void setUploadFileName(String uploadFileName) {
- this.uploadFileName = uploadFileName;
- }
- public List<SysFileVo> getFileVoList() {
- return fileVoList;
- }
- public void setFileVoList(List<SysFileVo> fileVoList) {
- this.fileVoList = fileVoList;
- }
- public String getMessage() {
- return message;
- }
- public void setMessage(String message) {
- this.message = message;
- }
- public String uploadSysFile() throws GlobalException, IOException {
- String isAll=fileVo.getIsAll();
- Employee emp = employeeService.getEmployeeByID(getSessionContainer().getUserId());
- if (fileVo == null) {
- fileVo = new SysFileVo();
- }
- String[] str = saveUpload();
- fileVo.setFileName(str[0]);
- fileVo.setVirtualName(str[1]);
- fileVo.setFilePath(str[2].replace("\\", "\\\\"));
- if (fileVo != null) {
- if (fileVo.getEmpid() == null) {
- Integer empid = emp.getEmpid();
- fileVo.setEmpid(empid);
- }
- if (fileVo.getUploadTime() == null) {
- fileVo.setUploadTime(DateUtils.format(new Date(System
- .currentTimeMillis()), DateUtils.formatStr_yyyyMMdd));
- }
- if (fileVo.getTableName() == null) {
- fileVo.setTableName(tableName);
- }
- if(fileVo.getYear()==null){
- if(year==null)
- year=DateUtils.getYear();
- fileVo.setYear(year);
- }
- if(fileVo.getIid()==null){
- fileVo.setIid(emp.getInstitute().getIid());
- }
- fileVo = sysFileService.addSysFileVo(fileVo);
- }
- if (fileVoList == null) {
- fileVoList = new ArrayList<SysFileVo>();
- }
- fileVo.setIsAll(isAll);
- if(fileVo.getIsAll()!=null&&fileVo.getIsAll().equals("1")){
- fileVoList = sysFileService.getAllSysFileByInfoId(
- fileVo.getTableName(), fileVo.getFid());
- }else{
- fileVoList = sysFileService.getSysFileByInfoId(
- fileVo.getTableName(),null, fileVo.getFid(),fileVo.getStatus());
- }
- String jsonStr = getJsonForFileList(fileVoList);
- HttpServletResponse response = getCurrentResponse();
- HttpServletRequest request=getCurrentRequest();
- request.setCharacterEncoding(ENCODING);
- response.setCharacterEncoding(ENCODING);
- response.setContentType("text/html");
- outPutString(jsonStr);
- return NONE;
- }
- public String getJsonForFileList(List<SysFileVo> filelist) {
- if (filelist == null)
- return "[]";
- StringBuffer buffer = new StringBuffer("[");
- for (SysFileVo vo : filelist) {
- buffer.append("{'id':'" + vo.getFileId() + "' ,'name':'"
- + vo.getFileName() + "','path':'"
- + vo.getFilePath().replace("\\", "\\\\") + "','typeName':'"
- + vo.getFileTypeName() + "','typeid':'"
- + vo.getFileTypeId() + "','status':'"
- + vo.getStatus() + "'},");
- }
- if (buffer.length() > 1)
- buffer = new StringBuffer(buffer.substring(0, buffer.length() - 1));
- buffer.append("]");
- return buffer.toString();
- }
- @SuppressWarnings("deprecation")
- public String[] saveUpload() throws IOException {
- String[] result = new String[3];
- try {
- if (uploadFileName != null && !"".equals(uploadFileName)) {
- String trueName = uploadFileName.substring(uploadFileName
- .lastIndexOf("/") + 1, uploadFileName.length());
- String fileName = new Date().getTime()
- + com.cnpc.utils.FileUtils.getExtention(uploadFileName);
- String path = PropertiesTools.getPropertiesValueByFileAndKey(
- "globalParameters.properties", "uploadPath");
- String targetDirectory = path;
- String targetFileName = fileName;
- // 以服务器的文件保存地址和原文件名建立上传文件输出流
- FileOutputStream fos = new FileOutputStream(path + "\\"
- + fileName);
- // 以上传文件建立一个文件上传流
- FileInputStream fis = new FileInputStream(upload);
- // 将上传文件的内容写入服务器
- byte[] buffer = new byte[1024];
- int len = 0;
- while ((len = fis.read(buffer)) > 0) {
- fos.write(buffer, 0, len);
- }
- fis.close();
- fos.flush();
- result[0] = trueName;
- result[1] = fileName;
- result[2] = path + "\\" + fileName;
- }
- } catch (Exception e) {
- e.printStackTrace();
- message = "对不起,文件上传失败了!!!!";
- }
- return result;
- }
- public String deleteSysFile() throws GlobalException, IOException {
- if (fileVo != null && fileVo.getFileId() != null) {
- SysFileVo deleteVo = sysFileService.getSysFileByID(fileVo
- .getFileId());
- deleteFile(deleteVo.getFilePath());
- sysFileService.deleteSysFileByVoId(deleteVo.getFileId());
- if (fileVoList == null) {
- fileVoList = new ArrayList<SysFileVo>();
- }
- if(fileVo.getIsAll()!=null&&fileVo.getIsAll().equals("1")){
- fileVoList = sysFileService.getAllSysFileByInfoId(
- deleteVo.getTableName(), deleteVo.getFid());
- }else{
- fileVoList = sysFileService.getSysFileByInfoId(deleteVo.getTableName(),null, deleteVo.getFid(),deleteVo.getStatus());
- }
- }
- String jsonStr = getJsonForFileList(fileVoList);
- HttpServletResponse response = getCurrentResponse();
- HttpServletRequest request=getCurrentRequest();
- request.setCharacterEncoding(ENCODING);
- response.setCharacterEncoding(ENCODING);
- response.setContentType("text/html");
- outPutString(jsonStr);
- return NONE;
- }
- public String downloadFile() throws Exception {
- SysFileVo filevo = sysFileService
- .getsysfilebypath(fileVo.getFilePath());
- HttpServletResponse response = getCurrentResponse();
- HttpServletRequest request=getCurrentRequest();
- request.setCharacterEncoding(ENCODING);
- response.setCharacterEncoding(ENCODING);
- response.setContentType("text/html");
- if (filevo != null) {
- setCurrentAttribute("filename", filevo.getFileName());
- setCurrentAttribute("fileurl", filevo.getFilePath());
- } else {
- setCurrentAttribute("filename", fileVo.getFileName());
- setCurrentAttribute("fileurl", fileVo.getFilePath());
- }
- return "download";
- }
- public void deleteFile(String path) {
- String targetDirectory = ServletActionContext.getRequest().getRealPath(
- "");
- File target = new File(targetDirectory, path);
- if (target.exists()) {
- target.delete();
- } else {
- System.out.println("文件不存在");
- }
- }
- public String ajaxCheckFile() throws IOException {
- String typeids = getCurrentParameter("typeids");
- String dictCode = getCurrentParameter("dictCode");
- // List<SysFileVo> filelist=sysFileService.getSysFileByInfoId(tabName,
- // Integer.valueOf(id));
- String[] arrType = null;
- if (!StrUtils.isEmpty(typeids))
- arrType = typeids.substring(0, typeids.length() - 1).split(",");
- List<Dictionary> dictlist = dictionaryService
- .getDictsByDictCode(dictCode);
- String str = "";
- boolean isExist = false;
- for (Dictionary dict : dictlist) {
- isExist = false;
- if (dict.getIsCheck() != null && dict.getIsCheck().equals("1")) {
- if (arrType != null) {
- for (String typeid : arrType) {
- if (dict.getDictid().equals(Integer.valueOf(typeid))) {
- isExist = true;
- break;
- }
- }
- }
- if (!isExist)
- str += dict.getDictName() + "不能为空!\r\n";
- }
- }
- outPutString(str);
- return NONE;
- }
- }
FileUploadAction包含了附件上传、删除、生成json附件列表功能,该处理类是直接复制、粘贴项目源代码而来,如果使用,请按照需求进行增删。
以上三个步骤就在SSH2中完成了ajaxFileUpload控件上传附件的功能,仅供参考。
2.AjaxFileUpload组件结合Struts2异步图片上传
使用AjaxFileUpload组件结合Struts2异步上传需要添加如下文件:
ajaxfileupload.js
jquery-x.x.x-min.js
struts2相关jar包
AjaxFileUpload组件下载连接:http://download.csdn.net/detail/yangfuqian/4337967
具体实现代码:
服务端:
- package com.tenghu.action.upload;
- import java.io.File;
- import java.io.FileInputStream;
- import java.io.FileOutputStream;
- import java.io.InputStream;
- import java.io.OutputStream;
- import javax.servlet.http.HttpServletRequest;
- import org.apache.struts2.ServletActionContext;
- import com.opensymphony.xwork2.ActionSupport;
- /**
- * 文件上传Action
- * @author xiaohu
- *
- */
- public class FileUpload extends ActionSupport{
- private String name;
- //封装上传文件域的属性
- private File file;
- //封装上传文件类型的属性
- private String fileContentType;
- //封装上传文件名的属性
- private String fileFileName;
- //提示信息
- private String json_message;
- private String JSON_MESSAGE="json_message";
- @Override
- public String execute() throws Exception {
- try {
- //设置文件保存目录
- String saveDir=getRootPath()+"/images";
- File saveFile=new File(saveDir);
- //判断
- if(!saveFile.exists()){
- saveFile.mkdirs();
- }
- //时间戳
- String timeStr="zycs"+System.currentTimeMillis();
- //获取文件后缀
- String fileSuffix=fileFileName.substring(fileFileName.indexOf("."));
- //拼接文件名
- String fileName=timeStr+fileSuffix;
- //创建文件输出流对象
- OutputStream fos=new FileOutputStream(saveDir+"/"+fileName);
- //创建文件输入流对象
- InputStream fis=new FileInputStream(file);
- //创建缓冲数组
- byte[] buffer=new byte[1024];
- int len=0;
- //从输入流中将数据写入到输出流中
- while((len=fis.read(buffer))!=-1){
- //写入
- fos.write(buffer,0,len);
- }
- //关闭资源
- fis.close();
- fos.close();
- //上传成功地址
- String successPath=getUrl()+"/images/"+fileName;
- json_message="{\"result\":1,\"message\":\""+successPath+"\"}";
- } catch (Exception e) {
- e.printStackTrace();
- json_message="{\"result\":0}";
- }
- return JSON_MESSAGE;
- }
- /**
- * 返回服务器http地址
- * @return
- */
- private String getUrl(){
- HttpServletRequest request=ServletActionContext.getRequest();
- return "http://"+request.getRemoteHost()+request.getContextPath();
- }
- /**
- * 获取项目根目录
- * @return
- */
- private String getRootPath(){
- String filePath = Thread.currentThread().getContextClassLoader()
- .getResource("").toString();
- if (filePath.toLowerCase().indexOf("file:") > -1) {
- filePath = filePath.substring(6, filePath.length());
- }
- if (filePath.toLowerCase().indexOf("classes") > -1) {
- filePath = filePath.replaceAll("/classes", "");
- }
- if (filePath.toLowerCase().indexOf("web-inf") > -1) {
- filePath = filePath.substring(0, filePath.length() - 9);
- }
- if (System.getProperty("os.name").toLowerCase().indexOf("window") < 0) {
- filePath = "/" + filePath;
- }
- if (filePath.endsWith("/"))
- filePath = filePath.substring(0, filePath.length() - 1);
- return filePath;
- }
- public String getName() {
- return name;
- }
- public void setName(String name) {
- this.name = name;
- }
- public File getFile() {
- return file;
- }
- public void setFile(File file) {
- this.file = file;
- }
- public String getFileContentType() {
- return fileContentType;
- }
- public String getJson_message() {
- return json_message;
- }
- public void setJson_message(String jsonMessage) {
- json_message = jsonMessage;
- }
- public void setFileContentType(String fileContentType) {
- this.fileContentType = fileContentType;
- }
- public String getFileFileName() {
- return fileFileName;
- }
- public void setFileFileName(String fileFileName) {
- this.fileFileName = fileFileName;
- }
- }
如果希望获取到上传图片的宽和高,可以添加以下代码:
- //获取图片缓冲流对象
- BufferedImage image=ImageIO.read(fis);
- image.getWidth();//图片宽
- image.getHeight();//图片高
js代码:
- <script type="text/javascript">
- $(document).ready(function() {
- //调用初始化方法
- UPLOAD.init();
- });
- var UPLOAD = {
- wWidth : $(window).width(),//获取浏览器可视化宽度
- wHeight : $(window).height(),//获取浏览器可视化高度
- //初始化上传文件窗口的位置
- init : function() {
- //获取窗口div对象
- var uObj = $(".w_sub");
- //设置上传窗口位置
- uObj.css( {"left" : (this.wWidth - uObj.width()) / 2,"top" : (this.wHeight - uObj.height()) / 2});
- //点击上传按钮显示上传窗口
- $("#upload").click(function(){$("#upload_w").show();});
- //调用关闭窗口
- this.closeUp();
- //调用关闭预览窗口
- this.closePre();
- //调用上传函数
- this.btnUpload();
- //调用预览图片
- this.btnPreview();
- this.dragDrop();
- },
- //关闭上传窗口
- closeUp:function(){
- $(".close").click(function(){$("#upload_w").hide();});
- },
- //关闭预览窗口
- closePre:function(){
- $(".pre").click(function(){$(".preview_w").hide();});
- },//点击上传
- btnUpload:function(){
- $(".sub_upload").click(function(){
- var file=$("#file").val();
- if(file==""){
- alert("请选择需要上传的图片");
- return;
- }else{
- //判断上传文件格式
- var suffixs=new Array("jpg","gif","png");
- //截取上传文件格式
- var fileType=file.substring(file.lastIndexOf('.')+1);
- if($.inArray(fileType,suffixs)<=-1){
- alert("图片格式错误");
- return;
- }else{
- var uploadUrl="uploadFile?time="+new Date().getTime();
- //异步上传
- $.ajaxFileUpload({
- url:uploadUrl,
- secureuri:false,
- fileElementId:"file",//上传id,这里是<input type="file" name="file" id="file"/>
- dataType:'text',
- success:function(data,status){
- var json=$.parseJSON(data);
- if(json.result==1){
- $("#upload_w").hide();
- $(".url").val(json.message);
- }else{
- alert("上传失败!");
- }
- },
- error:function(){
- alert("异步失败");
- }
- });
- }
- }
- });
- },
- //点击预览
- btnPreview:function(){
- //点击预览图片
- $("#proview_img").click(function(){
- //获取文本框中的路径
- var imagePath=$(".url").val();
- if(imagePath!=""){
- $("#image").attr("src",$(".url").val());
- $(".preview_w").show();
- }else{
- alert("还有上传图片");
- }
- });
- },
- /**
- *拖拽弹窗
- */
- dragDrop:function(){
- var self=this;
- var move=false;//标识是否移动元素
- var offsetX=0;//弹窗到浏览器left的宽度
- var offsetY=0;//弹出到浏览器top的宽度
- var title=$(".title");
- boxContent=$(".preview");
- //鼠标按下事件
- title.mousedown(function(){
- move=true;//当鼠标按在该div上的时间将move属性设置为true
- offsetX=event.offsetX;//获取鼠标在当前窗口的相对偏移位置的Left值并赋值给offsetX
- offsetY=event.offsetY;//获取鼠标在当前窗口的相对偏移位置的Top值并赋值给offsetY
- title.css({"cursor":"move"});
- }).mouseup(function(){
- //当鼠标松开的时候将move属性摄hi为false
- move=false;
- });
- $(document).mousemove(function(){
- if(!move){//如果move属性不为true,就不执行下面的代码
- return;
- }
- //move为true的时候执行下面代码
- var x = event.clientX-offsetX; //event.clientX得到鼠标相对于客户端正文区域的偏移,然后减去offsetX即得到当前推拽元素相对于当前窗口的X值(减去鼠标刚开始拖动的时候在当前窗口的偏移X)
- var y = event.clientY-offsetY; //event.clientY得到鼠标相对于客户端正文区域的偏移,然后减去offsetX即得到当前推拽元素相对于当前窗口的Y值(减去鼠标刚开始拖动的时候在当前窗口的偏移Y)
- if(!(x<0||y<0||x>(self.wWidth-boxContent.width())||y>(self.wHeight-boxContent.height()))){
- boxContent.css({"left":x,"top":y,"cursor":"move"});
- }
- });
- }
- }
- </script>
html代码:
- <body>
- 上传后的文件路径:
- <input type="text" class="url" />
- <span id="upload">上传</span>
- <span id="proview_img">预览</span>
- <br/>
- <!-- 上传文件弹窗 -->
- <div id="upload_w">
- <!-- 遮盖部分 -->
- <div class="cover"></div>
- <div class="w_sub">
- <form action="" method="post" enctype="multipart/form-data">
- <table width="100%" cellpadding="0" cellspacing="0">
- <tr><th class="title">图片上传<span class="close">×</span></th></tr>
- <tr><td style="padding-left: 20px">选择图片文件:<br />
- <input type="file"style="width: 95%; border: 1px solid #ddd; height: 25px; border-radius: 3px" name="file" id="file">
- </td>
- </tr>
- <tr><td>${promptInfo }</td></tr>
- <tr height="50px">
- <td align="center"><input type="button" value="上传" class="sub_upload" /></td>
- </tr>
- </table>
- </form>
- </div>
- </div>
- <!-- 预览图片窗口 -->
- <div class="preview_w">
- <!-- 遮盖部分 -->
- <div class="cover"></div>
- <div class="preview">
- <table width="100%" cellpadding="0" cellspacing="0">
- <tr><th class="title">图片预览<span class="pre">×</span></th></tr>
- <tr>
- <td style="padding: 20px">
- <img src="" id="image"/>
- </td>
- </tr>
- </table>
- </div>
- </div>
- </body>
css代码:
- <style type="text/css">
- * {
- margin: 0px;
- padding: 0px;
- }
- body {
- font: normal 15px/ 30px '微软雅黑'
- }
- .url {
- width: 250px;
- height: 30px;
- border: 1px solid #CCCCCC;
- border-radius: 4px;
- }
- span {
- color: #999999;
- cursor: pointer;
- }
- span:hover {
- color: orange
- }
- /*上传文件弹窗效果*/
- #upload_w,.preview_w{display: none;}
- .cover {
- width: 100%;
- height: 100%;
- filter: alpha(opacity = 30);
- -moz-opacity: 0.3;
- -khtml-opacity: 0.3;
- opacity: 0.3;
- background: #CCCCCC;
- position: fixed;
- top: 0
- }
- .w_sub {
- height: 150px;
- width: 350px;
- border: 3px solid #2CB9F2;
- background: #FFFFFF;
- position: fixed;
- padding: 10px;
- }
- /*上传按钮*/
- .sub_upload {
- height: 30px;
- width: 70px;
- background-color:#0A86CB;
- border-right:2px solid #0879B9;
- border-bottom:2px solid #0879B9;
- color:#FFFFFF;
- }
- .close,.pre{
- color:#2CB9F2;
- color:#0879B9;
- font-size: 25px;
- float: right;
- margin-right: 8px;
- line-height: 25px;
- cursor: pointer;
- }
- .preview{
- position: fixed;
- padding: 10px;
- border: 3px solid #2CB9F2;
- background:#FFFFFF;
- top:100px;
- left:100px;
- }
- table{border:1px solid #2CB9F2}
- .title{
- height:35px;
- background-color: #D6DEE3;
- font:normal 15px '微软雅黑';
- text-align: left;
- padding-left: 10px;
- color:#4C5A5F;
- }
- </style>
- <script type="text/javascript" src="js/jquery-1.10.2.min.js"></script>
- <script type="text/javascript" src="js/ajaxfileupload.js"></script>
实现效果:
初始化界面:
![]()
上传窗口:

上传成功后将文件路径放入文本框中:
![]()
预览窗口:

3.springMVC + ajaxfileupload异步上传图片预览,裁剪并保存图片
1、整体效果图:
2、实现原理:
(1)利用input的onchange事件异步上传图片到服务器
(2)获取上传图片的相对地址,回显到img标签中
(3)利用jcrop裁剪图片,提交给后台裁剪的起始坐标,宽度、高度
(4)后台裁剪图片并保存
3、用到的插件:
(1)JCrop图片裁剪插件
(2)异步上传图片插件:Ajaxfileupload.js
4、实现:
(1)jsp关键代码:
- <fieldset>
- <legend>头像上传</legend>
- <!-- 显示图片的img -->
- <img src="" id="realPic" width="400px" height="400px" />
- <!-- 缩略图预览 -->
- <div id="preview-pane">
- <div class="preview-container">
- <img src="" width="150px" height="150px" />
- </div>
- </div>
- <div class="container">
- <!-- 打开图片控制 -->
- <span class="btn btn-success fileinput-button">
- <i class="icon-plus icon-white"></i>
- <span>选择图片</span>
- <input type="file" onchange="ajaxFileUpload()" name="realPicFile" id="realPicFile" multiple />
- </span>
- <!--
- 这种做法IE不支持,拒绝访问.
- <input id="realPicFile" value="选择图片" onchange="ajaxFileUpload()" type="file" style="display: none;" name="realPicFile" />
- <a class="btn btn-success" href="javascript:selectPic();" > <i class="icon-plus icon-white"></i>
- 选择图片
- </a>
- -->
- <!-- 上传并裁剪图片 -->
- <img src="${ctx}/images/ajax-loader.gif" id="loading" style="display: none;">
- <a class="btn btn-success" href="javascript:cutPic();"><i class="icon-picture icon-white"></i>保存头像</a>
- <!-- 获取裁剪的起始坐标和宽度、高度给后台 -->
- <form id="coords" class="coords">
- <div class="inline-labels">
- <input type="hidden" size="4" id="x1" name="x1" />
- <input type="hidden" size="4" id="y1" name="y1" />
- <input type="hidden" size="4" id="x2" name="x2" />
- <input type="hidden" size="4" id="y2" name="y2" />
- <input type="hidden" size="4" id="w" name="w" />
- <input type="hidden" size="4" id="h" name="h" />
- </div>
- </form>
- </div>
- </fieldset>
控制样式的CSS :
- .jcrop-holder #preview-pane {
- width:156px;
- height:156px;
- display: block;
- position: absolute;
- /*z-index: 2000;*/
- top: 0px;
- right: -200px;
- padding: 6px;
- border: 1px rgba(0,0,0,.4) solid;
- background-color: white;
- -webkit-border-radius: 6px;
- -moz-border-radius: 6px;
- border-radius: 6px;
- -webkit-box-shadow: 1px 1px 5px 2px rgba(0, 0, 0, 0.2);
- -moz-box-shadow: 1px 1px 5px 2px rgba(0, 0, 0, 0.2);
- box-shadow: 1px 1px 5px 2px rgba(0, 0, 0, 0.2);
- }
- /* The Javascript code will set the aspect ratio of the crop
- area based on the size of the thumbnail preview,
- specified here */
- #preview-pane .preview-container {
- width: 156px;
- height: 156px;
- overflow: hidden;
- }
- #target-pane {
- width: 400px;
- height: 400px;
- }
- .fileinput-button {
- position: relative;
- overflow: hidden;
- }
- .fileinput-button input {
- position: absolute;
- top: 0;
- right: 0;
- margin: 0;
- opacity: 0;
- filter: alpha(opacity=0);
- transform: translate(-300px, 0) scale(4);
- font-size: 23px;
- direction: ltr;
- cursor: pointer;
- }
注意fileinput-button这个样式,本人对css不熟悉,所以这个代码是从jquery-file-upload插件中拷贝过来的,大概的意思是将file的input放到按钮上,置为透明,这样就能够兼容IE,否则如果隐藏input,而触发它的click事件,IE认为这样做不安全,报拒绝访问的错误 。
(2)、javascript关键代码:
- //Create variables (in this scope) to hold the API and image size
- var jcrop_api, boundx, boundy, path;
- /**
- * 更新缩略图,实现原理:根据原图框选的内容,显示到缩略图上,而缩略图也是原图是进行了放大,只是超过img范围的部分被隐藏
- */
- function updatePreview(c) {
- if (parseInt(c.w) > 0) {
- $('#x1').val(c.x);
- $('#y1').val(c.y);
- $('#x2').val(c.x2);
- $('#y2').val(c.y2);
- $('#w').val(c.w);
- $('#h').val(c.h);
- var rx = xsize / c.w;
- var ry = ysize / c.h;
- // 精确计算图片的位置
- $pimg.css({
- width : Math.round(rx * boundx) + 'px',
- height : Math.round(ry * boundy) + 'px',
- marginLeft : '-' + Math.round(rx * c.x) + 'px',
- marginTop : '-' + Math.round(ry * c.y) + 'px'
- });
- }
- }
- /**
- * 异步上传图片
- * @returns {Boolean}
- */
- function ajaxFileUpload() {
- $("#loading").ajaxStart(function() {
- $(this).show();
- })//开始上传文件时显示一个图片
- .ajaxComplete(function() {
- $(this).hide();
- });//文件上传完成将图片隐藏起来
- var file = $("#realPicFile").val();
- if(!/\.(gif|jpg|jpeg|png|JPG|PNG)$/.test(file))
- {
- Error("不支持的图片格式.图片类型必须是.jpeg,jpg,png,gif格式.");
- return false;
- }
- $.ajaxFileUpload({
- url : Util.getContentPath() + '/user/uploadHeaderPicTmp.do?inputId=realPicFile',//用于文件上传的服务器端请求地址
- secureuri : false,//一般设置为false
- fileElementId : 'realPicFile',//文件上传空间的id属性 <input type="file" id="file" name="file" />
- dataType : 'json',//返回值类型 一般设置为json
- success : function(data, status) //服务器成功响应处理函数
- {
- // 图片在服务器上的相对地址,加随机数防止不刷新
- path = Util.getContentPath() + data.path + "?" + Math.random();
- $("#realPic").attr("src", path);
- var imgs = $(".jcrop-holder").find("img");
- // 原本有图片,重新上传后,所有的img都需要刷新
- imgs.each(function (i, v) {
- $(this).attr("src", path);
- });
- $('#preview-pane .preview-container img').attr("src", path);
- // 切图样式
- // Grab some information about the preview pane
- $preview = $('#preview-pane'), $pcnt = $('#preview-pane .preview-container'), $pimg = $('#preview-pane .preview-container img'),
- xsize = $pcnt.width(), ysize = $pcnt.height();
- //console.log('init', [ xsize, ysize ]);
- $('#realPic').Jcrop({
- onChange : updatePreview, //切图框改变事件
- onSelect : updatePreview, // 切图框选择事件
- onRelease: clearCoords, // 切图框释放的事件
- bgFade : true,
- bgOpacity: .8, // 截图框以外部分的透明度
- setSelect: [10, 10, 100, 100], // 默认选择的区域
- aspectRatio : 1 //xsize / ysize 截图比例,这里我采用1 : 1 的比例,即切出来的为正方形
- }, function() {
- // Use the API to get the real image size
- var bounds = this.getBounds();
- boundx = bounds[0];
- boundy = bounds[1];
- // Store the API in the jcrop_api variable
- jcrop_api = this;
- // Move the preview into the jcrop container for css positioning
- $preview.appendTo(jcrop_api.ui.holder);
- });
- },
- error : function(data, status, e)//服务器响应失败处理函数
- {
- Error(e);
- }
- });
- return false;
- }
- function _getShowWidth(str) {
- return _getValue(str, "width");
- }
- function _getShowHeight(str) {
- return _getValue(str, "height");
- }
- function _getValue (str, key) {
- var str = str.replace(/\:|\;|\s/g, '').toLowerCase();
- var pos = str.indexOf(key);
- if (pos >= 0) {
- // 截取
- var tmp = str.substring(pos, str.length);
- var px = tmp.indexOf("px");
- if (px > 0){
- var width = tmp.substring(key.length, px);
- return width;
- }
- return 0;
- }
- return 0;
- }
- /**
- * 裁剪图片
- */
- function cutPic() {
- // 初始化数据
- var x1 = $('#x1').val() == "" ? 0 : $('#x1').val();
- var y1 = $('#y1').val() == "" ? 0 : $('#y1').val();
- var x2 = $('#x2').val();
- var y2 = $('#y2').val();
- var w = $('#w').val() == "" ? 150 : $('#w').val();
- var h= $('#h').val() == "" ? 150 : $('#h').val();
- var srcFile = $("#realPic").attr("src");
- if (srcFile == "" || !srcFile) {
- Error("没有选择任何图片.");
- return;
- }
- var showDiv = $(".jcrop-holder > .jcrop-tracker");
- // 从压缩存放图片的div中获取压缩后显示的宽度和高度,用来交给后台同比例进行裁剪
- // width: 404px; height: 304px; position: absolute; top: -2px; left: -2px; z-index: 290; cursor: crosshair;
- var style = showDiv.attr("style");
- // 原图片页面显示的宽度
- var showWidth = _getShowWidth(style);
- // 原图片页面显示的高度
- var showHeight = _getShowHeight(style);
- // console.log(showWidth + " " + showHeight);
- // 原地图的src地址,去掉后边防止不刷新的随机数
- srcFile = srcFile.substring(0, srcFile.indexOf("?"));
- $.ajax({
- type : "post",
- dataType : "json",
- url : Util.getContentPath() + "/user/uploadHeaderPic.do",
- data : {
- srcImageFile : srcFile,
- x : x1,
- y : y1,
- destWidth : w,
- destHeight : h,
- srcShowWidth : showWidth,
- srcShowHeight : showHeight,
- },
- success : function(data) {
- var okCallBack = function () {
- this.top.window.location = Util.getContentPath() + "/user/pcModiInfoInit.do";
- };
- var msg = eval(data);
- if(msg && msg.msg)
- if (msg.code == 1)
- Alert(msg.msg, okCallBack);
- else Error(msg.msg, okCallBack);
- else {
- Error("上传失败,请稍后重试.", okCallBack);
- return;
- }
- },
- error : function () {
- Error ("上传失败,请稍后重试.") ;
- }
- });
- }
- function clearCoords()
- {
- $('#coords input').val('');
- };
(3)springMVC代码:
- @RequestMapping("uploadHeaderPicTmp")
- @ResponseBody
- public String uploadHeaderPic(String inputId, MultipartHttpServletRequest request) {
- try {
- MultipartFile realPicFile = request.getFile(inputId);
- InputStream in = realPicFile.getInputStream();
- String path = request.getSession().getServletContext().getRealPath("/");
- path += TMP;
- User loginUser = SystemUtil.getLoginUser(request.getSession());
- String fileName = loginUser.getName() + "." + FilenameUtils.getExtension(realPicFile.getOriginalFilename());
- File f = new File(path + "/" + fileName);
- FileUtils.copyInputStreamToFile(in, f);
- return "{\"path\" : \"" + TMP + "/" + fileName + "\"}";
- } catch (Exception e) {
- LOG.error("upload header picture error : ", e);
- }
- return null;
- }
- @RequestMapping("uploadHeaderPic")
- @ResponseBody
- public GeneralMessage cutImage(String srcImageFile, int x, int y, int destWidth, int destHeight, int srcShowWidth, int srcShowHeight,
- HttpServletRequest request) {
- try {
- String path = request.getSession().getServletContext().getRealPath("/");
- Image img;
- ImageFilter cropFilter;
- String srcFileName = FilenameUtils.getName(srcImageFile);
- // 读取源图像
- File srcFile = new File(path + TMP + "/" + srcFileName);
- BufferedImage bi = ImageIO.read(srcFile);
- //前端页面显示的并非原图大小,而是经过了一定的压缩,所以不能使用原图的宽高来进行裁剪,需要使用前端显示的图片宽高
- int srcWidth = bi.getWidth(); // 源图宽度
- int srcHeight = bi.getHeight(); // 源图高度
- if (srcShowWidth == 0)
- srcShowWidth = srcWidth;
- if (srcShowHeight == 0)
- srcShowHeight = srcHeight;
- if (srcShowWidth >= destWidth && srcShowHeight >= destHeight) {
- Image image = bi.getScaledInstance(srcShowWidth, srcShowHeight, Image.SCALE_DEFAULT);//获取缩放后的图片大小
- cropFilter = new CropImageFilter(x, y, destWidth, destHeight);
- img = Toolkit.getDefaultToolkit().createImage(new FilteredImageSource(image.getSource(), cropFilter));
- BufferedImage tag = new BufferedImage(destWidth, destHeight, BufferedImage.TYPE_INT_RGB);
- Graphics g = tag.getGraphics();
- g.drawImage(img, 0, 0, null); // 绘制截取后的图
- g.dispose();
- String ext = FilenameUtils.getExtension(srcImageFile);
- path += HEADER_PIC;
- User loginUser = SystemUtil.getLoginUser(request.getSession());
- String fileName = loginUser.getName() + "." + ext;
- File destImageFile = new File(path + "/" + fileName);
- // 输出为文件
- ImageIO.write(tag, ext, destImageFile);
- loginUser.setPicPath(SystemConst.SYSTEM_CONTEXT_PATH_VALUE + HEADER_PIC + "/" + fileName);
- userService.update(loginUser);
- // 删除原临时文件
- srcFile.delete();
- GeneralMessage msg = new GeneralMessage();
- msg.setCode(GeneralMessage.SUCCESS);
- msg.setMsg("上传成功!");
- return msg;
- }
- } catch (Exception e) {
- e.printStackTrace();
- }
- return null;
- }
4.Android+struts2实现文件图片上传,附源码(侧重服务端开发)
前言
项目中遇到Android手机聊天的图片、语音文件保存到服务器,网上搜索一下大概3种思路:
1.servlet实现,有很多文章,利用DiskFileUpload
2.使用smartupload未学习
3.利用strtus2自带的文件上传功能。
由于strtus2已广泛应用与企业应用,且上手较快,学习成本低、配置简单。文件上传功能已封装,简单易用,故毫不犹豫选择他。
网上这方面的资料不少,但很多重复的,且比较乱,新手可能很难找到自己想要的。总算自己捣鼓半天完成了功能,整理做下笔记,供大家参考。最后附上源码
Android客户端
- //要用到三个东东来做Post:HttpClient,httpPost,MultipartEntity
- HttpClient httpClient = new DefaultHttpClient();
- httpClient.getParams().setParameter( CoreProtocolPNames.PROTOCOL_VERSION, HttpVersion.HTTP_1_1 );
- HttpPost httpPost = new HttpPost( "http://localhost:8680/upload/chat/uploadFile" );
- MultipartEntity postEntity = new MultipartEntity();
- // 字符用StringBody
- String fileName = "2.jpg";
- ContentBody cbFileName;
- cbFileName = new StringBody( fileName );
- // 文件用FileBody,并指定文件类型
- File file = new File( "D:\\FTP\\2.jpg");
- ContentBody cbFileData = new FileBody( file, "image/jpg" );
- // 把上面创建的这些Body全部加到Entity里面去。
- // 注意他们的key,这些key在Struts2服务器端Action的代码里必须保持一致!!
- postEntity.addPart( "fileName", cbFileName );
- postEntity.addPart( "fileData", cbFileData );
- httpPost.setEntity( postEntity );
- // 下面这句话就把数据提交到服务器去了
- HttpResponse response = httpClient.execute( httpPost );
服务端struts2
配置web.xml、引入相应jar包、等本文不展开论述,
struts.xml配置
- <package name="chat" namespace="/chat" extends="struts-default">
- <action name="uploadFile" class="com.tch.action.FileUploadAction" method="upload">
- </action>
- </package>
贴上Action类
- // 注意这些变量名,看见了没? 和Struts2的FormBean是一样的。
- // 要和客户端添加字段时的关键字保持一致!!
- private String fileName = null;
- private String fileData = null;
- //针对每个字段的关键字,下面的这些Set方法必须一个不少,否则你什么也得不到
- public void setFileName(String fileName) {
- this.fileName = fileName;
- }
- public void setFileData(String fileData) {
- this.fileData = fileData;
- }
- public String upload()
- {
- String webappPath = findServerPath();
- //path=D:\apache-tomcat-6.0.36\webapps\dqapi\
- //String path = ServletActionContext.getServletContext().getRealPath("/");
- //appPath=/dqapi
- //String appPath = ServletActionContext.getServletContext().getContextPath();
- String chatFile_path = ServletActionContext.getServletContext().getInitParameter("UPLOAD_CHAT_FILE_PATH");
- FileCopyUtil util = new FileCopyUtil();
- String[] array = fileName.split("\\.");
- String fileType = array[array.length-1];
- //String destDir = path.replace(appPath, chatFile_path);
- String destDir = webappPath + chatFile_path;
- //先获取HttpServletResponse
- HttpServletResponse response = (HttpServletResponse) ActionContext.getContext().get( ServletActionContext.HTTP_RESPONSE );
- //打开数据流,把要给客户端返回的数据写进数据流
- OutputStream writer = null;
- ......
- // 这里不用再返回其他字符串了。
- // 客户端接收的不是这里返回的数据,这个是显示结果网页才会用到的返回值。
- return null;
- }
将用户上传文件与web项目本身分离
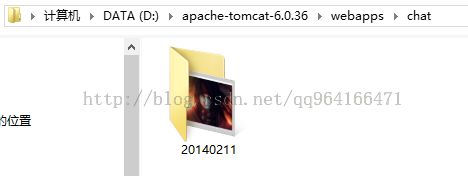
项目路径D:\apache-tomcat-6.0.36\webapps\upload

保存上传的文件到webapps目录下指定位置
文件拷贝代码如下
- public String copyFile(String fileType,String fileData,String destDir) throws IOException
- {
- Date date = new Date();
- String dirName = new SimpleDateFormat("yyyyMMdd").format(date);
- String newFileName = new SimpleDateFormat("yyyyMMddHHmmss_SSS").format(date);&nbs