图解在VC里使用graphics.h绘图(类似TC)
1 www.easyx.cn 下载 EasyX 库
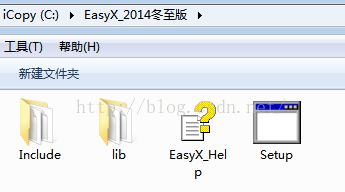
我下的2014;解压后如下图;
2 根据自己的VC 版本进行安装
3 在控制台画一个圆
#include <graphics.h> // 引用图形库
#include <conio.h>
void main()
{
     initgraph(640, 480); // 初始化绘图窗口
     circle(200, 200, 100); // 画圆,圆心(200, 200),半径 100
     getch(); // 按任意键继续
     closegraph(); // 关闭图形界面
}
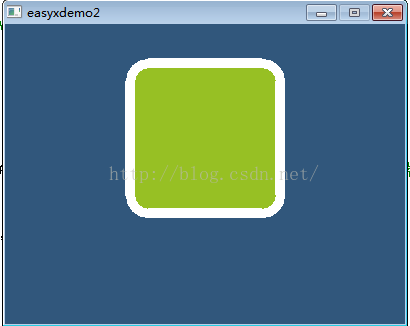
4 在控制台画一个方块
#include <graphics.h>
#include <conio.h>

#define PI 3.14159265

void main()
{
	// 创建大小为 800 * 600 的绘图窗口
	initgraph(400, 300);

	// 设置原点 (0, 0) 为屏幕中央(Y轴默认向下为正)
	setorigin(200, 150);

	// 使用藏青色填充背景
	setbkcolor(0x7c5731);
	cleardevice();

	// 设置绘图样式
	setlinecolor(WHITE);							// 设置线条颜色为白色
	setlinestyle(PS_SOLID | PS_ENDCAP_FLAT, 10);	// 设置线条样式为宽度 10 的实线,端点是平的
	setfillcolor(0x24c097);							// 设置填充颜色为绿色

	// 画方块
	fillroundrect(-75, -111, 75, 39, 36, 36);

	// 按任意键退出
	_getch();
	closegraph();
}
5 星空
这是来自easyx网站上的一个范例;
// 程序名称:星空
// 编译环境:Visual C++ 6.0,EasyX 2011惊蛰版
// 最后更新:2009-2-22
//
#include <graphics.h>
#include <time.h>
#include <conio.h>

#define MAXSTAR 200	// 星星总数

struct STAR
{
	double x;
	int y;
	double step;
	int color;
};

STAR star[MAXSTAR];

// 初始化星星
void InitStar(int i)
{
	star[i].x = 0;
	star[i].y = rand() % 480;
	star[i].step = (rand() % 5000) / 1000.0 + 1;
	star[i].color = (int)(star[i].step * 255 / 6.0 + 0.5);	// 速度越快,颜色越亮
	star[i].color = RGB(star[i].color, star[i].color, star[i].color);
}

// 移动星星
void MoveStar(int i)
{
	// 擦掉原来的星星
	putpixel((int)star[i].x, star[i].y, 0);

	// 计算新位置
	star[i].x += star[i].step;
	if (star[i].x > 640)	InitStar(i);

	// 画新星星
	putpixel((int)star[i].x, star[i].y, star[i].color);
}

// 主函数
void main()
{
	srand((unsigned)time(NULL)); // 随机种子
	initgraph(640, 480);	// 打开图形窗口

	// 初始化所有星星
	for(int i=0; i<MAXSTAR; i++)
	{
		InitStar(i);
		star[i].x = rand() % 640;
	}

	// 绘制星空,按任意键退出
	while(!kbhit())
	{
		for(int i=0; i<MAXSTAR; i++)
			MoveStar(i);
		Sleep(20);
	}

	closegraph();    // 关闭图形窗口
}
6 屏幕截图
这也是来自easyx网站的例子,演示了graphics.h也可在Win32程序中使用;
/////////////////////////////////////////////////////////
// 程序名称:实现桌面截图
// 编译环境:Visual C++ 6.0 / 2010,EasyX 20130117(beta)
// 作    者:yangw80 <yw80@qq.com>
// 最后修改:2013-1-29
// 项目类型:Win32 Application
//
#include <graphics.h>


// 抓取桌面图像到 *pimg 对象中
void CaptureDesktop(IMAGE *pimg)
{
	// 通过 Windows API 获取桌面的宽高
	int w = GetSystemMetrics(SM_CXSCREEN) / 2;
	int h = GetSystemMetrics(SM_CYSCREEN) / 2;

	// 调整 pimg 的大小
	Resize(pimg, w, h);

	// 获取桌面 DC
	HDC srcDC = GetDC(NULL);
	// 获取 IMAGE 对象的 DC
	HDC dstDC = GetImageHDC(pimg);

	// 在两个 DC 之间执行图像拷贝,将桌面抓图拷贝到 IMAGE 对象里面
	BitBlt(dstDC, 0, 0, w, h, srcDC, 0, 0, SRCCOPY);
}


// 主函数
int APIENTRY WinMain(HINSTANCE hInstance, HINSTANCE hPrevInstance, LPSTR lpCmdLine, int nCmdShow)
{
	// 定义 IMAGE 对象
	IMAGE img;

	// 调用抓取桌面图像的函数
	CaptureDesktop(&img);

	// 创建绘图窗口
	initgraph(500, 300);

	// 在窗口中显示 IMAGE 中保存的桌面图像
	putimage(0, 0, &img);

	// 按 ESC 键退出
	while(!(GetAsyncKeyState(VK_ESCAPE) & 0x8000))
		Sleep(20);

	closegraph();
	return 0;
}
7 做一个字符动画
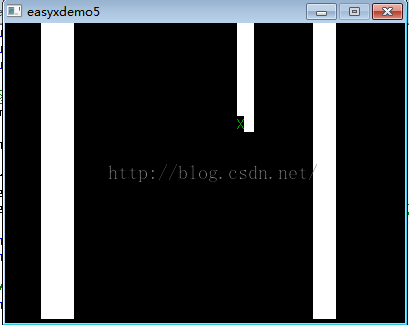
做一个字符从控制台窗口顶端往下落的动画;
#include <graphics.h>
#include <conio.h>
#include <time.h>

// 主函数
void main()
{
	initgraph(400, 300);		// 初始化屏幕为 640x480

	srand(time(NULL));			// 设置随机种子
	setfont(16, 0, "Arial");	// 设置字母的字体和大小
	setfillstyle(BLACK);		// 设置清除字母的填充区域颜色

	char target;				// 目标字母
	int x, y;					// 字母的位置

	// 主循环
	while(true)
	{
		target = 65 + rand() % 26;		// 产生任意大写字母
		x = rand() % 380;				// 产生任意下落位置
		for (y=0; y<280; y++)
		{
			setcolor(GREEN);			// 设置字母的颜色
			outtextxy(x, y, target);	// 显示字母

			// 延时,并清除字母
			Sleep(10);
			bar(x, y, x + 16, y + 16);
		}
	}


	// 关闭图形界面
	closegraph();
}
还有些问题,下落的字母会拖着一个白色尾巴;下次再搞;
8 改进
在 VC 中创建代码请直接使用默认的 .cpp 扩展名,不要加 .c 扩展名。
并不是所有的 TC 绘图函数都能支持,许多函数在 EasyX 库中都变得更强大了,比如颜色,过去 TC 只能支持 16 色,现在可以支持上千万种颜色。还有字体,可以使用 Windows 下安装的任何字体,等等。参考帮助。
上述工程下载
http://pan.baidu.com/s/1o8qyWLs
文件名
easyxdemo


