CentOS6.7下zabbix_server_proxy_agent 2.4.7
快速构建LAMP
# yum install httpd mysql mysql-libs php php-mysql mysql-server php-bcmath php-gd php-mbstring -y
安装Zabbix Server所需软件包
[root@localhost src]# ls
zabbix_2.4.7
[root@localhost src]# cd zabbix_2.4.7/
[root@localhost zabbix_2.4.7]# ls
zabbix-2.4.7-1.el6.x86_64.rpm zabbix-proxy-pgsql-2.4.7-1.el6.x86_64.rpm zabbix-web-2.4.7-1.el6.noarch.rpm
zabbix-agent-2.4.7-1.el6.x86_64.rpm zabbix-proxy-sqlite3-2.4.7-1.el6.x86_64.rpm zabbix-web-japanese-2.4.7-1.el6.noarch.rpm
zabbix-get-2.4.7-1.el6.x86_64.rpm zabbix-sender-2.4.7-1.el6.x86_64.rpm zabbix-web-mysql-2.4.7-1.el6.noarch.rpm
zabbix-java-gateway-2.4.7-1.el6.x86_64.rpm zabbix-server-2.4.7-1.el6.x86_64.rpm zabbix-web-pgsql-2.4.7-1.el6.noarch.rpm
zabbix-proxy-2.4.7-1.el6.x86_64.rpm zabbix-server-mysql-2.4.7-1.el6.x86_64.rpm
zabbix-proxy-mysql-2.4.7-1.el6.x86_64.rpm zabbix-server-pgsql-2.4.7-1.el6.x86_64.rpm
更换一下EPEL源
[root@localhost zabbix_2.4.7]# yum -y localinstall zabbix-2.4.7-1.el6.x86_64.rpm zabbix-agent-2.4.7-1.el6.x86_64.rpm zabbix-get-2.4.7-1.el6.x86_64.rpm zabbix-sender-2.4.7-1.el6.x86_64.rpm zabbix-server-2.4.7-1.el6.x86_64.rpm zabbix-server-mysql-2.4.7-1.el6.x86_64.rpm zabbix-web-2.4.7-1.el6.noarch.rpm zabbix-web-mysql-2.4.7-1.el6.noarch.rpm
数据库准备
[root@localhost zabbix_2.4.7]# vim /etc/my.cnf
[mysqld]
default-character-set = utf8 #此项可确保zabbix中文界面不乱码
[root@localhost zabbix_2.4.7]# service mysqld start
Starting mysqld: [ OK ]
#授权
[root@localhost zabbix_2.4.7]# mysql
mysql> create database zabbix;
Query OK, 1 row affected (0.00 sec)
mysql> grant all on zabbix.* to 'zabbix'@localhost identified by 'zabbix';
Query OK, 0 rows affected (0.00 sec)
mysql> flush privileges;
Query OK, 0 rows affected (0.00 sec)
mysql> \q
#导入zabbix数据
[root@localhost zabbix_2.4.7]# cd /usr/share/doc/zabbix-server-mysql-2.4.7/create/
[root@localhost create]# mysql --default-character-set=utf8 zabbix < schema.sql
[root@localhost create]# mysql --default-character-set=utf8 zabbix < images.sql
[root@localhost create]# mysql --default-character-set=utf8 zabbix < data.sql
#--default-character-set=utf8 此项为防止中文乱码,不用中文则可忽略
配置Zabbix Server
[root@localhost create]# vim /etc/zabbix/zabbix_server.conf
DBHost=localhost #指定数据库
DBName=zabbix #数据库名
DBUser=zabbix #数据库用户
DBPassword=zabbix #数据库密码
#其他参数根据实际需求修改即可
[root@localhost create]# vim /etc/zabbix/zabbix_agentd.conf
#配置本身agent用以监控自己
Server=127.0.0.1
ServerActive=127.0.0.1
Hostname=zabbixserver
#配置时区
[root@localhost create]# vim /etc/php.ini
date.timezone = Asia/Shanghai
#配置时区
[root@localhost create]# vim /etc/php.ini
date.timezone = Asia/Shanghai
[root@localhost create]# service httpd restart
Stopping httpd: [ OK ]
Starting httpd: httpd: Could not reliably determine the server's fully qualified domain name, using localhost.localdomain for ServerName [ OK ]
报错Starting httpd: httpd: Could not reliably determine the server's fully qualified domain name, using localhost.localdomain for ServerName
vi /etc/httpd/conf/httpd.conf 加入一句 ServerName localhost:80
[root@localhost create]# service zabbix-server start
Starting Zabbix server: [ OK ]
[root@localhost create]# service zabbix-agent start
Starting Zabbix agent: [ OK ]
设置httpd、mysql开机自动启动
[root@localhost create]# chkconfig httpd on
[root@localhost create]# chkconfig mysqld on
设置zabbix-server,zabbix-agent开机启动
[root@localhost create]# chkconfig zabbix-server on
[root@localhost create]# chkconfig zabbix-agent on
在 iptables 中放行 80,10050,10051 端口
[root@localhost create]# iptables -I INPUT -p tcp -m multiport --destination-port 80,10050:10051 -j ACCEPT
#查看防火墙结果
[root@localhost create]# iptables -L -n
Chain INPUT (policy ACCEPT)
target prot opt source destination
ACCEPT tcp -- 0.0.0.0/0 0.0.0.0/0 multiport dports 80,10050:10051
ACCEPT all -- 0.0.0.0/0 0.0.0.0/0 state RELATED,ESTABLISHED
ACCEPT icmp -- 0.0.0.0/0 0.0.0.0/0
ACCEPT all -- 0.0.0.0/0 0.0.0.0/0
ACCEPT tcp -- 0.0.0.0/0 0.0.0.0/0 state NEW tcp dpt:22
REJECT all -- 0.0.0.0/0 0.0.0.0/0 reject-with icmp-host-prohibited
Chain FORWARD (policy ACCEPT)
target prot opt source destination
REJECT all -- 0.0.0.0/0 0.0.0.0/0 reject-with icmp-host-prohibited
Chain OUTPUT (policy ACCEPT)
target prot opt source destination
[root@localhost ~]# service iptables save
iptables: Saving firewall rules to /etc/sysconfig/iptables:[ OK ]
#为防止乱码用楷体替换默认字体
楷体字体在windows字库里面拷贝一个
# mv simkai.ttf /usr/share/zabbix/fonts/
# vim /usr/share/zabbix/include/defines.inc.php
define('ZBX_GRAPH_FONT_NAME', 'simkai');
define('ZBX_FONT_NAME', 'simkai');
开始安装
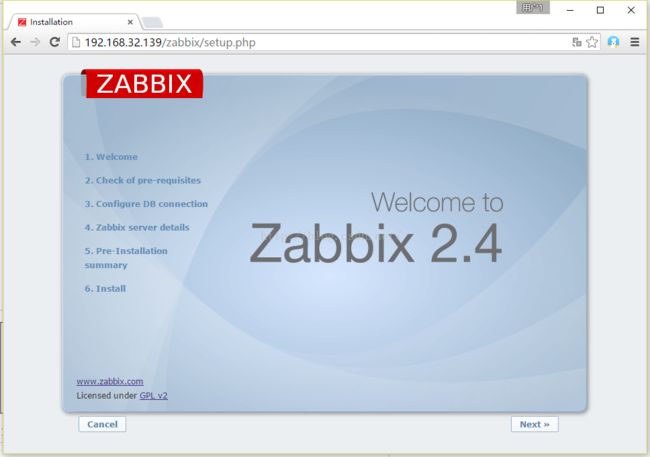
访问http://192.168.32.139/zabbix
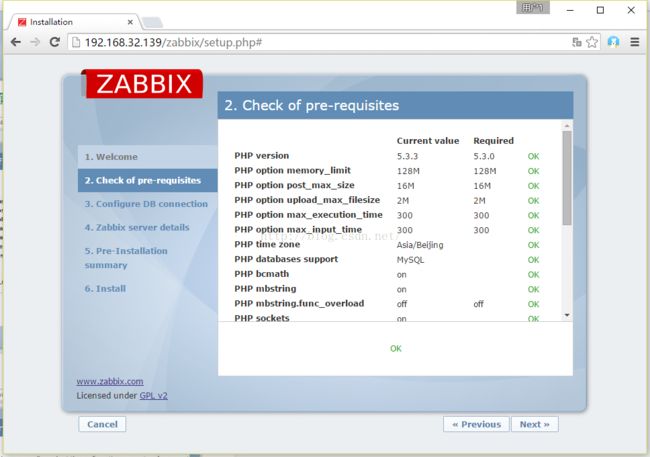
安装检测,如有错误,安装所需依赖包即可
填写数据库信息
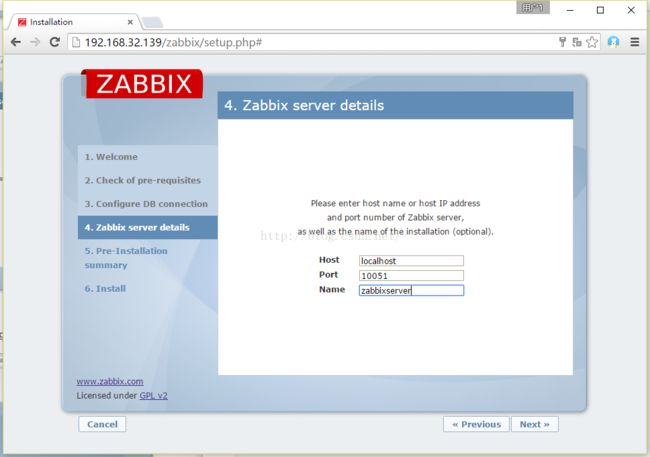
Name可自定义
Next-Next-Finish即可完成安装
登陆界面如下,默认用户admin,密码zabbix
报错zabbix server is not running: the information displayed may not be current可能是防火墙没关
关闭SELinux的方法:
修改/etc/selinux/config文件中的SELINUX="" 为 disabled ,然后重启
修改语言
Zabbix Proxy配置
安装Zabbix Proxy所需软件包
[root@localhost ~]# cd /usr/local/src/zabbix_2.4.7/
[root@localhost zabbix_2.4.7]# ls
zabbix-2.4.7-1.el6.x86_64.rpm zabbix-proxy-pgsql-2.4.7-1.el6.x86_64.rpm zabbix-web-2.4.7-1.el6.noarch.rpm
zabbix-agent-2.4.7-1.el6.x86_64.rpm zabbix-proxy-sqlite3-2.4.7-1.el6.x86_64.rpm zabbix-web-japanese-2.4.7-1.el6.noarch.rpm
zabbix-get-2.4.7-1.el6.x86_64.rpm zabbix-sender-2.4.7-1.el6.x86_64.rpm zabbix-web-mysql-2.4.7-1.el6.noarch.rpm
zabbix-java-gateway-2.4.7-1.el6.x86_64.rpm zabbix-server-2.4.7-1.el6.x86_64.rpm zabbix-web-pgsql-2.4.7-1.el6.noarch.rpm
zabbix-proxy-2.4.7-1.el6.x86_64.rpm zabbix-server-mysql-2.4.7-1.el6.x86_64.rpm
zabbix-proxy-mysql-2.4.7-1.el6.x86_64.rpm zabbix-server-pgsql-2.4.7-1.el6.x86_64.rpm
[root@localhost zabbix_2.4.7]# yum -y localinstall zabbix-2.4.7-1.el6.x86_64.rpm zabbix-get-2.4.7-1.el6.x86_64.rpm zabbix-proxy-2.4.7-1.el6.x86_64.rpm zabbix-proxy-mysql-2.4.7-1.el6.x86_64.rpm
数据库准备
#Proxy端已有数据库
mysql> create database zabbix_proxy;
Query OK, 1 row affected (0.06 sec)
mysql> grant all on zabbix_proxy.* to 'zabbixproxy'@localhost identified by 'zabbixproxy';
Query OK, 0 rows affected (0.06 sec)
mysql> flush privileges;
Query OK, 0 rows affected (0.03 sec)
#导入数据
[root@localhost zabbix_2.4.7]# mysql zabbix_proxy < /usr/share/doc/zabbix-proxy-mysql-2.4.7/create/schema.sql
配置Zabbix Proxy
[root@localhost zabbix_2.4.7]# vim /etc/zabbix/zabbix_proxy.conf
Server=192.168.32.139 #指向Zabbix Server
Hostname=zabbixproxy #主机名
DBHost=localhost #指定数据库
DBName=zabbix_proxy #数据库名
DBUser=zabbixproxy #数据库用户
DBPassword=zabbixproxy #数据库密码
ConfigFrequency=60 #配置文件同步间隔
DataSenderFrequency=5 #数据同步间隔
#其他参数根据自己实际需求修改即可
[root@localhost zabbix_2.4.7]# service zabbix-proxy start
Starting Zabbix proxy: [ OK ]
PS:我这个服务器也是辛苦,自己当server,agent,还要当proxy
注意了,查看zabbix_proxy.log发现服务并没有启动起来
查看log日志发现端口10051启动不起来
当然启动不起来了啊
zabbix-server服务已经把10051的端口给占用了
更改zabbix_proxy.conf中把监听端口改为10052
[root@localhost create]# iptables -I INPUT -p tcp -m multiport --destination-port 80,10050:10051,10052 -j ACCEPT
[root@localhost create]# iptables -L -n
[root@localhost ~]# service iptables save
Zabbix Agent配置
安装Zabbix Agent所需软件包
[root@localhost src]# cd zabbix_2.4.7/
[root@localhost zabbix_2.4.7]# ls
zabbix-2.4.7-1.el6.x86_64.rpm zabbix-proxy-pgsql-2.4.7-1.el6.x86_64.rpm zabbix-web-2.4.7-1.el6.noarch.rpm
zabbix-agent-2.4.7-1.el6.x86_64.rpm zabbix-proxy-sqlite3-2.4.7-1.el6.x86_64.rpmzabbix-web-japanese-2.4.7-1.el6.noarch.rpm
zabbix-get-2.4.7-1.el6.x86_64.rpm zabbix-sender-2.4.7-1.el6.x86_64.rpm zabbix-web-mysql-2.4.7-1.el6.noarch.rpm
zabbix-java-gateway-2.4.7-1.el6.x86_64.rpm zabbix-server-2.4.7-1.el6.x86_64.rpm zabbix-web-pgsql-2.4.7-1.el6.noarch.rpm
zabbix-proxy-2.4.7-1.el6.x86_64.rpm zabbix-server-mysql-2.4.7-1.el6.x86_64.rpm
zabbix-proxy-mysql-2.4.7-1.el6.x86_64.rpm zabbix-server-pgsql-2.4.7-1.el6.x86_64.rpm
[root@localhost zabbix_2.4.7]#yum -y localinstall zabbix-2.4.7-1.el6.x86_64.rpm zabbix-agent-2.4.7-1.el6.x86_64.rpm zabbix-sender-2.4.7-1.el6.x86_64.rpm
配置Zabbix Agent
# vim /etc/zabbix/zabbix_agentd.conf
Server= #指向proxy/或server
ServerActive=
Hostname=
# service zabbix-agent start
Starting Zabbix agent: [ OK ]


