我的词典:即粘即用二
<每篇十例>
实用一:
1.实现应用中的所有activity都全屏
在manifest中直接加入
android:theme="@android:style/Theme.NoTitleBar.Fullscreen"2.实现单个activity全屏
requestWindowFeature(Window.FEATURE_NO_TITLE);
getWindow().setFlags(WindowManager.LayoutParams.TYPE_STATUS_BAR, WindowManager.LayoutParams.TYPE_STATUS_BAR);
3.实现单个activity去掉title栏
requestWindowFeature(Window.FEATURE_NO_TITLE);1、改变标题内容:public void setTitle (CharSequence title)
2、隐藏标题:requestWindowFeature(Window.FEATURE_NO_TITLE);
3、隐藏标题和最上面的电池电量及信号栏(全屏):
public void setFullscreen() {
requestWindowFeature(Window.FEATURE_NO_TITLE);
getWindow().setFlags(WindowManager.LayoutParams.FLAG_FULLSCREEN,
WindowManager.LayoutParams.FLAG_FULLSCREEN);
}
4、自定义标题内容
<activity android:name=".activity.MainActivity" android:screenOrientation="portrait" android:label="@string/titlebar_text"
</actibity> 2)
MainActivity文件中:
requestWindowFeature(Window.FEATURE_NO_TITLE);
//设置窗口无标题栏
setContentView(R.layout.main);
//动态设置标题的值,getTitle()的值是该activity的声明中android:label的值
((TextView) findViewById(R.id.titlebar_text)).setText(getTitle());
//其中,getTitle()取得的值就是上述 android:label="@string/titlebar_text" 的值
5、自定义标题布局
protected void onCreate(Bundle savedInstanceState) {
super.onCreate(savedInstanceState);
//预先设置允许改变的窗口状态,需在 setContentView 之前调用,否则设置标题时抛运行时错误。
requestWindowFeature(Window.FEATURE_CUSTOM_TITLE);
setContentView(R.layout.custom_title);
//标题区域可设置为 layout ,如此可以有丰富的展现方式
getWindow().setFeatureInt(Window.FEATURE_CUSTOM_TITLE,
R.layout.custom_title_1);
}
res\layout\custom_title_1.xml 包含一个TextView 用于显示标题。Android可以把标题做为一个layout来展示,具有很好的扩展性。
 <RelativeLayout xmlns:android="http://schemas.android.com/apk/res/android" android:id="@+id/screen"
android:layout_width="fill_parent"
android:layout_height="fill_parent"
android:orientation="vertical">
<TextView android:id="@+id/left_text"
android:layout_width="wrap_content"
android:layout_height="wrap_content"
android:layout_alignParentLeft="true"
android:text="@string/custom_title_left" />
</RelativeLayout>
实用二:
在做项目的时候,难免会遇到测试使用apk软件崩溃的情况。鉴于程序的健壮性或者说是用户的体验,并为了便于日后修改出现该问题的bug;我们需要把使程序崩溃时对其进行捕捉,并将出现该问题的内容保存下来,发送给服务器进行整理。或者只写入本地文件便于我们自己调试查看。
/**
 * UncaughtException处理类,当程序发生Uncaught异常的时候,有该类
 * 来接管程序,并记录 发送错误报告
 * 项目:Jxvdy
 * 包名:com.jxvdy.oa.utils
 * @author Yuanjunhua
 *
 * 2014-11-13下午2:59:03
 */
public class CrashHandler implements UncaughtExceptionHandler {
    /** Debug Log tag*/
    public static final String TAG = "CrashHandler";
    /** 是否开启日志输出,在Debug状态下开启,
     * 在Release状态下关闭以提示程序性能
     * */
    public static final boolean DEBUG = true;
    /** 系统默认的UncaughtException处理类 */
    private Thread.UncaughtExceptionHandler mDefaultHandler;
    /** CrashHandler实例 */
    private static CrashHandler INSTANCE;
    /** 程序的Context对象 */
    private Context mContext;

    /** 使用Properties来保存设备的信息和错误堆栈信息*/
    private Properties mDeviceCrashInfo = new Properties();
    private static final String VERSION_NAME = "versionName";
    private static final String VERSION_CODE = "versionCode";
    private static final String STACK_TRACE = "STACK_TRACE";
    /** 错误报告文件的扩展名 */
    private static final String CRASH_REPORTER_EXTENSION = ".cr";
    //用于格式化日期,作为日志文件名的一部分
  	private DateFormat formatter = new SimpleDateFormat("yyyy-MM-dd-HH-mm-ss");
    /** 保证只有一个CrashHandler实例 */
    private CrashHandler() {}
    /** 获取CrashHandler实例 ,单例模式*/
    public static CrashHandler getInstance() {
        if (INSTANCE == null) {
            INSTANCE = new CrashHandler();
        }
        return INSTANCE;
    }

    /**
     * 初始化,注册Context对象,
     * 获取系统默认的UncaughtException处理器,
     * 设置该CrashHandler为程序的默认处理器
     *
     * @param ctx
     */
    public void init(Context ctx) {
        mContext = ctx;
        mDefaultHandler = Thread.getDefaultUncaughtExceptionHandler();
        Thread.setDefaultUncaughtExceptionHandler(this);
    }

    /**
     * 当UncaughtException发生时会转入该函数来处理
     */
    @Override
    public void uncaughtException(Thread thread, Throwable ex) {
        if (!handleException(ex) && mDefaultHandler != null) {
            //如果用户没有处理则让系统默认的异常处理器来处理
            mDefaultHandler.uncaughtException(thread, ex);
        } else {
            //Sleep一会后结束程序
            try {
                Thread.sleep(3000);
            } catch (InterruptedException e) {
                Log.e(TAG, "Error : ", e);
            }
            android.os.Process.killProcess(android.os.Process.myPid());
            System.exit(10);
        }
    }

    /**
     * 自定义错误处理,收集错误信息
     * 发送错误报告等操作均在此完成.
     * 开发者可以根据自己的情况来自定义异常处理逻辑
     * @param ex
     * @return true:如果处理了该异常信息;否则返回false
     */
    private boolean handleException(Throwable ex) {
        if (ex == null) {
            return true;
        }
        final String msg = ex.getLocalizedMessage();
        //使用Toast来显示异常信息
        new Thread() {
            @Override
            public void run() {
                Looper.prepare();
                Toast.makeText(mContext, msg, Toast.LENGTH_LONG).show();
                Looper.loop();
            }

        }.start();
        //收集设备信息
        collectCrashDeviceInfo(mContext);
        //保存错误报告文件
        String crashFileName = saveCrashInfoToFile(ex);
        //发送错误报告到服务器
        sendCrashReportsToServer(mContext);
        return true;
    }

    /**
     * 在程序启动时候, 可以调用该函数来发送以前没有发送的报告
     */
    public void sendPreviousReportsToServer() {
        sendCrashReportsToServer(mContext);
    }

    /**
     * 把错误报告发送给服务器,包含新产生的和以前没发送的.
     *
     * @param ctx
     */
    private void sendCrashReportsToServer(Context ctx) {
        String[] crFiles = getCrashReportFiles(ctx);
        if (crFiles != null && crFiles.length > 0) {
            TreeSet<String> sortedFiles = new TreeSet<String>();
            sortedFiles.addAll(Arrays.asList(crFiles));

            for (String fileName : sortedFiles) {
                File cr = new File(ctx.getFilesDir(), fileName);
                postReport(cr);
                cr.delete();// 删除已发送的报告
            }
        }
    }

    private void postReport(File file) {
        // TODO 使用HTTP Post 发送错误报告到服务器
        // 这里不再详述,开发者可以根据OPhoneSDN上的其他网络操作
        // 教程来提交错误报告
    }

    /**
     * 获取错误报告文件名
     * @param ctx
     * @return
     */
    private String[] getCrashReportFiles(Context ctx) {
        File filesDir = ctx.getFilesDir();
        FilenameFilter filter = new FilenameFilter() {
            public boolean accept(File dir, String name) {
                return name.endsWith(CRASH_REPORTER_EXTENSION);
            }
        };
        return filesDir.list(filter);
    }
    /**
     * 保存错误信息到文件中
     * @param ex
     * @return
     */
    private String saveCrashInfoToFile(Throwable ex) {
        Writer info = new StringWriter();
        PrintWriter printWriter = new PrintWriter(info);
        ex.printStackTrace(printWriter);

        Throwable cause = ex.getCause();
        while (cause != null) {
            cause.printStackTrace(printWriter);
            cause = cause.getCause();
        }

        String result = info.toString();  //ta:result中包含了错误的所有信息《错误原因,错误在哪个类的哪一行》
        printWriter.close();
        mDeviceCrashInfo.put(STACK_TRACE, result);
        Log.d("json", "------result>>>>:"+result);

        try {
//            long timestamp = System.currentTimeMillis();
            String timestamp = formatter.format(new Date());
            String fileName = "crash-" + timestamp + CRASH_REPORTER_EXTENSION;
            FileOutputStream trace = mContext.openFileOutput(fileName,
                    Context.MODE_PRIVATE);
            mDeviceCrashInfo.store(trace, "");
            trace.flush();
            trace.close();
            return fileName;
        } catch (Exception e) {
            Log.e(TAG, "an error occured while writing report file...", e);
        }
        return null;
    }


    /**
     * 收集程序崩溃的设备信息
     *
     * @param ctx
     */
    public void collectCrashDeviceInfo(Context ctx) {
        try {
            PackageManager pm = ctx.getPackageManager();
            PackageInfo pi = pm.getPackageInfo(ctx.getPackageName(),
                    PackageManager.GET_ACTIVITIES);
            if (pi != null) {
                mDeviceCrashInfo.put(VERSION_NAME,
                        pi.versionName == null ? "not set" : pi.versionName);
                mDeviceCrashInfo.put(VERSION_CODE, pi.versionCode);
            }
        } catch (NameNotFoundException e) {
            Log.e(TAG, "Error while collect package info", e);
        }
        //使用反射来收集设备信息.在Build类中包含各种设备信息,
        //例如: 系统版本号,设备生产商 等帮助调试程序的有用信息
        //具体信息请参考后面的截图
        Field[] fields = Build.class.getDeclaredFields();
        for (Field field : fields) {
            try {
                field.setAccessible(true);
                mDeviceCrashInfo.put(field.getName(), field.get(null));
                if (DEBUG) {
                    Log.d(TAG, field.getName() + " : " + field.get(null));
                }
            } catch (Exception e) {
                Log.e(TAG, "Error while collect crash info", e);
            }

        }

    }

}
还有一段保存错误信息的方法:
/**
	 * 保存错误信息到文件中
	 *
	 * @param ex
	 * @return	返回文件名称,便于将文件传送到服务器
	 */
	private String saveCrashInfo2File(Throwable ex) {

		StringBuffer sb = new StringBuffer();
		for (Map.Entry<String, String> entry : infos.entrySet()) {
			String key = entry.getKey();
			String value = entry.getValue();
			sb.append(key + "=" + value + "\n");
		}

		Writer writer = new StringWriter();
		PrintWriter printWriter = new PrintWriter(writer);
		ex.printStackTrace(printWriter);
		Throwable cause = ex.getCause();
		while (cause != null) {
			cause.printStackTrace(printWriter);
			cause = cause.getCause();
		}
		printWriter.close();
		String result = writer.toString();
		sb.append(result);
		try {
			long timestamp = System.currentTimeMillis();
			String time = formatter.format(new Date());
			String fileName = "crash-" + time + "-" + timestamp + ".log";
			if (Environment.getExternalStorageState().equals(Environment.MEDIA_MOUNTED)) {
				String path = Global.crashLogPath;
				File dir = new File(path);
				if (!dir.exists()) {
					dir.mkdirs();
				}
				FileOutputStream fos = new FileOutputStream(path + fileName);
				LogUtils.writeToDB(mContext, sb.toString(),0);//保存到了数据库中
				fos.write(sb.toString().getBytes());
				fos.close();
			}
			return fileName;
		} catch (Exception e) {
			Log.e(TAG, "an error occured while writing file...", e);
		}
		return null;
	}
然后要在项目文件中进行设置读写权限。如果捕捉异常的初始化放在了Application中,不要忘记了
<application
        android:name="com.junhua.text.MyApplication"
        android:icon="@drawable/ic_launcher"
        android:label="@string/app_name"
        android:launchMode="singleTask">
实用三:
Eclipse中查看Android SDK源代码
开发过程中,我们可能想看Android源码,想了解其中的实现,哪怕看函数定义也行啊,而不是看到“Source not found”令自己抓狂,如何能在Eclipse中嵌入源代码呢?
从别人的文章中了解到,实现这个挺简单的:
1. 下载Android的源代码
从http://www.weka.com.br/files/android/android-1.6-donut-src.zip下载1.6版的源代码(我所了解的下载地址)
2. 确保Eclipse已经关闭
3. 解压文件,把压缩包内的sources文件夹放置于SDK的目录下
配置的路径为&(SDK_Path)\platforms\android-ver.\sources文件夹
4. 重启Eclipse,按下F3,就能看到源码了。
实用四:
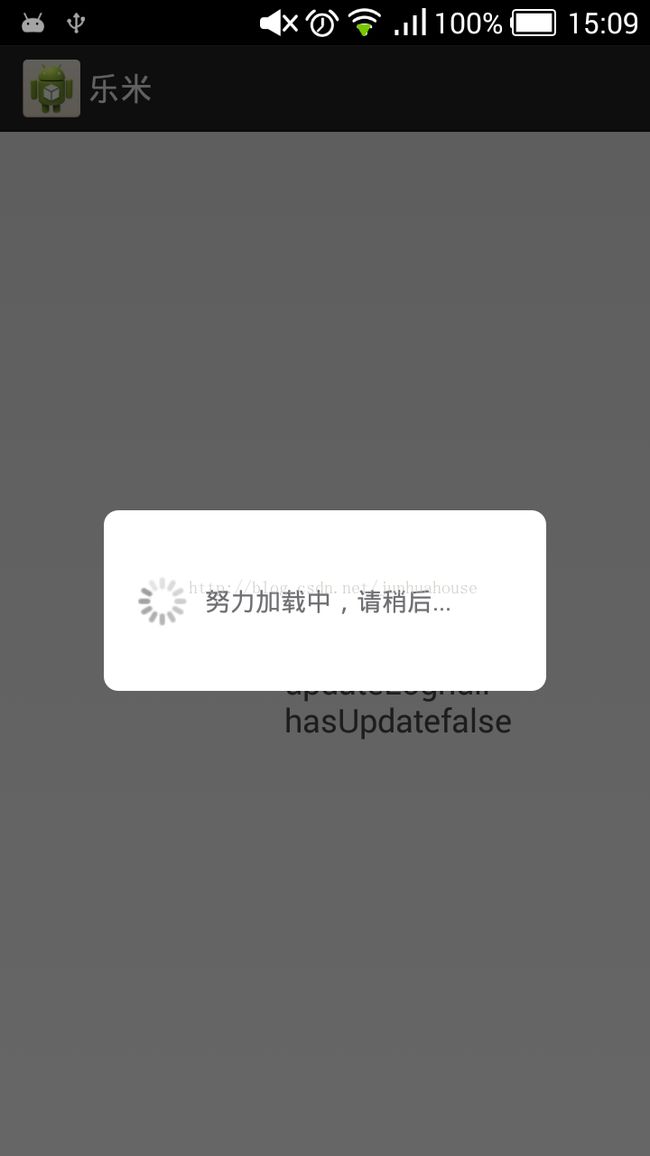
怎么去创建对话框,对话框?显示对话框之后,为什么点击周边对话框会消失??
            AlertDialog.Builder dialog  = new AlertDialog.Builder(GetLastestVertion.this);
		final Dialog dia = dialog.create();
	//	dia.setCanceledOnTouchOutside(false);
                dia.show();
	        dia.setContentView(LayoutInflater.from(GetLastestVertion.this).inflate(R.layout.wait_loading, null));
布局:
<?xml version="1.0" encoding="utf-8"?>
<RelativeLayout xmlns:android="http://schemas.android.com/apk/res/android"
    android:layout_width="wrap_content"
    android:layout_height="wrap_content"
     >

    <LinearLayout
        android:layout_width="245dp"
        android:layout_height="100dp"
        android:layout_centerInParent="true"
        android:gravity="center_vertical"
        android:background="@drawable/shap_dialog_content"
        android:orientation="horizontal" >

        <ProgressBar
            android:id="@+id/progressbar"
            android:layout_width="wrap_content"
            android:layout_height="wrap_content"
            android:paddingLeft="8dp"
            android:indeterminateDrawable="@drawable/frame_loading" />

        <TextView
            android:id="@+id/tvloading"
            android:layout_width="wrap_content"
            android:layout_height="wrap_content"
            android:gravity="center_vertical"
            android:text="努力加载中,请稍后..."
            android:textColor="#6d6d72"
            android:textSize="14sp" />
    </LinearLayout>

</RelativeLayout>
样式shap_dialog_content.xml
<?xml version="1.0" encoding="utf-8"?>
<shape xmlns:android="http://schemas.android.com/apk/res/android" android:shape="rectangle">
    <corners android:radius="8dp" />
    <solid  android:color="#FFFFFF"/>
</shape>
在使用setContentView(view);的时候,要在dialog.show();方法之后调用。否则,报错!在开发的时候遇到一个问题,就是一触摸对话框边缘外部,对话框会自动消失的解决方法:
方法一:setCanceledOnTouchOutside(false);调用这个方法的时候,点击对话框外面的地方不起作用,按返回键起作用;
方法二:setCancelable(false); 调用这个方法时候,对话框外面的地方点击以及按返回键都不起作用;
实用四:
这个让人很纠结的呀!因为 我真的搞不明白为什么编译成功却装不上。
最终的解决方案有俩:1.可能是你的模拟器或者手机的system内存不够,卸载几个软件就ok了。
2.加上这个行代码就好了--->android:installLocation="preferExternal"
<manifest xmlns:android="http://schemas.android.com/apk/res/android"
    package="com.jxvdy.oa"
    android:installLocation="preferExternal"
    android:versionCode="1"
    android:versionName="1.0" >
