VMware Workstation 12安装 Solaris 10 / 11
Hello and welcome to our today's article on Installation of Solaris using VMware Workstation. Oracle Solaris 11 is the world's most advanced enterprise operating system that delivers security, speed, and simplicity for enterprise cloud environments and DevOps. In our previous article we setup a new virtual machine for Solaris on VMware Workstation 12 and now we are going to show you a complete demonstration on the installation of Solaris 10/11. In this article we will be using the Solaris version 10 but you can follow the same instruction for the latest version of Solaris 11 that has been just released.
Let's follow the below steps to complete your installation of Solaris on VMware workstation 12.
1) Power On Solaris VM
Open the home page of your VMware Workstation and choose the Solaris 10 VM that you have created by following our previous article and click to the Power On button as shown below.
2) Boot Menue
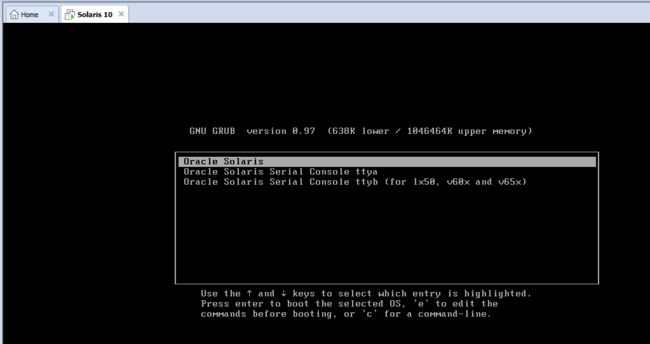
Once you have powered on your VM, you will see the grub menu and your VM will be starts boot from Solaris as shown in below image.
After starting the Solaris Boot process you will see the following message displayed on your screen showing the release version of SunOS.
2) ZFS Root File System
Here you will be asked to choose from the available options about what you want to do. So , choose the option 4 as shown in the below image to start the installation of ZFS root file system.
3) Keyboard Configurations
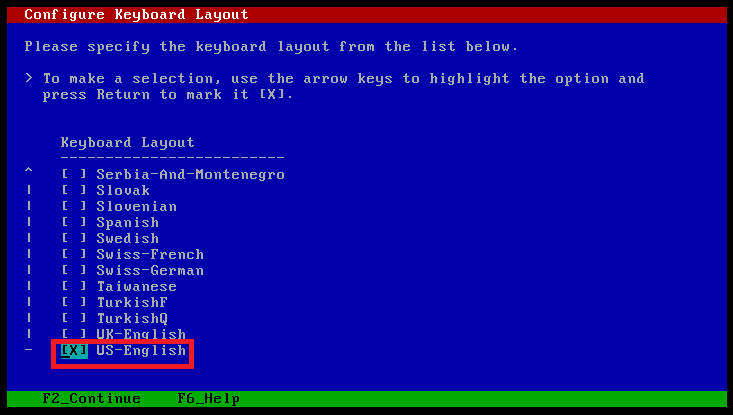
Choose your keyboard layout from the multiple available options by using your arrow keys as shown in the image.
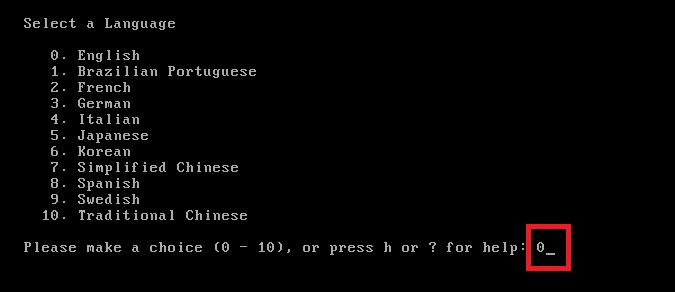
Then select your language by making a choice from the available options from 0-10 and press Enter key to continue.
4) Solaris Installation Program
In this section you will be guided on how the solaris installation program works. After reading it press 'F2' key as indicated below to continue.
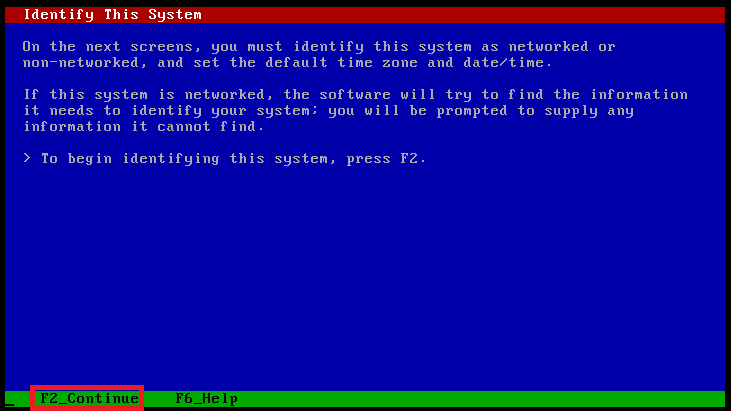
5) Identifying System
Press F2 key to identify your system with the network and set the default time zone and time/date.
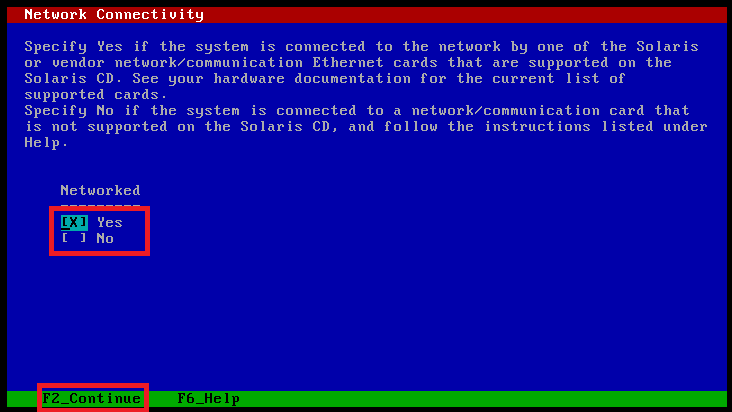
6) Network Connectivity
Choose the 'Yes' option to specify that your system is connected to the Solaris supported network and press "F2" to continue.
DHCP Network:
Then choose the Option to 'No' for specifying that you are not using the DHCP for your network.
System Hostname:
Choose your system hostname that will specify it on the network and then press 'F2' to continue.
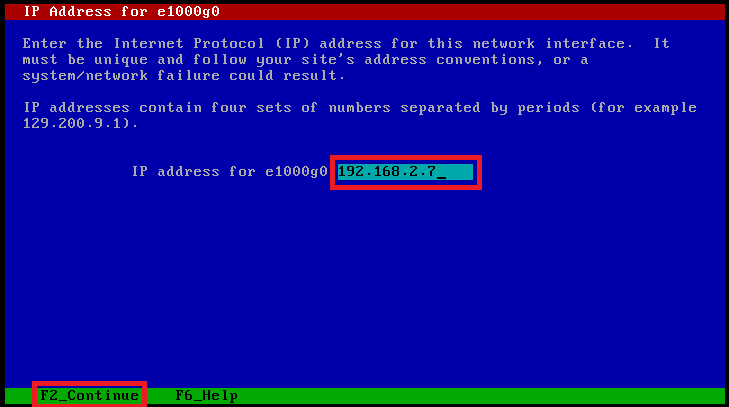
IP Address:
Enter the IP address for your network interface as shown.
System Subnet:
Choose the option 'Yes' if your system is part of a subnet.
Configure Subnet mask:
Configure the proper subnet mask for your system as shown below, you might face issues if you have configured your sub netmask incorrect.
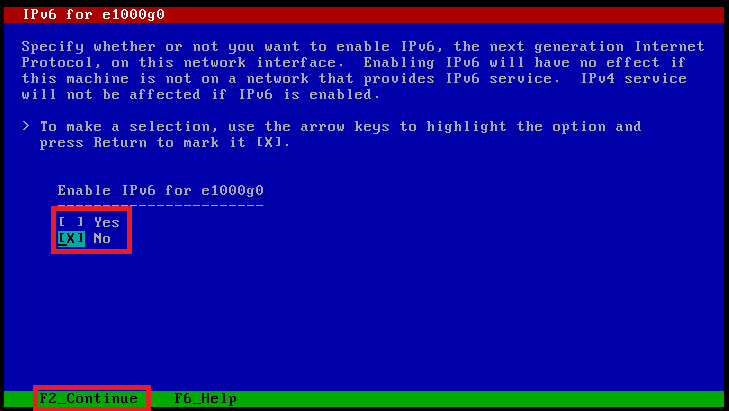
Configure Ipv6:
Choose the Option 'No' for IPv6 but you can still leave it to yes as it has no effect your system.
Default Route:
To set the default route you can choose the option to the one upon reboot and then press F2 key to move to the next step.
So, you have configured all required network settings, the summary of your selected options can be viewed on the follwoing snapshot. If you are sure that the information is correct then press 'F2' key to move to the next option.
7) Security Policy
In this section we configure the standard UNIX security policy, if you wish to use Kerberose security then you can choose 'Yes' option and then press 'F2' key to continue.
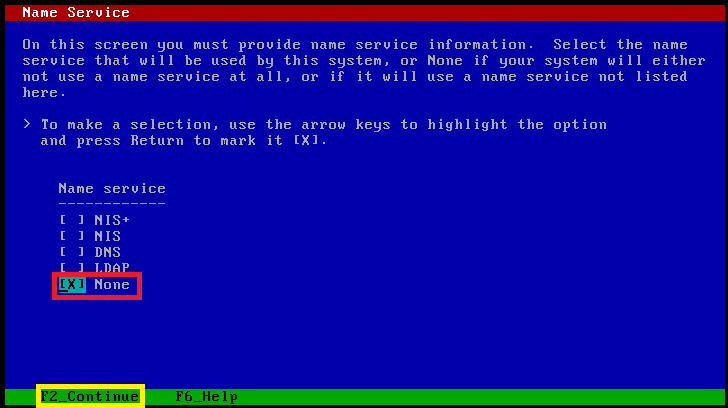
8) Name Service
Select the option for setting up the Name service for your network, if you are not using the any name service then choose the 'None' option and then press F2 key to continue.
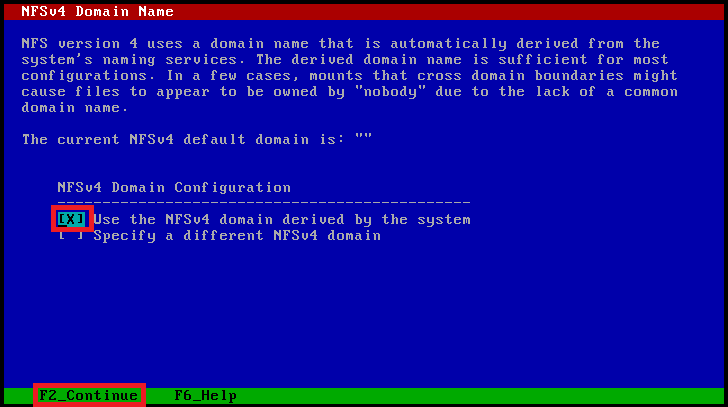
Next you will be asked to configure the NFSv4 domain Configurations, so choose the first option to use the NFSv4 domain derived by the system as shown in the below image.
9) Date and Time Zone
Select the your current time zone and the country or the region you are living in and choose the current date and time for your system settings. Then press F2 to proceed to the next step.
10) Root Password
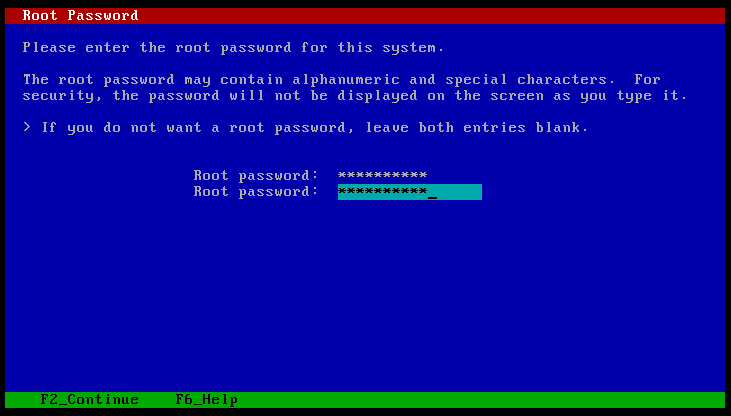
Setup your strong root password for your system and press 'F2' key to continue if you wish to leave your password as blank as yet.
11) Remote Service
Choose the Option to enable remote services that will make your client clients to easily access the network.
12) Configuration Manager Registration
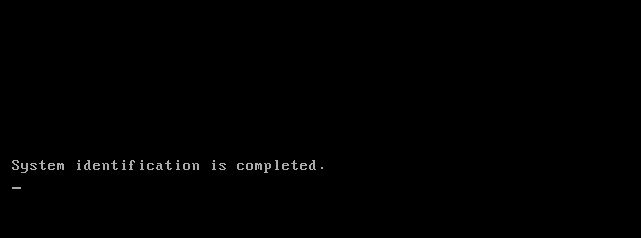
Leave this option as blank to provide Solaris auto registration information and simpliy move to the next step by pressing the 'F2' button.
Leave all option as blank for the proxy server settings, then you will see a notification message as shown below.
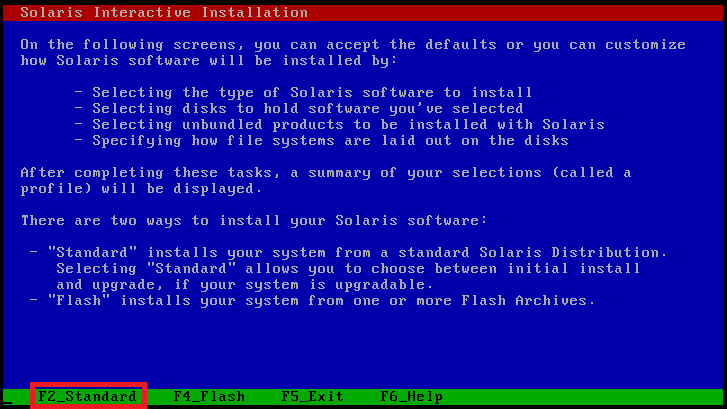
13) Solaris Interactive Installation
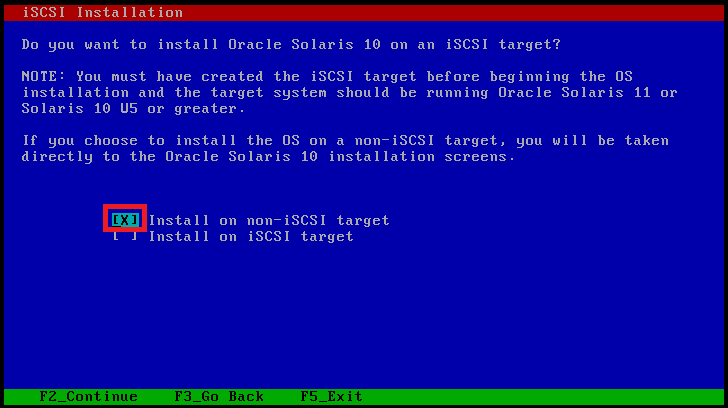
14) iSCSI Installation
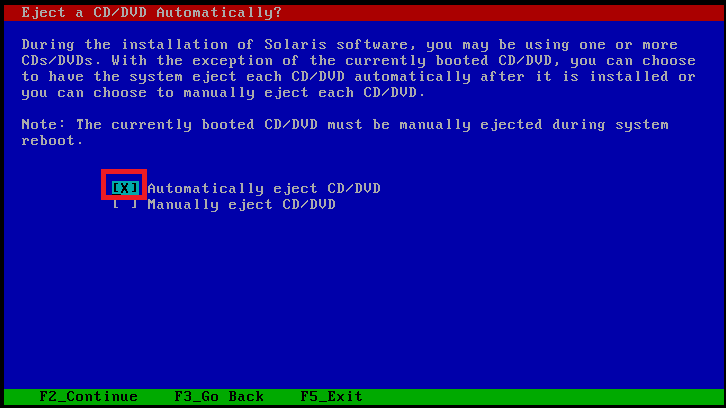
Eject CD/DVD Automatically:
Select the option to Eject your CD/DVD automatically from your system after completing the installation.
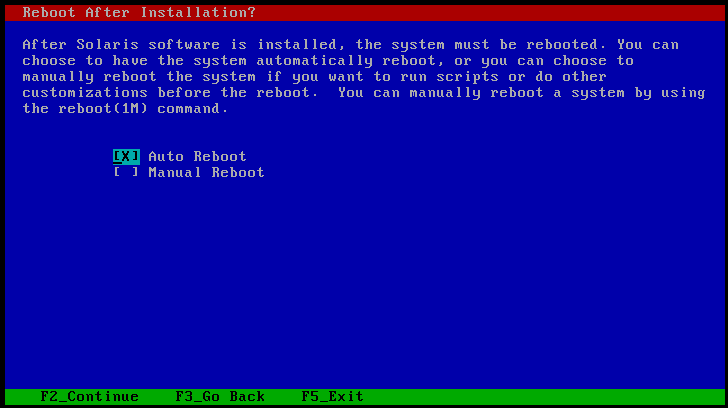
Auto Reboot:
Select the option to Automatically reboot the system after completing the installation.
You may need to manually eject the CD/DVD or select select a different boot device after reboot to avoid repeating the installation process.
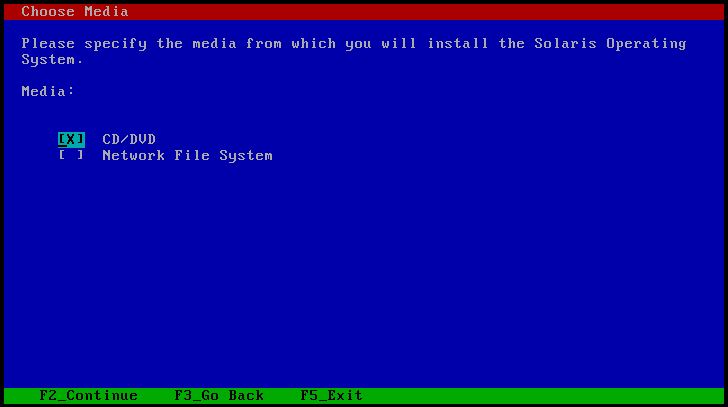
Choose MEdia:
Here you need to specify the media from which you are going to install the Solaris Operating system . So, we are going to choose CD/DVD ROM here.
License Agreement:
Press 'F2' key to accept the license agreement, and choose you geographical location to mention your initial locale after installing your operating system.
15) Additional Products
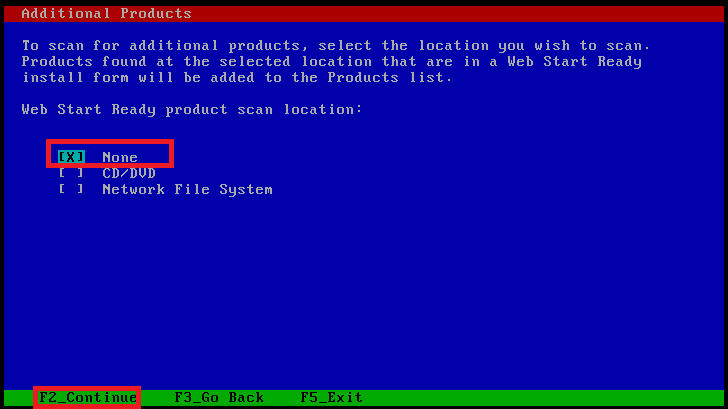
If you wish add some additional products then select the location you wish to scan. At this point we don't need to add any additional product so we are going to choose as 'None'.
16) Filesystem Type
Select the 'ZFS' as your file system type to to install solaris on it.
17) Select software
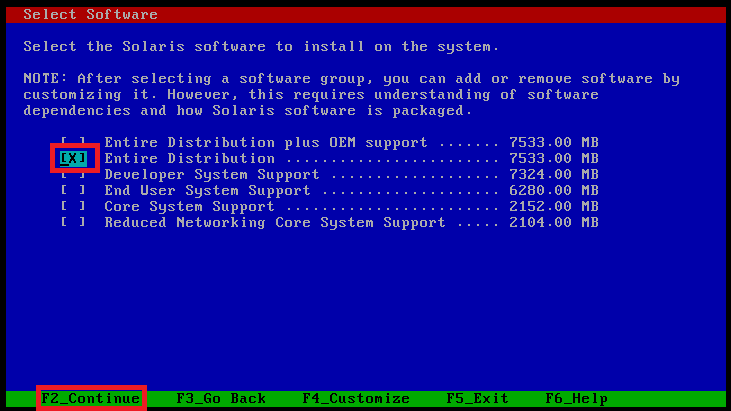
Select the second option 'Entire Distribution' for installing the Solaris software on your system and hit the 'F2' key to proceed to the next option.
18) Select Disks
In this section you need to choose the disk where your software for Saloris will be going to install on it.
19) Configure ZFS
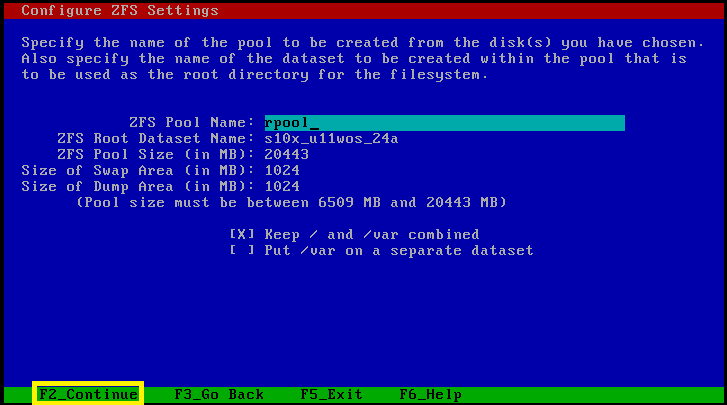
Now configure your ZFS root file system settings, you can leave them as default and press 'F2' key to continue your installation process.
20) Mount Remote File System
Press 'F2' key to mount remote file system that will helps in case of any space issues.
21) Profile
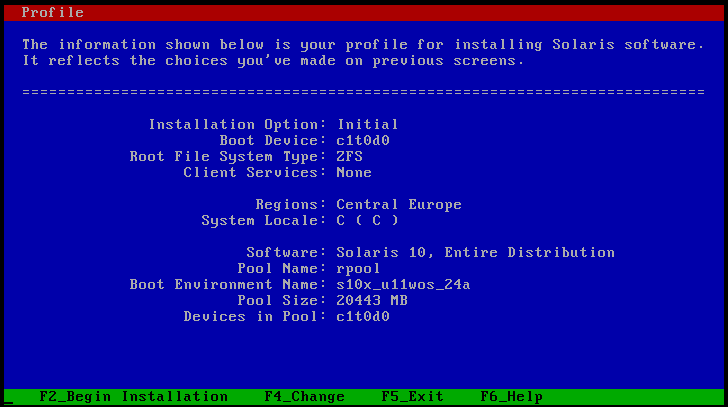
Let's review each option that you have selected to configure your environment for installation of Solaris. If everything is OK then hit 'F2' key to begin installation.
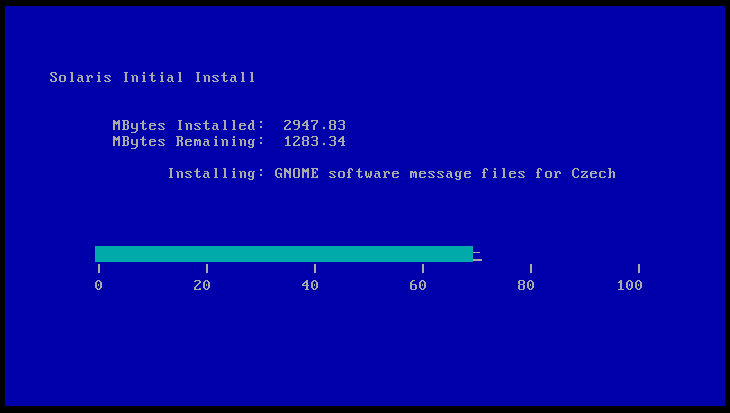
22) Solaris Initial Install
Once the installation process starts it will take few minutes to complete the installation process.
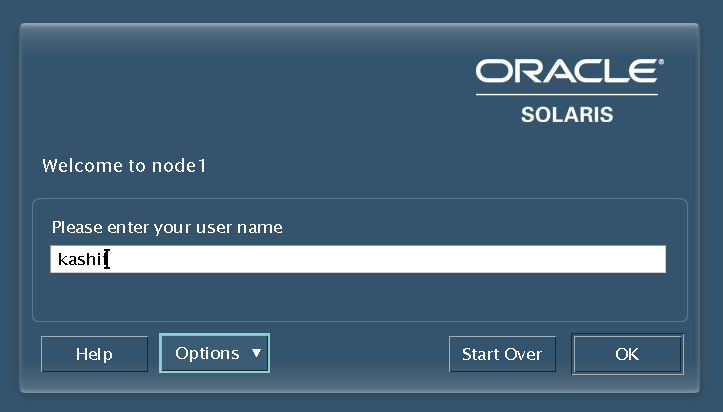
23) Welcome to Node1
How it looks? let's login to the Node using your the credentials you have configured in previous steps.
after providing the right credentials you will be asked to choose your default Desktop environment as CDE (Common Desktop Environment).
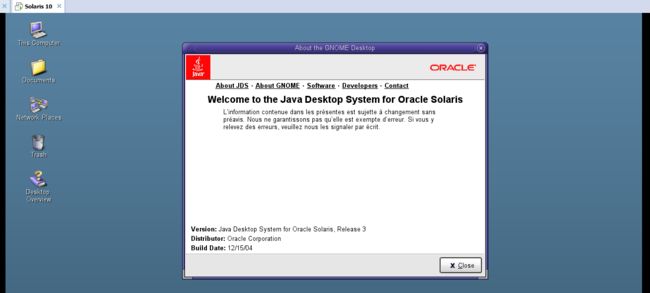
Welcome to Solaris Desktop
Welcome to the Java Desktop system for Oracle Solaris. It has been installed and ready to use for your testing or configure it for your production environment.
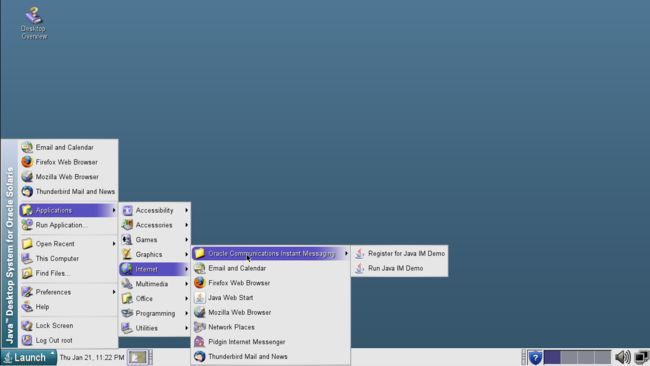
Click on the Launch key to explore its installed applications and features.
Conclusion
Solaris is claimed by many as the most advanced operating system in commercial use today.Free Solid relieable and feels good to use on your desktop.It is currently been developed as a Opensource project called OpenSolaris. You can test your hardware compatibility if it would run on your computer there is a tool on the Sun site which will test your hardware for free to see if its suitable. Hope you understand the basics installation of Solaris, if you are comfortable with using the Linux and working on the UNIX is not a big deal for you. So, keep enjoying with Solaris and don't forget to leave your comments.

