sprignmvc 中使用zyUpload 上传图片(批量)
在我们开发的java WEB项目中,文件上传这种需求实在是十分常见,而网上大多也都能搜到提供此类功能的js 脚本或js demo示例。 各种各样的js插件,各类的上传特效(本地预览、带进度上传等)实在让人眼花缭乱。。。 其中我比较喜欢的一种为zyupload.js ,无论是功能上还是代码简洁性上都很不错。
废话不多说,本文介绍当然是zyupload.js图片批量上传。
(至于java后端当然是我一直最喜欢的组合spring+springmvc+mybatics)
前端jsp 页面。
需要引入zyupload-1.0.0.min.css 、jquery-1.7.2.js、zyupload-1.0.0.min.js。 其中jquery-1.7.2.js是zyupload中自带的jquery js
$("#zyupload").zyUpload({}) 方法中的url 设置为相对应的上传文件后台controller (struts2中为action),
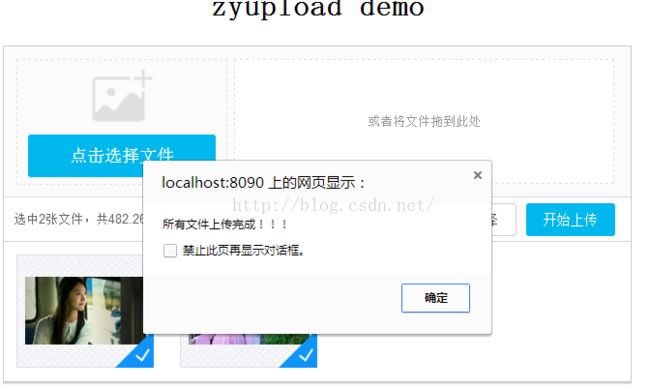
onSelect onDelete onSuccess onFailure onComplete 分别为controller 处理后的几个前端回调函数 (图片添加、删除、上传成功、上传失败、全部上传成功)
在实际上传过程中,多张图片是一张一张得上传上去的,所以才会有最后的一个onComplete回调 。。
<% page language="java" import="java.util.*" pageEncoding="utf-8"%>
<%
String path = request.getContextPath();
String basePath = request.getScheme()+"://"+request.getServerName()+":"+request.getServerPort()+path+"/";
%>
<!DOCTYPE html>
<html>
	<head>
		<meta charset="UTF-8">
		<title>zyupload demo</title>
		<link rel="stylesheet" href="<%=path %>/js/zyupload/skins/zyupload-1.0.0.min.css " type="text/css">
	</head>
	<body>
		<h1 style="text-align:center;">zyupload demo</h1>
		<div style="position: absolute;top: 100px; left: 20px;">
		</div>
	    <div id="zyupload" class="zyupload"></div>
	</body>
	    <script type="text/javascript" src="<%=path %>/js/jquery-1.7.2.js"></script>
	    <script type="text/javascript" src="<%=path %>/js/zyupload/zyupload-1.0.0.min.js"></script>
	    <script type="text/javascript">
			$(function(){
				contentPath='<%=path%>';
				// 初始化插件
				$("#zyupload").zyUpload({
					width            :   "650px",                 // 宽度
					height           :   "400px",                 // 宽度
					itemWidth        :   "140px",                 // 文件项的宽度
					itemHeight       :   "115px",                 // 文件项的高度
					url              :  contentPath+"/book/ajaxFileUpload.html",  // 上传文件的路径
					fileType         :   ["jpg","png","txt","js","exe"],// 上传文件的类型
					fileSize         :   51200000,                // 上传文件的大小
					multiple         :   true,                    // 是否可以多个文件上传
					dragDrop         :   true,                    // 是否可以拖动上传文件
					tailor           :   true,                    // 是否可以裁剪图片
					del              :   true,                    // 是否可以删除文件
					finishDel        :   true,  				  // 是否在上传文件完成后删除预览
					/* 外部获得的回调接口 */
					onSelect: function(selectFiles, allFiles){    // 选择文件的回调方法  selectFile:当前选中的文件  allFiles:还没上传的全部文件
					//	console.info("当前选择了以下文件:");
					//	console.info(selectFiles);
					//	alert("当前选择了以下文件:");
					//	alert(selectFiles);
					},
					onDelete: function(file, files){              // 删除一个文件的回调方法 file:当前删除的文件  files:删除之后的文件
					//	console.info("当前删除了此文件:");
					//	console.info(file.name);
					alert("当前删除了此文件:"+file.name);
					},
					onSuccess: function(file, response){          // 每文件上传成功的回调方法
					//	console.info("此文件上传成功:");
					   alert("此文件上传成功:"+file.name);
					   var data = JSON.parse(response);
					   alert(data.rc+","+data.msg+","+data.value);
				//		console.info(file.name);
				//		console.info("此文件上传到服务器地址:");
				//		console.info(response);
					//	$("#uploadInf").append("<p>上传成功,文件地址是:" + response + "</p>");
					},
					onFailure: function(file, response){          // 文件上传失败的回调方法
					//	console.info("此文件上传失败:");
					//	console.info(file.name);
					  alert("此文件上传失败:"+file.name);
					},
					onComplete: function(response){           	  // 上传完成的回调方法
					//	console.info("文件上传完成");
					//	console.info(response);
					   alert("所有文件上传完成!!!");
					   var data = JSON.parse(response);
					   alert(data.rc+","+data.msg+","+data.value);
					}
				});
			});

		</script>

</html>
后端controller 代码
上传图片 我这里用的是springmvc 自带的文件上传组件,需要在springmvc 的配置文件配置一个文件解析器。
package com.jelly.easyuidemo.controller;

import java.io.File;
import java.util.Map;
import java.util.UUID;

import javax.servlet.http.HttpServletRequest;
import javax.servlet.http.HttpServletResponse;

import org.springframework.stereotype.Controller;
import org.springframework.web.bind.annotation.RequestMapping;
import org.springframework.web.bind.annotation.RequestParam;
import org.springframework.web.bind.annotation.ResponseBody;
import org.springframework.web.multipart.MultipartFile;

import com.jelly.easyuidemo.util.AjaxUtil;


@Controller
@RequestMapping("/book")
public class BookController {
	//上传图片  img
	@RequestMapping("/fileUpload")
    public String fileUpload(@RequestParam(value = "file", required = false)
       MultipartFile file,HttpServletRequest request,HttpServletResponse response){
		response.setCharacterEncoding("utf-8");
    	//String path = request.getServletContext().getRealPath("/images/book/");
      String path="f:/easyuidemoimage/";
    	String fileName = file.getOriginalFilename();  //prefix  suffix
    	String  suffix=fileName.substring(fileName.lastIndexOf("."));
      String newFileName=	UUID.randomUUID().toString()+suffix;
      File targetFile = new File(path, newFileName);
      if(!targetFile.exists()){
          targetFile.mkdirs();
      }
      try {
          file.transferTo(targetFile);
          System.out.println("上传成功:"+path+newFileName);
          response.getWriter().write("文件上传成功:"+path+newFileName);
      } catch (Exception e) {
          e.printStackTrace();
      }
    	return null;
    }
	@RequestMapping("/toFileUpload")
	public String toFileUpload(){
		return "/book/fileUpload.jsp";
	}


     @RequestMapping("/ajaxFileUpload")
	 public  @ResponseBody Map<String,Object>  ajaxFileUpload(HttpServletRequest request,HttpServletResponse response,
			 @RequestParam(value = "file") MultipartFile file){
    	 try {
    	      String path="f:/easyuidemoimage/";
    	      String fileName = file.getOriginalFilename();  //prefix  suffix
    	      String  suffix=fileName.substring(fileName.lastIndexOf("."));
    	      String newFileName=	UUID.randomUUID().toString()+suffix;
    	      File targetFile = new File(path, newFileName);
    	      if(!targetFile.exists()){
    	          targetFile.mkdirs();
    	      }
    	      file.transferTo(targetFile);
              System.out.println("上传成功:"+path+newFileName);
              return  AjaxUtil.messageMap(1, "上传成功", newFileName);

		} catch (Exception e) {
			e.printStackTrace();

		}
    	 return  AjaxUtil.messageMap(-1, "上传失败");
	 }


}
     <!-- 配置文件上传,如果没有使用文件上传可以不用配置,当然如果不配,那么配置文件中也不必引入上传组件包 -->
    <bean id="multipartResolver"
        class="org.springframework.web.multipart.commons.CommonsMultipartResolver">
        <!-- 默认编码 -->
        <property name="defaultEncoding" value="utf-8" />
        <!-- 文件大小最大值 -->
        <property name="maxUploadSize" value="10000000" />
        <!-- 内存中的最大值 -->
        <property name="maxInMemorySize" value="40960" />
    </bean>
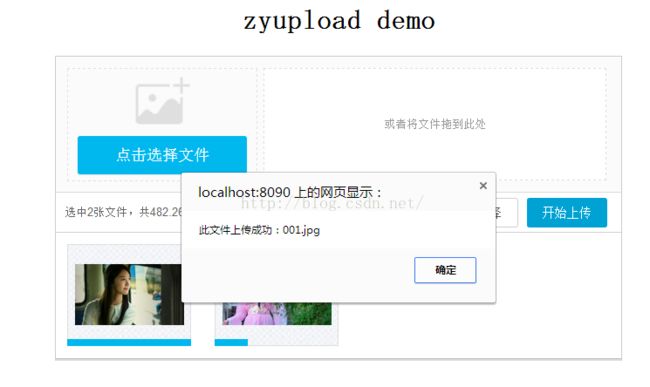
开始上传了啦。。。
上传过程中有进度条显示哦。。。
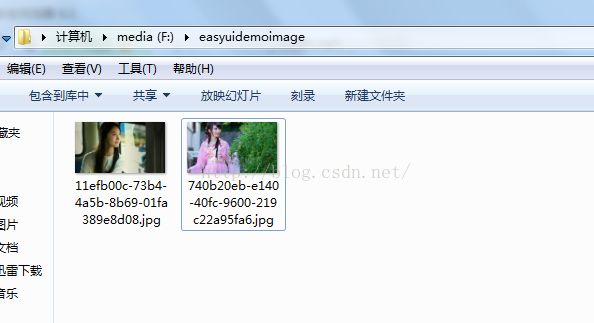
再看下上传后的文件在哪。
ok 功能演示完成。
由于设置了上传文件完成后删除文件预览,所以在最后的文件上传框中的预览文件会被清空。当然除了图片此例可以用来上传一些小文件。


