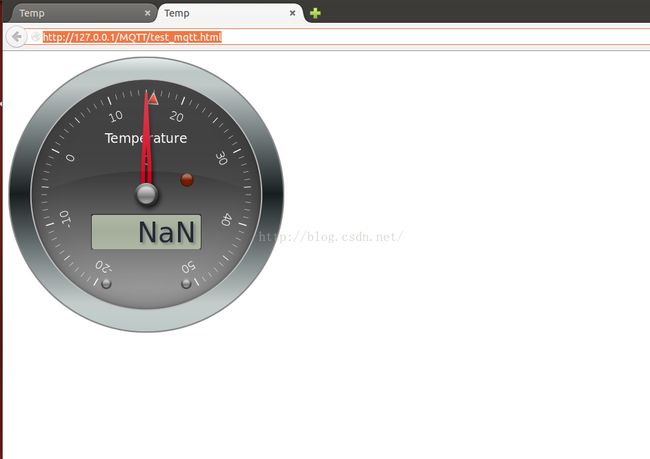
tempgauge测试-MQTT Over WebSocket
测试环境:
操作系统:ubuntu 12.04 32位
软件:
MQTT Broker:HiveMQ
MQTT Client:The Paho Javascript Client
下载地址: http://git.eclipse.org/c/paho/org.eclipse.paho.mqtt.javascript.git/
MQTT Client:mosquitto_pub
下载地址:http://mosquitto.org/download/
tempgauge
Read a topic from MQTT and display the value on a gauge.
首先在ubuntu上搭建HiveMQ环境
在这里选择HiveMQ作为MQTT Broker是因为HiveMQ原生支持WebSocket,而且软件很容易安装。
One of the big new features of the HiveMQ 1.4 release is definitely the native support for MQTT over Websockets. Every modern browser on any device is now a potential full-fledged MQTT client. With real publish/subscribe in the browser, web apps can take full advantage of highly scalable messaging with a very low bandwidth footprint.
安装HiveMQ:
下载HiveMQ: http://www.hivemq.com/downloads/
安装HiveMQ需要安装jre
sudo apt-get install openjdk-7-jre
解压之后
Change directory to HiveMQ directory
cd hivemq-3.0.2/
然后使用mqtt over websocket的配置文件
cp conf/examples/configuration/config-sample-mqtt-and-websockets.xml ./conf/config.xml
Execute startup script:
./bin/run.sh
就ok了
下面是测试的html文件index.html
<?xml version="1.0" encoding="UTF-8" standalone="no"?>
<!DOCTYPE html PUBLIC "-//W3C//DTD XHTML 1.0 Transitional//EN" "http://www.w3.org/TR/xhtml1/DTD/xhtml1-transitional.dtd">

<html xmlns="http://www.w3.org/1999/xhtml">
  <head>
    <script src="tempgauge-master/vendor/jquery.min.js" type="text/javascript"></script>
    <script src="tempgauge-master/vendor/mqttws31.js" type="text/javascript"></script>
    <script src="tempgauge-master/vendor/tween-min.js" type="text/javascript"></script>
    <script src="tempgauge-master/vendor/steelseries-min.js" type="text/javascript"></script>
    <title>Temp</title>
    <script type="text/javascript">
	var tempGauge;
	var client = new Messaging.Client("127.0.0.1", 8000,
				"myclientid_" + parseInt(Math.random() * 100, 10));
	/*
	var client = new Messaging.Client("10.0.0.11", 1883,"4001");
	*/

	client.onConnectionLost = function (responseObject) {
		alert("connection lost: " + responseObject.errorMessage);
		tempGauge.setLedColor(steelseries.LedColor.RED_LED); //change status LED to RED on broker disconnection

	};

	client.onMessageArrived = function (message) {
		tempGauge.setValue(message.payloadString);
	};

	var options = {
		timeout: 3,
		onSuccess: function () {
			alert("Connected");
			// Connection succeeded; subscribe to our topic
			client.subscribe('temp/random', {qos: 0});
			tempGauge.setLedColor(steelseries.LedColor.GREEN_LED); //change status LED to GREEN on broker connection

		},
		onFailure: function (message) {
			alert("Connection failed: " + message.errorMessage);
			tempGauge.setLedColor(steelseries.LedColor.RED_LED); //change status LED to RED on broker disconnection

		}
	};

	function init() {
	    // by @jpmens, Sep 2013
	    // from @bordignons Sep 2013
	    // original idea.. http://www.desert-home.com/2013/06/how-to-use-steelseries-gauges-with.html
	    // with help.. http://harmoniccode.blogspot.com.au/
	    // and code.. https://github.com/HanSolo/SteelSeries-Canvas

		tempGauge = new steelseries.Radial('gaugeCanvas', {
			gaugeType: steelseries.GaugeType.TYPE4,
			minValue:-15,
			maxValue:50,
			size: 400,
			frameDesign: steelseries.FrameDesign.STEEL,
			knobStyle: steelseries.KnobStyle.STEEL,
			pointerType: steelseries.PointerType.TYPE6,
			lcdDecimals: 0,
			section: null,
			area: null,
			titleString: 'Temperature',
			unitString: 'C',
			threshold: 100,
			lcdVisible: true,
			lcdDecimals: 2
		   });
		tempGauge.setValue(''); //gives a blank display 'NaN' until broker has connected
		tempGauge.setLedColor(steelseries.LedColor.RED_LED); //set the LED RED until connected


		/* Connect to MQTT broker */
		client.connect(options);
	}

    </script>
  </head>
  <body onload="init();">
       <div>
       <canvas id=gaugeCanvas width=200 height=200>No canvas in your browser...sorry...</canvas>
	   <p>Publish to the "temp/random" topic to change the gauge. A local
		   process runs every 15 seconds to update the value by adding a random
			   value in the range +/-2 degrees.</p>
				   <p>mosquitto_pub -h test.mosquitto.org -t temp/random -m 23.0</p>
					   <p>From <a href="https://github.com/jpmens/tempgauge">https://github.com/jpmens/tempgauge</a>
       </div>
  </body>
</html>
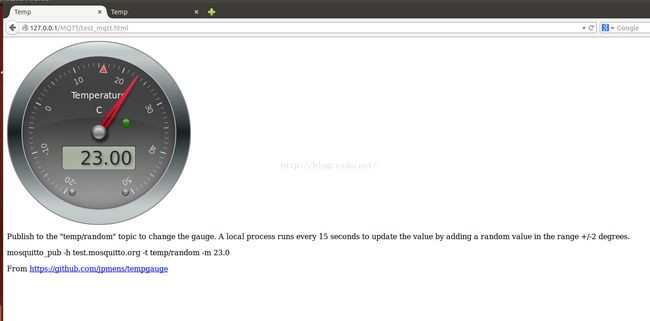
然后命令行执行mosquitto_pub -h 127.0.0.1 -t temp/random -m 23.0
就会看到网页实时显示了23
第一个测试大功告成。

