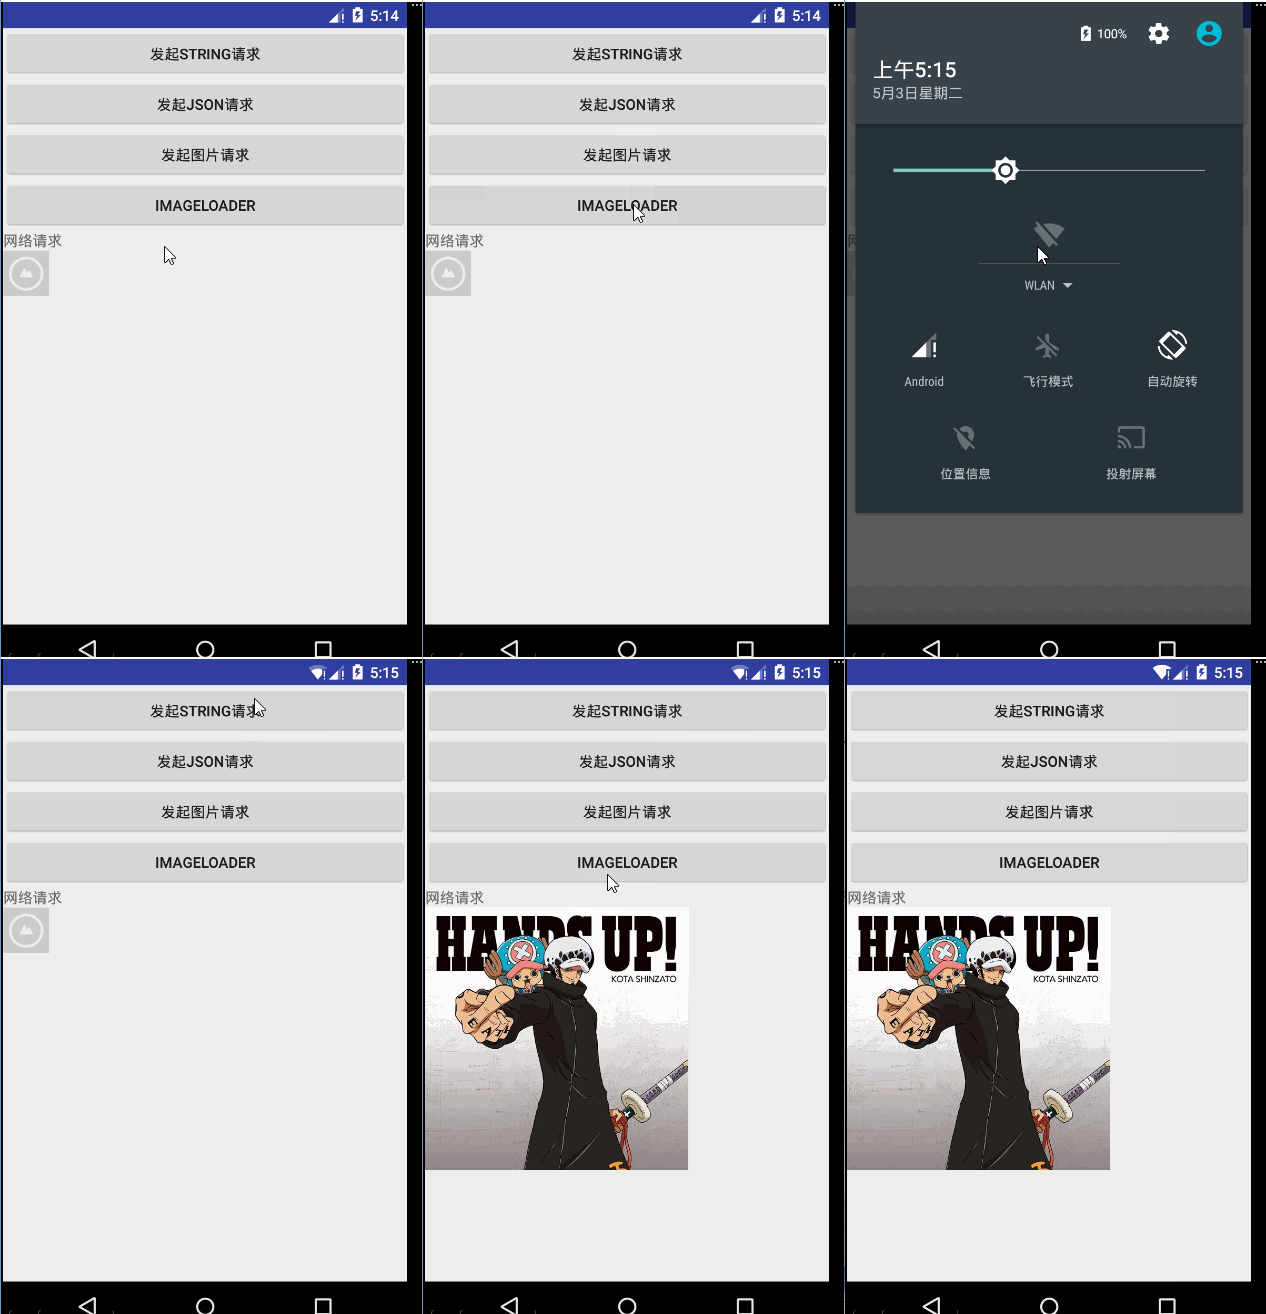
网络编程--Volley之ImageLoader
本博客多处参考了郭霖大神的博客http://blog.csdn.net/guolin_blog/article/details/9316683,十分感谢他的无私分享
ImageLoader的使用
- ImageLoader也可以用于加载网络上的图片,并且它的内部也是使用ImageRequest来实现的,不过ImageLoader明显要比ImageRequest更加高效,因为它不仅可以帮我们对图片进行缓存,还可以过滤掉重复的链接,避免重复发送请求。
由于ImageLoader已经不是继承自Request的了,所以它的用法也和我们之前学到的内容有所不同,总结起来大致可以分为以下四步:
- 创建一个RequestQueue对象。
- 创建一个ImageLoader对象。
- 获取一个ImageListener对象。
- 调用ImageLoader的get()方法加载网络上的图片。
public class VolleyUtils {
    private static VolleyUtils volleyUtils;
    private static RequestQueue requestQueue;//消息队列
    private ImageLoader imageLoader;//ImageLoader对象
    private Context context;

    private VolleyUtils(Context context) {
        this.context=context;
        requestQueue= Volley.newRequestQueue(context);
    }
    public  static synchronized  VolleyUtils newInstance(Context context){
        if (requestQueue==null){
            volleyUtils=new VolleyUtils(context);
        }
        return volleyUtils;
    }

    public RequestQueue getRequestQueue(){
        if(requestQueue == null){
            requestQueue = Volley.newRequestQueue(context.getApplicationContext());
        }
        return requestQueue;
    }

    //ImageLoader的构造函数接收两个参数,第一个参数就是RequestQueue对象,第二个参数是一个ImageCache对象,这里我们先new出一个空的ImageCache的实现即可。
    public ImageLoader getImageLoader() {
        imageLoader=new ImageLoader(getRequestQueue(), new ImageLoader.ImageCache() {
            @Override
            public Bitmap getBitmap(String url) {
                return null;
            }

            @Override
            public void putBitmap(String url, Bitmap bitmap) {

            }
        });
        return imageLoader;
    }

    public void addRequestQueue(Request request){
        getRequestQueue().add(request);
    }
}
ImageLoader的构造函数接收两个参数,第一个参数就是RequestQueue对象,第二个参数是一个ImageCache对象,这里我们先new出一个空的ImageCache的实现即可。
然后我们在对应的点击事件中的逻辑如下
ImageLoader.ImageListener listener = ImageLoader.getImageListener(imageView, R.mipmap.default_image, R.mipmap.failed_image);
                VolleyUtils.newInstance(getApplicationContext()).getImageLoader().get("http://img.my.csdn.net/uploads/201404/13/1397393290_5765.jpeg", listener);
我们通过调用ImageLoader的getImageListener()方法能够获取到一个ImageListener对象,getImageListener()方法接收三个参数,第一个参数指定用于显示图片的ImageView控件,第二个参数指定加载图片的过程中显示的图片,第三个参数指定加载图片失败的情况下显示的图片。
最后,调用ImageLoader的get()方法来加载图片如果想对图片指定大小也可以这样
VolleyUtils.newInstance(getApplicationContext()).getImageLoader().get("http://img.my.csdn.net/uploads/201404/13/1397393290_5765.jpeg", listener,200,200);应用图片的缓存功能
这里我们新建一个BitmapCache并实现了ImageCache接口,如下所示:
public class BitmapCache implements ImageCache {

    private LruCache<String, Bitmap> mCache;

    public BitmapCache() {
        int maxSize = 10 * 1024 * 1024;
        mCache = new LruCache<String, Bitmap>(maxSize) {
            @Override
            protected int sizeOf(String key, Bitmap bitmap) {
                return bitmap.getRowBytes() * bitmap.getHeight();
            }
        };
    }

    @Override
    public Bitmap getBitmap(String url) {
        return mCache.get(url);
    }

    @Override
    public void putBitmap(String url, Bitmap bitmap) {
        mCache.put(url, bitmap);
    }
}
可以看到,这里我们将缓存图片的大小设置为10M。接着修改创建ImageLoader实例的代码,第二个参数传入BitmapCache的实例,如下所示:
ImageLoader imageLoader = new ImageLoader(mQueue, new BitmapCache()); 这样我们就把ImageLoader的功能优势充分利用起来了。
这一部分摘自郭霖大神的博客http://blog.csdn.net/guolin_blog/article/details/9316683
我自己的写得代码如下:
- 首先BitmapCache是一样的,直接拷贝的
public class BitmapCache implements ImageLoader.ImageCache {
    private LruCache<String, Bitmap> mCache;

    public BitmapCache() {
        int maxSize = 10 * 1024 * 1024;
        mCache = new LruCache<String, Bitmap>(maxSize) {
            @Override
            protected int sizeOf(String key, Bitmap bitmap) {
                return bitmap.getRowBytes() * bitmap.getHeight();
            }
        };
    }

    @Override
    public Bitmap getBitmap(String url) {
        return mCache.get(url);
    }

    @Override
    public void putBitmap(String url, Bitmap bitmap) {
        mCache.put(url, bitmap);
    }
}- 再然后就是点击事件的逻辑处理
                ImageLoader.ImageListener listener = ImageLoader.getImageListener(imageView, R.mipmap.default_image, R.mipmap.failed_image);
                //可以看出来,加了缓存功能就是这里创建ImageLoader和上面不一样了,这里使用了我们光创建的缓存的工具类
                ImageLoader imageLoader = new ImageLoader(VolleyUtils.newInstance(getApplicationContext()).getRequestQueue(), new BitmapCache());
                imageLoader.get("http://img.my.csdn.net/uploads/201404/13/1397393290_5765.jpeg", listener);
NetworkImageView的使用
- NetworkImageView是一个自定义控制,它是继承自ImageView的,具备ImageView控件的所有功能,并且在原生的基础之上加入了加载网络图片的功能。NetworkImageView控件的用法要比前两种方式更加简单,大致可以分为以下五步:
- 创建一个RequestQueue对象。
- 创建一个ImageLoader对象。
- 在布局文件中添加一个NetworkImageView控件。
- 在代码中获取该控件的实例。
- 设置要加载的图片地址。
其中,第一第二步和ImageLoader的用法是完全一样的,因此这里我们就从第三步开始学习了。首先修改布局文件中的代码,在里面加入NetworkImageView控件,如下所示:
<LinearLayout xmlns:android="http://schemas.android.com/apk/res/android"
    android:layout_width="fill_parent"
    android:layout_height="fill_parent"
    android:orientation="vertical" >

    <Button
        android:id="@+id/button"
        android:layout_width="wrap_content"
        android:layout_height="wrap_content"
        android:text="Send Request" />

    <com.android.volley.toolbox.NetworkImageView
        android:id="@+id/network_image_view"
        android:layout_width="200dp"
        android:layout_height="200dp"
        android:layout_gravity="center_horizontal"
        />

</LinearLayout>
接着在Activity获取到这个控件的实例,这就非常简单了,代码如下所示:
networkImageView = (NetworkImageView) findViewById(R.id.network_image_view); 得到了NetworkImageView控件的实例之后,我们可以调用它的setDefaultImageResId()方法、setErrorImageResId()方法和setImageUrl()方法来分别设置加载中显示的图片,加载失败时显示的图片,以及目标图片的URL地址,如下所示:
networkImageView.setDefaultImageResId(R.drawable.default_image);
networkImageView.setErrorImageResId(R.drawable.failed_image);
networkImageView.setImageUrl("http://img.my.csdn.net/uploads/201404/13/1397393290_5765.jpeg",
imageLoader); - 其中,setImageUrl()方法接收两个参数,第一个参数用于指定图片的URL地址,第二个参数则是前面创建好的ImageLoader对象。
- 使用ImageRequest和ImageLoader这两种方式来加载网络图片,都可以传入一个最大宽度和高度的参数来对图片进行压缩,而NetworkImageView中则完全没有提供设置最大宽度和高度的方法,那么是不是使用NetworkImageView来加载的图片都不会进行压缩呢?
其实并不是这样的,NetworkImageView并不需要提供任何设置最大宽高的方法也能够对加载的图片进行压缩。这是由于NetworkImageView是一个控件,在加载图片的时候它会自动获取自身的宽高,然后对比网络图片的宽度,再决定是否需要对图片进行压缩。也就是说,压缩过程是在内部完全自动化的,并不需要我们关心,NetworkImageView会始终呈现给我们一张大小刚刚好的网络图片,不会多占用任何一点内存,这也是NetworkImageView最简单好用的一点吧。
当然了,如果你不想对图片进行压缩的话,其实也很简单,只需要在布局文件中把NetworkImageView的layout_width和layout_height都设置成wrap_content就可以了,这样NetworkImageView就会将该图片的原始大小展示出来,不会进行任何压缩。
另外一个image-loader的使用
首先需要我们导入包

然后的逻辑代码很简单如下:
        ImageLoader imageLoader=ImageLoader.getInstance();
        imageLoader.init(ImageLoaderConfiguration.createDefault(context));
imageLoader.displayImage(newsDetial.getImg(),viewHolder.imageView);- 就可以讲对应网络上的图片加载到imageView上了

