【iOS】本地推送和模拟远程推送
本地推送
参考了 标哥-iOS攻城狮 的《iOS本地推送(本地通知)》。大体结构和他的一样。这里写这篇博客是一种记录也是补充了一点知识。
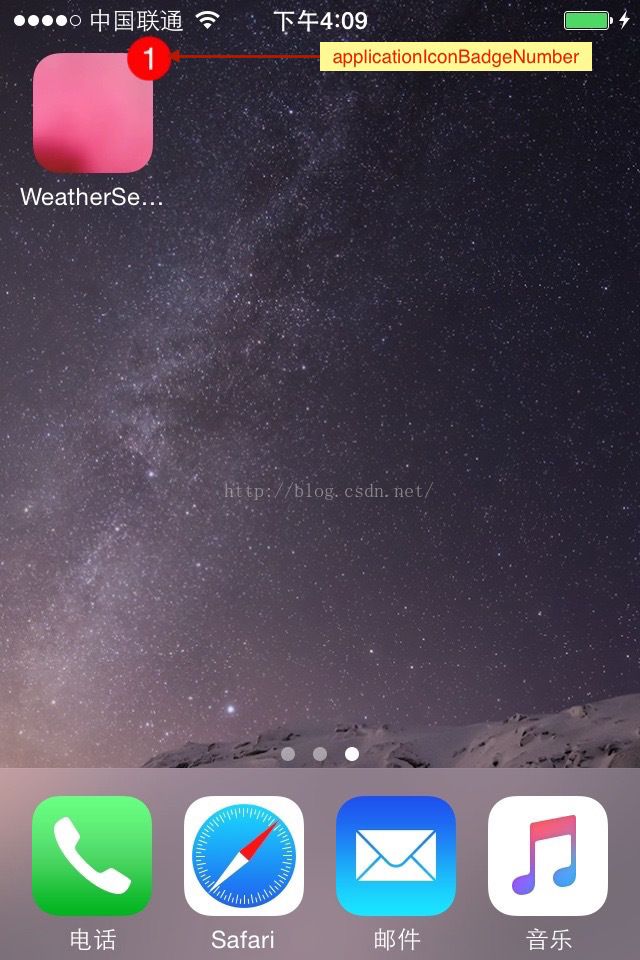
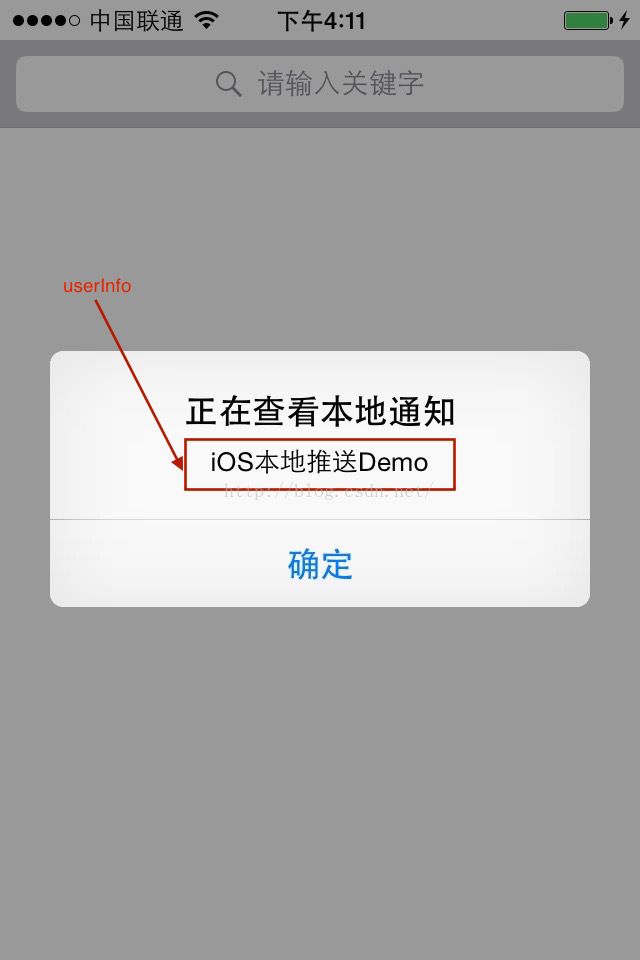
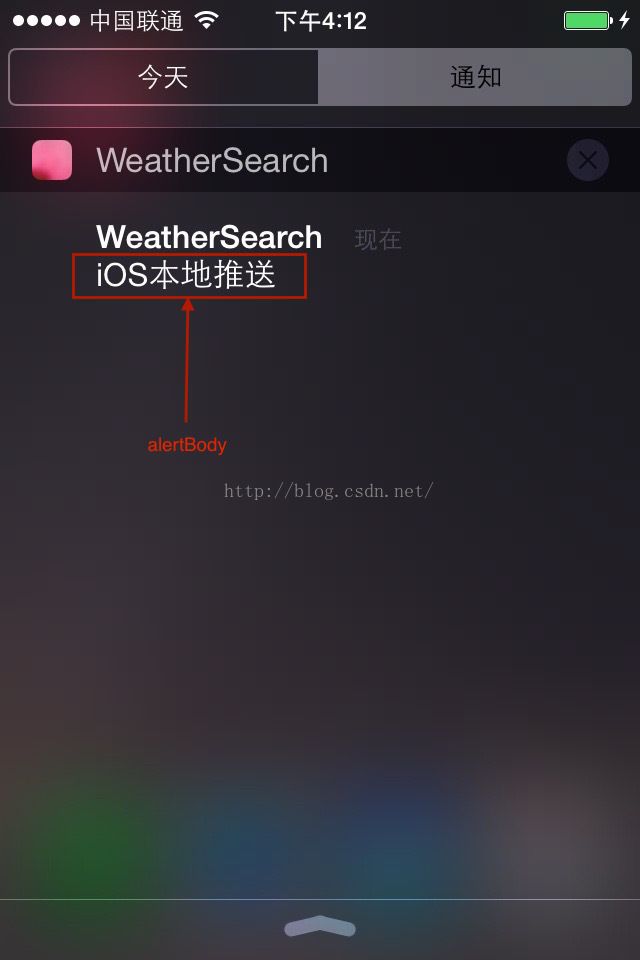
首先看看四张效果图:
效果图就是这样的了关于说明是:applicationIconBadgeNumber和alertBody都有说明。
#import "AppDelegate.h"

@interface AppDelegate ()

@end

@implementation AppDelegate

/**
 *  注册一个本地推送
 *
 *  @param alertTime 推送间隔时间
 */
- (void)registerLocalNotification:(NSInteger)alertTime {
	NSLog(@"发送通知");
	UILocalNotification *notification = [[UILocalNotification alloc] init];
	// 设置触发通知的时间
	NSDate *fireDate = [NSDate dateWithTimeIntervalSinceNow:alertTime];
	notification.fireDate = fireDate;
	// 时区  时区跟随时区变化
	notification.timeZone = [NSTimeZone defaultTimeZone];
	// 设置重复的间隔
	notification.repeatInterval = kCFCalendarUnitSecond;
	// 通知内容
	notification.alertBody =  @"iOS本地推送";
	// 设置icon右上角的显示数
	notification.applicationIconBadgeNumber = 1;
	// 通知被触发时播放的声音
	notification.soundName = UILocalNotificationDefaultSoundName;
	// 通知参数
	NSDictionary *userDict = [NSDictionary dictionaryWithObject:@"iOS本地推送Demo" forKey:@"key"];
	notification.userInfo = userDict;

	// ios8后,需要添加这个注册,才能得到授权
	if ([[UIApplication sharedApplication] respondsToSelector:@selector(registerUserNotificationSettings:)]) {
		UIUserNotificationType type =  UIUserNotificationTypeAlert | UIUserNotificationTypeBadge | UIUserNotificationTypeSound;
		UIUserNotificationSettings *settings = [UIUserNotificationSettings settingsForTypes:type
																				 categories:nil];
		[[UIApplication sharedApplication] registerUserNotificationSettings:settings];
		// 通知多长时间重复提示
		notification.repeatInterval = NSCalendarUnitSecond;
	}
	else {
		// 通知多长时间重复提示
		notification.repeatInterval = NSCalendarUnitSecond;
	}
	// 执行注册的通知
	[[UIApplication sharedApplication] scheduleLocalNotification:notification];
}

- (BOOL)application:(UIApplication *)application didFinishLaunchingWithOptions:(NSDictionary *)launchOptions {
	// Override point for customization after application launch.

	[self registerLocalNotification:5];

	return YES;
}
/**
 *  推送注册后就会调用这个方法
 *
 *  @param application          application description
 *  @param notificationSettings notificationSettings description
 */
- (void)application:(UIApplication *)application didRegisterUserNotificationSettings:(UIUserNotificationSettings *)notificationSettings{
	NSLog(@"注册");
}
/**
 *  查看推送消息后调用的方法
 *  每次查看都会调用
 *  @param application  application description
 *  @param notification notification description
 */
- (void)application:(UIApplication *)application didReceiveLocalNotification:(UILocalNotification *)notification {
	NSLog(@"notification:%@",notification);
	NSString *notMess = [notification.userInfo objectForKey:@"key"];
	UIAlertView *alert = [[UIAlertView alloc] initWithTitle:@"正在查看本地通知"
													message:notMess
												   delegate:nil
										  cancelButtonTitle:@"确定"
										  otherButtonTitles:nil];
	[alert show];
	// 更新applicationIconBadgeNumber
	NSInteger badge = [UIApplication sharedApplication].applicationIconBadgeNumber;
	badge--;
	badge = badge >= 0 ? badge : 0;
	[UIApplication sharedApplication].applicationIconBadgeNumber = badge;
}
notification打印出来的信息:
notification:<UIConcreteLocalNotification: 0x14595200>{fire date = 2015年10月9日 星期五 中国标准时间下午7:04:16, time zone = Asia/Shanghai (GMT+8) offset 28800, repeat interval = NSCalendarUnitSecond, repeat count = UILocalNotificationInfiniteRepeatCount, next fire date = 2015年10月9日 星期五 中国标准时间下午7:05:15, user info = {
key = "iOS\U672c\U5730\U63a8\U9001Demo";
}}
获取本机的 deviceToken
1.要有推送证书。
详细请参考 http://blog.csdn.net/woaifen3344/article/details/41311023
证书有问题会打印出这种警告的:
Error Domain=NSCocoaErrorDomain Code=3000 "未找到应用程序的“aps-environment”的授权字符串" UserInfo=0x14d65220 {NSLocalizedDescription=未找到应用程序的“aps-environment”的授权字符串}
2.编写如下代码
- (BOOL)application:(UIApplication *)application didFinishLaunchingWithOptions:(NSDictionary *)launchOptions {
	// Override point for customization after application launch.

	UIUserNotificationSettings * settings = [UIUserNotificationSettings settingsForTypes:UIUserNotificationTypeAlert|UIUserNotificationTypeBadge|UIUserNotificationTypeSound categories:nil];
	[application registerUserNotificationSettings:settings];
	[application registerForRemoteNotifications];

	NSDictionary * userInfo = launchOptions[UIApplicationLaunchOptionsRemoteNotificationKey];
	if (userInfo) {
		UILabel * label = [[UILabel alloc] init];
		label.frame = CGRectMake(10, 250, 200, 200);
		label.backgroundColor = [UIColor grayColor];
		label.font = [UIFont systemFontOfSize:12];
		label.text = [NSString stringWithFormat:@"%@",userInfo];
		label.textColor = [UIColor greenColor];
		[self.window.rootViewController.view addSubview:label];
	} else {
		NSLog(@"userInfo = nil");
	}

	return YES;
}
- (void)application:(UIApplication *)application didRegisterForRemoteNotificationsWithDeviceToken:(NSData *)deviceToken{
	NSLog(@"deviceToken = %@",deviceToken);  //这里就会打印出来 <span style="font-family: Arial, Helvetica, sans-serif;">deviceToken</span>
}
模拟远程推送
远程推送的原理
测试步骤
1.还是使用上面获取deviceToken的代码,真机调试,安装在测试机上。
2.在Xcode运行PushMeBaby。PushMeBaby源码下载。
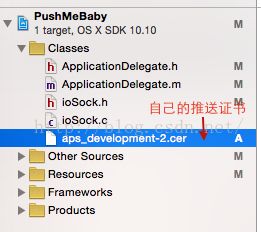
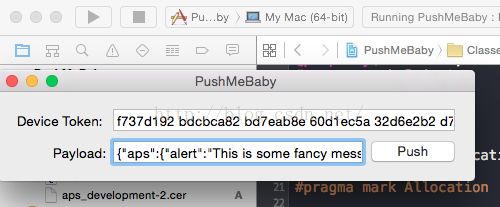
3.修改PushMeBaby里面的证书和deviceToken为你自己的。4.运行PushMeBaby在弹出如图的对话框
在Paload里面的信息是这样的:{"aps":{"alert":"This is some fancy message.","badge":1}} alert 就是我们的推送的alertBody。badge就是applicationIconBadgeNumber。
我们需要修改的推送消息和badge,修改完之后点击“Push”消息就推送出去了。
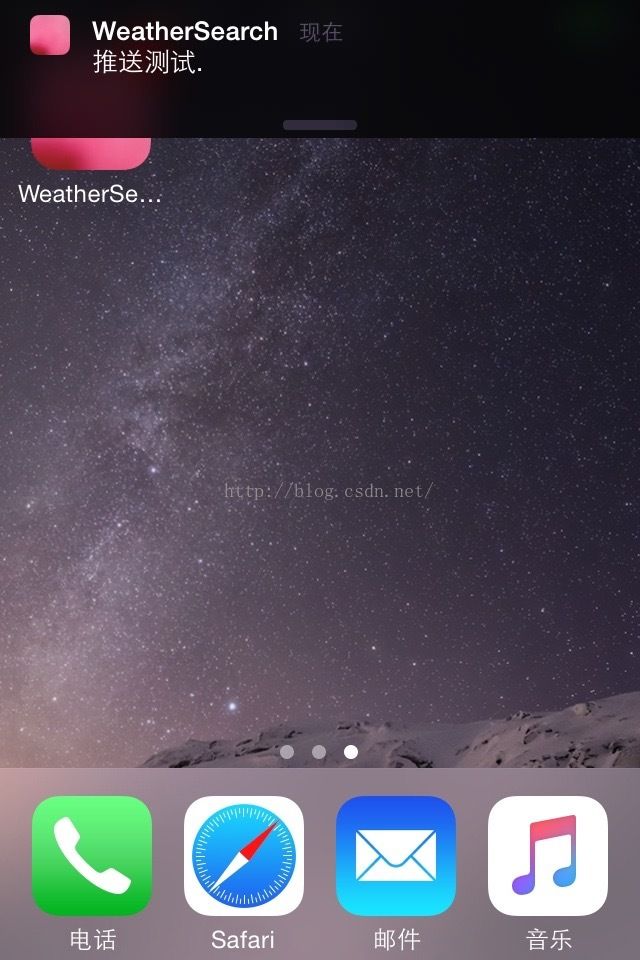
例如:This is some fancy message --- 》推送测试 1---》3。很快我们的手机就可以看见推送信息了。
icon右上角的applicationIconBadgeNumber也变为3了。模拟远程推送也就模拟完了。
