开始MongoDB 之旅
开始MongoDB 之旅
Luo Weifeng 2011-6-28
环境: Ubuntu 11.04
安装MongoDB
$sudo apt-get install mongodb
会自动安装libpcrecpp0 libboost-system1.42.0 libboost-filesystem1.42.0
libboost-program-options1.42.0 libboost-thread1.42.0 xulrunner-2.0-mozjs
mongodb-clients mongodb-server mongodb-dev mongodb 等依赖包。
$ps aux | grep mongod
安装Python语言驱动
$sudo apt-get install python-setuptools
$sudo easy_install pymongo
配置MongoDB
$sudo vim /etc/mongodb.conf
dbpath=’your datebase path’
logpath=’where to log’
logappend=true
bind_id=127.0.0.1
port=27017
使用Mongo测试数据库
Mongo是客户端,Mongod是服务端。下面使用Mongo测试下服务。
root@ubuntu:~# mongo
MongoDB shell version: 1.6.3
Mon Jun 27 19:15:05 *** warning: spider monkey build without utf8 support. consider rebuilding with utf8 support
connecting to: test
>
> db.serverStatus()
输出参数为json格式有几个主要的类型:
uptime: 服务器运行时间(秒)
localTime: 服务器本地时间
mem: 服务器内存信息
connections: 当前连接数
opcounters: 操作统计
查看所有数据库:
> show dbs
admin
local
可以看出最初的时候只有 admin local test三个数据库,test在使用,这里没有显示出来。
切换数据库
>use admin
switched to db admin
>db.stats()
使用WEB测试数据库
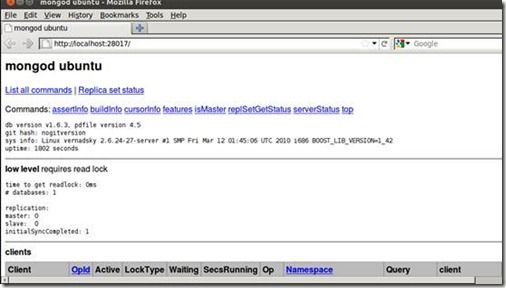
访问27017
根据要求再访问 27017 + 1000 = 28017
可以看到一个很完整的管理页面,显然不如CouchDB的漂亮,呵呵。
完整测试
创建数据库
MongoDB没有创建数据库的命令,可以使用use dbname进行切换,use可以切换到不存在的数据库,当有数据写入的时候就会创建数据库。
root@ubuntu:~# mongo
>use mytestdb
创建Collection
进入数据库建立coolection数据库才算建立完成。使用
db.createCollection("mytestdb ", {capped:true, size:10000}) 单位是kb
或者db.runCommand( {createCollection:" mytestdb ", capped:true, size:100000} )
capped参数是建立固定大小的数据库文件,为了保证效率,mongo会在建立collection的时候占用磁盘空间,防止碎片。
> db.createCollection("mytestdb ", {capped:true, size:10000})
> show collections
mytestdb
建立文档
>db. mytestdb.insert({name:'xiaowanzi',age:8})
示例查询
| 操作符 |
SQL |
Mongo |
| * |
Select * from mytestdb |
db.mytestdb.find() |
| Column |
Select name,age from mytestdb |
db.mytestdb.find({},{name:1,age:1}) |
| Where * |
Select * from mytestdb where age=24 |
db.mytestdb.find({age:24}) |
| Column where |
Select name,age from mytestdb where age=24 |
db.mytestdb.find({age:24},{name:1,age:1}) |
| >> << |
Select * from mytestdb where age>20 |
db.mytestdb.find({‘age’:{>:20}}) |
| Like |
Select * from mytestdb where name like ‘wang%’ |
db.mytestdb.find({name:/^wangfan/}) |
|
|
Select * from mytestdb where name like ‘%wang%’ |
db.mytestdb.find({name:/wangfan/}) |
| Order |
SELECT * FROM mytestdb ORDER BY name DESC |
db.mytestdb.find().sort({name:-1}) |
> db.mytestdb.find()
{ "_id" : ObjectId("4e093ff90edf95f31cbc7c29"), "name" : "xiaowanzi", "age" : 8 }
创建索引
使用ensureIndex来创建索引
db. mytestdb.ensureIndex({name:1})
db.runCommand({dropIndexes:'foo', index : '*'})
这里的1是正序,-1是倒序
删除索引
db.collection.dropIndexes();删除所有的索引
db. mytestdb.dropIndexes({name:1});
db.runCommand({dropIndexes:'wfcoll', index : {name:1}})
我们在name字段做一个索引,在age上做个负索引,如下:
>db.mytestdb.ensureIndex({name:1})
>db.mytestdb.ensureIndex({age:-1})
使用Python测试
$python
>>> import pymongo
>>> conn = pymongo.Connection(host="localhost",port=27017)
>>> db=conn.mytestdb
>>> for user in db.wfcoll.find({}):
... repr(user)


