Centos 7.2 KVM 配置
z
[root@dlp ~]# nmcli c add type bridge autoconnect yes con-name br0 ifname br0
Connection 'br0' (0f4b7bc8-8c7a-461a-bff1-d516b941a6ec) successfully added.
[root@dlp ~]#nmcli c modify br0 ipv4.addresses 10.0.0.30/24 ipv4.method manual
[root@dlp ~]#nmcli c modify br0 ipv4.gateway 10.0.0.1
[root@dlp ~]#nmcli c modify br0 ipv4.dns 10.0.0.1
[root@dlp ~]#nmcli c delete eno16777736
[root@dlp ~]#nmcli c add type bridge-slave autoconnect yes con-name eno16777736 ifname eno16777736 master br0
[root@dlp ~]# reboot [root@dlp ~]#ip addr
[root@dlp ~]# mkdir /etc/libvirt/storage
[root@dlp ~]# virsh pool-define /etc/libvirt/storage/disk01.xml
[root@dlp ~]# virsh pool-start disk01
[root@dlp ~]# virsh pool-autostart disk01
[root@dlp ~]# virsh pool-list
[root@dlp ~]# virsh pool-info disk01
[root@dlp ~]# virt-top
[root@kvm01 ~]# virsh list
[root@kvm02 ~]# virsh list
[root@kvm02 ~]# virsh migrate --live centos7 qemu+ssh://10.0.0.21/system
[email protected]'s password: [root@kvm02 ~]# virsh list
|
It's Virtualization with KVM ( Kernel-based Virtual Machine ) + QEMU.
This requires that the CPU on your computer which has a function Intel VT or AMD-V. |
|
| [1] | Install KVM. |
|
[root@dlp ~]# yum -y install qemu-kvm libvirt virt-install bridge-utils
# make sure modules are loaded
[root@dlp ~]# lsmod | grep kvm kvm_intel 138567 0 kvm 441119 1 kvm_intel [root@dlp ~]# lsmod | grep kvm
|
| [2] | Configure Bridge networking for KVM virtual machine. Replace the interface name "eno16777736" for your own environment's one. |
# add bridge "br0"
[root@dlp ~]# nmcli c add type bridge autoconnect yes con-name br0 ifname br0
Connection 'br0' (0f4b7bc8-8c7a-461a-bff1-d516b941a6ec) successfully added.
# set IP for br0
[root@dlp ~]#nmcli c modify br0 ipv4.addresses 10.0.0.30/24 ipv4.method manual
# set Gateway for br0
[root@dlp ~]#nmcli c modify br0 ipv4.gateway 10.0.0.1
# set DNS for "br0"
[root@dlp ~]#nmcli c modify br0 ipv4.dns 10.0.0.1
# remove the current setting
[root@dlp ~]#nmcli c delete eno16777736
# add an interface again as a member of br0
[root@dlp ~]#nmcli c add type bridge-slave autoconnect yes con-name eno16777736 ifname eno16777736 master br0
# restart
[root@dlp ~]# reboot
1: lo: <LOOPBACK,UP,LOWER_UP> mtu 65536 qdisc noqueue state UNKNOWN group default
    link/loopback 00:00:00:00:00:00 brd 00:00:00:00:00:00
    inet 127.0.0.1/8 scope host lo
       valid_lft forever preferred_lft forever
    inet6 ::1/128 scope host
       valid_lft forever preferred_lft forever
2: eno16777736: <BROADCAST,MULTICAST,UP,LOWER_UP>
    mtu 1500 qdisc pfifo_fast master br0 state UP group default qlen 1000
    link/ether 00:0c:29:9f:9b:d3 brd ff:ff:ff:ff:ff:ff
3: virbr0: <NO-CARRIER,BROADCAST,MULTICAST,UP> mtu 1500 qdisc noqueue state DOWN group default
    link/ether 22:f8:64:25:97:44 brd ff:ff:ff:ff:ff:ff
    inet 192.168.122.1/24 brd 192.168.122.255 scope global virbr0
       valid_lft forever preferred_lft forever
4: br0: <BROADCAST,MULTICAST,UP,LOWER_UP> mtu 1500 qdisc noqueue state UP group default
    link/ether 00:0c:29:9f:9b:d3 brd ff:ff:ff:ff:ff:ff
    inet 10.0.0.30/24 brd 10.0.0.255 scope global br0
       valid_lft forever preferred_lft forever
    inet6 fe80::20c:29ff:fe9f:9bd3/64 scope link
       valid_lft forever preferred_lft forever
|
Install GuestOS and create a Virtual Machine. This example shows to install CentOS 7.
|
|
| [1] | Install GuestOS on text mode via network, it's OK on Console or remote connection with Putty and so on.Furthermore, Virtual Machine's images are placed at /var/lib/libvirt/images by default as a Storage Pool,but this example shows to create and use a new Storage Pool. |
| [root@dlp ~]# mkdir -p /var/kvm/images # create a new Storage Pool
--name centos7 \
Starting install...
--ram 4096 \
--disk path=/var/kvm/images/centos7.img,size=30 \ --vcpus 2 \ --os-type linux \ --os-variant rhel7 \ --network bridge=br0 \ --graphics none \ --console pty,target_type=serial \ --location 'http://ftp.iij.ad.jp/pub/linux/centos/7/os/x86_64/' \ --extra-args 'console=ttyS0,115200n8 serial'
# start installation
|
|
The example of options above means like follows. There are many options for others, make sure with "man virt-install".
--name
specify the name of Virtual Machine
--ram
specify the amount of memories of Virtual Machine
--disk path=xxx ,size=xxx
'path=' ⇒ specify the location of disks of Virtual Machine
--vcpus'size=' ⇒ specify the amount of disks of Virtual Machine
specify the virtual CPUs
--os-type
specify the type of GuestOS
--os-variant
specify the kind of GuestOS - possible to confirm the list with the command below
--network# osinfo-query os
specify network types of Virtual Machine
--graphics
specify the kind of graphics. if set 'none', it means nographics.
--console
specify the console type
--location
specify the location of installation where from
--extra-args
specify parameters that is set in kernel
|
| [2] | Install on text mode, it's the same with common procedure of installation.After finishing installation, reboot first and then login prompt is shown like follwos. |
CentOS Linux 7 (Core) Kernel 3.10.0-123.el7.x86_64 on an x86_64 localhost login: |
| [3] | Move to GuestOS to HostOS with Ctrl + ] key. Move to HostOS to GuestOS with a command 'virsh console (name of virtual machine)'. |
|
[root@localhost ~]# # push Ctrl + ]
[root@dlp ~]# virsh console centos7
[root@dlp ~]# # Host's console
# move to Guest
Connected to domain www
Escape character is ^] # Enter key
[root@localhost ~]# # Guest's console
|
| [4] | Because after installing GuestOS from network, it is minimum settings,so it's useful to save it as a template in order to create new virtual machines later. |
| [root@dlp ~]# virt-clone --original centos7 --name template --file /var/kvm/images/template.img
Allocating 'template.img'
| 20 GB 01:44
Clone 'template' created successfully.
[root@dlp ~]# ll /var/kvm/images/template.img
# disk image
-rwxr-xr-x 1 root root 32212254720 Jul 11 23:34 /var/kvm/images/template.img [root@dlp ~]# ll /etc/libvirt/qemu/template.xml
# xml file
-rw------- 1 root root 1843 Jul 11 23:32 /etc/libvirt/qemu/template.xml |
| [5] |
Set basic initial configuration to GuestOS first before using it.
|
| [6] | Define a new Storage Pool. |
[root@dlp ~]# vi /etc/libvirt/storage/disk01.xml
# create new
<pool type='dir'>
<name>disk01</name>
<capacity>0</capacity>
<allocation>0</allocation>
<available>0</available>
<source>
</source>
<target>
<path>/var/kvm/images</path>
<permissions>
<mode>0700</mode>
<owner>-1</owner>
<group>-1</group>
</permissions>
</target>
</pool>
# any name you like
<name>disk01</name>
<capacity>0</capacity>
<allocation>0</allocation>
<available>0</available>
<source>
</source>
<target>
# specify a pool directory
<path>/var/kvm/images</path>
<permissions>
<mode>0700</mode>
<owner>-1</owner>
<group>-1</group>
</permissions>
</target>
</pool>
# define the pool
[root@dlp ~]# virsh pool-define /etc/libvirt/storage/disk01.xml
Pool disk01 defined from /etc/libvirt/storage/disk01.xml
# start the pool
[root@dlp ~]# virsh pool-start disk01
Pool disk01 started
# set auto-start
[root@dlp ~]# virsh pool-autostart disk01
Pool disk01 marked as autostarted
# confirm to show the pool list
[root@dlp ~]# virsh pool-list
Name                 State      Autostart
-----------------------------------------
disk01               active     yes
# confirm to show the details
[root@dlp ~]# virsh pool-info disk01
Name:           disk01
UUID:           2de62477-7132-4512-b5d8-003e28da105c
State:          running
Persistent:     yes
Autostart:      yes
Capacity:       197.17 GiB
Allocation:     2.90 GiB
Available:      194.27 GiB
|
If you installed Desktop Environment,it's possible to create a Virtual machine on GUI.This example shows to install Windows Server 2012 R2 on GUI.
|
|
| [1] | Install virt-manager first. |
| [root@dlp ~]#
yum -y install virt-manager
|
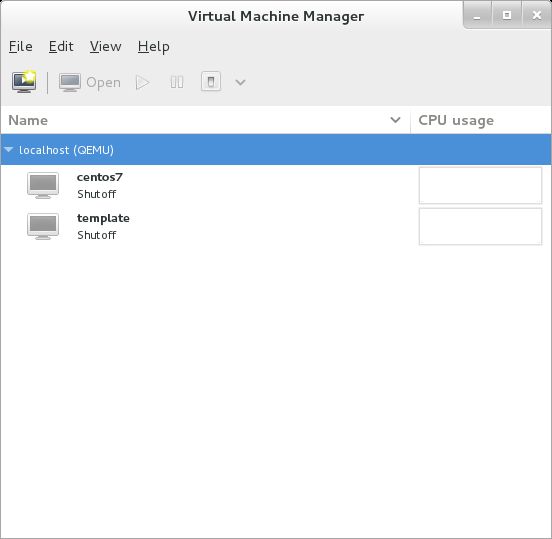
| [2] | Start Desktop and run 'Virtual Machine Manager'. |
 |
| [3] | Click 'New' button (it's just the PC-icon on upper-left) and open a wizard to create a new Virtual Machine. |
| |
| [4] | Specify the name of virtual machine and installation source. This example selects local media. |
 |
| [5] | Select Installation media or ISO image, and specify OS type and version. Windows Server 2012 in not listed, but it's possible to install it to select Windows 2008. |
 |
| [6] | Specify the amount of memories and number of virtual CPUs. |
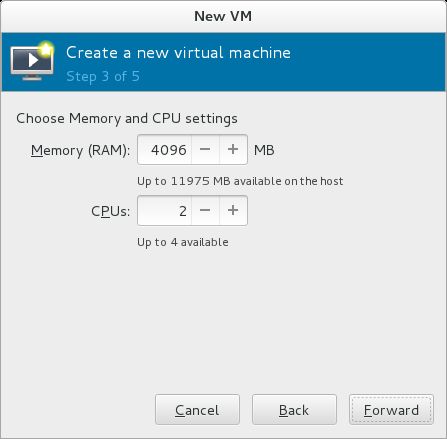 |
| [7] | Specify the amount of disks. |
 |
| [8] | Open 'Advanced options' and make sure the settings for networking or architecture are correct. |
 |
| [9] | Windows Server 2012 R2 Installation starts. |
 |
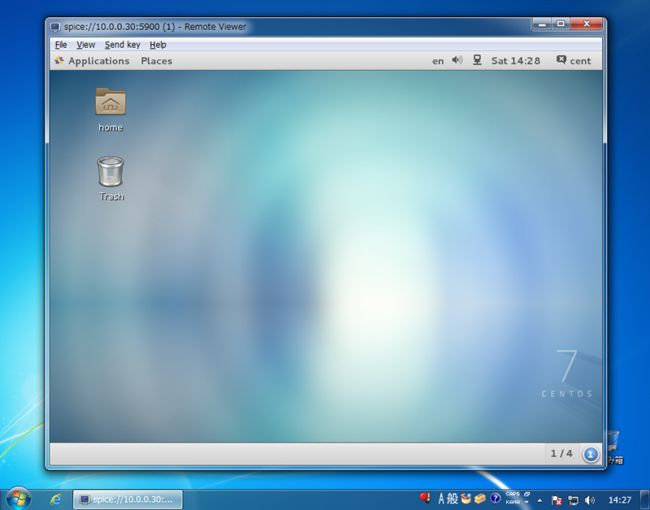
| [10] | Installation finished and Windows Server 2012 R2 is running. |

|
Basic Operarions with virsh command
|
|
| [1] | Start Virtual Machine |
|
[root@dlp ~]# virsh start centos7
[root@dlp ~]# virsh start centos7 --console
# Start Virtual Machine 'centos7'
# start and connect to console of 'centos7'
Connected to domain centos7 |
| [2] | Stop Virtual Machine |
|
[root@dlp ~]# virsh shutdown centos7
[root@dlp ~]# virsh destroy centos7
# Stop Virtual Machine 'centos7'
Domain centos7 is being shutdown
# Stop fourcely Virtual Machine 'centos7'
Domain centos7 destroyed |
| [3] | Set auto-start for Virtual Machines |
|
[root@dlp ~]# virsh autostart centos7
[root@dlp ~]# virsh autostart --disable centos7
# Enable auto-start for 'centos7'
# Disable auto-start for 'centos7'
|
| [4] | List all Virtual Machines |
| [root@dlp ~]# virsh list
# List all active Virtual Machines
 Id    Name               State
----------------------------------------
 2     centos7            running
[root@dlp ~]# virsh list --all
# List all Virtual Machines included inactives
Id Name State ---------------------------------------- - centos7 shut off - template shut off - Win2k12 shut off |
| [5] | Switch console Move to GuestOS to HostOS with Ctrl + ] key. Move to HostOS to GuestOS with a command 'virsh console (name of virtual machine)'. |
| [root@dlp ~]# virsh console centos7
# connect to 'centos7'
Connected to domain centos7
Escape character is ^] # Enter
CentOS Linux 7 (Core)
Kernel 3.10.0-123.el7.x86_64 on an x86_64
localhost login:
Password:
# just switched on Guest
Last login: Sat Jul 12 20:51:10 2014 [root@localhost ~]# # Ctrl + ] key [root@dlp ~]# # just switched on Host |
| [6] | For Other options below, there are many options, please try to execute them. |
[root@dlp ~]# virsh --help
virsh [options]... [<command_string>]
virsh [options]... <command> [args...]

  options:
    -c | --connect=URI      hypervisor connection URI
    -r | --readonly         connect readonly
    -d | --debug=NUM        debug level [0-4]
    -h | --help             this help
    -q | --quiet            quiet mode
    -t | --timing           print timing information
    -l | --log=FILE         output logging to file
    -v                      short version
    -V                      long version
         --version[=TYPE]   version, TYPE is short or long (default short)
    -e | --escape <char>    set escape sequence for console

  commands (non interactive mode):

 Domain Management (help keyword 'domain')
    attach-device                  attach device from an XML file
    attach-disk                    attach disk device
    attach-interface               attach network interface
    autostart                      autostart a domain
    blkdeviotune                   Set or query a block device I/O tuning parameters.
    blkiotune                      Get or set blkio parameters
    blockcommit                    Start a block commit operation.
    blockcopy                      Start a block copy operation.
    blockjob                       Manage active block operations
    blockpull                      Populate a disk from its backing image.
    blockresize                    Resize block device of domain.
    change-media                   Change media of CD or floppy drive
    console                        connect to the guest console
    cpu-baseline                   compute baseline CPU
    cpu-compare                    compare host CPU with a CPU described by an XML file
    cpu-stats                      show domain cpu statistics
    create                         create a domain from an XML file
    define                         define (but don't start) a domain from an XML file
    desc                           show or set domain's description or title
    destroy                        destroy (stop) a domain
    detach-device                  detach device from an XML file
    detach-disk                    detach disk device
    detach-interface               detach network interface
    domdisplay                     domain display connection URI
    domfstrim                      Invoke fstrim on domain's mounted filesystems.
    domhostname                    print the domain's hostname
    domid                          convert a domain name or UUID to domain id
    domif-setlink                  set link state of a virtual interface
    domiftune                      get/set parameters of a virtual interface
    domjobabort                    abort active domain job
    domjobinfo                     domain job information
    domname                        convert a domain id or UUID to domain name
    dompmsuspend                   suspend a domain gracefully using power management functions
    dompmwakeup                    wakeup a domain from pmsuspended state
    domuuid                        convert a domain name or id to domain UUID
    domxml-from-native             Convert native config to domain XML
    domxml-to-native               Convert domain XML to native config
    dump                           dump the core of a domain to a file for analysis
    dumpxml                        domain information in XML
    edit                           edit XML configuration for a domain
    inject-nmi                     Inject NMI to the guest
    send-key                       Send keycodes to the guest
    send-process-signal            Send signals to processes
    lxc-enter-namespace            LXC Guest Enter Namespace
    managedsave                    managed save of a domain state
    managedsave-remove             Remove managed save of a domain
    maxvcpus                       connection vcpu maximum
    memtune                        Get or set memory parameters
    migrate                        migrate domain to another host
    migrate-setmaxdowntime         set maximum tolerable downtime
    migrate-compcache              get/set compression cache size
    migrate-setspeed               Set the maximum migration bandwidth
    migrate-getspeed               Get the maximum migration bandwidth
    numatune                       Get or set numa parameters
    qemu-attach                    QEMU Attach
    qemu-monitor-command           QEMU Monitor Command
    qemu-agent-command             QEMU Guest Agent Command
    reboot                         reboot a domain
    reset                          reset a domain
    restore                        restore a domain from a saved state in a file
    resume                         resume a domain
    save                           save a domain state to a file
    save-image-define              redefine the XML for a domain's saved state file
    save-image-dumpxml             saved state domain information in XML
    save-image-edit                edit XML for a domain's saved state file
    schedinfo                      show/set scheduler parameters
    screenshot                     take a screenshot of a current domain console and store it into a file
    setmaxmem                      change maximum memory limit
    setmem                         change memory allocation
    setvcpus                       change number of virtual CPUs
    shutdown                       gracefully shutdown a domain
    start                          start a (previously defined) inactive domain
    suspend                        suspend a domain
    ttyconsole                     tty console
    undefine                       undefine a domain
    update-device                  update device from an XML file
    vcpucount                      domain vcpu counts
    vcpuinfo                       detailed domain vcpu information
    vcpupin                        control or query domain vcpu affinity
    emulatorpin                    control or query domain emulator affinity
    vncdisplay                     vnc display

 Domain Monitoring (help keyword 'monitor')
    domblkerror                    Show errors on block devices
    domblkinfo                     domain block device size information
    domblklist                     list all domain blocks
    domblkstat                     get device block stats for a domain
    domcontrol                     domain control interface state
    domif-getlink                  get link state of a virtual interface
    domiflist                      list all domain virtual interfaces
    domifstat                      get network interface stats for a domain
    dominfo                        domain information
    dommemstat                     get memory statistics for a domain
    domstate                       domain state
    list                           list domains

 Host and Hypervisor (help keyword 'host')
    capabilities                   capabilities
    freecell                       NUMA free memory
    hostname                       print the hypervisor hostname
    node-memory-tune               Get or set node memory parameters
    nodecpumap                     node cpu map
    nodecpustats                   Prints cpu stats of the node.
    nodeinfo                       node information
    nodememstats                   Prints memory stats of the node.
    nodesuspend                    suspend the host node for a given time duration
    sysinfo                        print the hypervisor sysinfo
    uri                            print the hypervisor canonical URI
    version                        show version

 Interface (help keyword 'interface')
    iface-begin                    create a snapshot of current interfaces settings,
                                   which can be later committed (iface-commit) or restored (iface-rollback)
    iface-bridge                   create a bridge device and attach an existing network device to it
    iface-commit                   commit changes made since iface-begin and free restore point
    iface-define                   define (but don't start) a physical host interface from an XML file
    iface-destroy                  destroy a physical host interface (disable it / "if-down")
    iface-dumpxml                  interface information in XML
    iface-edit                     edit XML configuration for a physical host interface
    iface-list                     list physical host interfaces
    iface-mac                      convert an interface name to interface MAC address
    iface-name                     convert an interface MAC address to interface name
    iface-rollback                 rollback to previous saved configuration created via iface-begin
    iface-start                    start a physical host interface (enable it / "if-up")
    iface-unbridge                 undefine a bridge device after detaching its slave device
    iface-undefine                 undefine a physical host interface (remove it from configuration)

 Network Filter (help keyword 'filter')
    nwfilter-define                define or update a network filter from an XML file
    nwfilter-dumpxml               network filter information in XML
    nwfilter-edit                  edit XML configuration for a network filter
    nwfilter-list                  list network filters
    nwfilter-undefine              undefine a network filter

 Networking (help keyword 'network')
    net-autostart                  autostart a network
    net-create                     create a network from an XML file
    net-define                     define (but don't start) a network from an XML file
    net-destroy                    destroy (stop) a network
    net-dumpxml                    network information in XML
    net-edit                       edit XML configuration for a network
    net-info                       network information
    net-list                       list networks
    net-name                       convert a network UUID to network name
    net-start                      start a (previously defined) inactive network
    net-undefine                   undefine an inactive network
    net-update                     update parts of an existing network's configuration
    net-uuid                       convert a network name to network UUID

 Node Device (help keyword 'nodedev')
    nodedev-create                 create a device defined by an XML file on the node
    nodedev-destroy                destroy (stop) a device on the node
    nodedev-detach                 detach node device from its device driver
    nodedev-dumpxml                node device details in XML
    nodedev-list                   enumerate devices on this host
    nodedev-reattach               reattach node device to its device driver
    nodedev-reset                  reset node device

 Secret (help keyword 'secret')
    secret-define                  define or modify a secret from an XML file
    secret-dumpxml                 secret attributes in XML
    secret-get-value               Output a secret value
    secret-list                    list secrets
    secret-set-value               set a secret value
    secret-undefine                undefine a secret

 Snapshot (help keyword 'snapshot')
    snapshot-create                Create a snapshot from XML
    snapshot-create-as             Create a snapshot from a set of args
    snapshot-current               Get or set the current snapshot
    snapshot-delete                Delete a domain snapshot
    snapshot-dumpxml               Dump XML for a domain snapshot
    snapshot-edit                  edit XML for a snapshot
    snapshot-info                  snapshot information
    snapshot-list                  List snapshots for a domain
    snapshot-parent                Get the name of the parent of a snapshot
    snapshot-revert                Revert a domain to a snapshot

 Storage Pool (help keyword 'pool')
    find-storage-pool-sources-as   find potential storage pool sources
    find-storage-pool-sources      discover potential storage pool sources
    pool-autostart                 autostart a pool
    pool-build                     build a pool
    pool-create-as                 create a pool from a set of args
    pool-create                    create a pool from an XML file
    pool-define-as                 define a pool from a set of args
    pool-define                    define (but don't start) a pool from an XML file
    pool-delete                    delete a pool
    pool-destroy                   destroy (stop) a pool
    pool-dumpxml                   pool information in XML
    pool-edit                      edit XML configuration for a storage pool
    pool-info                      storage pool information
    pool-list                      list pools
    pool-name                      convert a pool UUID to pool name
    pool-refresh                   refresh a pool
    pool-start                     start a (previously defined) inactive pool
    pool-undefine                  undefine an inactive pool
    pool-uuid                      convert a pool name to pool UUID

 Storage Volume (help keyword 'volume')
    vol-clone                      clone a volume.
    vol-create-as                  create a volume from a set of args
    vol-create                     create a vol from an XML file
    vol-create-from                create a vol, using another volume as input
    vol-delete                     delete a vol
    vol-download                   download volume contents to a file
    vol-dumpxml                    vol information in XML
    vol-info                       storage vol information
    vol-key                        returns the volume key for a given volume name or path
    vol-list                       list vols
    vol-name                       returns the volume name for a given volume key or path
    vol-path                       returns the volume path for a given volume name or key
    vol-pool                       returns the storage pool for a given volume key or path
    vol-resize                     resize a vol
    vol-upload                     upload file contents to a volume
    vol-wipe                       wipe a vol

 Virsh itself (help keyword 'virsh')
    cd                             change the current directory
    connect                        (re)connect to hypervisor
    echo                           echo arguments
    exit                           quit this interactive terminal
    help                           print help
    pwd                            print the current directory
    quit                           quit this interactive terminal


  (specify help <group> for details about the commands in the group)

  (specify help <command> for details about the command)
|
Install useful tools for virt management.
|
|
| [1] | Install virt tools. |
| [root@dlp ~]# yum -y install libguestfs-tools virt-top |
| [2] | "ls" a directory in a virtual machine. |
[root@dlp ~]# virt-ls -l -d centos7 /roottotal 36 dr-xr-x---. 2 root root 4096 Jan 8 22:38 . drwxr-xr-x. 17 root root 4096 Jan 8 22:36 .. -rw-------. 1 root root 61 Jan 8 22:38 .bash_history -rw-r--r--. 1 root root 18 Dec 29 2013 .bash_logout -rw-r--r--. 1 root root 176 Dec 29 2013 .bash_profile -rw-r--r--. 1 root root 176 Dec 29 2013 .bashrc ... |
| [3] | "cat" a file in a virtual machine. |
[root@dlp ~]# virt-cat -d centos7 /etc/passwd
root:x:0:0:root:/root:/bin/bash bin:x:1:1:bin:/bin:/sbin/nologin daemon:x:2:2:daemon:/sbin:/sbin/nologin adm:x:3:4:adm:/var/adm:/sbin/nologin lp:x:4:7:lp:/var/spool/lpd:/sbin/nologin sync:x:5:0:sync:/sbin:/bin/sync ... |
| [4] | Edit a file in a virtual machine. |
[root@dlp ~]# virt-edit -d centos7 /etc/fstab
# # /etc/fstab # Created by anaconda on Thu Jan 8 13:20:43 2015 # # Accessible filesystems, by reference, are maintained under '/dev/disk' # See man pages fstab(5), findfs(8), mount(8) and/or blkid(8) for more info # /dev/mapper/centos-root / xfs defaults 1 1 UUID=537b215f-30a1-4e82-b05d-f480aa8e1034 /boot xfs defaults 1 2 /dev/mapper/centos-swap swap swap defaults 0 0 |
| [5] | Display disk usage in a virtual machine. |
[root@dlp ~]# virt-df -d centos7
Filesystem 1K-blocks Used Available Use% centos7:/dev/sda1 508588 72348 436240 15% centos7:/dev/centos/root 8910848 779252 8131596 9% |
| [6] | Mount a disk for a virtual machine. |
[root@dlp ~]# guestmount -d centos7 -i /media
total 32 lrwxrwxrwx. 1 root root 7 Jan 8 22:22 bin -> usr/bin dr-xr-xr-x. 4 root root 4096 Jan 8 22:37 boot drwxr-xr-x. 2 root root 6 Jan 8 22:20 dev drwxr-xr-x. 74 root root 8192 Jan 8 22:36 etc ... |
| [7] | Display the status of virtual machines. |
virt-top 22:32:virt-top14 - x86_64 4/4CPU 2801MHz 11968MB 2 domains, 1 active, 1 running, 0 sleeping, 0 paused, 1 inactive D:0 O:0 X:0 CPU: 0.2% Mem: 500 MB (500 MB by guests) ID S RDRQ WRRQ RXBY TXBY %CPU %MEM TIME NAME 6 R 0 0 0.2 4.0 0:09.14 guestfs-o7nss1p3kxvyl1r5 - (centos7)
|
This is the example to use Live Migration function for virtual machines.
This requires 2 KVM host server and a storage server like follows.
Please set DNS or hosts to resolve names or IP addresses normally, first. +----------------------+
| [ NFS Servver ] |
| nfs.srv.world |
| |
+-----------+----------+
|10.0.0.30
|
+----------------------+ | +----------------------+
| [ KVM Host #1 ] |10.0.0.21 | 10.0.0.22| [ KVM Host #2 ] |
| +----------+----------+ |
| kvm01.srv.world | | kvm02.srv.world |
+----------------------+ +----------------------+
|
| [1] |
Configure Storage server which has virtual machine images. For Storage server, it's OK to use NFS, iSCSI, GlusterFS and so on. This example uses NFS Storage server.
|
| [2] |
Configure 2 KVM host server and mount a directory provided from Storage server on the same mount point on both KVM server. This example mounts on [/var/kvm/images].
|
| [3] |
Create and start a virtual machine on a KVM host server.
|
| [4] | It's OK all, execute Live Migration like follows on server which virtual machine is running. After finishing it, virtual machine is migrated on another KVM host like follows. |
 Id    Name             State
--------------------------------------
 3     centos7          running
[root@kvm01 ~]# virsh migrate --live centos7 qemu+ssh://10.0.0.22/system
[email protected]'s password:
[root@kvm01 ~]# virsh list
[email protected]'s password:
# root password
 Id    Name             State
--------------------------------------
# just migrated
### on another KVM Host ###
[root@kvm02 ~]# virsh list
 Id    Name              State
---------------------------------------
 1     centos7           running
# back to the KVM Host again like follows
[root@kvm02 ~]# virsh migrate --live centos7 qemu+ssh://10.0.0.21/system
[email protected]'s password:
 Id    Name             State
--------------------------------------
|
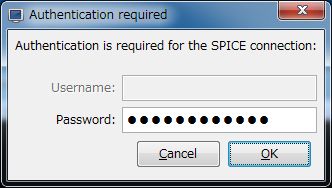
Install Desktop Virtualization "SPICE ( Simple Protocol for Independent Computing Environment )".It's possible to connect to virtual machines from remote client computer.
|
|
| [1] | Install SPICE Server if it's not installed yet. ( Normally it's already installed with KVM for dependency ) |
| [root@dlp ~]#
yum -y install spice-server spice-protocol
|
| [2] | Edit existing virtual machine's xml-file and start virtual machine with SPICE like follows.This site's example has created a virtual machine without graphics, so it's OK to change settings like follows,but if you created virtual machine with a graphics, Remove "<graphics>***" and "<video>***" sections in xml file because qxl is used for graphics. |
|
[root@dlp ~]#
virsh edit centos7
# edit the configration of "centos7"
<domain type='kvm'>
  <name>centos7</name>
  <uuid>b38a50ca-a1ae-4d37-ba10-caf1e05b43ce</uuid>
  <memory unit='KiB'>4194304</memory>
  <currentMemory unit='KiB'>4194304</currentMemory>
  <vcpu placement='static'>2</vcpu>
  .
  .
  .
# add follows
# set any password for "passwd=***" section
# specify a uniq number for "sound" section "slot='0x06'"
# the "slot='0x02'" in video section is fixed number for graphics
    <graphics type='spice' port='5900' autoport='no' listen='0.0.0.0' passwd='password'>
      <listen type='address' address='0.0.0.0'/>
    </graphics>
    <sound model='ac97'>
      <address type='pci' domain='0x0000' bus='0x00' slot='0x06' function='0x0'/>
    </sound>
    <video>
      <model type='qxl' ram='65536' vram='32768' heads='1'/>
      <address type='pci' domain='0x0000' bus='0x00' slot='0x02' function='0x0'/>
    </video>
    <memballoon model='virtio'>
      <address type='pci' domain='0x0000' bus='0x00' slot='0x05' function='0x0'/>
    </memballoon>
  </devices>
</domain>

Domain centos7 XML configuration edited.
[root@dlp ~]# virsh start centos7
# start VM
Domain centos7 started |
| [3] |
Configuration is all OK. See next page to connect to SPICE server from SPICE client.
|
| [4] | By the way, if you'd like to enable SPICE on initial creating of virtual machine, specify like follows. Then, it's possible to install Systems with SPICE which requires GUI like Windows without installing Desktop Environment on KVM Host computer. |
| [root@dlp ~]# virt-install \
--name Win2k12R2 \
--ram 6144 \ --disk path=/var/kvm/images/Win2k12R2.img,size=100 \ --vcpus=4 \ --os-type windows \ --os-variant=win2k8 \ --network bridge=br0 \ --graphics spice,listen=0.0.0.0,password=password \ --video qxl \ --cdrom /tmp/X64FRE_SERVER_EVAL_JA-JP-IRM_SSS_X64FREE_JA-JP_DV5.ISO |
| [5] | If Firewalld is running, allow SPICE port which you asgined to a virtual machine. |
| [root@dlp ~]# firewall-cmd --add-port=5900/tcp --permanent [root@dlp ~]# firewall-cmd --reload
[root@dlp ~]# virsh edit centos7
# edit a virtual machine "centos7"
# change like folows for "cpu mode" section
<cpu mode='
host-passthrough
'> |